The Secret to Stress-Free, Soul-Warming Dinner Rolls (You Make Them Ahead!)
Hey there, my fellow food adventurer! Let’s talk about one of life’s simple, profound pleasures: the smell of fresh, homemade dinner rolls baking in the oven. It’s a scent that spells comfort, celebration, and coming together. It’s the culinary equivalent of a warm hug. But if you’ve ever tried to whip up a batch of yeast rolls on the same day as a big holiday feast or a busy family dinner, you know the secret truth: it can feel like a part-time job. The rising, the punching, the shaping, the waiting… all while also trying to roast a turkey, whip potatoes, and entertain guests. It’s enough to make even the most passionate home cook reach for the store-bought bag.
Well, my friend, I’m here to let you in on a game-changing kitchen secret. What if I told you that you could do almost all the work the day before? That you could mix up a gorgeous, supple dough, tuck it into the fridge for a long, slow beauty sleep, and then simply shape and bake your way to golden, buttery perfection the next day? No stress, no last-minute frenzy. Just the glorious reward of hot, fluffy, homemade rolls that will have everyone at your table thinking you’re a culinary wizard.
These Make-Ahead Dinner Rolls are my absolute go-to for a reason. They are soft, subtly sweet, and have that irresistible pull-apart texture we all dream of. They are the heroes of my holiday table and the star of my cozy Sunday suppers. So, tie on your apron, and let’s dive into this beautiful, forgiving process together. I promise, once you try this method, you’ll never look at homemade bread the same way again.
Print
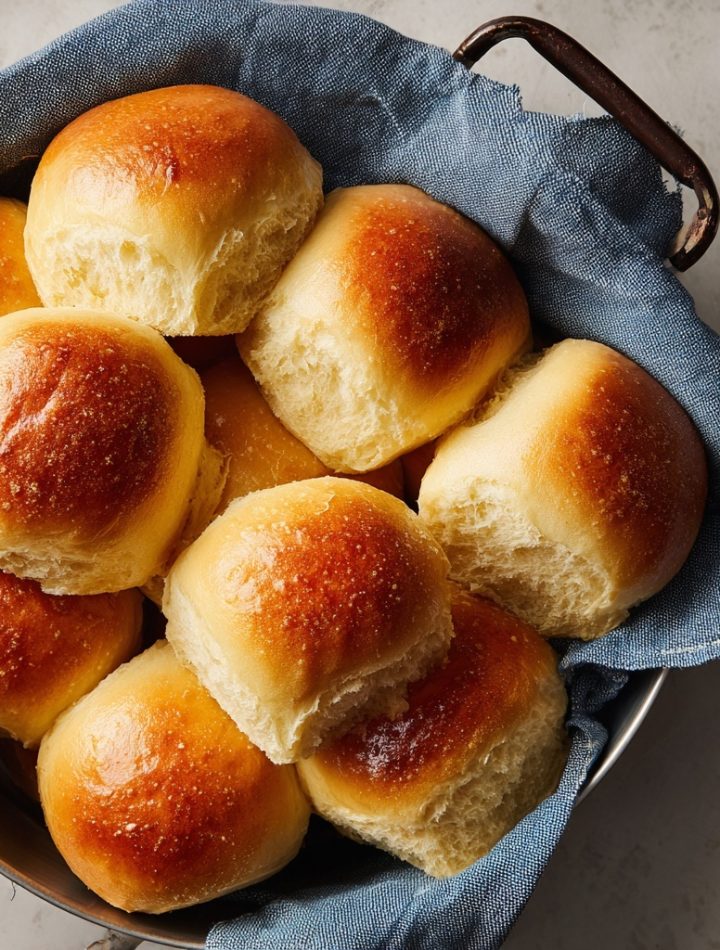
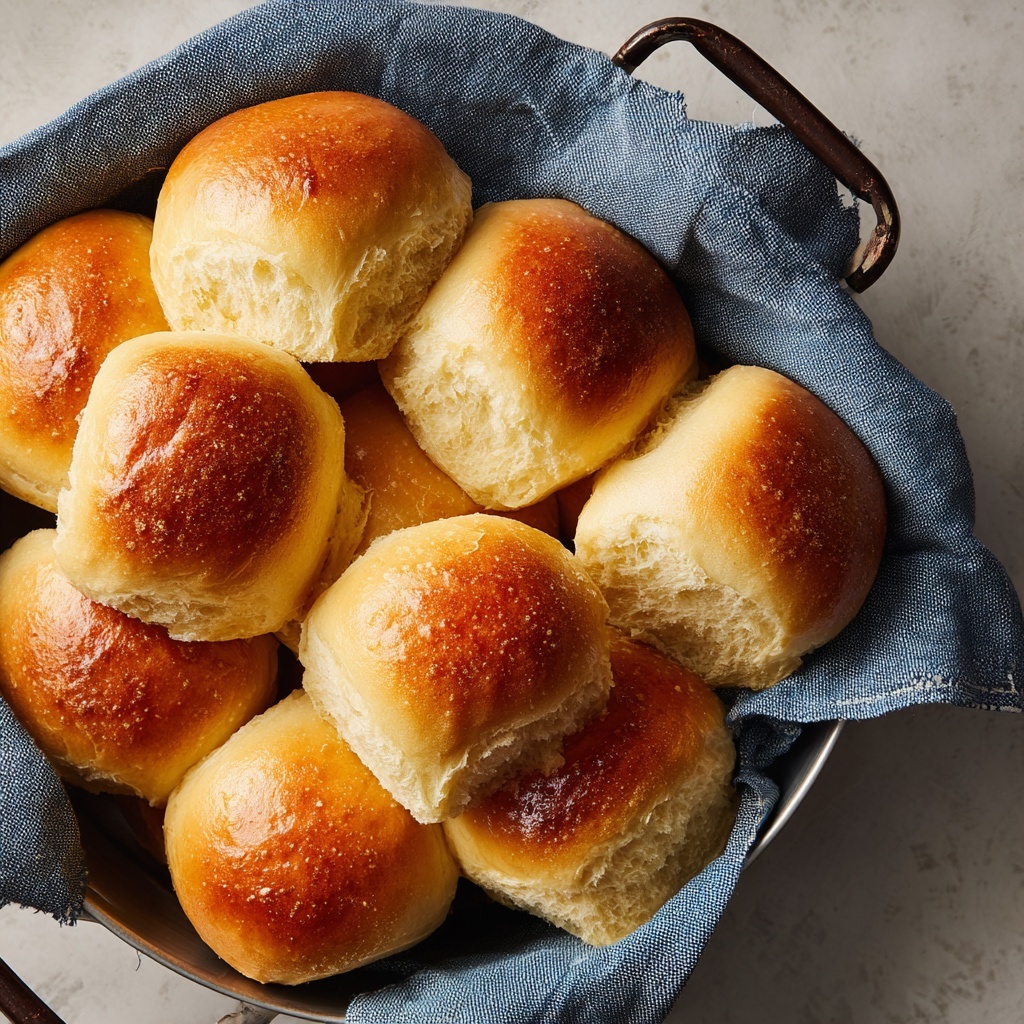
Make-Ahead Dinner Rolls
- Total Time: ~14 hours (mostly hands-off)
- Yield: 16–20 rolls 1x
Description
There’s nothing like the smell of fresh dinner rolls baking—but sometimes all the prep on the same day feels overwhelming. These Make-Ahead Dinner Rolls solve that problem! The dough rises overnight in the fridge, so all you need to do is shape and bake the next day. Soft, buttery, and golden, they’re perfect for holidays or any family dinner.
Ingredients
1 cup warm milk (110°F)
2¼ teaspoons active dry yeast (1 packet)
¼ cup granulated sugar
⅓ cup unsalted butter, melted
2 large eggs
1½ teaspoons salt
4½ cups all-purpose flour (more as needed)
2 tablespoons melted butter (for brushing)
Instructions
In a large bowl, combine warm milk, yeast, and sugar. Let sit 5–10 minutes until foamy.
Stir in melted butter, eggs, and salt. Gradually add flour, mixing until a soft dough forms.
Knead on a lightly floured surface for 6–8 minutes, until smooth and elastic.
Place dough in a greased bowl, cover tightly, and refrigerate overnight (8–12 hours).
The next day, punch down dough and divide into 16–20 equal portions. Shape into balls and place in a greased 9×13-inch pan.
Cover and let rise in a warm spot for 45–60 minutes, until puffy.
Preheat oven to 375°F (190°C). Bake rolls for 18–22 minutes, until golden brown.
Brush warm rolls with melted butter and serve.
- Prep Time: 20 mins
- Cook Time: 20 mins
- Category: Dinner
Nutrition
- Calories: 160
- Fat: 4g
- Carbohydrates: 26g
A Kitchen Full of Laughter and Flour
This recipe always takes me back to my first “real” Thanksgiving hosting gig. I was determined to do everything from scratch. The turkey was brining, the pies were prepped, and I was feeling pretty smug. Then I looked at my recipe timeline and saw “START ROLL DOUGH – 4 HRS BEFORE DINNER.” My heart sank. How was I supposed to manage a finicky yeast dough while also juggling a dozen other hot, bubbling dishes? It was a recipe for a meltdown.
In a panic, I called my grandma. I could hear her smiling through the phone. “Clara, honey,” she said, “the fridge is your best friend. Let time do the hard work for you.” She walked me through her “overnight method,” a trick she learned from her mother. That year, as my family gathered in a kitchen fragrant with roasting herbs and baking rolls, I wasn’t flustered. I was calm, pulling a tray of golden-brown beauties from the oven, brushing them with butter, and feeling a deep connection to the generations of cooks in my family who had figured out how to make feasting feel joyful, not frantic. It was a lesson in balance that perfectly captures the spirit of my kitchen today.
Gathering Your Golden Ticket to Roll Heaven
One of the things I love most about this recipe is its beautiful simplicity. These are pantry-staple ingredients that come together to create pure magic. Let’s break them down, because knowing your “why” makes the “how” so much more fun.
- 1 cup warm milk (110°F/43°C): The liquid base for our dough. Whole milk will give you the richest, softest crumb, but 2% works beautifully too! The warmth is crucial—it wakes up the yeast. Pro tip: if you don’t have a thermometer, it should feel warm to the touch but not hot—like a perfect baby bottle.
- 2¼ teaspoons active dry yeast (1 packet): Our little miracle workers! This is what makes the dough rise and gives it that wonderful, airy texture. Make sure your yeast isn’t expired for the best results.
- ¼ cup granulated sugar: This does two things: it gives the yeast a quick snack to get it foaming and active, and it adds a subtle sweetness that balances the salt and butter perfectly.
- ⅓ cup unsalted butter, melted, plus 2 tbsp more for brushing: Butter is the key to flavor and tenderness. Using unsalted lets you control the salt level in your dough. We’ll use the extra for that glorious, shiny finish straight out of the oven.
- 2 large eggs: These are our structure-builders! Eggs make the rolls wonderfully rich and tender and help create that beautiful, golden-brown color.
- 1½ teaspoons salt: Don’t forget the salt! It’s not just for flavor; it actually strengthens the gluten structure. Without it, your rolls would taste flat and be a bit weak.
- 4½ cups all-purpose flour (more as needed): The backbone of our rolls. I like all-purpose for its reliable, versatile results. The “more as needed” is a chef’s secret—flour humidity can vary, so you might need a sprinkle more during kneading if the dough is too sticky.
Let’s Make Some Magic: The Step-by-Step
Ready to get your hands dirty? This process is so therapeutic. Let’s walk through it together, step by blissful step.
Step 1: Wake Up the Yeast!
In a large bowl (I mean it, go big—this dough will grow!), combine your warm milk, yeast, and sugar. Give it a gentle stir and then walk away for 5-10 minutes. This is my favorite part. You’re giving the yeast a chance to prove it’s alive and kicking. When you come back, you should see a foamy, creamy layer on top—that’s your green light! If you don’t see foam, your yeast might be old or your milk was too hot/cold. No worries, just start this step over.
Step 2: Create the Dough
Once your yeast is foamy, stir in the ⅓ cup of melted butter, eggs, and salt. The mixture might look a little curdled at first, but that’s totally normal—trust the process! Now, gradually add the flour, about a cup at a time, mixing with a wooden spoon or a dough hook attachment until a soft, shaggy dough forms. It will pull away from the sides of the bowl.
Step 3: The Knead for Speed (and Texture!)
Lightly flour your clean countertop and turn the dough out. Here’s where you put a little love into it. Knead the dough for 6-8 minutes. You’re looking for it to become smooth, slightly elastic, and no longer sticky. My kneading technique is simple: push the dough away from you with the heel of your hand, fold it back over itself, give it a quarter turn, and repeat. It’s a little kitchen dance! If the dough sticks to your hands, add a tiny bit more flour, a tablespoon at a time.
Step 4: The Overnight Beauty Rest
This is the secret weapon! Place your beautiful, smooth dough ball into a lightly greased bowl (I just use the same bowl, wiped out and greased). Turn it over once to coat the top. Now, cover the bowl tightly with plastic wrap—this is important to prevent the dough from drying out. Tuck it into the refrigerator and let it rest for 8-12 hours, or overnight. The cold temperature slows the yeast way down, allowing the flavor to develop beautifully without over-proofing.
Step 5: Shape with Love (Day 2!)
The next day, your dough will have risen slowly and gracefully. Pull it from the fridge—it will be cold and firm. Gently punch it down to release the air. Turn it out onto a lightly floured surface and divide it into 16-20 equal pieces. I like to use a kitchen scale for perfect rolls, but eyeballing it works just fine! To shape, take a piece of dough and pull the edges down and under, pinching them together at the bottom to create a smooth, tight top. Place these little dough balls into a greased 9×13-inch baking pan.
Step 6: The Final Rise
Cover the pan with a clean kitchen towel and let the rolls rise in a warm, draft-free spot for 45-60 minutes. They should look puffy and have doubled in size. A great trick: I often turn my oven on for one minute, turn it off, and then place the pan in the warm (not hot!) oven to rise. It creates the perfect cozy environment.
Step 7: Bake to Golden Perfection
Once risen, it’s showtime! Preheat your oven to 375°F (190°C). Bake the rolls for 18-22 minutes. You’re looking for a gorgeous, deep golden brown on top. If you tap the top, it should sound hollow. Another chef’s hack: an instant-read thermometer inserted into the center of a roll should read 190°F (88°C).
Step 8: The Butter Glaze of Glory
The moment they come out of the oven, brush the tops generously with the remaining 2 tablespoons of melted butter. This gives them a gorgeous sheen, an extra layer of flavor, and keeps the tops soft. Let them cool in the pan for just a few minutes before serving warm. Try to resist eating three straight from the pan. (I won’t judge if you fail!).
Serving Up the Warmth
Presentation is part of the fun! I love to serve these rolls right in the baking pan, nestled in a tea towel to keep them warm. It feels rustic and welcoming. Place a small dish of softened butter or a flavored compound butter (like honey-rosemary or garlic-herb) right next to them. They are the ultimate sidekick to a hearty stew, a holiday feast, or simply a big, green salad. For a special touch, sprinkle them with a little flaky sea salt or fresh chopped herbs right after you brush on the butter.
Make Them Your Own: Fun Flavor Twists!
The basic recipe is a perfect canvas for your creativity. Here are a few of my favorite ways to mix it up:
- Garlic & Herb: Knead 2 cloves of minced garlic, 1 tablespoon of chopped fresh parsley, and 1 teaspoon of chopped fresh rosemary into the dough during the last minute of kneading.
- Everything Bagel: After brushing with butter, sprinkle the warm rolls generously with everything bagel seasoning for a savory, crunchy kick.
- Whole Wheat Honey: Substitute 1 ½ cups of the all-purpose flour with whole wheat flour and swap the sugar for honey. It adds a lovely, nutty depth.
- Cheesy Pull-Aparts: Toss 1 cup of shredded sharp cheddar cheese into the dough during the flour-adding stage. You get cheesy, gooey pockets in every bite!
Clara’s Kitchen Chronicles
This recipe has been a living, evolving thing in my kitchen. The first time I made it, I was so nervous about the overnight rise that I woke up at 3 a.m. to check on the dough! (Spoiler: it was fine, just slowly doing its thing). Over the years, I’ve learned to embrace its flexibility. Don’t have 12 hours? A 6-hour fridge rise still works wonders. Need to hold them longer? You can let the shaped rolls do their second rise in the fridge for a few hours before baking. This recipe is a friend, not a tyrant.
The best part? Seeing the look on my friends’ faces when they bite into one. It’s a look of pure, unadulterated joy. That’s the real reward. It’s a reminder that the best food isn’t just about fuel; it’s about connection, memory, and sharing a little piece of your heart, one buttery roll at a time.
Your Roll Questions, Answered!
Q: My dough didn’t rise much in the fridge overnight. What happened?
A: Don’t panic! A cold rise is much slower and less dramatic than a warm one. The dough should have expanded, but it won’t necessarily double. As long it looks puffy and you saw that initial foam from the yeast, it’s almost certainly fine. The true test is the second rise at room temperature. If it puffs up then, you’re golden!
Q: Can I freeze these rolls?
A: Absolutely! They are fantastic freezer-friendly. You have two options: 1) After shaping the rolls, place the pan in the freezer until the rolls are solid, then transfer them to a freezer bag. The day you want them, put them in the pan, let them thaw and rise (this will take several hours), and bake. Or 2) Bake the rolls completely, let them cool, and then freeze them in a bag. Reheat from frozen in a 350°F oven for 10-15 minutes.
Q: My rolls are a bit dense. Where did I go wrong?
A: Density is usually a sign of one of three things: 1) Old yeast that wasn’t active enough. 2) Over-flouring the dough during kneading, which makes it tough. Remember, it’s better for the dough to be a little sticky than a dry, heavy brick! 3) Not letting them rise long enough during the second rise. Be patient and wait for them to get nice and puffy.
Q: Can I make the entire recipe and bake it on the same day?
A> You can! After the first rise in the bowl (let it rise in a warm place for 1-1.5 hours until doubled), punch it down and proceed with shaping and the second rise. The overnight method just deepens the flavor and makes your day-of life infinitely easier.
Nourishment Note
While I’m all about feel-good food, I don’t believe in obsessive calorie counting. These rolls are made with real, whole ingredients: flour, eggs, milk, and butter. They are a source of joy and carbohydrates, both of which are essential for a happy life! Enjoy them as part of a balanced meal. For those who are curious, an estimated nutritional breakdown per roll is about: 160 calories, 4g fat, 26g carbs, and 4g protein.