 Homemade Hamburger Helper: Your Weeknight Hero (Without the Box!)
Hey, kitchen adventurers! Clara here, your fellow flavor-chaser from Unknown. Raise your hand if Hamburger Helper was your childhood weeknight MVP! 🙋♀️ That bright orange box was pure magic after soccer practice or on those “I can’t even” days. But let’s be real – as we grow up and start paying attention to ingredients, that nostalgic glow sometimes fades faster than cheap food coloring. What if I told you we could capture every ounce of that cozy, cheesy, beefy comfort in a homemade version that’s faster than takeout and tastes a million times better? This isn’t just “better than the box” – it’s a full-blown kitchen revolution in one pan.
I get it. When life throws chaos (hello, forgotten homework, overflowing laundry baskets, or just sheer exhaustion!), the siren song of processed convenience is strong. But what if your comfort food could actually fuel your adventures instead of weighing you down? This recipe is my love letter to busy souls who crave both ease and real-deal goodness. We’re talking rich, creamy sauce hugging tender pasta and savory beef, all built from scratch with ingredients you can pronounce. It’s still incredibly budget-friendly, cooks in about 30 minutes flat, and uses just one pan (because who has time for dishes?). Get ready to rediscover that childhood joy, but this time, it’s packed with flavor that’ll make your taste buds do a happy dance. Let’s ditch the mystery powder and cook something that feels like a warm hug!
My Hamburger Helper Epiphany: From Box Blues to Kitchen Cheers
Picture this: It’s my first year living solo in a tiny apartment with a kitchen barely bigger than a shoebox. I was surviving on a steady diet of instant noodles and, you guessed it, boxed Hamburger Helper. One particularly grim Tuesday, I was stirring that fluorescent orange sauce, feeling a weird mix of comfort and… disappointment. Where was the *real* cheese? The depth? That’s when my culinary curiosity kicked in. Armed with nothing but ground beef, some sad-looking pantry staples, and sheer determination (maybe a dash of hunger-fueled desperation?), I started experimenting. The first attempt? Let’s just say the pasta was mush, and the sauce resembled lumpy wallpaper paste. Not my finest hour!
But the *idea* stuck with me. I remembered how my grandma could make magic from simple ingredients. So, I kept tinkering – swapping the mystery powder for real spices, using broth for richness, and melting actual sharp cheddar. The moment I nailed that creamy, cheesy, perfectly seasoned sauce? Pure triumph! It tasted like nostalgia, but better – richer, more satisfying, and without that weird aftertaste. Now, this homemade version is my go-to when I need a win, a reminder that sometimes the simplest comforts, made with love (and real cheese!), are the absolute best. It’s the taste of resilience and a little kitchen courage!
Print
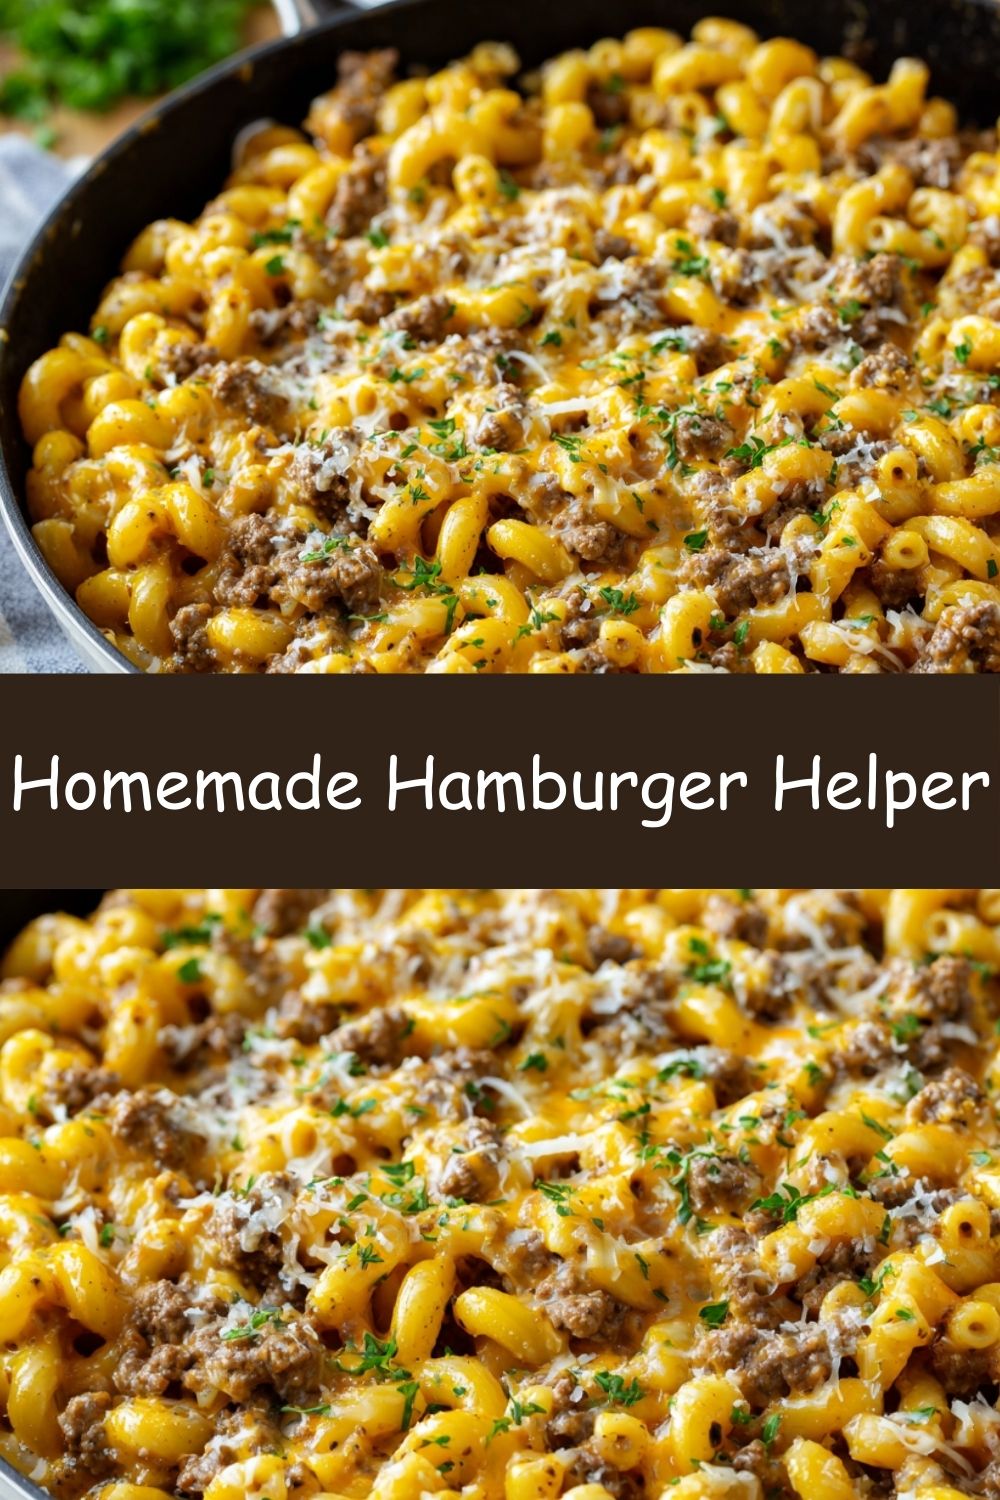
Homemade Hamburger Helper
- Total Time: 35 mins
- Yield: serves 8
Description
All the nostalgic flavor you love—made from scratch and even better. This homemade hamburger helper skips the box and delivers creamy, cheesy, beefy goodness in just one pot. Perfect for busy weeknights, picky eaters, and serious comfort food cravings.
Ingredients
2 tbsp vegetable oil
2 lbs ground beef
2 small onions, diced
2 tbsp garlic, minced
4 tbsp tomato paste
1 tsp salt
½ tsp ground black pepper
1 tsp paprika
3 cups milk
2 cups beef broth or water
4 cups elbow macaroni, uncooked
2 cups shredded cheddar cheese
Fresh parsley, chopped (optional, for garnish)
Instructions
Heat oil in a large pot over medium-high heat. Add ground beef and cook until browned.
Add onions and garlic, cook until soft and fragrant.
Stir in tomato paste, salt, pepper, and paprika. Mix well.
Pour in milk and beef broth. Bring to a boil.
Add macaroni, reduce heat to a simmer, and cover. Cook for 10–12 minutes, stirring occasionally, until pasta is tender.
Remove from heat, stir in cheddar cheese until melted and creamy.
Garnish with parsley and serve hot.
- Prep Time: 10 min
- Cook Time: 25 mins
- Category: Dinner
Nutrition
- Calories: 520
- Sodium: 650mg
- Carbohydrates: 12g
- Cholesterol: 90mg
Gather Your Flavor Crew: Simple Ingredients, Big Impact
Here’s the beauty of this recipe: it’s built on pantry heroes and fridge staples. No weird chemicals, just good, honest food coming together to create something magical. Let’s break it down:
- 1 lb ground beef (85/15 lean/fat ideal): Our hearty star! The little bit of fat adds SO much flavor. Chef Insight: Leaner beef works, but add 1 tbsp olive oil when browning. For a twist, try ground turkey or Italian sausage!
- 1 small onion, diced: The aromatic base that builds sweetness. Sub Tip: No onion? Use 1 tsp onion powder added with the garlic.
- 2 cloves garlic, minced: Non-negotiable flavor booster! Chef Hack: Use the pre-minced stuff in a pinch (about 1 tsp).
- 2 cups beef broth: Liquid gold for depth! Sub Tip: Chicken or veggie broth works great too. Low-sodium is best for controlling salt.
- 1 1/2 cups milk (whole or 2% recommended): Creates the luscious creamy base. Sub Tip: Need dairy-free? Unsweetened almond or oat milk works surprisingly well here.
- 2 cups elbow macaroni, uncooked: The classic! Sub Tip: Any small pasta works (shells, rotini, cavatappi). Gluten-free? Use your favorite GF elbows!
- 1 tbsp tomato paste: The secret umami weapon! It adds richness, not tomato flavor. Chef Insight: Freeze leftover paste in 1 tbsp dollops on parchment paper!
- 1 tsp paprika (smoked or sweet): Warmth and color! Flavor Twist: Smoked paprika adds a fantastic BBQ-esque depth.
- 1/2 tsp dried oregano: A subtle herbal note. Sub Tip: Dried thyme or basil can pinch-hit.
- Salt & pepper to taste: Season as you go! Start with 1/2 tsp salt.
- 1 1/2 cups shredded sharp cheddar cheese: The glorious, melty finale! Chef MUST: Shred it yourself! Pre-shredded has anti-caking agents that can make sauce grainy.
Let’s Build That Cheesy Dream: Step-by-Step Magic
Ready to see how easily this comes together? Grab your favorite large, deep skillet or Dutch oven (with a lid!) – this is a one-pan wonder!
- Brown & Build Flavor: Fire up that skillet over medium heat! Crumble in your ground beef and toss in those diced onions. Cook, stirring occasionally and breaking up the beef, until it’s beautifully browned and the onions are soft and translucent (about 5-7 minutes). Chef Tip: Don’t rush the browning! Those crispy bits = flavor gold. Drain any excess fat if you like (I leave a little for richness!).
- Spice it Up! Push the beef mixture to the side slightly. Add the minced garlic, tomato paste, paprika, oregano, salt, and pepper right onto the hot surface of the pan. Let them sizzle and get fragrant for just 30 seconds to 1 minute – this “blooms” the spices and wakes up the tomato paste! Then, stir everything together so the beef and onions get coated in that flavorful paste. Your kitchen should smell AMAZING right now. Chef Hack: Smelling is believing! If you can’t smell the garlic and spices strongly after 30 seconds, they need a touch more time.
- Liquids & Pasta Party: Carefully pour in the beef broth and milk – it might sizzle dramatically, that’s okay! Give it a good stir, scraping up any tasty browned bits stuck to the bottom (that’s pure flavor!). Now, stir in the uncooked elbow macaroni. Make sure all those little elbows are submerged in the liquid. Bring the whole glorious mixture to a lively boil. Pro Tip: Stir gently but confidently as it comes up to temp to prevent sticking.
- Simmer to Perfection: Once it’s boiling, immediately reduce the heat to low (you want a gentle simmer, not a rolling boil). Cover that pan tightly with a lid! Set your timer for 12 minutes. Give it a good stir every 3-4 minutes. This prevents sticking and ensures even cooking. At 12 minutes, check your pasta – it should be tender but still have a slight bite (al dente). If it needs another minute or two, give it! The sauce will thicken significantly as it sits. Chef Insight: Stirring frequency matters! More stirring = creamier sauce as the pasta releases starch.
- The Grand Cheesy Finale: This is the moment! Take the skillet completely OFF the heat source. Sprinkle in your glorious shredded cheddar cheese. Now, stir gently but continuously until that cheese is completely melted and has transformed the sauce into a velvety, orange-hued dream. It will look loose at first but thickens up beautifully within a minute. MUST-DO TIP: Removing from heat prevents the cheese from getting stringy or seizing up. Be patient and stir until smooth!
Dishing Up the Comfort
This beauty is ready to shine straight from the pan! Spoon generous portions into shallow bowls – it’s hearty, so those bowls help it cool faster for hungry mouths. Want to make it look extra inviting? A tiny sprinkle of fresh chopped parsley adds a pop of color and freshness. Feeling indulgent? A little extra shredded cheese on top never hurts! This is pure, unadulterated comfort food, so serve it hot, maybe with a simple green salad or some steamed broccoli on the side for a veggie boost. And please, absolutely lick the spoon – it’s the chef’s privilege!
Make It Your Own: Flavorful Twists & Swaps
The beauty of this base recipe? It’s a canvas! Here are 5 fun ways to riff on it:
- Cheesy Blast Off: Swap half the cheddar for pepper jack or Monterey Jack for a kick, or use gouda for extra smokiness!
- Veggie Powerhouse: Stir in 1 cup of frozen peas, corn, or chopped spinach during the last 5 minutes of simmering. Diced bell peppers cooked with the onions are awesome too!
- Southwest Fiesta: Add 1 tsp chili powder and 1/2 tsp cumin with the spices. Stir in a can of rinsed black beans and a handful of corn with the cheese. Top with avocado slices!
- Creamy Mushroom & Herb: Sauté 8 oz sliced mushrooms with the onions. Swap the oregano for 1 tsp dried thyme. Use a blend of cheddar and Swiss cheese.
- Lean & Green (Vegetarian!): Skip the beef! Use 1.5 cups cooked lentils or a plant-based ground “meat.” Use veggie broth. It’s still incredibly satisfying!
Clara’s Kitchen Chronicles: Notes from the Trenches
This recipe has seen some things! That first gloopy attempt taught me the critical importance of not overcooking the pasta and the magic of adding cheese off-heat. My husband now considers this his ultimate “bad day buster” meal, and my toddler surprisingly gobbles it up (shredded cheese is life). One time, I accidentally grabbed hot paprika instead of sweet – wowza! It was deliciously spicy, but definitely not kid-friendly. Lesson learned: label your spice jars! Over the years, I’ve found that letting it sit, covered, for 5 minutes after adding the cheese makes it even creamier. It’s evolved from a desperate kitchen experiment to a beloved staple. It’s forgiving, flexible, and always delivers that warm, cheesy hug we all need sometimes. Don’t stress perfection – embrace the cheesy, comforting chaos!
Your Hamburger Helper Questions, Solved!
Let’s tackle those common kitchen conundrums:
- Q: Help! My sauce is too thin/runny! What happened?A: Don’t panic! Likely causes: 1) Pasta wasn’t quite done, so it didn’t release enough starch. Simmer uncovered for a few more minutes, stirring often. 2) Heat was too high when melting cheese, causing it to seize slightly instead of melting smoothly. Ensure you take it OFF the heat! 3) Different pasta absorbs differently. Let it sit covered for 5 minutes off-heat – it thickens remarkably! If still too thin, mix 1 tsp cornstarch with 1 tbsp cold water and stir it in, heating gently for 1 minute.
- Q: Can I make this ahead of time? How do I store leftovers?A: Absolutely! It reheats beautifully. Cool completely, store in an airtight container in the fridge for up to 4 days. Reheat gently on the stovetop over low-medium heat, adding a splash of broth or milk to loosen it up. Stir frequently! Freezing works too (up to 3 months), thaw overnight in the fridge before reheating.
- Q: Why did my cheese get clumpy or stringy?A: This usually happens if the sauce is too hot when you add the cheese or if you used pre-shredded cheese. Always remove the pan from the heat completely before adding cheese. Shredding your own block cheese is key – pre-shredded has coatings that prevent smooth melting. Stir gently but constantly until fully melted.
- Q: Can I use a different pasta shape?A: Yes! Shells, rotini, cavatappi, or small penne work great. Just stick to similar sizes (about 2 cups uncooked). Cooking time might vary slightly by shape – start checking for doneness around 10 minutes. Gluten-free pasta works too; just check the package for liquid absorption and adjust broth slightly if needed.
Nourishment Note (Because Real Food Matters!)
While I’m all about joy first, it’s nice knowing what fuels you! This homemade version packs more protein and fewer additives than the box. Here’s a general idea per serving (based on 6 servings): ~420 calories | 21g fat