 Meet Your New Snack Soulmate: No-Bake Granola Bars
Hey snack squad! Clara here from Unknown. Raise your hand if you’ve ever stared into the abyss of your pantry at 3 PM, desperately seeking something that’s actually satisfying (and not just sad, crumbly crackers)? 🙋♀️ What if I told you your snack salvation is just 10 minutes away—no oven required? These No-Bake Granola Bars are your crunchy-chewy-chocolatey BFFs, ready to rescue hangry emergencies, lunchbox routines, or post-yoga cravings. Forget store-bought bars packed with mystery ingredients and sad raisins. We’re talking pantry staples you probably have right now—oats, honey, a lil’ butter—transformed into something that’ll make you do a happy kitchen dance. They’re gluten-free adaptable, endlessly customizable, and so stupidly easy, you’ll laugh while making them. Seriously, the hardest part? Waiting 2 hours while they chill. But trust me, licking that warm, honey-kissed spoon? *Chef’s kiss.* Ready to make snack time shine? Let’s roll!
That Time I Fed a Soccer Team (and Saved My Sanity)
Picture this: It’s 2018, and I’m frantically pacing my kitchen while 12 sugar-crazed 8-year-olds (my niece’s soccer team) descend upon my house like tiny, cleat-wearing locusts. I’d promised “healthy snacks,” but my first batch of homemade bars? Crumble city. Cue panic! Then I remembered my grandma’s “glue trick”—melted sugar + butter = edible cement. I tossed oats, cereal, honey, and chocolate into a pot, pressed it like my sanity depended on it, and held my breath. When those kids DEVOURED them, shouting “Aunt Clara, these are BOMB!”? Pure magic. Now, these bars are my edible love language—wedged into college care packages, smuggled onto hiking trails, and yes, still bribing small athletes. They’re not just snacks; they’re tiny, delicious life rafts.
Print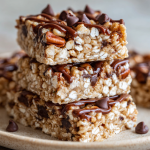
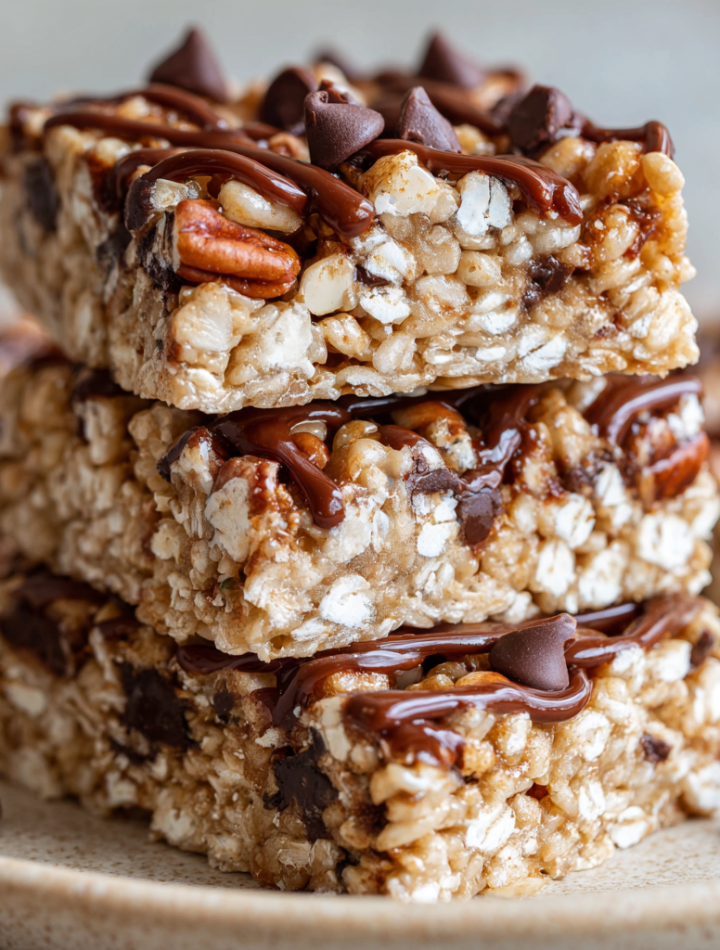
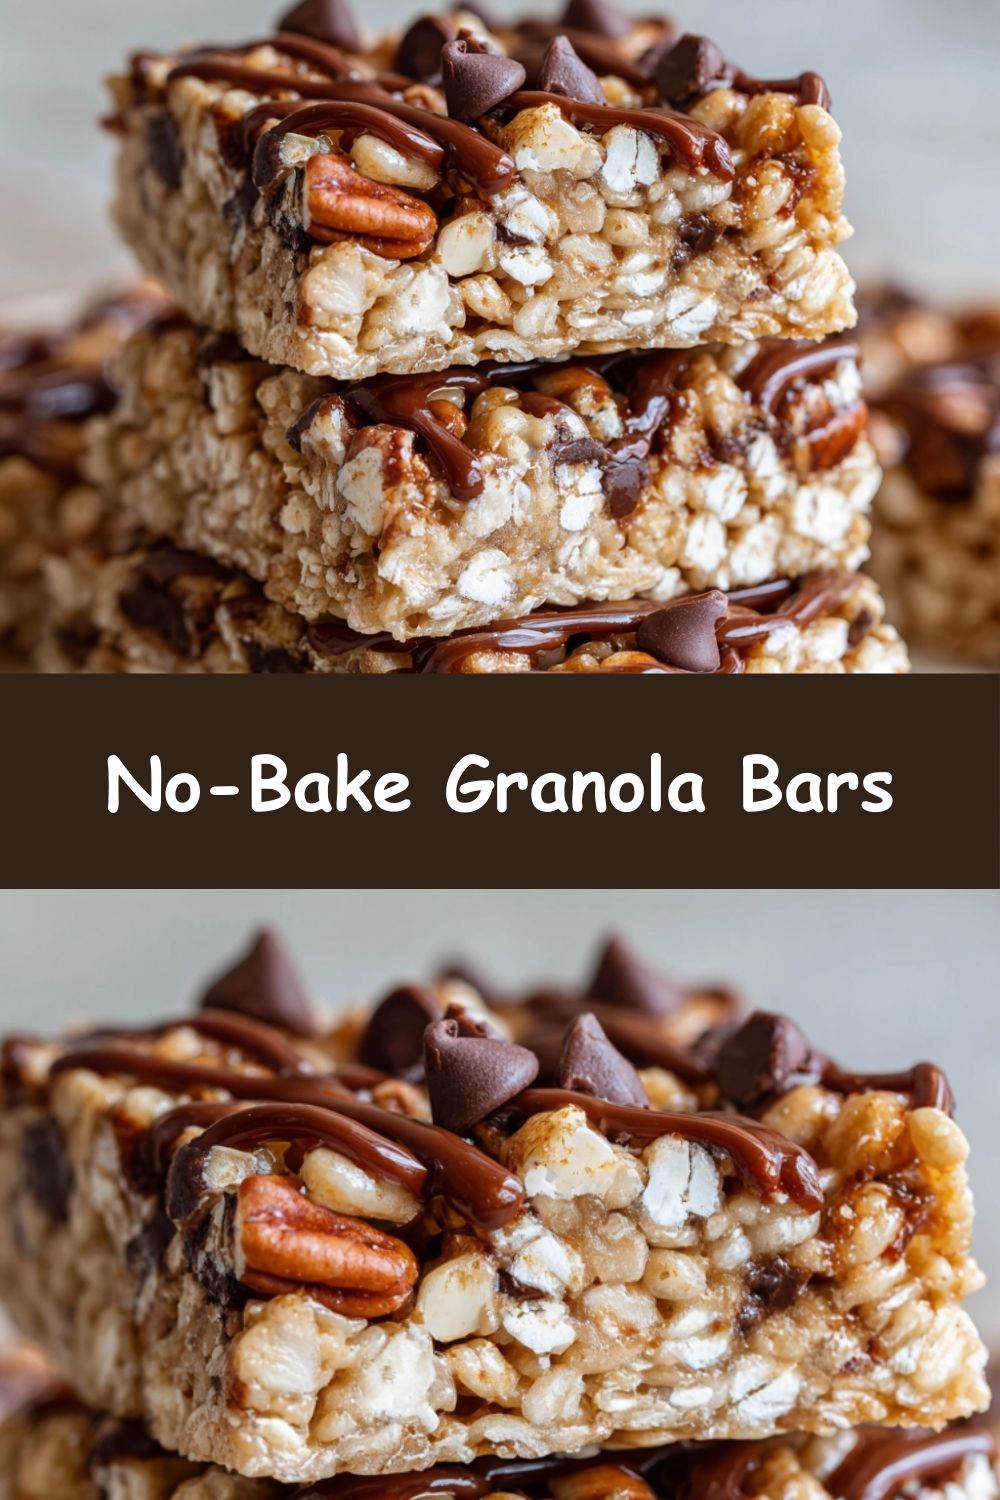
No-Bake Granola Bars
- Total Time: ~2 hrs 10 mins
- Yield: ~12 bars
Description
These chewy, nutty, chocolate-kissed bars are your new go-to for quick snacks, lunchbox treats, or late-night cravings. No oven required—just a handful of pantry staples, one pot, and a little chill time. Homemade never tasted (or looked) this good!
Ingredients
1 cup Rice Krispies
2 cups oats
¼ cup honey
¼ cup butter
⅓ cup brown sugar
½ tsp vanilla extract
⅓ cup chocolate chips
Handful of chopped pecans (optional)
Instructions
Mix the Base: In a large bowl, combine oats and Rice Krispies.
Make the Syrup: In a saucepan, heat brown sugar, butter, and honey over medium-high heat until bubbling. Remove from heat, stir in vanilla.
Combine: Pour the hot syrup over the oat mix. Stir until evenly coated.
Add Crunch: Fold in chopped pecans (if using).
Press & Set: Firmly press the mixture into a greased or lined pan. Pack it tightly to help it hold together.
Top It Off: Sprinkle chocolate chips on top and gently press them in.
Chill: Let it sit at room temp or in the fridge for 2 hours to firm up. Cut into bars and enjoy!
- Prep Time: 10 mins
- Cook Time: 2 hours
- Category: Snack
Nutrition
- Calories: 160
- Fat: 7g
- Carbohydrates: 22g
- Protein: 2g
Gather Your Goodies: What You’ll Need
- 1 cup Rice Krispies – Our secret crunch weapon! Swap for cornflakes or gluten-free crisped rice.
- 2 cups rolled oats – Use old-fashioned, NOT instant. They add chew! GF? Certified oats work perfectly.
- ¼ cup honey – Nature’s glue! Maple syrup works if vegan, but reduce by 1 tbsp (it’s thinner).
- ¼ cup butter – Unsalted is best. Coconut oil makes a dairy-free rockstar swap.
- ⅓ cup brown sugar – Deep flavor magic. Coconut sugar? Go for it!
- ½ tsp vanilla extract – Splash in the good stuff. Almond extract? *Drools*.
- ⅓ cup chocolate chips – Dark, milk, or mini chips—your call! Freeze-dried strawberries? Yes, chef!
- Handful chopped pecans – Optional but glorious. Walnuts, almonds, or seeds add protein punch!
Chef’s Whisper: “That butter-honey-sugar mix? We call it ‘liquid gold’ in my kitchen. It’s the glue holding your snack dreams together!”
Let’s Make Some Magic: Step-by-Step
- Mix the Base: Dump oats and Rice Krispies into a BIG bowl. Why big? So you can stir like a maniac without oat avalanches. Toss ’em like you’re at a beach party—get ’em mingling!
- Make the Syrup: Grab a saucepan. Melt butter, honey, and brown sugar over medium heat. Don’t stir yet! Let it bubble for 90 seconds (set a timer!)—this caramelizes the sugar, making bars chewy, not crunchy. Remove from heat, then stir in vanilla. It’ll sizzle and smell like heaven. That’s your cue!
- Combine: Pour that gorgeous syrup over your oat mix. QUICKLY fold with a silicone spatula. Work fast—the syrup sets as it cools. Coat every oat! Tip: Spritz your spatula with oil to prevent sticking.
- Add Crunch: Toss in those pecans (or your nutty faves). Fold gently—don’t crush the Krispies!
- Press & Set: Line an 8×8 pan with parchment paper (overhanging edges = easy lifting!). Dump in your mix. Now, PRESS LIKE YOUR SNACK FUTURE DEPENDS ON IT! Use a glass with a flat bottom or measuring cup. Compact it tightly—this prevents crumbly bars. Smooth the top.
- Top It Off: Sprinkle chocolate chips evenly. Gently press them in so they stick. Pro move: Add flaky salt now for sweet-salty bliss.
- Chill: Let bars set at room temp for 2 hours OR speed-chill in the fridge for 45 mins. No peeking! They need to bond. Then, lift out using parchment, slice into 12 bars, and try not to eat them all standing at the counter.
Hot Tip: “Warm knife = clean cuts! Run your knife under hot water before slicing.”
How to Serve These Beauties
Slide these babies into wax paper sleeves for lunchboxes (cute + no mess!). Stack ’em on a rustic board for brunch—next to fruit skewers and yogurt dip. Crumble one over vanilla ice cream for a “healthy-ish” sundae (wink). Or just shove one in your face mid-Zoom call. I won’t judge! They’re fabulous with cold almond milk or a midday coffee.
Mix It Up: Fun Variations to Try
- Tropical Vibes: Swap pecans for macadamias + ¼ cup chopped dried mango. Use coconut oil instead of butter!
- Peanut Butter Cup: Replace 2 tbsp butter with creamy PB. Top with mini peanut butter cups!
- Seedy Superfood: Omit nuts—add 2 tbsp chia seeds + 3 tbsp pumpkin seeds. Drizzle with tahini after chilling.
- Birthcake Bar: Add rainbow sprinkles + white chocolate chips. Perfect for lunchbox surprises!
- Apple Pie: Fold in ¼ cup dried apples + 1 tsp cinnamon. Divine with caramel drizzle.
Chef’s Notes: Behind the Recipe
These bars evolved from my “granola glue fails” era! Early versions either dissolved like sand or could’ve chipped a tooth. The breakthrough? Letting that syrup bubble just long enough to reach “thread stage” (when you drip some off a spoon, it forms a thin thread). Now, I double batches for road trips—wrapped in foil, they last weeks! Funny story: My dog, Biscuit, once stole a whole tray off the counter. He unwrapped the parchment paper like a pro. Now, I chill bars on top of the fridge… and share a corner with him (sans chocolate!).
FAQs: Your Questions, Answered
Help, my bars crumbled! What did I do wrong?
You might not have pressed firmly enough (really lean into it!) OR your syrup didn’t boil long enough. Next time, let it bubble the full 90 seconds—it should coat the back of a spoon thickly. Crumbled bars? Sprinkle over yogurt!
Can I use quick oats instead of rolled?
I don’t recommend it—quick oats absorb more liquid, making bars dense and gummy. Rolled oats give that perfect chew!
How long do these last? And can I freeze them?
They’ll stay fresh in an airtight container for 2 weeks (if they last that long!). Freeze for up to 3 months—layer between parchment in a tub. Thaw at room temp for 10 mins.
My chocolate chips melted when I pressed them. Sad!
Let the mixture cool 5 minutes before adding chips! Or, press chips in halfway through chilling—they’ll stick beautifully.
Nutritional Info (Per Bar)
Calories: ~160 | Fat: 7g | Carbs: 22g | Fiber: 2g | Protein: 2g
Note: Stats include pecans. Use sugar-free chocolate chips to reduce sugar!
And just like that—you’ve got a batch of chewy, wholesome granola bars without ever turning on the oven! Perfect for meal prep, lunchboxes, or a quick post-workout bite, these bars prove that healthy snacking can be simple and seriously delicious. Mix, press, chill, and enjoy—you’ll never need store-bought again!