 Your New Favorite Autumn Ritual Starts Here
Is there anything better than the smell of something warm, spiced, and buttery baking in the oven on a crisp fall morning? It’s like a hug for your entire house, a signal that yes, today is going to be a good day. I live for those moments, and this Pumpkin Cream Cheese Danish Braid is the ultimate co-conspirator in creating them.
We’re talking about flaky, shatter-in-your-mouth puff pastry, swirled around a heart of velvety spiced pumpkin and sweet, tangy cream cheese. It’s that stunning, braided masterpiece you see in fancy bakery cases, the one that makes you stop and stare. But here’s my little secret: it’s shockingly simple to make at home. No professional pastry chef skills required, just a little enthusiasm and a love for licking the spoon.
This braid is my go-to for so many occasions. It turns a regular Tuesday breakfast into a celebration. It’s the star of any brunch spread, guaranteed to have your friends asking for the recipe. And it’s the most satisfying dessert after a cozy autumn supper. It’s the kind of recipe that feels both indulgent and a little bit nourishing (hello, pumpkin!)—the perfect embodiment of that balance I’m always chasing in the kitchen.
So, tie on your favorite apron, preheat that oven, and let’s create some magic together. We’re about to make your kitchen smell absolutely incredible.
The Bakery Window & My Kitchen Epiphany
This recipe was born from a serious case of bakery window envy. Years ago, I was living in this tiny apartment with an even tinier kitchen, and my weekend walk would always take me past this beautiful little patisserie. In the fall, they’d display these elaborate, golden braided pastries filled with what I could only imagine was spiced pumpkin goodness. They looked intricate, professional, and frankly, intimidating.
I’d stare longingly, but my student budget at the time said, “Clara, you can look, but you cannot buy.” One particularly blustery Saturday, the craving hit an all-time high. Determined, I marched home, looked in my fridge, and saw a lone sheet of puff pastry leftover from a pot pie experiment, a can of pumpkin purée, and a block of cream cheese. It was kismet.
I threw caution to the wind, slathered, dolloped, and folded that pastry with zero technique, fully expecting a delicious but hideous mess. But when I pulled a gorgeous, golden, puffed braid out of my rickety oven, I actually did a little dance right there on the linoleum. It wasn’t just good; it was better than the bakery’s because I had made it. That feeling of triumphant, accessible deliciousness is what I’ve baked into every step of this recipe for you.
Print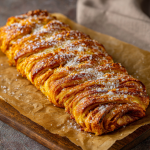
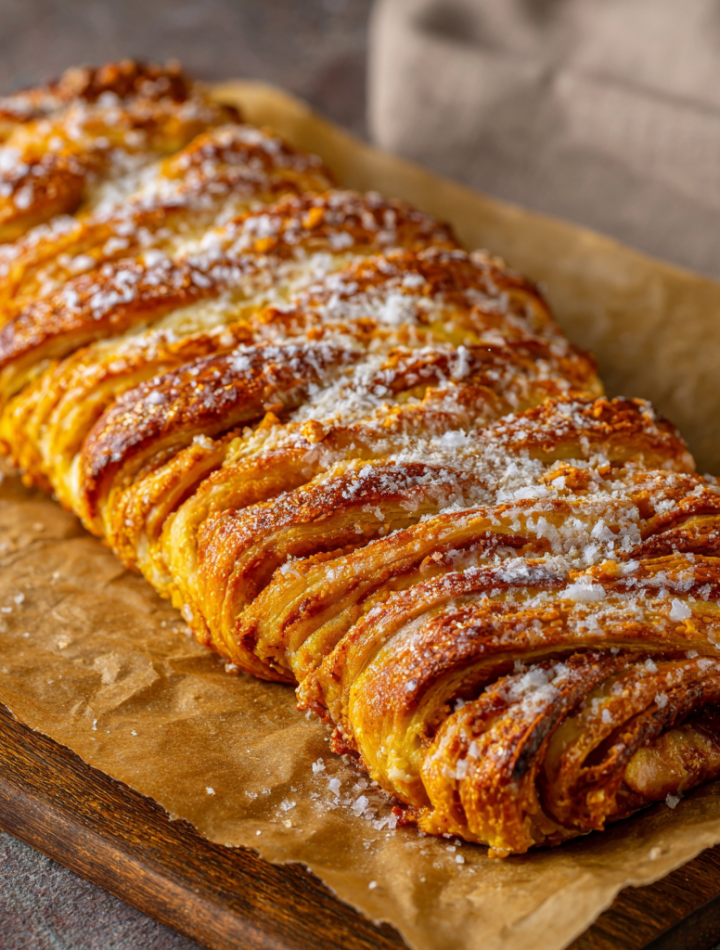
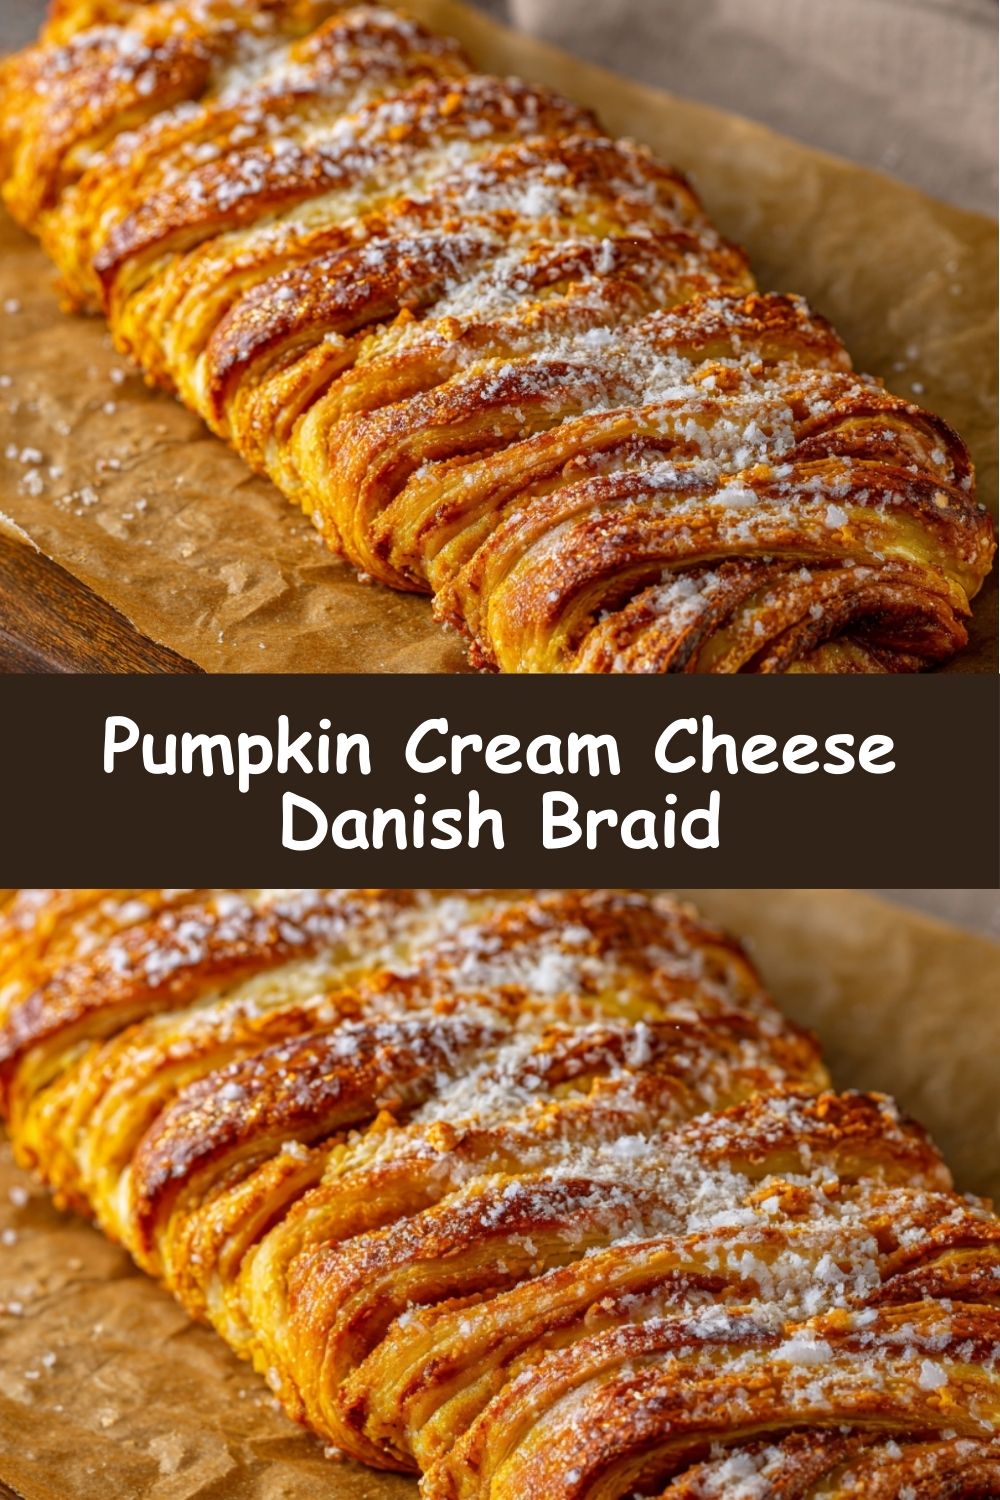
Pumpkin Cream Cheese Danish Braid
- Total Time: 45 minutes
- Yield: 6–8 slices 1x
Description
Flaky puff pastry, a spiced pumpkin filling, and sweet cream cheese come together in this beautiful, bakery-worthy braid. It’s crisp on the outside, creamy in the center, and perfect for autumn brunches, coffee dates, or a cozy dessert.
Ingredients
1 sheet puff pastry, thawed
4 oz cream cheese, softened
2 tablespoons sugar
½ teaspoon vanilla extract
Pumpkin Filling:
½ cup pumpkin purée
2 tablespoons brown sugar
½ teaspoon pumpkin pie spice
Pinch of salt
For Finishing:
1 egg (for egg wash)
Optional: powdered sugar glaze or dusting
Instructions
In a bowl, mix cream cheese, sugar, and vanilla until smooth.
In another bowl, stir together pumpkin, brown sugar, spice, and salt.
Roll puff pastry into a rectangle (about 10×12″).
Spread cream cheese down the center third of the pastry, then layer pumpkin mixture on top.
Cut 1-inch strips on both outer sides of the pastry. Fold strips over the filling in a crisscross pattern.
Brush with egg wash. Bake for 20–25 minutes or until golden and puffed.
Cool slightly before glazing or dusting with powdered sugar.
- Prep Time: 20 mins
- Cook Time: 25 mins
- Category: breakfast
Nutrition
- Calories: 230
- Sugar: 9g
- Sodium: 140mg
- Fat: 14g
- Saturated Fat: 7g
- Carbohydrates: 21g
- Protein: 3g
- Cholesterol: 40mg
Gathering Your Autumn Arsenal
This is where the magic begins! The beauty of this recipe lies in its simplicity and the quality of a few key ingredients. Here’s what you’ll need:
- 1 sheet puff pastry, thawed: This is our secret weapon for that incredible, flaky texture. Look for an all-butter puff pastry if you can find it—the flavor is next level. Chef’s Insight: Thaw it slowly in the fridge overnight for the best results. If you’re in a pinch, you can thaw it on the counter for about 40 minutes, but keep an eye on it! You want it pliable but still cold to the touch.
- 4 oz cream cheese, softened: Full-fat is my preference here for the creamiest, richest texture and to prevent any weeping. Substitution Tip: For a lighter version, Neufchâtel cheese works perfectly. For a dairy-free swap, a high-quality vegan cream cheese alternative will do the trick.
- 2 tablespoons granulated sugar: Just enough to sweeten the cream cheese layer and balance the tang.
- ½ teaspoon pure vanilla extract: The warm notes of vanilla are a classic friend to both pumpkin and cream cheese. Don’t skip it!
For the Pumpkin Filling:
- ½ cup pumpkin purée: Not pumpkin pie filling! We want pure, unadulterated pumpkin. Chef’s Insight: If your purée looks a bit watery, give it a gentle blot with a paper towel to soak up excess moisture. This ensures our braid doesn’t get soggy.
- 2 tablespoons brown sugar: I love the deep, molasses-like flavor brown sugar adds. It complements the warm spices perfectly.
- ½ teaspoon pumpkin pie spice: The cozy flavor bomb! Substitution Tip: No pre-mixed spice? Make your own! A blend of ¼ tsp cinnamon, ⅛ tsp ginger, and a pinch each of nutmeg and allspice or cloves will create magic.
- Pinch of salt: This is crucial! Salt makes all the other flavors pop and prevents our Danish from tasting one-note sweet.
For Finishing:
- 1 egg (for egg wash): This is our golden-brown secret. A simple egg wash (just the egg beaten with a teaspoon of water or milk) gives the pastry that professional, glossy, beautiful finish.
- Optional: powdered sugar for dusting or a simple glaze: For a little extra sweetness and a gorgeous finished look. A simple glaze is just ½ cup powdered sugar mixed with 1-2 tablespoons of milk or orange juice until smooth.
Let’s Build Something Beautiful: The Braiding Process
Don’t let the braid intimidate you! It’s much easier than it looks, and I’ll guide you through every fold. Read through all the steps once before you start—it’s like reading a map before a road trip!
- Preheat and Prep: Preheat your oven to 400°F (200°C). This is a hot oven, and we need that intense heat to make the pastry puff up dramatically. Line a baking sheet with parchment paper. This is non-negotiable for easy cleanup and preventing any sticky situations!
- Make the Fillings: In a small bowl, beat the softened cream cheese, granulated sugar, and vanilla extract together until it’s completely smooth and no lumps remain. In another bowl, stir together the pumpkin purée, brown sugar, pumpkin pie spice, and that all-important pinch of salt. Chef’s Hack: You can do this with a spatula, but a small whisk works wonders to really incorporate the spices evenly into the pumpkin.
- Roll and Rectangle: On a lightly floured surface, unfold your thawed puff pastry sheet. Gently roll it out just enough to smooth any creases and create a rectangle that’s roughly 10×12 inches. Don’t go overboard—we still want those buttery layers to puff! Use your hands to straighten the edges a bit if needed. Chef’s Note: If your pastry gets too warm and sticky, pop it on the prepared baking sheet and into the fridge for 5 minutes to firm up. Cold pastry is your friend!
- Map It Out: Mentally (or with the back of a knife, very lightly) divide your rectangle into three equal sections lengthwise. The beautiful, filled middle third is our “target zone.” The two outer thirds are where we’ll be making our cuts for the braid.
- Fill the Center: Spread the sweetened cream cheese mixture evenly down the center third of your pastry, leaving about an inch clear at the top and bottom. Next, gently spoon the pumpkin mixture on top of the cream cheese layer and spread it out. You’ve just created a delicious striped filling!
- The Grand Braid: Here’s the fun part! Using a sharp knife or a pizza cutter, make diagonal cuts about 1 inch apart down each side section of the pastry, moving from the filling outward to the edge. You should end up with about 6-7 strips on each side. Now, starting at the top, fold the top flap of pastry down over the filling. Then, begin folding the strips over the filling, alternating from the left and right sides in a criss-cross pattern. It will look like a braid or a lattice. Don’t worry if it’s not perfect—rustic is charming! When you get to the bottom, fold the bottom flap up and continue braiding until all strips are folded over.
- The Golden Touch: In a small bowl, beat your egg with a teaspoon of water or milk to make an egg wash. Use a pastry brush to gently but generously brush the entire surface of the braided pastry. This is what gives it that gorgeous, glossy, golden-brown color. Pro Tip: Try to avoid getting big drips of egg wash down the sides onto the cut edges, as it can “glue” the layers together and inhibit puffing.
- Bake to Perfection: Carefully transfer your beautiful creation (parchment paper and all) onto the baking sheet. Bake for 20-25 minutes. You’re looking for a deep, golden brown color and a pastry that has puffed up significantly. The bottom should sound hollow if you tap it lightly. The smell in your kitchen will be your best indicator that it’s almost done!
- The Hardest Part: Wait! Remove the Danish from the oven and let it cool on the baking sheet for at least 15-20 minutes. I know, the temptation is real! But this resting time allows the fillings to set slightly. If you cut into it too soon, the delicious lava of pumpkin and cream cheese will flow right out.
- Final Flourish: Once it’s just warm, it’s time for the final touch. You can simply dust it with a snowfall of powdered sugar for an elegant look, or drizzle it with a simple glaze for a little extra sweetness. Then, slice, serve, and accept all the compliments coming your way.
How to Serve Your Masterpiece
This braid is a star all on its own, but how you present it can turn it into a full experience. I love placing the whole, gorgeous braid on a beautiful wooden cutting board or a rustic ceramic platter right in the center of the table. Let people admire it for a moment before you slice it into generous portions.
For the ultimate cozy moment, serve it slightly warm alongside a big mug of strong coffee, a frothy latte, or a pot of spicy chai tea. The warm pastry and the hot drink are a match made in heaven. If you’re serving it as a dessert, a small scoop of vanilla bean ice cream or a dollop of lightly sweetened whipped cream on the side takes it to a whole new level of decadence.
Make It Your Own: Delicious Twists & Swaps
The fun doesn’t stop here! This recipe is a fantastic canvas for your own creativity. Here are a few of my favorite ways to mix it up:
- Apple Cinnamon Twist: Swap the pumpkin filling for a quick apple compote. Simply sauté 1 peeled, diced apple with a tablespoon of butter, a tablespoon of brown sugar, and ½ teaspoon of cinnamon until soft.
- Chocolate Hazelnut Dream: Replace the cream cheese layer with your favorite chocolate-hazelnut spread. It pairs surprisingly well with the pumpkin, or you can skip the pumpkin and just use the spread for a simpler, decadent treat.
- Gingerbread Spice: Change up the spices in the pumpkin filling! Use a blend of cinnamon, ginger, and a tiny pinch of cloves for a gingerbread-inspired flavor.
- Pecan Streusel Top: Before baking, sprinkle the top with a simple streusel made from 2 tbsp flour, 2 tbsp brown sugar, 1 tbsp cold butter, and 2 tbsp chopped pecans, rubbed together until crumbly.
- Savory-Sweet Option: Add a handful of crispy, crumbled bacon into the cream cheese mixture. Trust me on this one—the salty, smoky flavor with the sweet pumpkin is incredible.
From My Kitchen to Yours: A Few Extra Thoughts
This recipe has evolved so much from that first messy attempt in my tiny apartment kitchen. I’ve learned that the key truly is keeping the pastry cold. I now even chill the filled braid for 10-15 minutes before brushing it with egg wash and baking. This extra step ensures maximum puff and flakiness.
I also have a funny story about the first time I tried to “healthify” it too much. I used a low-fat cream cheese and didn’t blot my pumpkin. The result was a delicious-tasting but… well, let’s just say a very *soggy-bottomed* situation. It taught me that some recipes are worth using the full-fat, good stuff for structural integrity and pure joy. Balance, remember? It’s not about perfection; it’s about the delicious journey.
This braid has become my signature housewarming gift, my go-to “I owe you a meal” delivery, and my favorite thing to make with my niece. It’s more than a recipe; it’s a little edible piece of autumn joy. I hope it becomes that for you, too.
Your Questions, Answered!
Q: Can I make this ahead of time?
A: Absolutely! You have two great options. 1) Assemble and Freeze: Assemble the entire braid up to the point of baking, then freeze it solid on the baking sheet. Once frozen, wrap it tightly in plastic wrap. Bake from frozen, adding 5-10 minutes to the baking time. 2) Bake and Reheat: You can bake it fully, let it cool completely, and store it covered at room temperature for a day. Reheat slices in a 350°F (175°C) oven for 5-8 minutes to re-crisp the pastry.
Q: My pastry didn’t puff up very much. What happened?
A> The most common culprit is pastry that was too warm when it went into the oven. The butter layers need to be cold so that when they hit the hot oven, the water in the butter turns to steam, creating that lift. Another reason could be handling the pastry too much, which can melt the butter with the heat of your hands. Work quickly and use that fridge if you need to!
Q: My filling leaked out everywhere while baking. How do I prevent that?
A> A little leakage is normal and totally okay! But a flood usually means either 1) the filling was too wet (remember to blot that pumpkin!), 2) you overfilled the center (leave that 1-inch border!), or 3) the braid wasn’t sealed well enough at the ends. Make sure you’ve folded the top and bottom flaps over securely to create a “packet” for the filling.
Q: Can I use homemade puff pastry?
A> You absolutely can, and I salute your ambition! Homemade puff pastry is a glorious thing. Just be sure to roll it to a similar thickness as the store-bought sheets. Keep in mind that this will significantly increase your prep time, but the flavor payoff is incredible.
Nutritional Information*
*This is an approximate estimate based on the ingredients used and calculated for 8 servings. Values can vary based on specific brands and substitutions.
Per Serving: Calories: ~230 | Fat: 14g | Saturated Fat: 7g | Cholesterol: 40mg | Sodium: 140mg | Carbohydrates: 21g | Sugar: 9g | Protein: 3g