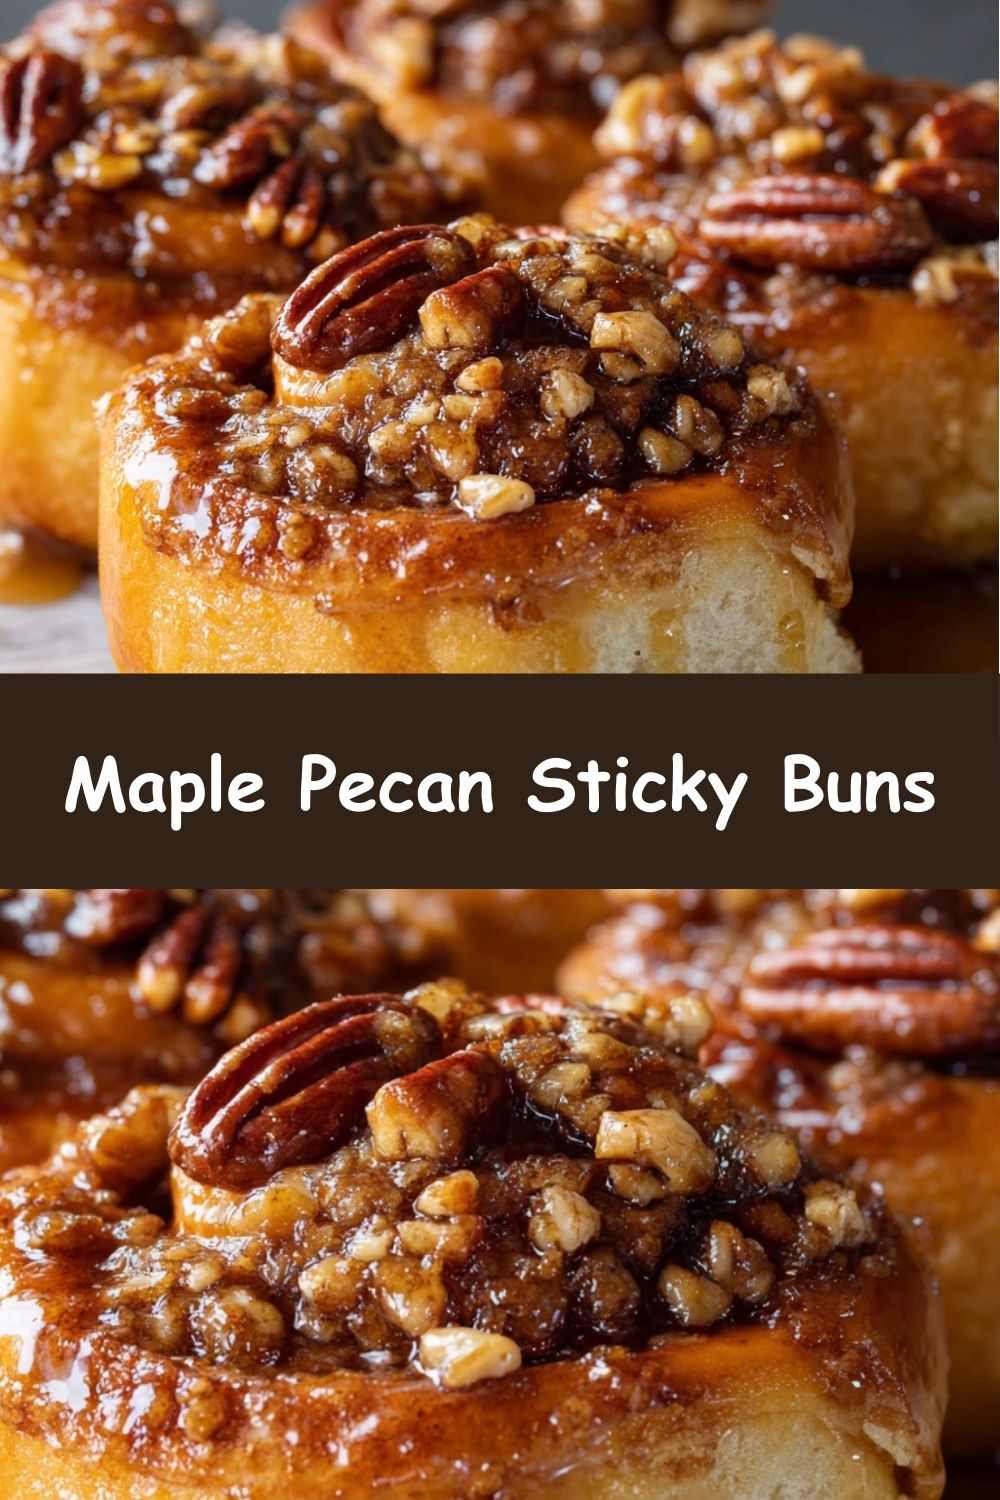
 Maple Pecan Sticky Buns: The Ultimate Recipe for a Cozy Morning
Is there anything in the world that smells more like a hug than a batch of sticky buns baking in the oven? That warm, sweet, buttery, cinnamony aroma that just wraps itself around your entire house and pulls everyone into the kitchen, noses first, asking, “Is it ready yet?” It’s pure, unadulterated morning magic. And today, my friend, we are making the ultimate version: my Maple Pecan Sticky Buns.
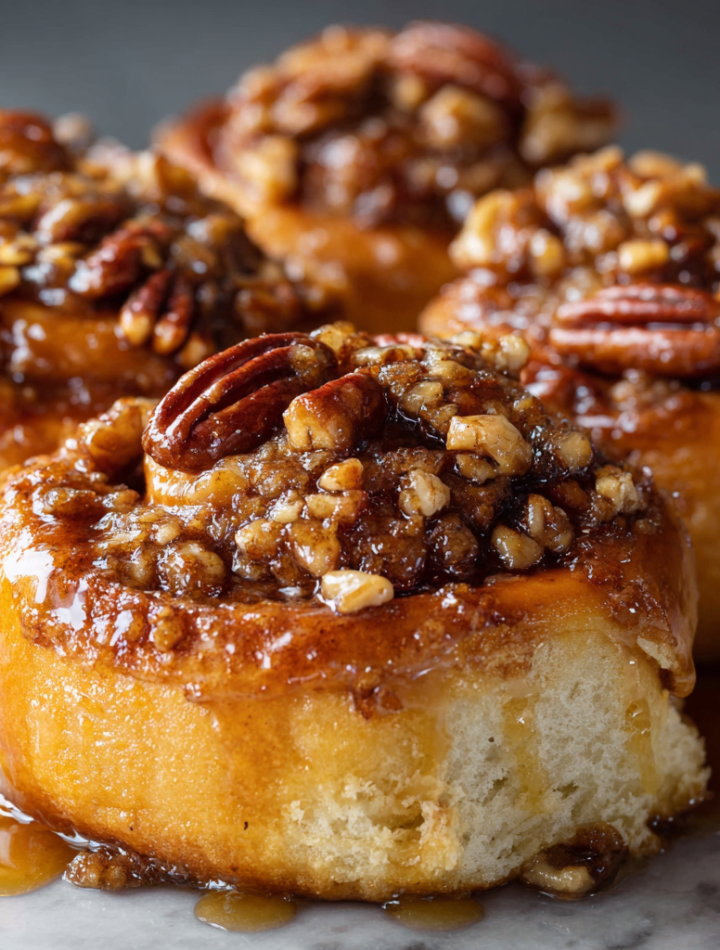
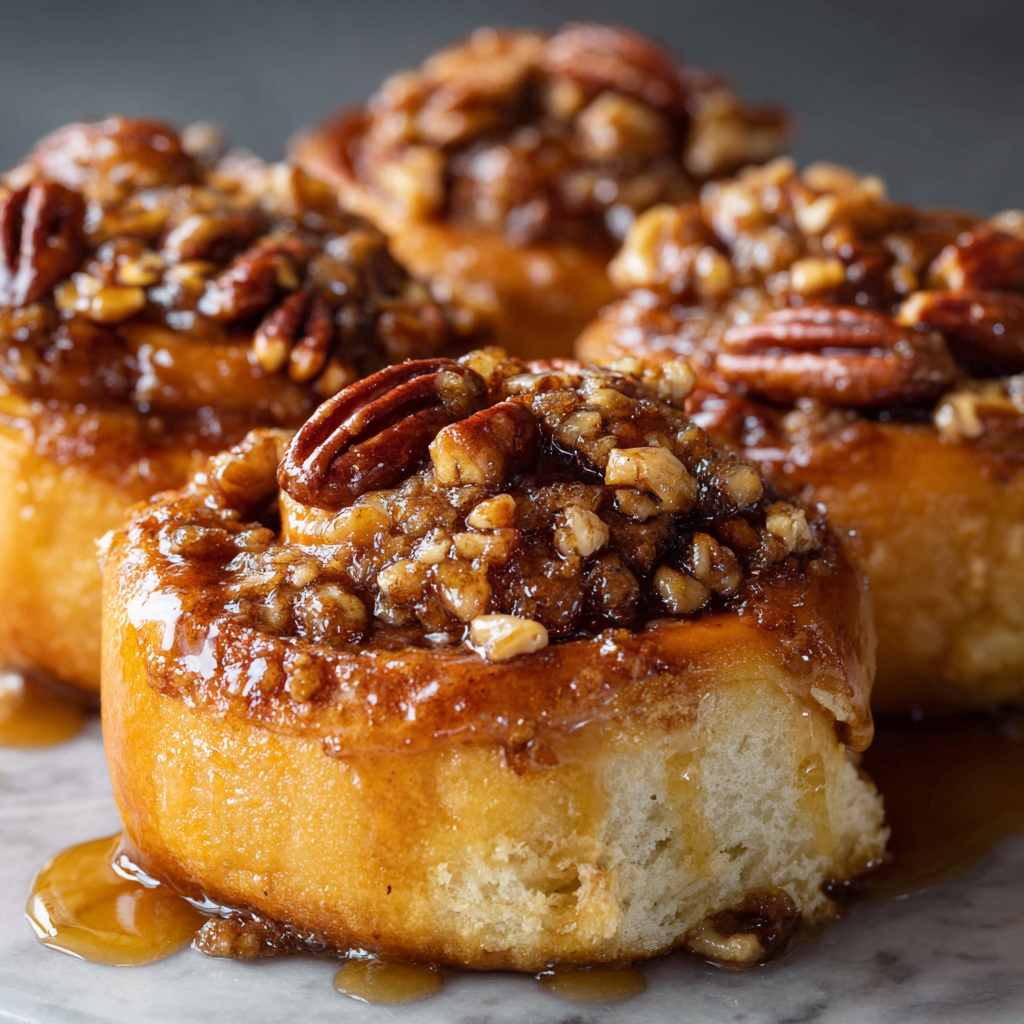
These aren’t just any sticky buns. We’re talking about impossibly soft, feather-light rolls, swirled with a cozy blanket of cinnamon sugar, and then—the real showstopper—baked right on top of a bubbling, caramel-like lake of pure maple syrup and toasty pecans. When you flip that pan over, it’s a moment of pure culinary drama that delivers a gooey, crunchy, utterly divine masterpiece. It’s the kind of treat that turns a regular Saturday into a celebration and makes holiday mornings feel truly special.
Now, I see you. Maybe you’re thinking, “Clara, yeast dough? That sounds… intimidating.” I get it. I’ve been there, staring at a packet of yeast like it’s a mysterious science experiment. But I promise you, this recipe is my most-tested, most-loved, and most-foolproof guide. We’re going to walk through every single step together, with all my best chef hacks and a whole lot of encouragement. This is a labor of love, but it’s a joyful one. So, put on your favorite apron, cue up a good playlist, and let’s create some kitchen magic together. This is one adventure that ends with you licking that maple syrup spoon and feeling like a total baking rockstar.
Print
Maple Pecan Sticky Buns
- Total Time: 2 hours
- Yield: 12 servings 1x
Description
Soft, fluffy rolls soaked in buttery maple syrup and topped with a caramelized pecan crunch—these sticky buns are pure morning magic. They’re rich, sweet, and make any brunch feel like a celebration.
Ingredients
For the Dough:
3 cups all-purpose flour
¼ cup sugar
1 packet (2¼ tsp) active dry yeast
½ teaspoon salt
¾ cup warm milk
¼ cup unsalted butter, melted
1 large egg
For the Filling:
½ cup brown sugar
1 tablespoon cinnamon
3 tablespoons unsalted butter, softened
For the Maple Pecan Topping:
½ cup butter
½ cup brown sugar
⅓ cup pure maple syrup
1 cup chopped pecans
Instructions
Combine flour, sugar, yeast, and salt. Stir in milk, melted butter, and egg. Knead until dough is smooth. Let rise 1 hour, until doubled.
In a saucepan, melt butter for topping. Stir in brown sugar and maple syrup. Simmer 1 minute, then pour into greased 9×13-inch pan. Sprinkle pecans over top.
Roll dough into a rectangle. Spread with butter, then sprinkle with brown sugar and cinnamon. Roll up and slice into 12 pieces.
Place rolls cut-side down on top of maple-pecan mixture. Let rise 30 minutes.
Bake at 350°F (175°C) for 25–30 minutes or until golden. Cool 5 minutes, then invert onto a platter to reveal the sticky topping.
- Prep Time: 30 minutes (plus rising time)
- Cook Time: 30 minutes
- Category: breakfast
Nutrition
- Calories: 380
- Sugar: 22g
- Sodium: 170mg
- Fat: 20g
- Saturated Fat: 9g
- Carbohydrates: 45g
- Protein: 5g
- Cholesterol: 55mg
The Sweet Smell of Home: A Sticky Bun Memory
My love affair with sticky buns started long before I ever baked them myself. It began in my grandma’s kitchen, a place that always smelled faintly of flour and perfume. Every Christmas Eve, without fail, she’d disappear into that kitchen after dinner. The whir of her ancient stand mixer was our signal that the magic had begun. My sister and I would sneak down the hall to watch her, a flour-dusted queen in a holiday apron, her hands moving with a quiet confidence as she kneaded the dough.
We’d wake up on Christmas morning to that iconic scent—a rich, sweet, buttery perfume that had seeped into every corner of the house. It was more potent than any potpourri. The buns were always served warm, the pecans gloriously sticky, the syrup threatening to drip down our chins. It wasn’t just breakfast; it was a ritual. It was the taste of anticipation, of family, of pure joy. This recipe is my homage to her. I’ve tweaked it over the years (hello, pure maple syrup instead of corn syrup!), but the soul of it—that feeling of cozy, celebratory love—remains exactly the same. It’s my hope that this recipe becomes a part of your own family’s story, creating sticky, sweet memories for years to come.
Gathering Your Sticky Bun Symphony: The Ingredients
Baking is a science, but it’s also an art. Using great ingredients is the first step to creating a masterpiece. Here’s exactly what you’ll need and why each component matters.
For the Dough:
- 3 cups all-purpose flour: The foundation of our fluffy buns. I like unbleached all-purpose for its reliable protein content, which gives us structure without toughness. For a slightly more tender crumb, you can swap one cup for bread flour!
- ¼ cup sugar: This isn’t just for sweetness; it’s food for the yeast, helping it get active and bubbly, which is what makes our dough rise.
- 1 packet (2¼ tsp) active dry yeast: The tiny miracle worker! Make sure your yeast is fresh. If it doesn’t foam after 5-10 minutes in warm liquid, it’s past its prime and won’t make your dough rise.
- ½ teaspoon salt: The flavor enhancer. It balances the sweetness and strengthens the gluten network in the dough.
- ¾ cup warm milk: Whole milk will give you the richest, most tender dough, but 2% works great too. The key is warm, not hot. Think baby bottle temperature (around 110°F). Too hot and you’ll kill the yeast!
- ¼ cup unsalted butter, melted: For unparalleled richness and flavor. Using unsalted lets us control the salt level in the dough.
- 1 large egg, at room temperature: The binder that adds structure, richness, and a beautiful golden color to the baked buns.
For the Cinnamon Filling:
- ½ cup brown sugar: I prefer dark brown sugar for its deeper molasses flavor, but light brown works perfectly too.
- 1 tablespoon cinnamon: Use the good stuff! Fresh, fragrant cinnamon makes a world of difference. Don’t be shy with it.
- 3 tablespoons unsalted butter, softened: Softened is the key word here. It needs to be spreadable at room temperature to easily coat the dough without tearing it.
For the Maple Pecan Topping (The Star of the Show!):
- ½ cup butter: We’re melting this down to create the base of our sticky, caramel-like sauce.
- ½ cup brown sugar: Combined with the butter and maple, this creates that iconic gooey texture.
- ⅓ cup pure maple syrup: Please, please use the real stuff! The imitation syrup just won’t give you that deep, complex flavor. This is where the magic happens.
- 1 cup chopped pecans: Toasted pecans are a game-changer here. Just pop them in a dry skillet for a few minutes until fragrant. It unlocks their nutty flavor and adds a crucial crunch.
Let’s Get Baking: Your Step-by-Step Guide to Glory
Ready? Let’s do this. Read through all the steps once before you begin. I’ve packed this section with all my best tips to ensure your success.
Step 1: Wake Up the Yeast. In a small bowl or a liquid measuring cup, combine your warm milk (remember, just warm to the touch!) and the ¼ cup of sugar. Sprinkle the yeast over the top, give it a gentle stir, and walk away for 5-10 minutes. You’re waiting for a foamy, frothy layer to form on top. This is your sign that the yeast is alive and hungry, ready to make your dough puff up beautifully. If nothing happens, start over with new yeast.
Step 2: Make the Dough. In the bowl of a stand mixer fitted with a dough hook (or a large bowl if kneading by hand), whisk together the flour and salt. Pour in the yeasty milk mixture, the melted butter, and the egg. Mix on low speed until a shaggy dough forms. Then, increase the speed to medium and knead for 5-7 minutes. The dough should slap against the sides of the bowl, become smooth, and be slightly tacky but not sticky. If it’s sticking to the bowl, add a tablespoon of flour at a time until it clears the sides. Chef’s Hack: The windowpane test! Pinch off a small piece of dough and gently stretch it. If you can stretch it thin enough to see light through it without it tearing, your gluten is perfectly developed.
Step 3: First Rise. Shape the dough into a ball, place it in a lightly greased bowl, and turn it over to coat. Cover the bowl tightly with plastic wrap or a damp kitchen towel. Now, find a warm, draft-free spot for it to rise. My favorite trick? Turn your oven on to its lowest setting for one minute, then TURN IT OFF. Place the covered bowl in the warm (not hot!) oven. Let it rise for about 1 hour, or until doubled in size.
Step 4: Create the Sticky Lake. While the dough is rising, make your topping. In a saucepan, melt the ½ cup of butter over medium heat. Stir in the brown sugar and maple syrup. Bring it to a gentle simmer, let it bubble for just one minute (this helps it thicken slightly), then immediately remove from heat. Pour this liquid gold into your greased 9×13-inch baking pan, tilting the pan to coat the bottom evenly. Sprinkle your toasted chopped pecans all over the top. Set this aside.
Step 5: Roll and Fill. Punch down the risen dough to release the air. Turn it out onto a lightly floured surface. Using a rolling pin, roll it into a roughly 12×18-inch rectangle. Spread the softened 3 tablespoons of butter evenly over the entire surface, leaving a small border along one long edge. In a small bowl, mix the brown sugar and cinnamon, then sprinkle this mixture evenly over the butter. Chef’s Hack: Lightly pat the cinnamon sugar down with your hands so it adheres to the butter and doesn’t all spill out when you roll.
Step 6: Roll, Seal, and Slice. Starting with the long edge closest to you (the one with the butter all the way to the edge), tightly roll the dough into a log, rolling toward the clean border. Pinch the seam to seal it. Using a sharp serrated knife or, even better, a piece of unflavored dental floss, slice the log into 12 equal pieces. Chef’s Floss Hack: Slide a piece of floss under the roll, cross the ends over the top, and pull. It gives you a clean cut without squishing the dough!
Step 7: Second Rise. Place your 12 swirls, cut-side down, on top of the maple pecan mixture in your pan. They won’t fill the pan now, but they will after they rise and bake! Cover the pan and let the rolls rise again in a warm place for 30-45 minutes, until they’re puffy and touching each other.
Step 8: Bake to Golden Perfection. Preheat your oven to 350°F (175°C). Once the rolls have puffed up, place the pan in the oven and bake for 25-30 minutes. You’re looking for a deep golden brown on top and that glorious sticky sauce bubbling furiously around the edges. The kitchen will smell insane.
Step 9: The Grand Flip! This is the most important step. Remove the pan from the oven and let it cool on a wire rack for ONLY 5 minutes. Any longer and the caramel will harden and stick to the pan. Place your serving platter upside down over the baking pan. With confidence (and oven mitts!), quickly and carefully flip the whole thing over. Lift the pan away to reveal your masterpiece—a gorgeous, glistening crown of pecans and syrup.
How to Serve These Glorious Buns
Serve these sticky buns warm, straight from the flip! The gooey, syrupy topping is at its absolute best when it’s still warm and fluid. I like to pull them apart and let everyone have their own bun. A cold glass of milk or a hot cup of strong black coffee is the non-negotiable perfect partner to cut through the sweetness. For a truly decadent brunch, a dollop of lightly sweetened whipped cream or a scoop of vanilla ice cream on the side turns it into an unforgettable dessert-for-breakfast situation. Just be prepared for requests for seconds.
Mix It Up! Creative Sticky Bun Twists
Once you’ve mastered the classic, the world of sticky buns is your oyster! Here are a few fun variations:
- Apple Cider Twist: Replace the milk in the dough with warm apple cider. Add a layer of very thinly sliced apples (like Honeycrisp or Granny Smith) over the cinnamon sugar before rolling.
- Orange Cardamom: Add the zest of one orange to the dough and a ½ teaspoon of ground cardamom to the cinnamon filling. So bright and fragrant!
- Salty Sweet: Use salted butter in the topping and finish the baked buns with a flaky sea salt (like Maldon) right after you flip them.
- Nut-Free Bliss: Simply omit the pecans! The maple caramel sauce is still incredible on its own. You could even add a handful of old-fashioned oats for a different kind of texture.
- Venture Beyond Pecans: Try this with walnuts or even toasted, chopped almonds for a different flavor profile.
Clara’s Kitchen Notes & Stories
This recipe has been through it all with me. I’ve made it in a dozen different kitchens, for everything from lazy Sundays to frantic holiday mornings. I once, in a sleep-deprived state, forgot the sugar in the dough. Let’s just say the yeast was very disappointed and the resulting bricks were… not blog-worthy. We’ve all been there! The beauty of baking is that every “mistake” is a lesson.
The single biggest evolution was switching from a corn syrup-based glaze to pure maple syrup. It was a revelation. The flavor is so much deeper and more complex, less one-note sweet. It feels more nourishing, in its own indulgent way. These buns have also taught me patience. That second rise is crucial for that iconic fluffy texture—don’t rush it! Now, this recipe feels like an old friend. It’s reliable, it’s joyful, and it never, ever fails to bring a smile to the faces of anyone who eats one. That’s the real magic, right there.
Your Sticky Bun Questions, Answered!
Q: Can I make these the night before?
A: Absolutely! This is my favorite make-ahead trick. After you place the sliced rolls in the pan with the topping, instead of doing the second rise, cover the pan tightly with plastic wrap and pop it in the refrigerator overnight. The next morning, take the pan out of the fridge, let it sit on the counter (still covered) for about 60-90 minutes to come to room temperature and finish rising, then bake as directed. You might need to add 2-3 extra minutes to the bake time since the pan is cold.
Q: My dough didn’t rise. What went wrong?
A: The most common culprits are old yeast or liquid that was too hot. Yeast is a living organism, and if it’s expired, it won’t work. If your liquid was too hot (above 120°F or so), it killed the yeast. Always test your yeast first and use a thermometer if you’re unsure! The environment can also be a factor—if your kitchen is very cold, the dough will take much longer to rise.
Q: The caramel topping hardened and stuck to the pan when I flipped them. Help!
A: This means you waited too long to flip them. That 5-minute cooling window is critical. The sugar is molten and fluid right out of the oven but begins to set as it cools. If this happens, just pop the pan back into the warm oven for a minute or two to re-melt the syrup, then try flipping again.
Q: Can I freeze these?
A: You can! The baked and cooled buns freeze beautifully. Let them cool completely after flipping, then wrap them individually in plastic wrap and place them in a freezer bag. To reheat, thaw at room temperature and warm in a 300°F oven for 10 minutes, or microwave for 20-30 seconds. You can also freeze the un-baked, assembled pan after the second rise. Wrap it well and freeze.