 Ditch the Chalky, Overpriced Bars: Your New Favorite Homemade Protein Bars Are Here!
Hey there, my fellow flavor adventurer! Let’s have a real talk for a second. How many times have you stood in the grocery store aisle, squinting at the microscopic print on a protein bar wrapper, only to find a novel’s worth of unpronounceable ingredients, a sneaky amount of sugar, and a price tag that makes your wallet weep? You buy it anyway because you need something quick, something fuel-filled, something to power you through that 3 PM slump or your post-workout recovery. You take a bite, and… meh. It’s chalky. It’s weirdly synthetic. It’s a total taste bud letdown.
I’ve been there more times than I care to admit. For years, I believed that was just the trade-off: convenience for taste, nutrition for enjoyment. But friends, I am here to tell you that it is a lie! You can absolutely have it all—a bar that’s wildly delicious, incredibly nutritious, simple to make, and easy on your budget. The solution isn’t in that shiny wrapper; it’s waiting for you right in your own kitchen.
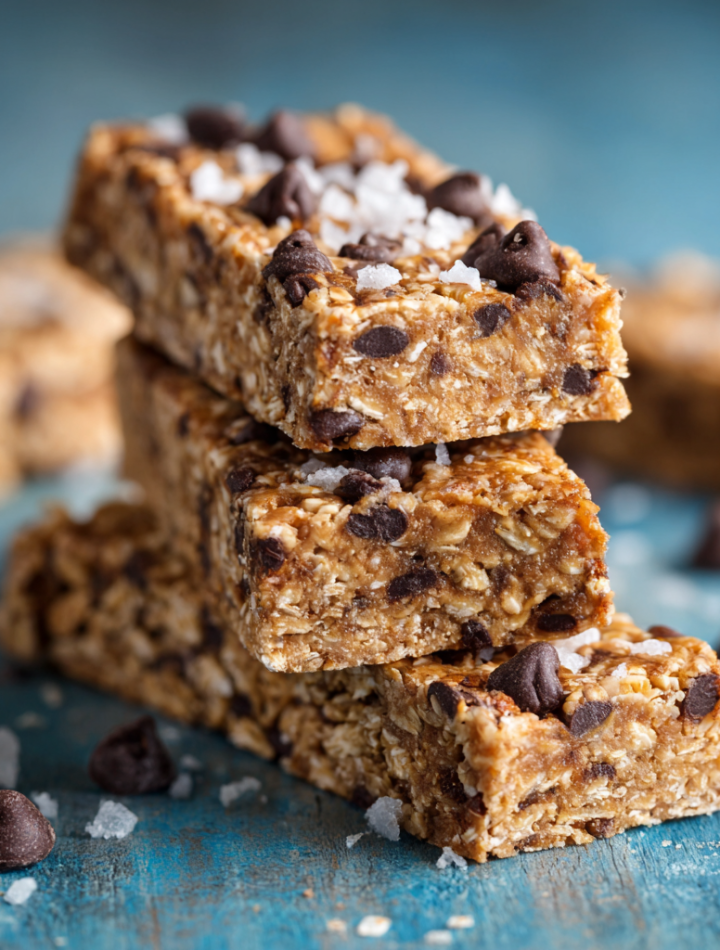
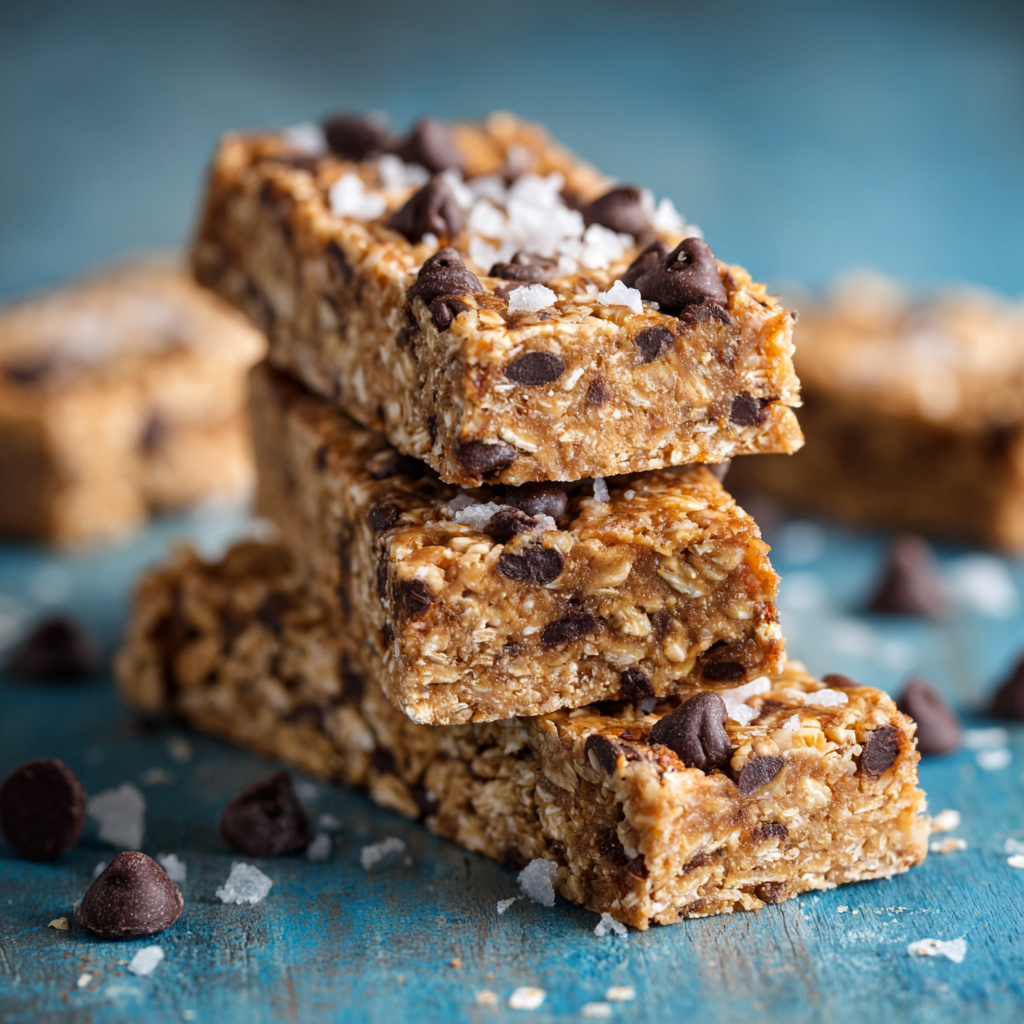
These Homemade Protein Bars are my absolute go-to for a reason. They are chewy, satisfying, and 100% customizable to whatever you’re craving. They require zero baking (hello, no-heat kitchen wins!), and they come together in about ten minutes of active time. We’re talking whole, real ingredients that you can feel good about, a solid punch of protein to keep you full and energized, and a flavor so good you’ll actually look forward to eating them. This isn’t just a recipe; it’s your ticket to ditching the mediocre and embracing a snack that truly lights you up from the inside. Let’s get mixing!
Print
Homemade Protein Bars
- Total Time: 1 hr 10 mins
- Yield: 10 bars
Description
Ditch the store-bought bars—these Homemade Protein Bars are clean, simple, and loaded with fuel to keep you going. With no baking and endless flavor options, they’re the perfect grab-and-go snack for your workouts, workdays, or snack attacks.
Instructions
1 1/2 cups rolled oats
1 cup protein powder (any flavor)
1/2 cup natural peanut butter or almond butter
1/3 cup honey or maple syrup
1/4 cup milk (dairy or plant-based)
1/4 cup mini chocolate chips or chopped nuts (optional)
1/2 tsp vanilla extract
Pinch of salt
Notes
In a large bowl, mix oats, protein powder, and salt.
Stir in peanut butter, honey, milk, and vanilla until fully combined.
Fold in chocolate chips or nuts if using.
Press mixture firmly into a parchment-lined 8×8” pan.
Chill in the fridge for 1–2 hours until firm.
Slice into bars and store in the fridge or freezer.
- Prep Time: 10 min
- Category: Snack
Nutrition
- Calories: 210
- Fat: 9g
- Carbohydrates: 18g
- Fiber: 3g
- Protein: 10–12g
The Hiking Trip That Started It All
I have to take you back to a few summers ago. My best friend, Maya, and I decided to be ~extra adventurous~ and tackle a pretty intense day hike. We packed our backpacks with water, sunscreen, and, of course, snacks. I, being the “prepared” one, had grabbed a couple of the “top-rated” protein bars from the store. Hours in, with burning calves and stunning views, we decided to break for lunch. We found a perfect rock overlooking a valley and pulled out our fuel. I handed Maya a bar. We unwrapped them simultaneously, took a bite, and just burst out laughing. They were so bad. So dry, so strangely fruity in a way fruit has never tasted, and they left a weird film in our mouths. We ended up trading for her far-superior trail mix, but that feeling of disappointment stuck with me.
That night, covered in dirt and blissfully exhausted, I raided my pantry. I was determined to create something better. I started with the basics: oats for lasting energy, peanut butter for that stick-to-your-ribs goodness, and a scoop of the vanilla protein powder I used in my morning smoothies. A little honey for sweetness, a splash of milk to bring it all together. I pressed it into a pan, crossed my fingers, and let the fridge work its magic. The next morning, I sliced it into bars, wrapped one in parchment paper, and took it on my walk. One bite and I did a little happy dance right there on the sidewalk. It was chewy, peanut buttery, perfectly sweet, and it actually tasted like real food! I texted Maya immediately: “We will never have a bad bar again.” And we haven’t.
Gathering Your Kitchen Crew: The Ingredients
Here’s the beautiful part: this recipe is more of a template than a rigid rulebook. These are the core players, but feel free to get creative with the substitutions! This is your bar, your rules.
- 1 ½ cups Rolled Oats (aka Old-Fashioned Oats): This is our base, our foundation, our hearty, fiber-filled friend that gives these bars their wonderful chewy texture and keeps you full for hours. Chef’s Insight: Don’t use quick oats! They absorb too much moisture and can make the bars gummy. If you need a gluten-free option, just make sure your oats are certified GF.
- 1 cup Protein Powder: The star of the show! This is where you can really personalize the flavor. Vanilla, chocolate, peanut butter, even unflavored—they all work beautifully. Pro Tip: The type of protein powder matters! I’ve found whey protein isolate or a blended plant-based protein (like brown rice/pea blend) gives the best, least-chalky texture. Avoid casein-based powders for this no-bake recipe, as they can become overly thick and dense.
- ½ cup Natural Peanut Butter or Almond Butter: This is our “glue” and our source of healthy fats. I strongly recommend using a natural, drippy nut butter where the only ingredients are nuts and maybe salt. The oily kind is crucial for helping the mixture bind together. Substitution Tip: Sunflower seed butter works perfectly for a nut-free version! Just note it might turn the bars a slightly greenish color over time (it’s a harmless reaction with the baking soda, but totally safe to eat!).
- ⅓ cup Honey or Maple Syrup: Our natural sweetener and another binding agent. Honey gives a classic, floral sweetness, while maple syrup offers a deeper, richer flavor. Substitution Tip: For a vegan bar, maple syrup is the way to go. Agave nectar also works in a pinch!
- ¼ cup Milk (dairy or plant-based): This is the magic moisture regulator. It brings everything together into a perfect, pressable dough. You can use almond milk, oat milk, coconut milk, or good old cow’s milk. Chef’s Hack: Start with a scant ¼ cup and add the last tablespoon only if your mixture seems too dry. The perfect consistency should be like a thick, slightly sticky cookie dough.
- ¼ cup Mini Chocolate Chips or Chopped Nuts (optional but highly recommended): The fun mix-ins! Mini chocolate chips distribute better than regular-sized ones. Chopped almonds, walnuts, or pecans add a fantastic crunch. Get Creative: This is where you can really play—dried cranberries, chopped apricots, shredded coconut, even a sprinkle of cinnamon or espresso powder!
- ½ tsp Vanilla Extract: The flavor enhancer. It rounds out all the other flavors and makes everything taste richer and more homemade.
- Pinch of Salt: Don’t you dare skip this! Salt is the ultimate flavor booster. It cuts the sweetness and makes the peanut butter and chocolate notes pop. If your nut butter is unsalted, you might even add an extra tiny pinch.
Let’s Make Some Magic: Step-by-Step Instructions
Ready? This is the easiest “cooking” you’ll do all week. Put on some good music, and let’s get to it.
Step 1: The Dry Team Assembly
Grab a large mixing bowl—give yourself plenty of room to stir without making a mess. Dump in your rolled oats, protein powder, and that all-important pinch of salt. Give this a good whisk. Why? We want to break up any little clumps in the protein powder and ensure every single oat is coated in that flavorful powder. This is the secret to a uniform bar with no weird, dry pockets. Little Chef Hack: If your protein powder is particularly clumpy, you can sift it into the bowl with the oats. It feels fancy and makes a huge difference!
Step 2: Bring in the Wet Team
Now, add your peanut butter, honey (or maple syrup), and vanilla extract to the bowl. Now, here’s a pro move: before you add the milk, just pour in most of it. Hold back that last tablespoon. Grab a sturdy spatula or wooden spoon and start to mix. You’ll see the dry ingredients slowly come together. It might seem crumbly at first, but keep going! Once it’s mostly combined, assess the texture. Is it holding together when you press it? If it’s still too dry and crumbly, add that last tablespoon of milk. If it’s already forming a cohesive dough, leave it out! Different nut butters and protein powders have different absorption rates, so this is your moment to be the chef and trust your instincts.
Step 3: The Fun Part – Mix-Ins!
Your dough is ready! Now, fold in your chocolate chips, nuts, or whatever fun add-ins you’ve chosen. “Folding” just means gently incorporating them so you don’t break the chips or overwork the dough. Make sure they’re evenly distributed for maximum joy in every bite.
Step 4: Press It Like You Mean It
Line an 8×8 inch baking pan with parchment paper. This is non-negotiable for easy removal! Leave some overhang on two sides to create “handles.” Now, dump your mixture into the prepared pan. This is the most important step for getting bars that don’t crumble: PRESS, PRESS, PRESS! Use your hands, the bottom of a flat measuring cup, or even a small glass to press the mixture down into an even, super compact layer. Get into the corners and really apply some pressure. The more compact it is now, the better your bars will hold their shape later. I like to put a little piece of parchment on top and press with the measuring cup for a super smooth top.
Step 5: The Patience Game (a.k.a. Chilling)
Pop the pan into the refrigerator for at least 1-2 hours, or until it’s completely firm. I know, I know, waiting is the hardest part! But this is crucial for the bars to set up properly. If you’re in a huge rush, you can speed this up by putting them in the freezer for about 30-45 minutes. Once it’s rock solid, use the parchment paper handles to lift the entire slab out of the pan onto a cutting board.
Step 6: Slice and Celebrate!
Using a sharp knife, slice the slab into 10 rectangular bars (or 12 smaller ones!). If the knife starts to stick, you can run it under hot water and dry it quickly for cleaner cuts. And that’s it! You just made incredibly delicious, healthy protein bars. Give yourself a pat on the back.
How to Serve & Savor Your Creation
These bars are the ultimate grab-and-go genius, but that doesn’t mean we can’t plate them with a little love! For a quick breakfast, I love to place a bar on my favorite little plate with a side of Greek yogurt and a handful of fresh berries. It feels like a real meal! For a post-workout treat, I’ll crumble one right over a bowl of chocolate pudding or nice cream for the most epic protein-packed sundae. If I’m serving them to friends (which I often do, because they’re always a hit), I’ll stack them on a rustic wooden board with some fresh fruit and coffee. However you serve them, just know you’re serving up a big dose of self-care.
Make It Your Own: Flavor Variations
The fun doesn’t stop with chocolate chips! This recipe is a blank canvas. Here are a few of my favorite twists:
- Almond Joy: Use chocolate protein powder, almond butter, and fold in shredded coconut and mini dark chocolate chips.
- Apple Pie: Use vanilla protein powder. Replace the milk with unsweetened applesauce and fold in a tablespoon of cinnamon and a handful of finely chopped dried apples.
- Double Chocolate Mint: Use chocolate protein powder. Add ¼ tsp peppermint extract with the wet ingredients and fold in cacao nibs instead of chocolate chips for a serious crunch.
- Tropical Sunrise: Use vanilla or unflavored protein powder. Fold in chopped dried mango, pineapple, and shredded coconut.
- Nut-Free Super Seed: Use sunflower seed butter and fold in a mix of pumpkin seeds, sunflower seeds, and chopped dates.
Chef’s Notes: A Few Kitchen Confessions
This recipe has evolved so much since that first pan! I initially tried to make them with quick oats (mistake, they were mushy). I’ve also learned the hard way that not all protein powders are created equal. One time, I used a very dense plant-based powder and didn’t adjust the liquid—I basically made protein brickle. It was… edible, but let’s just say it built character (and jaw muscle).
The biggest lesson? Don’t be afraid to get your hands dirty. Literally. The best tool for mixing and pressing is your own two hands. You can feel the texture better than any spoon can. This recipe is forgiving. If it’s too wet, add a few more oats. Too dry? Another tiny splash of milk. You’ve got this. These bars have become a weekly staple in my house, and my favorite thing is asking my partner, “What flavor should we make this week?” It’s a little ritual that never gets old.
Your Questions, Answered: FAQs & Troubleshooting
Q: My bars are too crumbly and fall apart! What did I do wrong?
A: This is usually one of two things: not enough binding agent or not enough pressure. First, make sure you’re using a natural, oily nut butter and enough honey/maple syrup. If your mixture seemed dry, add another tablespoon of milk next time. Second, and this is the big one, you really have to PRESS the mixture into the pan with serious force. Don’t be gentle! Compact it as much as humanly possible.
Q: Can I make these without protein powder?
A: You can, but they won’t be *protein* bars, more like energy bars. The texture will also be different, as the protein powder is a key dry ingredient. To replace it, you could try using ½ cup of additional oats and ½ cup of almond flour or coconut flour. The mixture will likely need a bit more liquid to compensate, so add milk a tablespoon at a time until you get a dough that holds together.
Q: How long do they last, and how should I store them?
A: Because they are fresh and lack preservatives, they need to be kept chilled. I store them in a single layer in an airtight container in the fridge for up to 2 weeks. For longer storage, they freeze beautifully for up to 3 months! I wrap each bar individually in parchment paper and then place them all in a large freezer bag. Grab one in the morning, and it’ll be thawed and ready to eat by your snack time.
Q: My bars turned out really hard after chilling. How can I fix this?
A: This typically happens if you used a protein powder that is very absorbent or if you added a bit too much of the dry ingredients. Don’t worry! Just let the bar sit at room temperature for 5-10 minutes before eating. It will soften up perfectly. Next time, try reducing the protein powder by 2 tablespoons and see if that helps.
Nutritional Information*
*Please note: This is an estimate and can vary greatly based on the specific brands and ingredients you use.
Per bar (assuming recipe makes 10 bars, with chocolate chips and using whey protein):
- Calories: ~210
- Protein: 10–12g
- Fat: 9g
- Carbohydrates: 18g
- Fiber: 3g
At the end of the day, these homemade protein bars aren’t just about fueling your body—they’re about having fun in the kitchen and making something you’ll actually look forward to eating. With the flexibility to mix and match flavors, fix common mishaps, and adjust to your taste, this recipe becomes uniquely yours every time you make it. Whether you’re pressing them into the pan for the week ahead or experimenting with a new flavor combo, these bars prove that healthy snacking can be both simple and seriously satisfying.