 Spooky, Sweet, and So Much Fun: Let’s Make Monster Marshmallow Pops!
Hey there, my fellow kitchen adventurer! Clara here, and can you feel it? That crisp, cool air, the rustle of brightly colored leaves, and the undeniable buzz of excitement that means Halloween is just around the corner. It’s my absolute favorite time to get playful in the kitchen. While I’m usually all about those glow-from-the-inside-out bowls, I firmly believe that a little bit of spooky-sweet magic is just as nourishing for the soul. And that’s exactly what we’re whipping up today: Monster Marshmallow Pops!
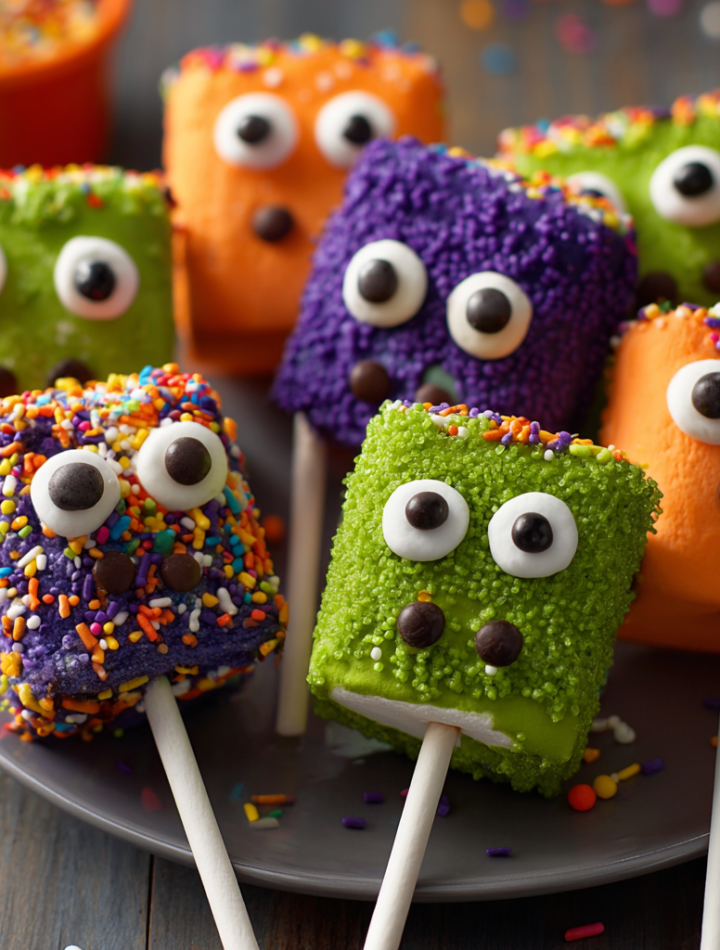
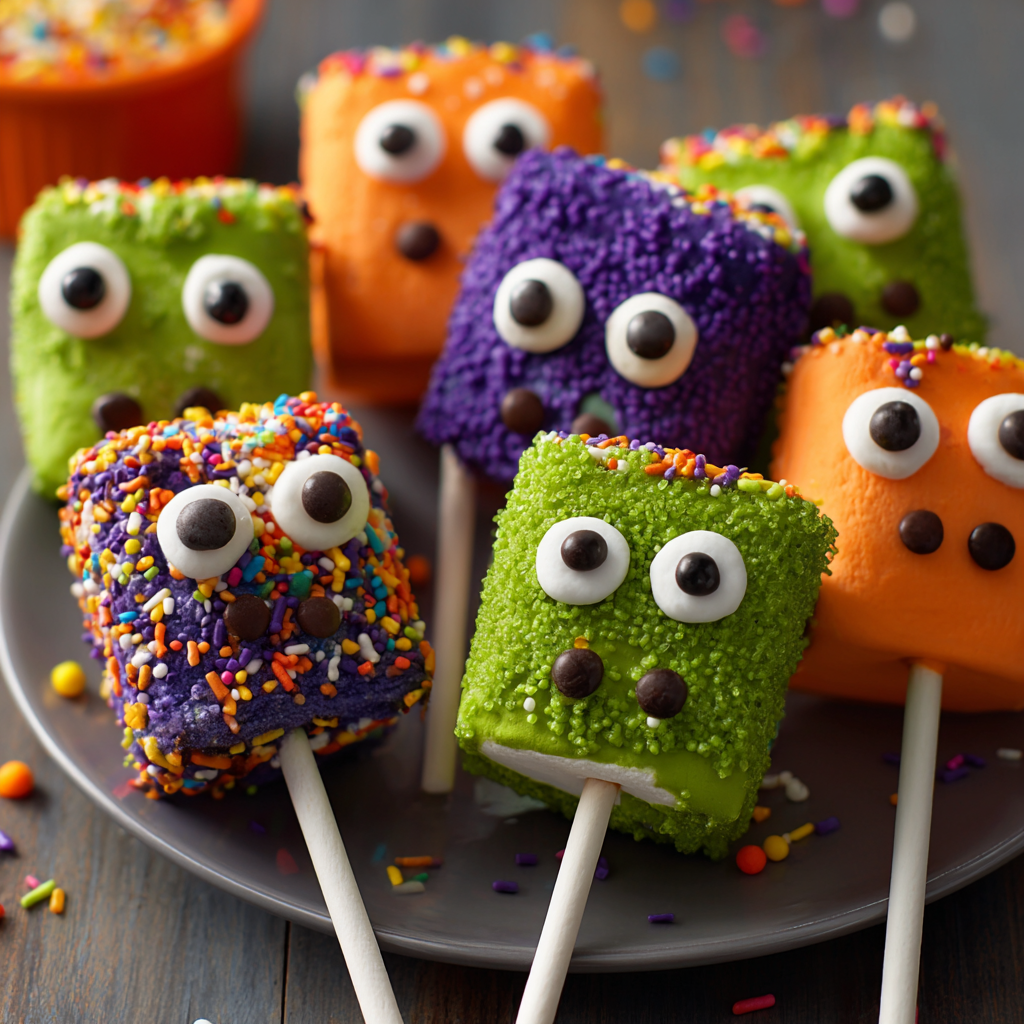
Imagine this: plump, pillowy marshmallows, dunked in a coat of vibrant, melt-in-your-mouth candy, and brought to life with googly candy eyes. They’re silly, they’re adorable, and they are guaranteed to make everyone—from the tiniest trick-or-treater to the most sophisticated party guest—break into a huge grin. The best part? These cuties come together in mere minutes with almost zero baking skills required. Seriously, if you can dip something and stick eyes on it, you are already a master monster-maker. So, grab your favorite Halloween playlist, let’s get our hands a little messy, and create a treat that’s as fun to make as it is to devour. Let’s turn simple ingredients into a centerpiece that steals the show!
The Happy Little Kitchen Accident That Started It All
You know, this recipe always takes me back to one particularly chaotic, flour-dusted Halloween. My niece and nephew, then just little munchkins, were over for a “spooky baking day.” Our ambitious plan to create intricate, web-covered cupcakes had just ended in a spectacular frosting explosion. We were all a little deflated, staring at the mess, with two very disappointed mini-chefs on the verge of a sugar-less meltdown.
I did what any panic-stricken aunt would do: I started frantically pulling things out of the pantry. A bag of jumbo marshmallows, some leftover candy melts from another project, and a rogue container of sprinkles tumbled onto the counter. “What if we just… stick these on sticks and make silly faces?” I said, more out of desperation than inspiration. What happened next was pure magic. Their little eyes lit up. The disappointment vanished, replaced by giggles as they debated whether a marshmallow needed two eyes or ten. That messy kitchen accident became the hit of their school party the next day. It was a powerful little reminder that the best recipes aren’t about perfection—they’re about the joy you create along the way. These pops are my edible memory of that day, and I’m so excited to share that joy with you.
Print
Monster Marshmallow Pops
- Total Time: 15 minutes
- Yield: 12 pops 1x
Description
These Monster Marshmallow Pops are spooky-sweet treats that come together in minutes and steal the spotlight on any Halloween table. Jumbo marshmallows get dipped in colorful melted candy coating, then brought to life with candy eyes and lollipop sticks. They’re fun to make, perfect for parties, and a guaranteed hit with kids and adults alike.
Ingredients
12 large marshmallows
1 cup green, purple, or orange candy melts (or a mix)
Candy eyes
12 lollipop sticks
Sprinkles (optional)
Wax paper or a cooling rack
Instructions
Melt candy coating in separate bowls according to package instructions until smooth.
Insert a lollipop stick into each marshmallow.
Dip each marshmallow into the melted coating, letting excess drip off.
Quickly press on candy eyes before the coating sets.
Optional: Add sprinkles or decorations for extra flair.
Set pops upright on wax paper or a rack to cool and harden completely.
- Prep Time: 15 minutes
- Category: Dessert
Nutrition
- Calories: 110
- Fat: 3.5g
- Saturated Fat: 2.5g
Gathering Your Monster-Making Squad
Here’s the beautiful part: you only need a handful of simple ingredients to create a whole squad of adorable edible monsters. Let’s break it down!
- 12 large marshmallows: The bigger, the better! They’re the perfect fluffy canvas for our monster creations. For a twist, you could use flavored marshmallows like strawberry or vanilla for a little extra surprise.
- 1 cup green, purple, or orange candy melts (or a mix!): This is where the personality comes in! Candy melts (also called candy wafers or melting chocolates) are my go-to because they set firm and come in every color imaginable. Chef’s Insight: If you’re in a pinch, you can use high-quality white chocolate chips mixed with a drop or two of oil-based food coloring. Just know it might not set quite as firmly.
- Candy eyes: The star of the show! You can find these in the baking aisle in all sizes. The bigger the eyes, the goofier the monster. No candy eyes? No problem! Tiny chocolate chips or even little dots of black icing work in a snap.
- 12 lollipop sticks: You can find paper or wooden sticks at any craft store or online. They give you a perfect handle for dipping and eating.
- Sprinkles (optional): Because more is more when it comes to monsters! Think black and orange jimmies for a classic look, or even some sanding sugar for a sparkly, textured monster coat.
- Wax paper or a cooling rack: This is your landing pad for the pops to set without sticking to everything. A cooling rack is fantastic because it allows any excess coating to drip off cleanly.
Let’s Build Some Monsters! Your Foolproof Guide
Alright, team, it’s go time! This process is so fast and fun. Just follow these steps, and you’ll have a monster army in no time.
- Melt Your Candy Coating: First, separate your candy melts by color into small, microwave-safe bowls. Microwave them in 30-second bursts, stirring vigorously between each burst, until they are completely smooth and drippy. Pro Chef Hack: Do NOT overheat them! If they get too hot, they can seize up and become a clumpy mess. If this happens, don’t panic! Stir in a tiny bit of solid vegetable shortening (like Crisco) to help bring it back to a smooth consistency.
- Assemble Your Base: Take a lollipop stick and gently press it into the flat bottom of a marshmallow. Push it about halfway through—you want it to be secure enough to hold the weight of the marshmallow when you dip it, but not so far that it pokes out the top. Now you’ve got a marshmallow lollipop!
- The Big Dip: Hold your marshmallow pop by the stick and dunk it straight into the bowl of melted candy. Swirl it around gently to make sure it’s fully coated. When you lift it out, gently tap your wrist or swirl the pop over the bowl to let any excess coating drip off. This is the key to avoiding a giant, messy candy puddle at the base of your pop!
- Give It a Face: This is the most important step—work quickly! While the coating is still wet, immediately press your candy eyes onto the marshmallow. Get creative with the placement! Cross-eyed, one eye, three eyes—let your inner monster designer run wild.
- Accessorize (Optional): If you’re using sprinkles, now is the time to add them. You can roll the wet pop in a bowl of sprinkles or just scatter them over the top for a fun, messy look.
- Set It and Forget It: Now, find a place for your newly created monster to rest. You can stick the end of the lollipop stick into a styrofoam block to let them set upright, or simply lay them flat on a sheet of wax paper. If you lay them flat, just be aware you might get a little flat spot on one side. Let them sit for a good 15-20 minutes, or until the candy coating is completely firm to the touch.

How to Serve Your Spooky Squad
Presentation is half the fun! For a real “wow” factor, stick your finished monster pops into a clean, dry floral foam block that you’ve covered with Halloween-themed tissue paper. It creates a spooky monster bouquet that’s the perfect centerpiece for your party table. Alternatively, you can simply arrange them standing up in a heavy mug or jar filled with black beans or candy corn to hold them in place. However you serve them, just be prepared for them to disappear in a flash!
Monster Mash-Up: Creative Twists & Swaps
The beauty of this recipe is its versatility. Don’t be afraid to play around and make it your own!
- The “Mummy” Wrap: Use white candy melts for coating. Once set, use a toothpick and a little black icing to draw squiggly “mummy wrap” lines and two little eyes peeking out.
- Vampire Bites: After dipping in red coating, use a small triangle of a fruit roll-up or a sliver of a red fruit leather to create a little vampire cape at the base. Add two candy eyes and two mini chocolate chip “fangs.”
- Gluten-Free & Nut-Free: This recipe is naturally gluten and nut-free! Just always double-check your specific candy melt and marshmallow brands to ensure there’s no cross-contamination if allergies are a severe concern.
- Zombie Green: Mix a few drops of black food coloring into green candy melts to create a gross, gruesome zombie green. Drag a fork through the coating after dipping to make scratch marks!
Clara’s Kitchen Confidential
Over the years, I’ve made approximately one million of these pops (slight exaggeration, but it feels like it!), and they’ve evolved from that first panicked creation. One year, I tried to be fancy and use real chocolate. Let’s just say it was a delicious, but very melty, disaster—not ideal for little hands at a party! That’s how I became a candy melt evangelist; they’re just designed for this job.
My biggest piece of advice? Embrace the imperfections. Not every monster will be a perfect specimen. Some might have a lazy eye, others might be a little lopsided. That’s what gives them character! The goal is to have fun and laugh a little. I promise, no one will notice a few flaws when they’re too busy marveling at how cute they are and then devouring them in one bite.
Your Monster Pop Questions, Answered!
Q: My candy coating is too thick and clumpy! How can I thin it out?
A: This is a common issue! Candy melts can sometimes be finicky. The best way to thin them out is to add a very small amount of paramount crystals or solid vegetable shortening (NOT butter or oil, as this can cause the coating to seize). Start with ½ teaspoon per cup of melts, stir, and add more only if needed until it reaches a smooth, dippable consistency.
Q: Can I make these ahead of time?
A: Absolutely! These are a fantastic make-ahead treat. Once fully set, store them in a single layer in an airtight container at cool room temperature for up to 3 days. Avoid the fridge, as it can cause condensation that makes the coating sticky and the marshmallows soft.
Q: My eyes won’t stick! What am I doing wrong?
A: Timing is everything! You have to apply the eyes while the coating is still wet and tacky. If you’ve already let the coating start to set, you can use a tiny, tiny dab of the melted candy or a dot of corn syrup as “glue” to secure the eye in place.
Q: The marshmallow is sliding off the stick! Help!
A: This usually happens if the marshmallow is particularly soft or if you dip it while the coating is still very hot. Make sure your coating has cooled slightly (but is still liquid) before dipping. You can also try pushing the stick about ¾ of the way through the marshmallow for a more secure hold.
Quick Nutrition & Prep Details
Prep Time: 15 minutes | Servings: 12 pops | Calories: 110 per pop
These are a fun, occasional treat! While they’re not a green glow bowl, they’re perfect for celebrating and creating happy memories.