 Spooky, Gooey, and Gloriously Chocolatey: Meet Your New Halloween Obsession
Okay, can we just agree that Halloween is the absolute best holiday for a food lover? It’s the one night of the year where being extra is not only encouraged but required. The cobwebs, the costumes, the sheer theatricality of it all! And the food? It’s a chance to let our creativity run wild, to make things that are deliciously spooky and a little bit gruesome, all in the name of good fun.
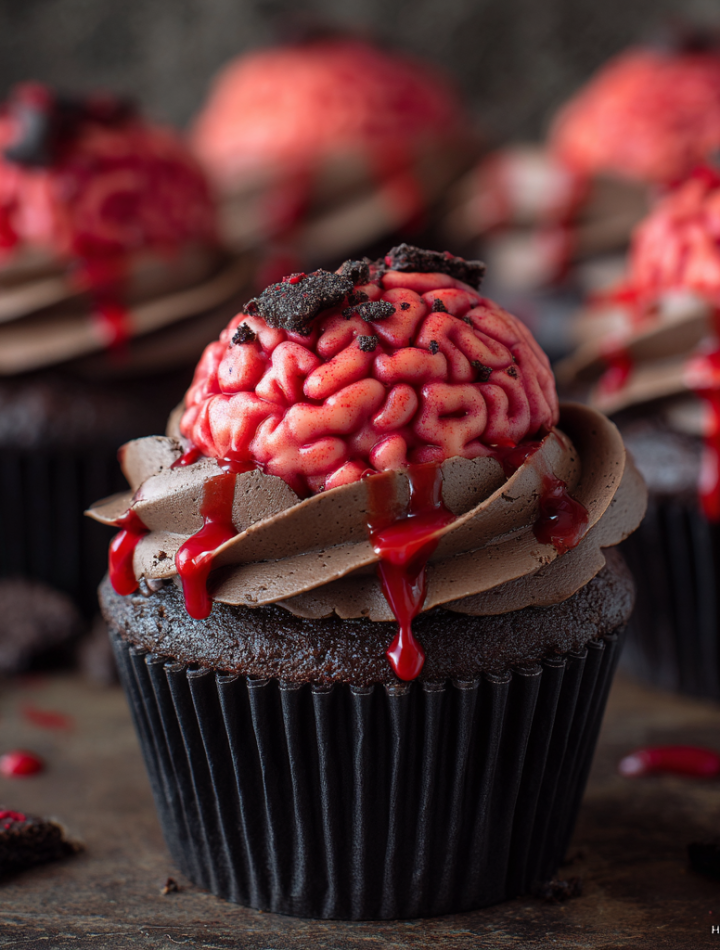
If you’ve been scrolling through Pinterest, desperately looking for a showstopping dessert that will make your guests gasp (in the best way possible), your search ends right here. These Zombie Brain Cupcakes are my pride and joy every October. We’re talking ultra-moist, intensely chocolatey cupcakes that are so good they’d be a hit any day of the year, topped with a buttercream that’s equal parts creepy and chic. The best part? They’re seriously fun to make. This is the kind of baking project that will have you cackling with glee as you pipe those intricate brainy swirls. So, grab your favorite apron, put on a spooky playlist, and let’s create some edible magic that’s sure to be the life—or afterlife—of the party!
A Kitchen Catastrophe That Started It All
This recipe actually came from a Halloween party disaster of epic proportions. Picture it: me, three years ago, attempting an elaborate graveyard cake with cookie tombstones and a chocolate soil that looked… questionable. The cake itself was dry, the frosting was sliding off, and my “spooky” marshmallow ghosts looked more like sad, melted blobs. I was about to serve this tragedy to my friends when I had a last-minute panic attack. I scrapped the whole thing, but I had a batch of perfectly good chocolate cupcakes cooling on the rack. I looked at my piping tips, a bottle of red food coloring, and thought, “What’s the grossest-but-coolest thing I can make with this?”
I started frantically tinting buttercream a fleshy pink and piped what I thought a brain might look like. I mixed some jam with red dye for a bloody effect and just went for it. When I brought them out, expecting pity eats, my friends went absolutely nuts. They were taking pictures, laughing, and genuinely impressed. That messy, panic-induced creation became the most talked-about item of the night. It taught me a beautiful lesson: sometimes the best recipes are born from happy accidents and a willingness to embrace a little mess. Now, I’ve perfected that frantic experiment into the (slightly less messy) recipe you see today!
Print
Zombie Brain Halloween Cupcakes
- Total Time: 56 minute
- Yield: 24 muffin cups 1x
Description
These gory-chic cupcakes are a Halloween showstopper—moist double chocolate cakes topped with red-tinted brainy buttercream and a sticky “blood” drizzle. Rich in flavor and spooky in style, they’re as fun to make as they are to devour.
Ingredients
Wet:
6 tbsp water
6 tbsp milk
2 tsp instant coffee
240 g sugar
2 eggs
100 ml neutral oil
1/2 tsp salt
1 tsp vanilla
Dry:
160 g flour
50 g cocoa powder (Dutch processed)
1 tsp baking powder
1/2 tsp baking soda
Frosting:
300 g butter (room temp)
150 g icing sugar
1/4 tsp salt
1 tsp vanilla
Red + tiny bit of black food coloring
Blood Drip:
4 tbsp honey or seedless jam
Red food coloring
Instructions
Preheat oven to 350°F. Line 24 muffin cups.
Mix wet ingredients in a bowl.
Sift and add dry ingredients. Mix until smooth.
Fill liners 3/4 full. Bake 15–18 min. Cool completely.
Beat butter, sugar, salt, and vanilla for frosting. Add color to get a fleshy brain shade.
Pipe frosting in zig-zag loops for brain texture.
Mix honey/jam with food coloring and drizzle as “blood.”
Optional: Add chocolate chips to batter or use raspberry extract in frosting.
Tips
Don’t chill filled piping bags—metal tips can clog.
Use jam for a fruitier “blood” with real seeds.
- Cook Time: 15–18 min
- Category: Dessert
Nutrition
- Calories: 280
- Sugar: 22g
- Fat: 15g
- Carbohydrates: 34g
- Protein: 3g
Gathering Your Ghoulish Ingredients
Here’s everything you’ll need to bring these spooky sweets to life (or un-life?). I’ve included some chef-y notes and easy swaps to make sure this recipe works for you!
For the Super-Moist Chocolate Cupcakes (Makes 24)
- 6 tbsp water & 6 tbsp milk: The combination of water and milk creates a perfectly balanced liquid base that ensures a tender crumb without making the batter too heavy.
- 2 tsp instant coffee: Don’t skip this! You won’t taste coffee, I promise. It’s my secret weapon for deepening the chocolate flavor and making it taste rich and complex. If you don’t have any, a shot of hot espresso works too.
- 240 g sugar: I weigh my sugar for accuracy, but if you’re using cups, that’s about 1 ¼ cups. Using gram measurements is a baker’s best friend for perfect results every time.
- 2 eggs: Make sure they’re at room temperature! This helps them emulsify into the batter, creating a smooth, uniform texture.
- 100 ml neutral oil (like vegetable or avocado): Oil keeps these cupcakes incredibly moist for days, much more so than butter. It’s the key to that decadent, fudgy texture.
- 1/2 tsp salt & 1 tsp vanilla extract: The dynamic duo of flavor enhancement. Salt makes the chocolate pop, and vanilla adds a warm, sweet undertone.
- 160 g flour (about 1 ⅓ cups): I use all-purpose. For a gluten-free swap, a good 1:1 GF blend works wonderfully here.
- 50 g Dutch-processed cocoa powder: Dutch-processed is less acidic and has a darker, smoother chocolate flavor that is ideal for this recipe. In a pinch, you can use natural cocoa powder, but the color and taste will be slightly different.
- 1 tsp baking powder & 1/2 tsp baking soda: Our leavening dream team. They work together to give our cupcakes a beautiful rise and a light, fluffy dome.
For the Creepy-Crawly Brain Frosting
- 300 g butter (that’s about 1 ⅓ cups), room temp: This is non-negotiable. Your butter must be softened to the point where you can easily press a finger into it. This is the only way to get a silky, non-lumpy frosting.
- 150 g icing sugar (confectioners’ sugar): This is less sugar than most buttercreams, making it less sweet and more buttery, which is perfect for balancing the rich cupcake.
- 1/4 tsp salt & 1 tsp vanilla: Again, we’re boosting flavor and cutting sweetness.
- Red & a tiny bit of black food coloring: Gel food coloring is highly recommended over liquid. It’s more potent (so you use less) and won’t throw off the consistency of your frosting. We’re aiming for a realistic, fleshy pink.
For the Sticky “Blood” Drip
- 4 tbsp honey or seedless raspberry jam: Honey gives a clear, glossy blood effect. Seedless raspberry jam adds a fruity tang and little specks that look eerily like real blood clots—it’s fantastically gross!
- Red food coloring: Gel coloring works best here too to get a deep, blood-red color without making the mixture too runny.
Conjuring Your Cupcakes: A Step-by-Step Spell
Follow these steps, and you’ll be a baking sorcerer in no time! I’ve packed each step with my best tips to ensure your success.
Step 1: Preheat & Prep
First things first, get that oven preheating to 350°F (175°C). This is crucial for an even bake. Line two standard 12-cup muffin tins with your favorite Halloween-themed liners. This recipe makes exactly 24, so don’t try to squeeze them all into one tin!
Step 2: Wake Up the Chocolate
In a large bowl, whisk together the water, milk, and instant coffee granules until the coffee is completely dissolved. This is our flavor base! Now, whisk in the sugar, room temperature eggs, neutral oil, salt, and vanilla. Whisk it all for a good minute until it’s completely smooth and slightly glossy. You’re building the structure of your batter right here.
Step 3: The Dry Wardrobe
Place a sieve over your bowl of wet ingredients and sift in the flour, cocoa powder, baking powder, and baking soda. Sifting is not just for fussy bakers! It breaks up any lumps in the cocoa and aerates the flour, which leads to a lighter cupcake. Gently fold the dry ingredients into the wet using a spatula. Chef’s Hack: Stop folding the second you see no more dry streaks of flour. Overmixing is the enemy of tender cupcakes—it develops gluten and can make them tough.
Step 4: Bake to Perfection
Using a cookie scoop or a spoon, divide the batter evenly between the 24 liners, filling each one about ¾ of the way full. This is the perfect amount to get a nice dome without overflow. Pop them in the oven and bake for 15-18 minutes. You’ll know they’re done when you gently press the center and it springs back, or a toothpick inserted comes out with a few moist crumbs attached. Let them cool in the tin for 5 minutes before transferring them to a wire rack to cool completely. I mean completely! Frosting a warm cupcake is a recipe for a melty, sad puddle.
Step 5: Crafting the Creepy Cranium
While the cupcakes cool, make your brain frosting. In the bowl of a stand mixer fitted with the paddle attachment (or using a hand mixer), beat the room-temperature butter on medium speed for 2-3 minutes until it’s pale, smooth, and fluffy. This step is vital for texture! Gradually add the icing sugar and salt, beating on low first to avoid a sugar cloud, then increasing to high for another 2-3 minutes. Scrape down the bowl, add the vanilla, and beat until incorporated. Now, add your red gel food coloring a little at a time, followed by the tiniest dot of black to dull the bright red into a more realistic flesh tone. Beat until the color is uniform.
Step 6: Pipe Those Brains!
Scoop your fleshy frosting into a piping bag fitted with a small round tip (like Wilton #12). Pro Tip: Don’t chill the filled bag or the buttercream will harden and be impossible to pipe. Starting at the center of a cooled cupcake, pipe a straight line down the middle to form the “brain stem”. Then, pipe a series of continuous, squiggly “S” shapes on either side of the center line, building them up on top of each other to create a 3D, textured brain look. Don’t overthink it! Brains are wrinkly and weird—imperfection is the goal.
Step 7: The Bloody Finale
In a small bowl, mix your honey or seedless jam with enough red gel food coloring to create a deep, blood-red syrup. Using a spoon, carefully drizzle the “blood” over the frosted brains, letting it drip down the sides gruesomely. For extra effect, you can even add a little pool of it on your serving plate.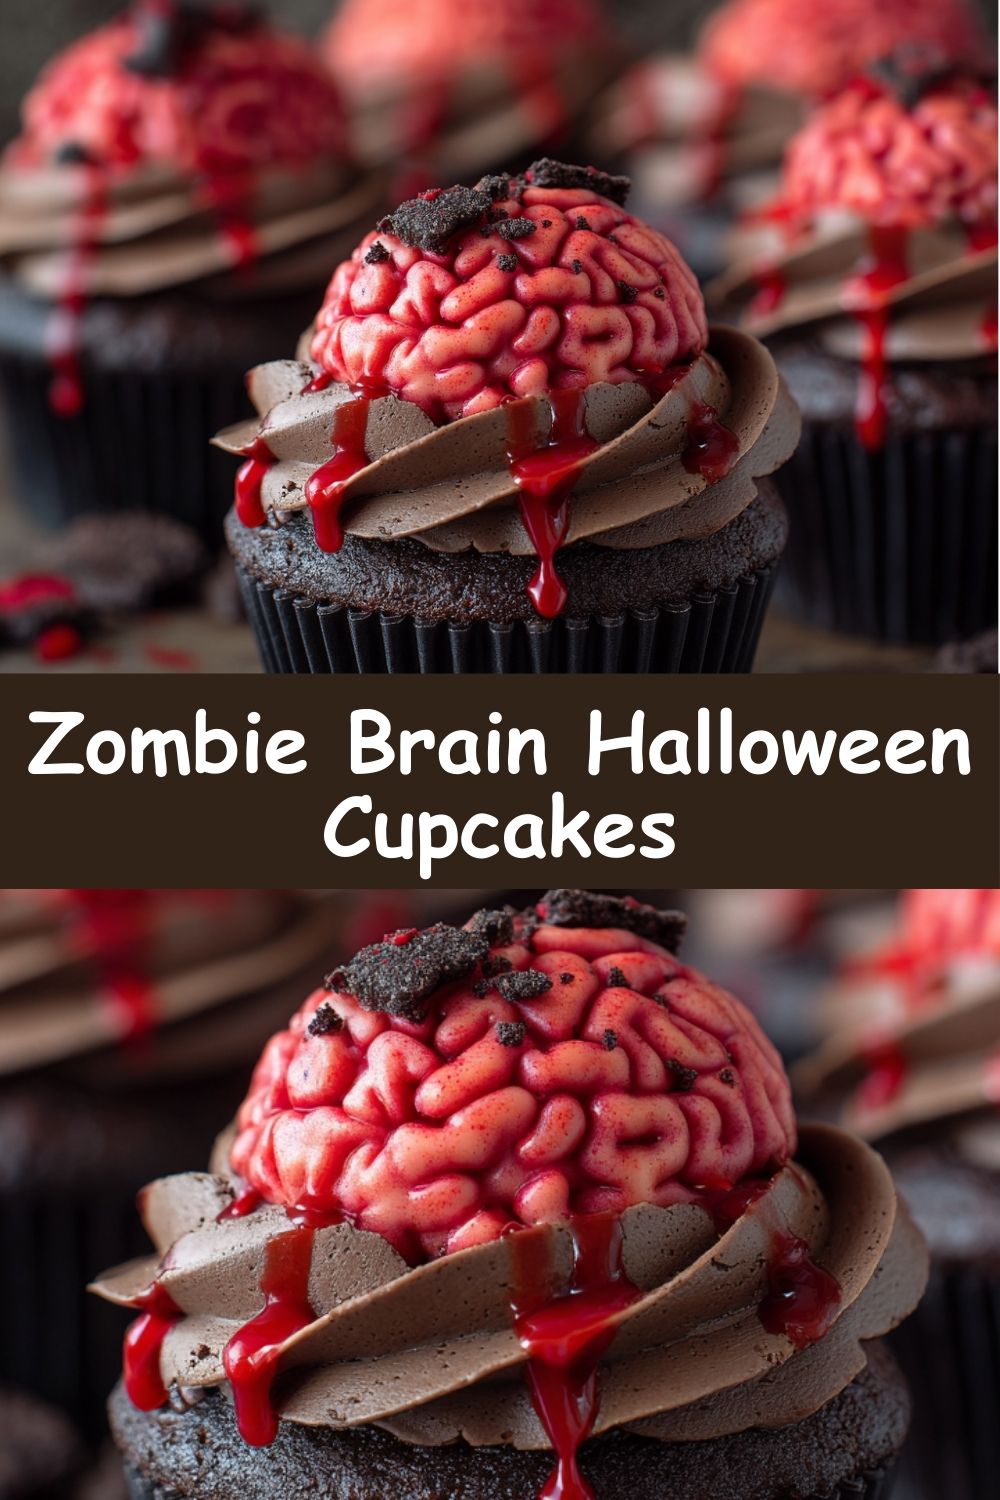
How to Serve These Spooky Sensations
Presentation is everything with these cupcakes! For maximum impact, arrange them on a stark black slate platter or a weathered wooden board. Scatter a few plastic spiders, fake eyeballs, or even some crumbled chocolate cookie “dirt” around them to set the scene. I love serving them with a dramatic flair—dim the lights, light a few orange candles, and watch as your guests marvel at your culinary artistry before they gleefully dig into the gory goodness.
Get Creative: Spooky Twists & Swaps
- Vegan Zombies: Use plant-based milk, flax eggs (2 tbsp ground flaxseed + 5 tbsp water), and vegan butter. For the blood, agave syrup works instead of honey.
- Mocha Brains: Add ½ cup of mini chocolate chips to the batter for a surprise texture. Add a teaspoon of espresso powder to the frosting for a mocha-kick that pairs amazingly with the chocolate.
- Berry Gory Brains: Use seedless raspberry jam for the blood and add a ½ teaspoon of raspberry extract to the buttercream for a fruity, tangy twist.
- Nutty Cranium: Fold ½ cup of finely chopped toasted walnuts or pecans into the cupcake batter for a nutty crunch that contrasts beautifully with the smooth frosting.
- Gluten-Free Ghouls: Simply swap the all-purpose flour for your favorite 1:1 gluten-free baking blend.
From My Kitchen to Yours: A Few Final Thoughts
This recipe has evolved so much from that first panicked party night. I’ve tweaked the cupcake to be the most chocolatey and moist version possible, and I’ve learned that gel food coloring is a total game-changer. One of my favorite kitchen memories is teaching my niece how to pipe the brains. She was so concentrated, her little tongue stuck out, and she created the most abstract, wonderfully weird brains I’ve ever seen. They were perfect. So remember, this is supposed to be fun! Don’t stress if your brains don’t look like a medical textbook. Embrace the mess, laugh, and enjoy the process. The best part is smashing them into your face anyway!
Your Spooky Questions, Answered
Q: My buttercream is too soft and my brains are slumping! What did I do wrong?
A: This usually means your butter was too warm, or you over-mixed it. The quick fix? Pop the bowl in the fridge for 10-15 minutes to firm up the butter slightly, then re-whip it. If you’re in a real pinch, you can add a tablespoon or two of extra icing sugar to help stiffen it up.
Q: Can I make these cupcakes ahead of time?
A: Absolutely! The unfrosted cupcakes freeze beautifully for up to 3 months. Just thaw and frost the day you need them. The frosting can be made ahead and stored in an airtight container in the fridge for a week. Let it come to room temperature and re-whip it before piping. I’d assemble the fully decorated cupcakes the day you plan to serve them for the freshest look.
Q: My “blood” drizzle is too thick/too thin. How can I fix it?
A> If it’s too thick (not dripping), warm it for 5 seconds in the microwave or whisk in a tiny bit of water or lemon juice. If it’s too thin and runny, whisk in a little more jam or a pinch of powdered sugar to thicken it up. You want a syrup-like consistency.
Q: I only have liquid food coloring. Can I use it?
A> You can, but use it sparingly! Liquid coloring can alter the consistency of your frosting, making it wetter. Add it drop by drop and be prepared that you might need to add a bit more powdered sugar to compensate. The color also won’t be as vibrant as with gel.
Nutritional Information (Per Cupcake)
Let’s be real, these are a treat! But here’s the breakdown for those who are curious:
Calories: ~280 | Fat: 15g | Carbs: 34g | Sugar: 22g | Protein: 3g