Bakery-Style Salted Caramel Cookies: Your New Favorite Obsession
Hey there, my fellow flavor adventurer! Have you ever had one of those moments where you’re standing in a bakery, staring into a glass case, and a cookie just… winks at you? You know the one. It’s perfectly puffed, with a crackly, sugar-dusted top, and you just know that hidden inside is a secret pocket of molten, gooey, salty-sweet caramel. You buy it, you take that first life-changing bite, and then… it’s gone. And you’re left wondering, “How do I get that magic into my kitchen?”
Well, my friend, wonder no more. Consider this recipe your official invitation to skip the bakery line and create that pure, unadulterated joy right on your own countertop. We’re talking about the kind of cookie that makes your entire house smell like a warm hug, the kind that is chewy in all the right places, with a rich, toffee-like depth from browned butter, and a glorious, oozy caramel center that’s perfectly punctuated by a flake of sea salt. This isn’t just a cookie; it’s an experience. And the best part? You are 100% capable of making it. So, tie on your favorite apron, put on a good playlist, and let’s cook something totally worth licking the spoon—and the bowl—for.
The Cookie That Started It All
This recipe feels like an old friend to me now, but it all started with a bit of a kitchen disaster. Years ago, I was attempting to impress a date by baking something “simple” like chocolate chip cookies. Of course, I decided to get fancy and add this new jar of salted caramel I’d found. Long story short: I didn’t seal the dough properly. The cookies went into the oven as beautiful, promising mounds of dough and came out as a flat, caramel-lava volcano all over my baking sheet. It was a sticky, hilarious mess! We ended up eating the salvaged, crumbly bits with spoons straight from the tray, laughing until our sides hurt. It was a total failure by bakery standards, but it was a perfect, joyful moment. That messy first attempt taught me the most important lesson: baking is about the fun and the flavor, not perfection. It sent me on a mission to perfect the seal, to create a cookie that could contain all that glorious, gooey potential. And let me tell you, the victory of finally nailing this recipe? So much sweeter than that first batch (and significantly less messy!).
Print
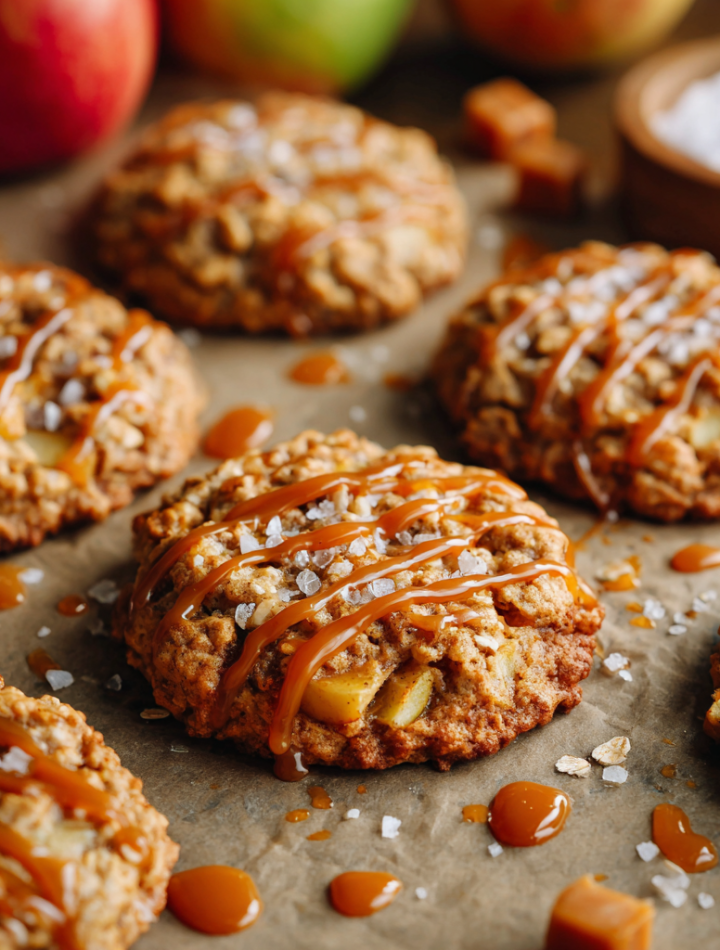
Bakery-Style Salted Caramel Cookies
- Yield: ~32 cookies
Description
Sweet, chewy, and packed with molten caramel, these cookies taste like they came straight from a high-end bakery. Browned butter, a hint of cinnamon, and a hit of sea salt make every bite rich, warm, and unforgettable. Make a double batch—you’ll thank yourself later.
Ingredients
Cookie Dough
▢ 6 cups all-purpose flour
▢ 1 tsp salt
▢ ½ tsp baking soda
▢ ½ tsp cream of tartar
▢ ½ tsp cinnamon (optional)
▢ 1 cup browned butter, cooled
▢ ⅔ cup vegetable oil
▢ 1⅓ cups light brown sugar
▢ 1 cup powdered sugar
▢ 2 eggs
▢ 2 tbsp milk
▢ 2 tbsp vanilla bean paste or extract
Salted Caramel Center
▢ 4 (10.5 oz) bags chewy caramels, unwrapped
▢ 4 tbsp milk or cream
▢ 1 tbsp butter (optional)
▢ 4 tsp fine sea salt
▢ Flaky salt, for topping
Instructions
Brown Butter: Melt and brown butter until golden and nutty. Cool.
Make Dough: Mix dry ingredients in one bowl. In another, beat browned butter, oil, sugars, eggs, milk, and vanilla. Combine wet and dry. Chill 30–45 mins.
Caramel Filling: Melt caramels with milk (and butter if using). Stir in sea salt. Cool slightly.
Assemble: Scoop 3 tbsp dough, flatten, add a spoon of caramel, seal, and roll. Flatten slightly on tray.
Bake: 350°F (175°C) for 9–11 mins. Sprinkle flaky salt while warm. Cool before moving.
- Category: Dessert
Nutrition
- Calories: 270
- Fat: 13g
- Carbohydrates: 35g
- Protein: 3g
Gathering Your Cookie Squad: The Ingredients
Here’s the dream team that’s going to make these cookies legendary. Read through these notes—they’re like little chef secrets that make all the difference!
For the Cookie Dough:
- 6 cups all-purpose flour: The foundation of our cookie. It gives structure so our cookies puff up instead of spreading into a caramel puddle.
- 1 tsp salt: Crucial for balancing all the sweetness and making the flavors pop. Don’t you dare skip it!
- ½ tsp baking soda + ½ tsp cream of tartar: This dynamic duo is our secret weapon for that perfect, soft, and chewy bakery-style texture. The cream of tartar reacts with the baking soda to create a loftier, more tender crumb.
- ½ tsp cinnamon (optional): My little chef’s insight! This is the “what’s that amazing flavor?” secret. It adds a warm, undeniably cozy depth that pairs magically with the caramel.
- 1 cup browned butter, cooled: This is the MVP, the game-changer! Browning the butter gives it a deep, nutty, almost toffee-like flavor that takes these cookies from great to “OH WOW.”
- ⅔ cup vegetable oil: This might seem odd, but trust me! The oil keeps the cookies incredibly moist and chewy for days, while the butter gives the flavor. It’s the best of both worlds.
- 1⅓ cups light brown sugar + 1 cup powdered sugar: The brown sugar brings molasses-rich moisture and chew, while the powdered sugar helps create those beautiful, crackly tops we all love.
- 2 eggs: Our binding agent, bringing everything together beautifully.
- 2 tbsp milk: A splash of liquid for just the right dough consistency.
- 2 tbsp vanilla bean paste or extract: Vanilla bean paste is my absolute favorite here—you get those gorgeous little speckles and a more robust, complex vanilla flavor. Extract works perfectly too!
For the Salted Caramel Center:
- 4 (10.5 oz) bags chewy caramels, unwrapped: The star of the show! I use classic Kraft caramels for reliable meltability and flavor. Pro tip: enlist a helper to unwrap these—it’s the most tedious part of the job!
- 4 tbsp milk or cream: This helps the caramel melt into a smooth, spoonable, lava-like consistency instead of a thick, stubborn blob.
- 1 tbsp butter (optional): Adding a pat of butter makes the caramel even glossier and richer. Highly recommended!
- 4 tsp fine sea salt: We’re mixing salt into the caramel, not just on top. This ensures every single bite has that perfect sweet-salty balance.
- Flaky salt, for topping: Like Maldon sea salt. This is for that final, elegant finish and a little salty crunch in every bite.
Let’s Get Baking: The Step-by-Step Magic
Okay, team! Let’s break this down. Follow these steps, and you’ll be a caramel cookie hero in no time.
1. Brown That Butter! Place your cup (two sticks) of butter in a light-colored saucepan over medium heat. Melt it, then keep cooking, swirling the pan often. It will foam and sputter—that’s normal! Watch closely for little brown bits forming at the bottom and a warm, nutty aroma. This is the sign! Immediately pour it into a heatproof bowl to stop the cooking, making sure to scrape all those tasty brown bits in. Let this cool completely. (I sometimes pop it in the fridge for a bit to speed this up!). Chef Hack: Browning butter is a smell you’ll want to bottle. It’s that good.
2. Whisk the Dry Team. In a large bowl, whisk together your flour, salt, baking soda, cream of tartar, and that optional-but-amazing cinnamon. Giving these a good whisk ensures our leavening agents are evenly distributed for a perfect rise every time.
3. Combine the Wet Team. In the bowl of a stand mixer (or a large bowl with a hand mixer), combine the cooled browned butter, vegetable oil, brown sugar, and powdered sugar. Mix on medium until it’s smooth and well-combined. Then, beat in the eggs, one at a time, followed by the milk and vanilla. Mix until it’s a lovely, smooth, pale mixture.
4. Unite the Forces! With the mixer on low, gradually add the dry ingredients to the wet ingredients. Mix until just combined and no dry streaks of flour remain. Overmixing is the enemy of tender cookies! The dough will be thick and glorious.
5. The Essential Chill. Cover the bowl and chill the dough for 30-45 minutes. This is non-negotiable! It firms up the dough, making it easier to handle and preventing our cookies from spreading too much in the oven. This step equals thick, puffy cookies.
6. Create the Caramel Goo. While the dough chills, make the filling. Combine the unwrapped caramels, milk/cream, and optional butter in a microwave-safe bowl. Heat in 30-second bursts, stirring well between each, until completely smooth and melted. Stir in the 4 teaspoons of fine sea salt. Let this cool until it’s thick enough to scoop but still soft. If it gets too firm, just pop it back in the microwave for 10 seconds.
7. The Assembly Line. Preheat your oven to 350°F (175°C) and line baking sheets with parchment paper. This is where the fun begins! Use a large cookie scoop or a measuring spoon to portion out about 3 tablespoons of dough. Flatten it into a disc in your palm. Place a spoonful (about 1-2 teaspoons) of the cooled caramel in the center. Carefully bring the dough up and around the caramel, pinching it closed to form a sealed ball. Make sure it’s completely sealed—this is our defense against lava leaks! Place the sealed ball on the baking sheet and gently flatten it just slightly. They don’t spread a ton, so you can place them about 2 inches apart.
8. Bake to Perfection. Bake for 9-11 minutes. They should look just set around the edges but still soft in the center. They might look a tiny bit underdone—that’s perfect! They will continue to cook on the hot tray. Chef Hack: For perfectly round cookies, as soon as they come out of the oven, take a large round cookie cutter or a glass and gently swirl it around the edge of any cookie that spread unevenly to nudge it back into a perfect circle.
9. The Grand Finale. Immediately after pulling them from the oven, sprinkle the tops with a pinch of flaky sea salt. Let the cookies cool on the baking sheet for at least 15-20 minutes. I know, the wait is torture! But this is critical for the caramel to set enough so you don’t burn your mouth and so the cookie firms up for the perfect chewy texture. Then, devour!
How to Serve These Beauties
These cookies are a showstopper all on their own, still slightly warm from the oven with a glass of cold milk is my absolute heaven. For the ultimate indulgence, place one on a small plate, add a small scoop of high-quality vanilla bean ice cream on the side, and maybe even drizzle a little extra warm caramel over the top. You’ve just created a restaurant-level dessert! They also make the most thoughtful gift—stack a few in a clear cellophane bag tied with a ribbon, and you’ll instantly become someone’s favorite person.
Mix It Up! Recipe Variations
Feel like playing? Here are some delicious twists on the classic:
- Chocolate Drizzle: Melt some dark chocolate with a touch of coconut oil and drizzle it over the cooled cookies for a decadent finish.
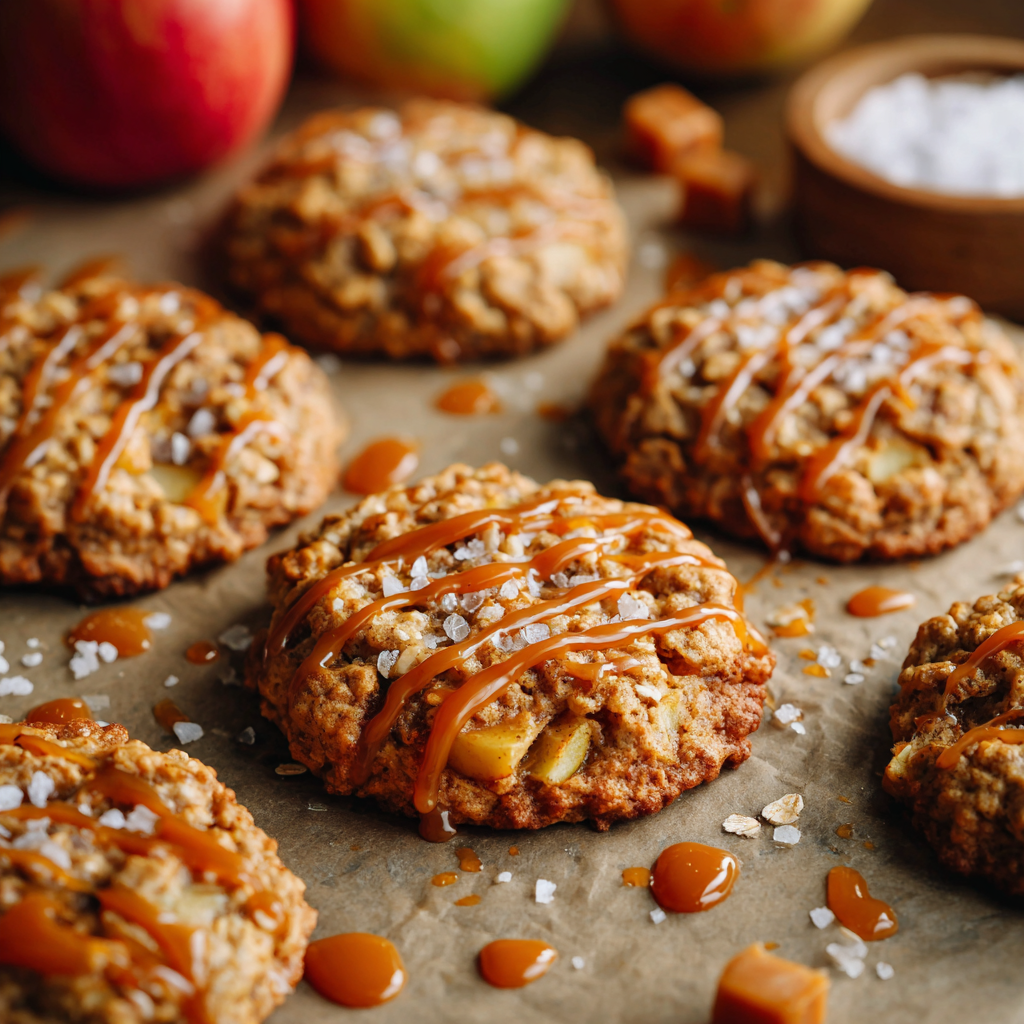
- Apple Pie Spin: Add 1 tsp of apple pie spice to the dough and mix in ½ cup of finely chopped dried apples for a fall-inspired treat.
- Nutty Delight: Fold ¾ cup of chopped toasted pecans or walnuts into the dough for a wonderful crunch.
- Dark Chocolate Chunk: Add 1 cup of chopped dark chocolate to the dough along with the caramel center for a double chocolate caramel situation. Yes, please!
- Gluten-Free Swap: Use a 1:1 gluten-free all-purpose flour blend in place of the regular flour.
Clara’s Chef Notes
This recipe has evolved so much from my first caramel-lava kitchen disaster! The biggest game-changer was realizing that chilling the dough is the key to a cookie that can handle the hot caramel without melting into a puddle. I’ve also learned that a double batch is never optional—these cookies disappear at an alarming rate. I once brought them to a potluck and literally watched a very polite, reserved man quietly take three and hide them in a napkin “for later.” I consider that the highest compliment. Don’t be afraid of the caramel; just make sure your seal is tight, and even if one leaks a little, it just becomes a delicious, chewy caramel crisp on the baking sheet. No cookie left behind!
FAQs & Troubleshooting
Q: My caramel all leaked out! What did I do wrong?
A: The most common culprits are 1) The caramel was too hot when you wrapped it, which thins the dough, or 2) The seal wasn’t quite tight enough. Make sure your caramel is cooled and thick, and really pinch that dough closed, smoothing over any cracks. Also, don’t over-flatten the dough balls on the tray before baking.
Q: Can I make the dough ahead of time?
A: Absolutely! You can prepare the dough, wrap it tightly in plastic wrap, and keep it in the fridge for up to 2 days. You can also freeze the shaped, unbaked dough balls on a tray, then transfer to a freezer bag for up to 3 months. Bake from frozen, adding 1-2 minutes to the bake time.
Q: My cookies turned out cakey, not chewy. Why?
A: This usually means the dough was over-mixed after the flour was added, or there was a bit too much flour. When measuring flour, spoon it into the measuring cup and level it off instead of scooping the cup directly into the bag, which can pack in too much.
Q: What can I use instead of cream of tartar?
A> You can substitute the ½ tsp baking soda + ½ tsp cream of tartar with 2 teaspoons of baking powder. The texture might be slightly different, but it will still work!
Nutritional Information (Per Cookie)
Disclaimer: This is an estimate provided for informational purposes only. This is a treat, and a darn good one!
Calories: 270kcal | Carbohydrates: 35g | Protein: 3g | Fat: 13g