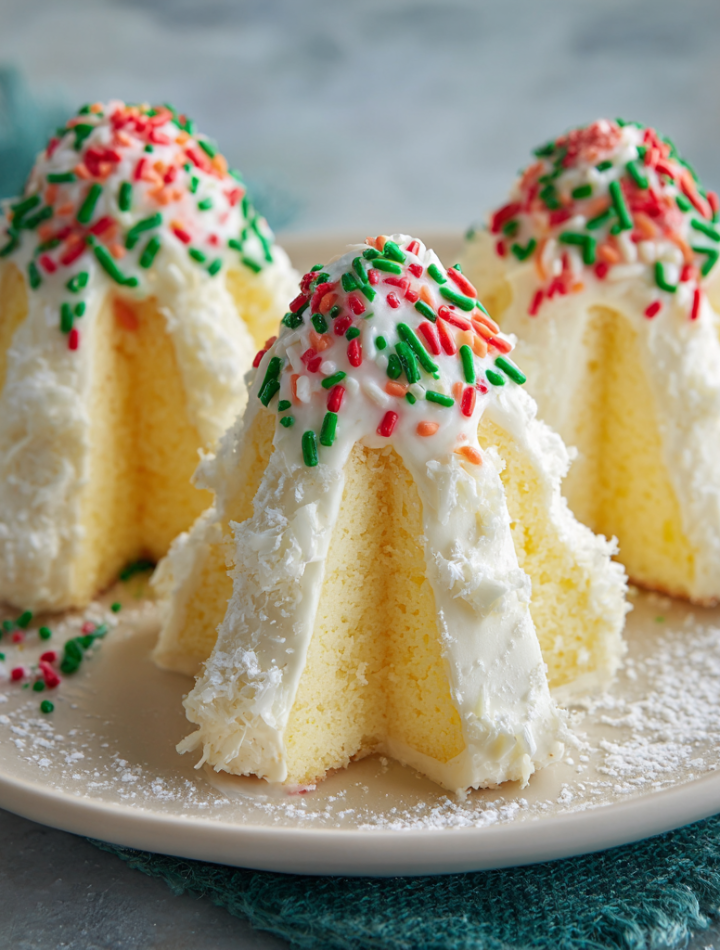

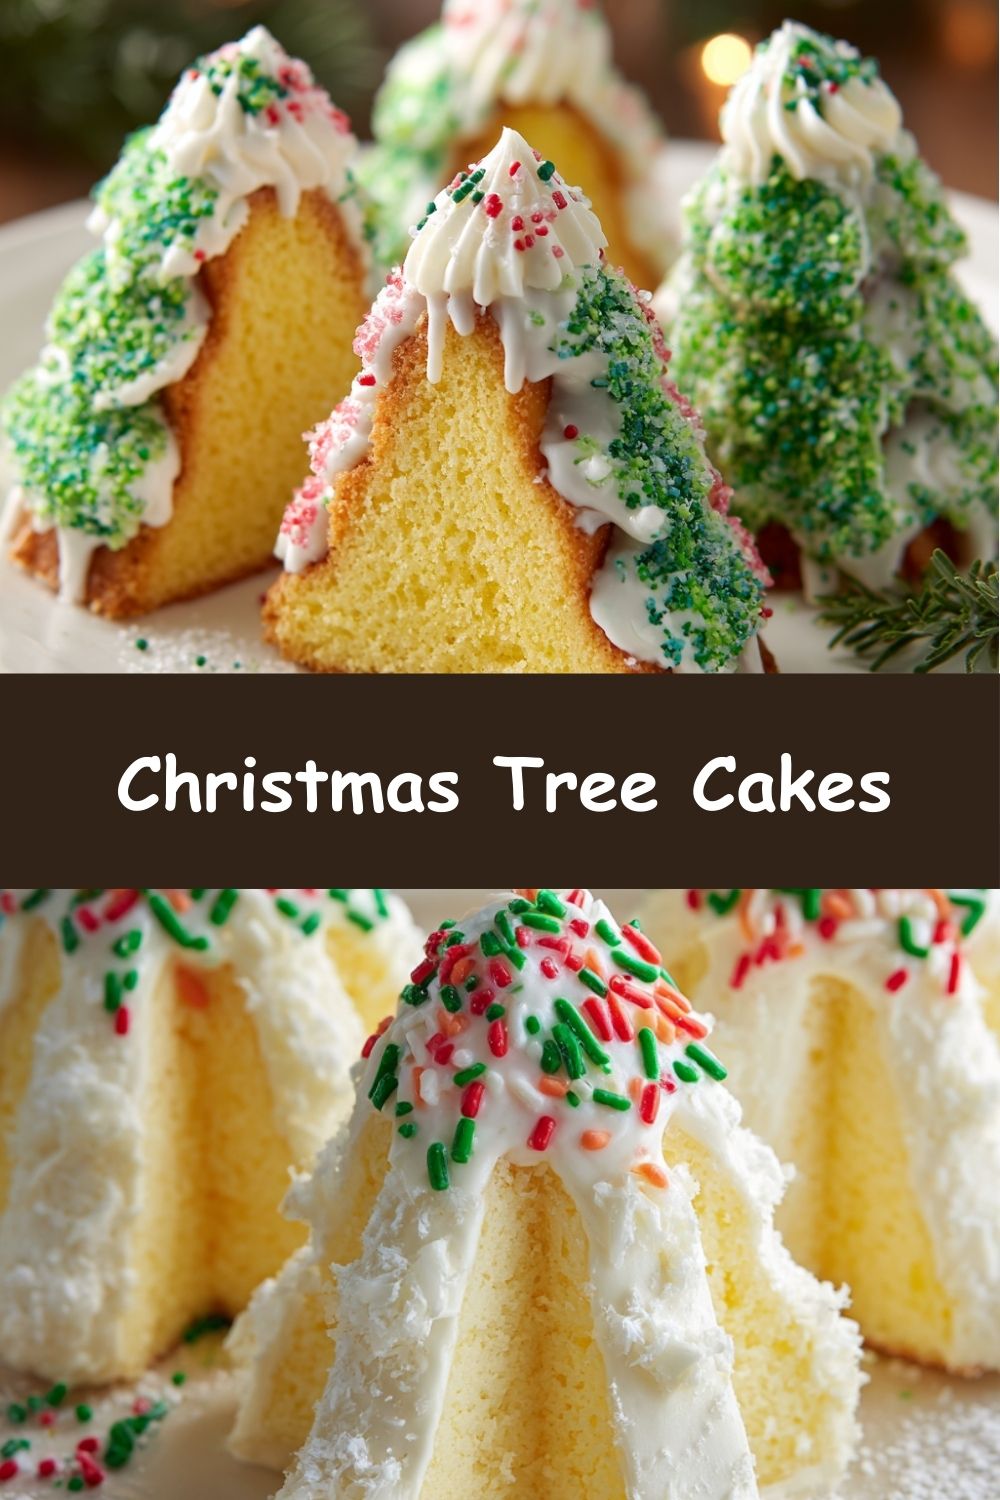
Let’s Bake Some Holiday Magic: Homemade Christmas Tree Cakes!
Hey there, my festive friend! Can you smell it? That unmistakable scent of vanilla cake baking, mingling with the promise of sweet marshmallow and the rich aroma of melting white chocolate. It’s the smell of pure, unadulterated holiday joy, and it’s wafting straight from my kitchen to yours. If you, like me, have a deep-seated love for those iconic, cellophane-wrapped holiday treats but also have a passion for creating something incredible with your own two hands, then you are in the absolute right place. Today, we’re not just baking; we’re embarking on a deliciously nostalgic adventure. We’re making our very own Homemade Christmas Tree Cakes!
This is more than a recipe; it’s a project. It’s a chance to put on your favorite holiday playlist, dust the counter with powdered sugar (and probably yourself, too—no judgment here!), and create something that will make everyone’s eyes light up. These adorable little trees are a total showstopper on any dessert tray and make the most heartfelt, handmade gift. They combine a fluffy, tender yellow cake with a cloud-like marshmallow filling, all enveloped in a crisp shell of white chocolate and finished with a flurry of festive sprinkles. So, grab your favorite mixing bowl and let’s turn our kitchens into a winter wonderland bakery. I promise, the result is so worth licking the spoon, the bowl, and maybe even the counter!
A Box of Memories: My First Christmas Tree Cake
I’ll never forget the first time I laid eyes on a Christmas Tree Cake. I was probably seven years old, rummaging through my grandma’s pantry in search of a post-dinner treat. Tucked behind the oatmeal and the cans of green beans, I found a small, red box adorned with cheerful trees. It was like discovering hidden treasure. I pried it open (with permission, of course!) and was greeted by these perfectly formed, sprinkles-dusted cakes. They looked almost too magical to eat. Almost.
That first bite was a core memory in the making. The way the sweet coating gave way to the soft cake, and the creamy center just melted in my mouth… it was heaven. From that year on, it became our little tradition. Every December, a box would appear, and my grandma and I would share one with a cup of cocoa, making a solemn pact that the red ones were the best. This recipe is my way of bottling that feeling—that specific brand of holiday magic and nostalgia—and sharing it with you. It’s my grown-up, from-scratch homage to that little red box, and I think Grandma would absolutely approve.
Print
Christmas Tree Cakes
- Yield: 10–12 cakes 1x
Description
These homemade Christmas Tree Cakes are a festive spin on the nostalgic holiday favorite. Fluffy yellow cake, a sweet marshmallow filling, and a smooth white chocolate shell come together in a fun tree shape—perfect for gifting or dessert trays.
Ingredients
Cake:
1 box yellow cake mix (plus eggs, oil, water)
1 tsp vanilla extract (optional)
Filling:
½ cup butter, softened
1 cup marshmallow creme
1½ cups powdered sugar
1 tsp vanilla extract
1–2 tbsp milk or cream
Coating:
2 cups white chocolate or almond bark, melted
Holiday sprinkles
Red gel icing (optional)
Instructions
Bake the cake in a 9×13” pan at 350°F. Cool completely.
Cut tree shapes using a cookie cutter. Freeze for 15–20 mins.
Mix filling until smooth and fluffy.
Sandwich filling between two tree cutouts. Freeze again to firm up.
Dip each cake in melted white chocolate or spoon coating over top.
Decorate with sprinkles and red gel if using. Let set at room temp.
- Category: Dessert
Nutrition
- Calories: 320
- Fat: 17g
- Carbohydrates: 38g
- Protein: 3g
Gathering Your Holiday Baking Squad (The Ingredients!)
Here’s the crew that’s going to make this holiday magic happen. Don’t stress about perfection—baking is about joy, not pressure! I’ve included some easy swaps and chef-y insights to make you feel like a pro.
- 1 box yellow cake mix (plus the eggs, oil, and water it calls for) – This is our secret weapon for a reliably soft, fluffy, and perfectly shaped cake base. It’s what the original uses, and it works beautifully. Chef’s Tip: Look for a “butter recipe” yellow cake mix for an extra-rich flavor.
- 1 tsp vanilla extract (optional) – I always add this to the cake batter. It’s that warm, cozy flavor boost that makes a box mix taste wonderfully homemade.
- ½ cup butter, softened – For our filling. Softened is key here, people! Leave it on the counter for an hour. It should yield slightly to a gentle press. This ensures a smooth, lump-free, creamy filling.
- 1 cup marshmallow creme (like Fluff) – The star of the filling! This gives us that iconic, gooey-sweet, nostalgic center. It’s non-negotiable for that authentic taste.
- 1½ cups powdered sugar – This sweetens and thickens our filling to the perfect pipeable consistency.
- 1 tsp vanilla extract – Because vanilla makes everything better. It cuts the sweetness and adds depth.
- 1–2 tbsp milk or cream – This is our moisture variable. Start with 1 tbsp and add the second only if needed to get a smooth, spreadable consistency.
- 2 cups white chocolate chips or almond bark, melted – Almond bark is my #1 choice for coating. It’s specifically designed for dipping and setting up with a firm, non-tempering-required snap. White chocolate chips work too, but I highly recommend adding a teaspoon of coconut oil to help it melt smoothly and thin out for easier dipping.
- Holiday sprinkles & Red gel icing (optional) – The festive finery! Use whatever sprinkles make your heart happiest. The red gel is for creating those cute little “berry” dots on the tree.
Let’s Build Some Edible Evergreens! (Step-by-Step)
Okay, team! Let’s do this. Read through all the steps first—it’s like reading the map before a road trip. It makes the journey so much smoother.
Step 1: Bake the Cake! Preheat your oven to 350°F (175°C). Grease and flour a 9×13 inch metal baking pan. Prepare your box cake mix according to the package directions, stirring in that optional teaspoon of vanilla. Pour the batter into your prepared pan and bake for the time specified on the box, or until a toothpick inserted into the center comes out clean. Let the cake cool in the pan for about 10 minutes, then turn it out onto a wire rack to cool completely. I mean it—no warm cake! This is crucial for clean cutting. Chef’s Hack: Bake the cake the night before, let it cool, wrap it tightly, and assemble the trees the next day. Breaking up the work makes it feel like less of a project!
Step 2: Carve Your Forest! Once your cake is totally cool, it’s time to get artistic. Use a Christmas tree-shaped cookie cutter (about 3 inches tall is perfect) to cut out your shapes. Press down firmly and try to place the cutter strategically to get as many trees as possible from the cake. You should get 10-12 trees, which means 20-24 halves. Gently remove the trees from the pan. Don’t worry about the scraps! See my Chef’s Notes below for what to do with those delicious cake bits. Pro Tip: If your cake is crumbly when cutting, pop the whole sheet cake into the freezer for 20 minutes first. A slightly frozen cake cuts like a dream!
Step 3: The Freeze is Key! Place your tree cutouts on a parchment-lined baking sheet and pop them into the freezer for 15-20 minutes. This is another non-negotiable step! A firm, cold cake is much easier to handle, won’t crumble when you spread the filling, and will hold its shape beautifully during the chocolate-dipping process.
Step 4: Whip Up the Fluffy Cloud Filling! While the cakes are chilling, make the filling. In a medium bowl, beat the softened butter with an electric mixer until it’s smooth and creamy. Beat in the marshmallow creme until everything is well combined and fluffy. Gradually beat in the powdered sugar. It will look thick! Now, add 1 tablespoon of milk and the teaspoon of vanilla. Beat on medium-high speed for 2-3 minutes until the filling is light, fluffy, and wonderfully spreadable. If it’s still too stiff, add the second tablespoon of milk.
Step 5: Assemble Your Trees! Take your cold cake trees out of the freezer. Pair them up by size. Spread or pipe a generous layer of the marshmallow filling onto the flat side of one tree half. Gently press the matching half on top to make a cake sandwich. Repeat with all trees. Place the assembled cakes back on the parchment-lined tray and return them to the freezer for another 20-30 minutes. This sets the filling and makes the cakes rock-solid for dipping, which is the secret to a clean, professional-looking coating.
Step 6: The Magical Chocolate Dip! Melt your coating of choice (almond bark or white chocolate chips with a tsp of coconut oil) in a deep, narrow bowl or a liquid measuring cup. The depth helps you fully submerge the cakes. Remove a few cakes from the freezer at a time (keep the rest cold!). Using a fork or a dipping tool, carefully lower a cake sandwich into the melted chocolate. Swirl it around to coat completely, then lift it out, gently tapping the fork on the edge of the bowl to shake off any excess chocolate.
Step 7: Decorate with Abandon! Quickly, before the chocolate sets, place the dipped cake on a fresh piece of parchment paper and immediately shower it with holiday sprinkles. If you’re using the red gel icing to make berries, add a few small dots now. Repeat the dipping and decorating process with the remaining cakes, working in small batches. Let the finished trees set completely at room temperature until the coating is firm. This usually takes about an hour.
How to Serve Your Festive Masterpiece
Presentation is part of the fun! Pile these festive trees high on a beautiful cake stand or a simple wooden board for a gorgeous dessert table centerpiece. They’re the perfect sweet ending to a holiday meal alongside coffee or hot cocoa. For gifting, place them in clear cellophane bags tied with a ribbon, or arrange them in a festive holiday tin layered between sheets of parchment paper. They’re a gift made with so much love, and that’s the best ingredient of all.
Mix It Up! Christmas Tree Cake Variations
- Chocolate Lover’s Tree: Use a chocolate cake mix and dip the assembled cakes in melted dark chocolate for a decadent twist.
- Peppermint Party: Add ¼ tsp of peppermint extract to the marshmallow filling and crush up candy canes to use instead of sprinkles for a cool, minty flavor.
- Funfetti Festive: Use a funfetti cake mix and add rainbow sprinkles to the cake batter for a confetti-filled inside that matches the festive outside!
- Gluten-Free Joy: Use your favorite gluten-free yellow cake mix to make this recipe accessible for everyone.
- “Naked” Tree Cakes: Prefer less chocolate? Simply drizzle the melted coating over the tops of the assembled cakes instead of fully dipping them.
Clara’s Kitchen Confidential (A.K.A. Chef’s Notes)
This recipe has evolved so much since my first attempt, which was… a learning experience. Let’s just say I didn’t freeze the cakes long enough, and my first batch turned into a delicious but decidedly abstract “Christmas puddle” art installation. The freezing steps are your best friends here—don’t skip them!
Now, about those cake scraps… you absolutely cannot waste them! That’s baker’s gold right there. My favorite thing to do is toss the scraps in a bowl with any leftover marshmallow filling and a handful of sprinkles, mix it all together, and roll them into cake pops! Or, layer the scraps in a jar with some pudding and whipped cream for an instant holiday trifle. Zero waste, maximum deliciousness.
Most importantly, have fun with it. Your trees don’t need to be perfect. Maybe one has a lopsided star or a particularly enthusiastic coating of sprinkles. That’s what makes them charming and uniquely yours. It’s about the joy of creating something together. Happy baking!
Your Questions, Answered! (FAQs)
Q: My coating is too thick and clumpy for dipping. What did I do wrong?
A: This usually means the chocolate got too hot or was heated too quickly. Almond bark is forgiving, but white chocolate can seize up. If it’s too thick, try stirring in a teaspoon of solid shortening or coconut oil to thin it out. Always melt your coating in short bursts in the microwave, stirring between each, or use a double boiler for gentle, even heat.
Q: Can I make these ahead of time?
A: Absolutely! These are a fantastic make-ahead treat. Once fully set, store them in a single layer in an airtight container at room temperature for up to 3 days. For longer storage, you can keep them in the refrigerator for up to a week, but let them come to room temperature before serving for the best texture and flavor.
Q: My cake is crumbling when I try to cut it! Help!
A: No worries! This is common. First, ensure the cake is completely cool. If it’s still crumbling, my best hack is to briefly freeze the entire baked sheet of cake (about 20-30 minutes) before cutting. A slightly frozen cake is infinitely easier to cut cleanly. You can also try using a small amount of powdered sugar on your cutter to prevent sticking.
Q: Is there a substitute for marshmallow creme?
A: You can try making a simple buttercream by creaming together ½ cup softened butter with 2 cups powdered sugar, 1 tsp vanilla, and 1-2 tbsp of milk. It won’t have the exact same gooey texture, but it will still be delicious! For a flavor twist, you could even use a seedless raspberry jam as the filling.
Nutritional Information (Approximate, Per Cake)
Calories: 320kcal | Carbohydrates: 38g | Protein: 3g | Fat: 17g | Saturated Fat: 9g | Cholesterol: 35mg | Sodium: 220mg | Sugar: 30g
Please note: This is an estimated nutritional breakdown based on the ingredients used. It will vary slightly based on specific product choices and portion sizes.