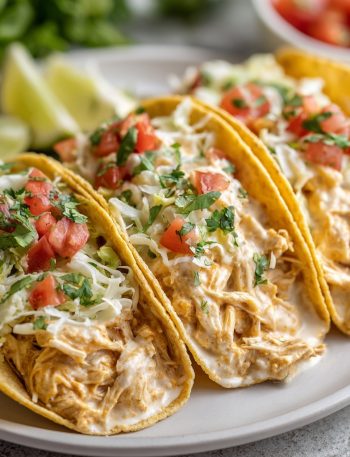
Your New Favorite Weeknight Fiesta: Southwest Chicken Taco Pasta Skillet
Hey there, my fellow flavor adventurer! Clara here, from my cozy kitchen to yours. Let’s be real for a second: how many times have you stood in front of the fridge after a long day, your stomach growling, your brain completely out of ideas, and the dreaded question of “what’s for dinner?” hanging in the air? You want something that feels like a treat, something that makes your taste buds do a happy dance, but you also don’t want to spend the next hour washing a mountain of dishes. Sound familiar?
Well, my friend, I have the absolute *perfect* solution that’s about to become your weeknight superhero. Imagine all the zesty, bold, and utterly delicious flavors of your favorite chicken tacos… but cozy, comforting, and all swirled together with pasta in one single skillet. Yes, you read that right! This Southwest Chicken Taco Pasta Skillet is the glorious love child of taco night and pasta night, and it’s here to solve all your dinner dilemmas.
It’s fast, it’s hearty, it’s packed with protein and veggies, and it’s guaranteed to make everyone at your table light up. It’s the kind of nourishing, feel-good meal that proves healthy eating doesn’t have to be boring or complicated. So, grab your favorite skillet, and let’s cook up a fiesta!
The Night We Ditched the Taco Shells
This recipe was born out of a classic “kitchen sink” scenario. It was a rainy Tuesday, and my craving for tacos was battling my deep desire for the comfort of a big bowl of cheesy pasta. I had some chicken, a half-empty jar of salsa, and a lingering bag of tortilla chips that was begging to be used. The thought of stuffing individual taco shells felt like too much work, and that’s when the lightbulb went off.
I decided to throw caution (and the traditional taco format) to the wind. I started browning the chicken with a hefty dose of taco seasoning—the smell alone was already a win. Then, in went the pasta, salsa, and broth. I held my breath as it simmered, hoping I wasn’t creating a starchy disaster. But what emerged was pure magic. The pasta soaked up all that incredible spiced, tomatoey goodness, the cheese melted into a creamy, dreamy sauce, and the crushed chips on top added that perfect, nostalgic crunch. It was an instant hit, and it’s been a “requested-by-name” meal in my house ever since. It’s a happy little reminder that the best recipes often come from a bit of chaos and a whole lot of curiosity!
Print
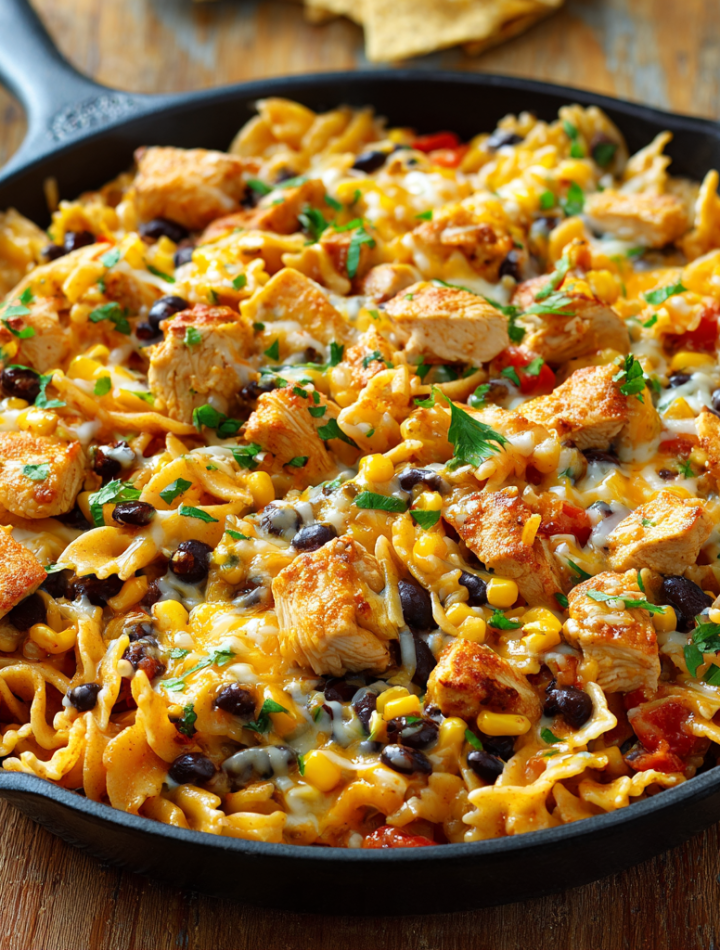
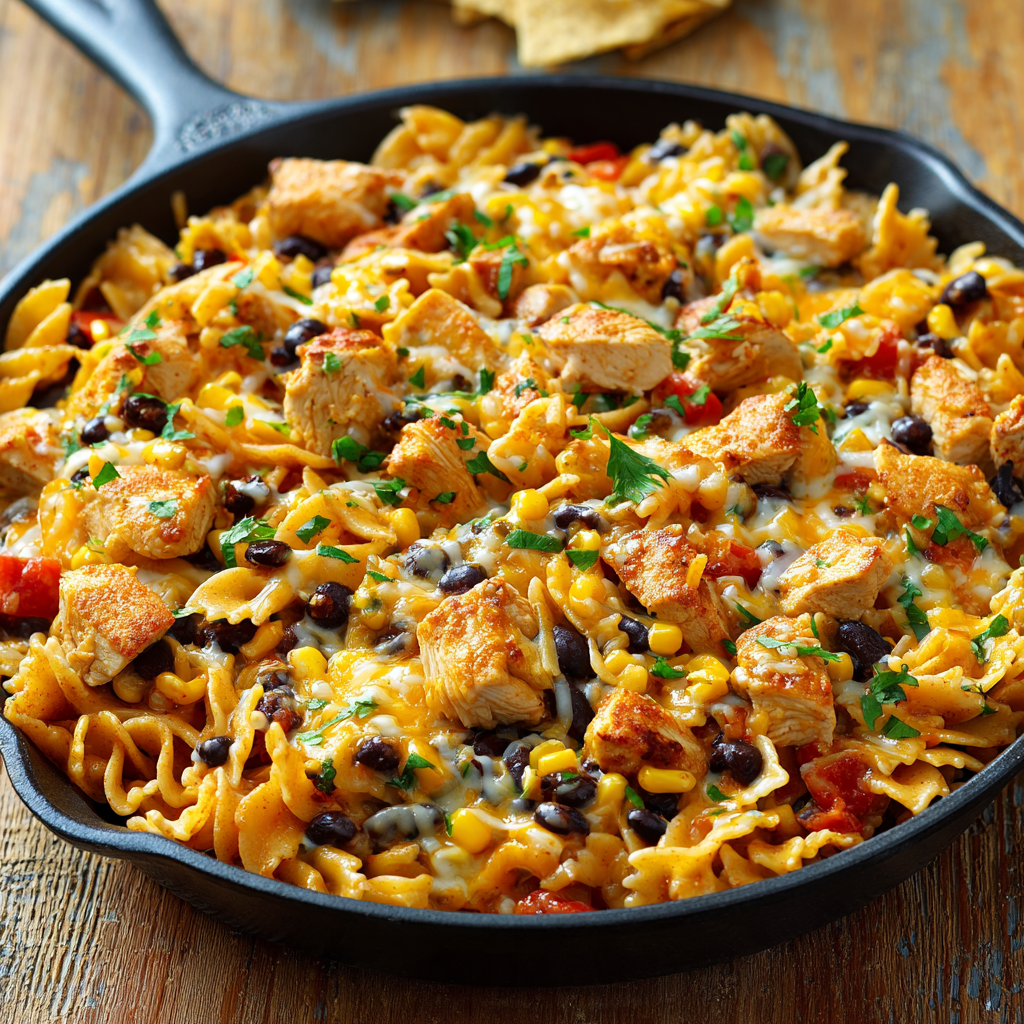
Southwest Chicken Taco Pasta Skillet
- Total Time: 35 minutes
- Yield: 6 servings 1x
Description
This one-pan wonder brings the bold flavors of tacos to your dinner table in pasta form. Juicy chicken, black beans, corn, and salsa come together with taco seasoning for a zesty kick. Finished with melted cheddar and pepper jack, and optionally topped with crunchy tortilla chips, it’s a fast, hearty meal that feels like a fiesta in a skillet.
Ingredients
12 oz pasta (penne or rotini works well)
1 lb chicken breast, diced
1 packet taco seasoning
1 cup salsa
1 cup corn (fresh, canned, or frozen)
1 cup black beans, drained and rinsed
2 cups chicken broth
1 cup shredded cheddar cheese
1 cup shredded pepper jack cheese
1 cup crushed tortilla chips (optional topping)
Instructions
In a large skillet, cook chicken until browned. Stir in taco seasoning and coat well.
Add pasta, salsa, corn, black beans, and chicken broth. Stir to combine.
Bring to a boil, reduce heat, cover, and simmer 15 minutes until pasta is cooked and most liquid is absorbed.
Stir in cheddar and pepper jack until melted and creamy.
If desired, sprinkle with crushed tortilla chips before serving for extra crunch.
- Prep Time: 10 minutes
- Cook Time: 25 minutes
- Category: Dinner, Main Course
Nutrition
- Calories: 490
- Fat: 18g
- Carbohydrates: 46g
- Protein: 33g
Gather Your Flavor Party Crew
Here’s everything you’ll need to bring this vibrant skillet to life. I’ve included my favorite tips and swaps so you can make it your own!
- 12 oz pasta (penne or rotini work well): These shapes are perfect for catching all the saucy, cheesy goodness. Chef’s Insight: I love using a whole wheat or legume-based pasta (like chickpea or lentil rotini) for an extra protein and fiber boost—you honestly can’t tell the difference once it’s all mixed in!
- 1 lb chicken breast, diced: Lean, protein-packed, and a fantastic flavor carrier. Substitution Tip: For a super quick shortcut, use a store-bought rotisserie chicken! Just shred it and add it in with the beans and corn since it’s already cooked.
- 1 packet taco seasoning: Our flavor MVP! It’s a convenient blend of chili powder, cumin, garlic, and other spices. Chef’s Insight: If you have 5 extra minutes, try making your own blend! It’s a great way to control the sodium and avoid any sneaky additives. (I’ll share my go-to blend in the notes!).
- 1 cup salsa: This is our secret weapon for adding depth and tang. Substitution Tip: Use your favorite heat level! Mild for the kids, hot if you like it spicy. A chunky salsa will give you more texture, while a smooth one will blend into the sauce more.
- 1 cup corn (fresh, canned, or frozen): Adds a lovely pop of sweetness and color. Chef’s Insight: If you have time, char some fresh corn in a dry pan before adding it—it unlocks a whole new level of smoky-sweet flavor!
- 1 cup black beans, drained and rinsed: For plant-based protein and a creamy, hearty texture. Substitution Tip: Pinto or kidney beans would be just as delicious here.
- 2 cups chicken broth: This is the liquid that will cook our pasta to perfection and become the base of our sauce. Substitution Tip: Vegetable broth works great for a pescatarian version!
- 1 cup shredded cheddar cheese & 1 cup shredded pepper jack cheese: The glorious, melty, cheesy crown! Pepper jack gives a little kick, but you can use all cheddar if you prefer. Chef’s Insight: For the creamiest melt, always shred your own cheese from a block. The pre-shredded stuff has anti-caking agents that can make the sauce a bit grainy.
- 1 cup crushed tortilla chips (optional topping): Don’t you dare skip this! It provides the essential CRUNCH that takes this dish from great to absolutely unforgettable.
Let’s Build Our One-Pan Wonder!
Okay, team! Let’s fire up the stove. The best part? We’re using just one skillet, which means less cleanup and more time for enjoying your masterpiece.
- Brown that Chicken: Grab your largest, deepest skillet (I use a 12-inch cast iron or stainless steel one) and place it over medium-high heat. Add a tiny drizzle of olive oil if your pan isn’t non-stick. Toss in your diced chicken and cook it for about 5-7 minutes, stirring occasionally, until it’s nicely browned on all sides and cooked through. Chef’s Hack: Don’t crowd the pan! If you add too much chicken at once, it will steam instead of brown. Give it some space for that delicious golden color.
- Spice it Up: Reduce the heat to medium. Now, sprinkle that glorious taco seasoning all over the chicken. Stir constantly for about 30 seconds. Can you smell that? Toasting the spices with the chicken for a brief moment wakes up their oils and makes the flavor 10x more powerful. It’s a tiny step with a huge reward!
- The Big Pour: Here’s where the magic happens. Add your uncooked pasta, salsa, corn, black beans, and chicken broth to the skillet. Give it all a really good stir, making sure every piece of pasta is submerged in that flavorful liquid. Scrape any browned bits off the bottom of the pan—that’s pure flavor gold!
- Simmer to Perfection: Bring the whole mixture to a lively boil. Once it’s bubbling, immediately reduce the heat to low, cover the skillet with a tight-fitting lid, and let it simmer for 15 minutes. Do not peek! Well, maybe just once to give it a quick stir halfway through to prevent sticking. We need to trap all that steam to cook the pasta perfectly.
- Get Cheesy: After 15 minutes, uncover your masterpiece. The pasta should be tender and most of the liquid should be absorbed. Take the skillet off the heat entirely. Now, sprinkle in both of your shredded cheeses. Stir gently and continuously. You’ll watch as the residual heat melts the cheese into the most creamy, dreamy sauce that coats every single ingredient. Oh, it’s a beautiful thing.
- The Grand Finale (Crunch Time): If you’re going for the crunch (and you totally should), now’s the time! Sprinkle the crushed tortilla chips evenly over the top. You can serve it right from the skillet for a gorgeous, rustic presentation.
How to Serve This Skillet Sensation
This dish is a complete meal in itself, but I love to serve it family-style right in the middle of the table with a few fun toppings on the side. Think of it as a DIY pasta bar! Set out small bowls of fresh diced avocado, a big dollop of cool sour cream or Greek yogurt, chopped fresh cilantro, sliced jalapeños for the brave, and a big wedge of lime for squeezing over everything. The bright, fresh toppings contrast perfectly with the rich, cheesy pasta. Don’t forget the spoons—you’ll want to get every last bit!
Mix It Up! Endless Possibilities
The beauty of this recipe is its flexibility. Here are a few ways to twist it:
- Turkey or Beef Lover: Swap the chicken for lean ground turkey or ground beef. Brown it with the taco seasoning, drain any excess fat, and proceed with the recipe.
- Go Meatless: Omit the chicken and use an extra can of black beans or pinto beans. You might need a touch less broth, so start with 1.5 cups and add more if needed.
- Creamy Dreamy: Stir in ¼ cup of cream cheese or Mexican crema along with the shredded cheese for an ultra-luxurious, velvety sauce.
- Green Goddess: Add a handful of fresh spinach or chopped kale in the last 2 minutes of cooking. It will wilt perfectly into the hot pasta.
- Smoky & Spicy: Use a chipotle-flavored salsa or add a teaspoon of smoked paprika to the taco seasoning for a deep, smoky kick.
Clara’s Kitchen Confidential
This recipe has evolved so much since that first chaotic Tuesday! My biggest learnings: toasting the spices and shredding your own cheese are absolute game-changers. I also love to make a big double batch and portion the leftovers for lunches—it reheats like a dream in the microwave with a tiny splash of water or broth to loosen it up.
And as promised, here’s my quick DIY taco seasoning blend if you want to skip the packet: Mix together 1 tbsp chili powder, 1.5 tsp cumin, 1 tsp paprika, 1 tsp salt, ½ tsp garlic powder, ½ tsp onion powder, ¼ tsp black pepper, and a pinch of cayenne if you like heat. It’s so fresh and vibrant!
One funny story: I once accidentally used a jar of super spicy habanero salsa. Let’s just say we were all breathing fire by the end of dinner, but we couldn’t stop eating it because it was so darn good. We learned our lesson to always taste your salsa first!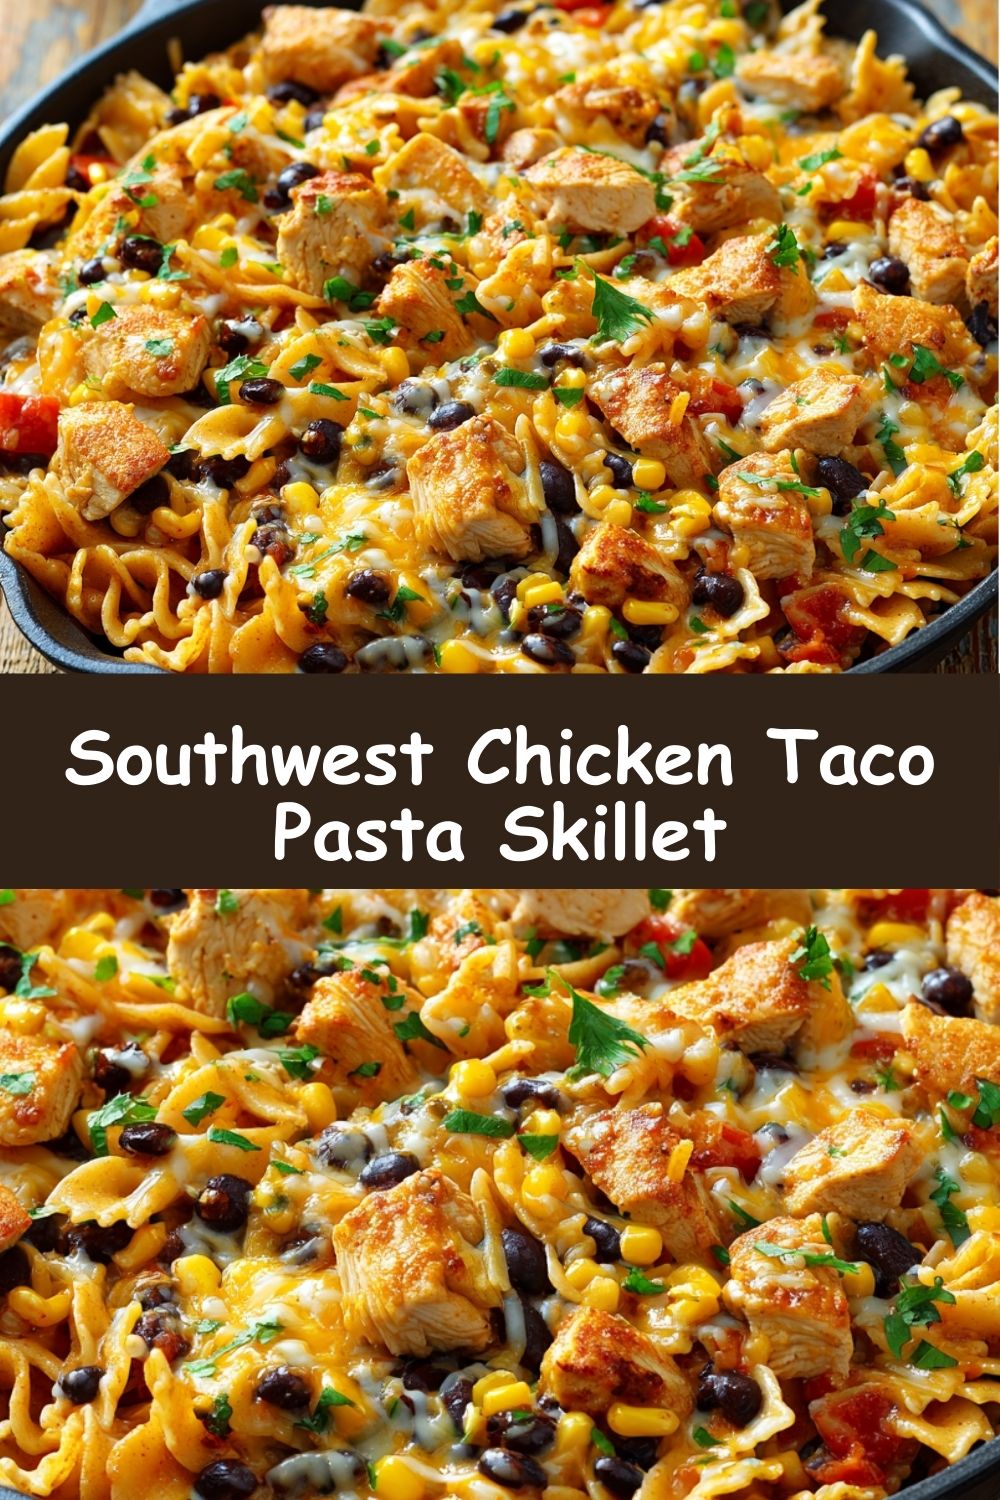
Your Questions, Answered!
Q: My pasta is still hard after 15 minutes! What happened?
A: Don’t worry! This can happen if your skillet isn’t covered tightly enough, your heat was too low, or your pasta is just a particularly stubborn shape. Simply add another ¼ cup of broth or water, re-cover, and simmer for another 3-5 minutes, checking frequently.
Q: Can I make this gluten-free?
A: Absolutely! Just use your favorite gluten-free pasta (I find brown rice or quinoa blends work well) and double-check that your taco seasoning and broth are certified gluten-free. The cooking method remains exactly the same.
Q: It turned out a bit too saucy/watery. How can I fix it?
A: Sauces can vary! If it’s too liquidy after the cheese has melted, simply turn the heat back to low and let it simmer uncovered for a few more minutes, stirring often, until it thickens up to your liking.
Q: Can I freeze the leftovers?
A: You can, but be aware that the pasta may become a little softer upon reheating. Thaw overnight in the fridge and reheat in a skillet with a splash of broth to bring it back to life. For the best texture, I’d recommend enjoying it within 3-4 days in the fridge.
Nourish Your Glow
Prep time: 10 minutes | Cook time: 25 minutes | Servings: 6
Approximate nutritional info per serving (without optional tortilla chip topping):
Calories: 490 | Protein: 33g | Carbohydrates: 46g | Fat: 18g
This is a well-balanced meal packed with protein from the chicken and beans, complex carbs from the pasta and corn, and healthy fats from the cheese. It’s the perfect fuel to keep you energized and satisfied!