The Garlic Knots That Will Steal the Show (And Your Heart)
Tell me if this sounds familiar: you’re planning a cozy dinner with friends, a big family pasta night, or maybe just a solo movie marathon that deserves a seriously good snack. You’ve got the main event sorted—a glorious pot of marinara-simmered goodness or a epic charcuterie board—but something is missing. That something, my friend, is the warm, buttery, garlic-scented embrace of a homemade garlic knot.
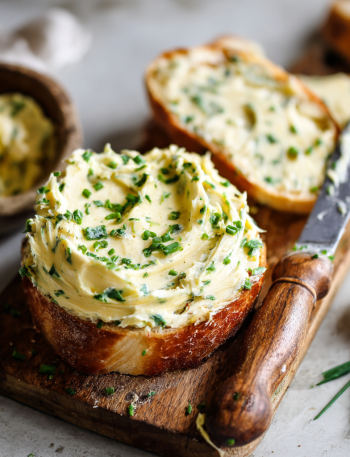
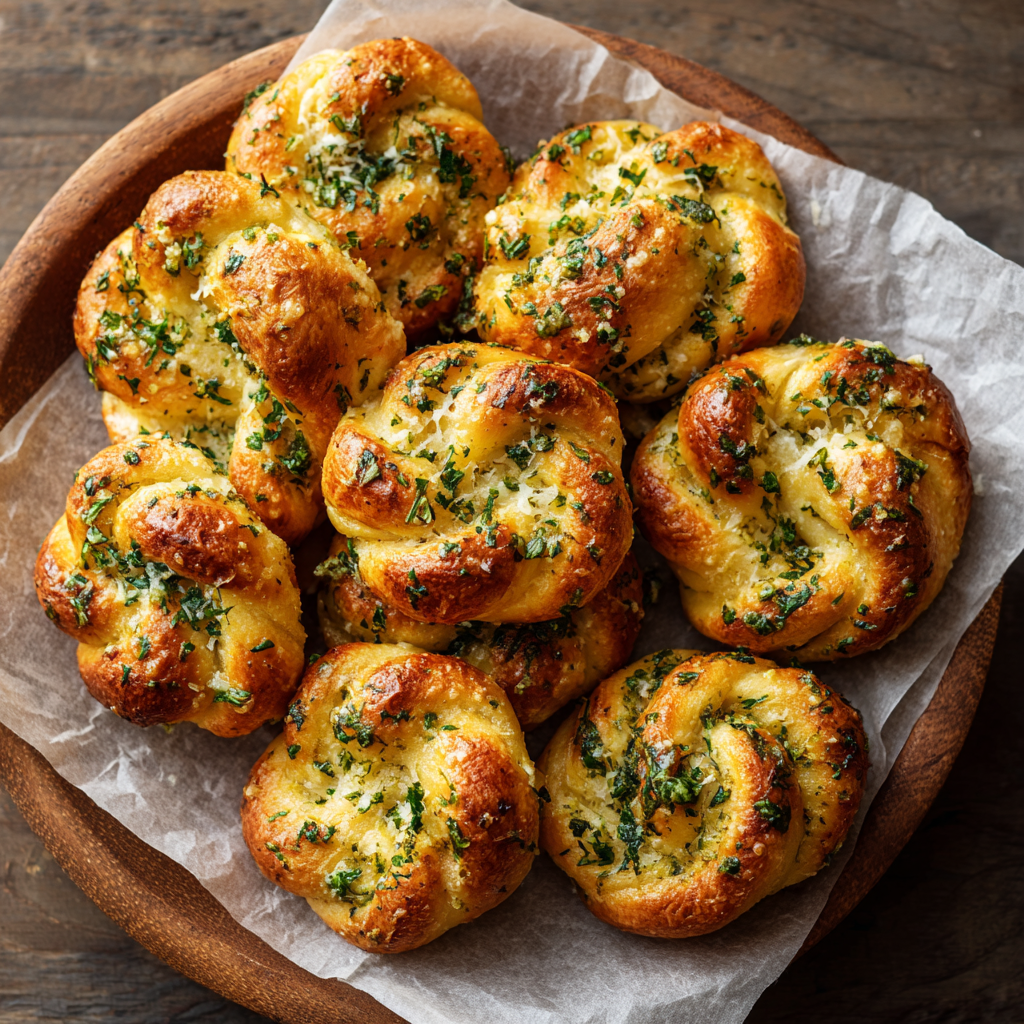
Not just any garlic knot. I’m talking about the kind of garlic knots that make people pause mid-sentence. The ones with a golden, slightly crisp exterior that gives way to a cloud-soft, chewy interior. The kind drenched in a garlic-infused herb butter so good you’ll consider drinking it with a straw (no judgment here, we’ve all been there). These are the garlic knots that turn a simple meal into a celebration.
I’m so excited to share my ultimate recipe for Perfect Garlic Knots with you today. This is a doubled batch, because let’s be real, one batch is never enough. It makes 32 glorious, pull-apart bites that are perfect for feeding a crowd or for ensuring you have glorious leftovers for the next day (they reheat like a dream!). We’re keeping it simple with store-bought pizza dough because I’m all about delicious wins without the stress, and we’re elevating them with a few chef-y twists that make all the difference. So, tie on your apron, and let’s bake some magic!
The First Bite: A Garlicky Love Story
My love affair with garlic knots started in the most unassuming way. I was about sixteen, and my best friend dragged me to this tiny, hole-in-the-wall pizzeria that was more famous for its arcade games than its food. We ordered a pizza, and the guy behind the counter, with a wink, tossed a few knotted-up pieces of dough into a basket and said, “On the house.”
When that basket landed on our sticky, Formica table, the scent hit me first—an intoxicating wave of roasted garlic and fresh parsley. They were glistening, irregularly shaped, and looked a little messy. We tore into them, and I remember the sheer joy of that first bite. The dough was impossibly soft and warm, the butter was savory and rich, and the garlic… oh, the garlic was present in the best way possible. It wasn’t a fancy meal, but in that moment, it was pure, unadulterated happiness. It taught me that the best food isn’t always the most complicated; it’s the food made with a little bit of love and a lot of flavor. That’s the spirit I try to bring to every recipe here at Unknown, and it’s definitely the spirit behind these knots.
Print
Perfect Garlic Knots
- Total Time: 2 hours 30 minutes
Description
These garlic knots are the buttery, golden pull-apart bites you didn’t know you needed more of. Made with pizza dough and drenched in garlicky herb butter, they work as a crowd-pleasing side, snack, or appetizer. This doubled batch serves 32 knots — perfect for parties, family dinners, or game day spreads — with added twists for that extra wow factor.
Ingredients
2 lbs pizza dough (homemade or store-bought), risen and punched down
Olive oil, for brushing
1 cup unsalted butter
10–12 cloves garlic, finely minced or pressed
2 teaspoons coarse salt
4 tablespoons fresh parsley, finely minced
1 teaspoon Italian seasoning (optional twist)
½ teaspoon crushed red pepper flakes (optional for heat)
Garnish: grated Parmesan cheese, extra coarse salt (optional)
Instructions
Preheat oven to 400°F (200°C). Line baking sheets with parchment paper or lightly oil.
Divide dough into 32 equal pieces. Roll each piece into a rope (about 6–8 inches), then tie into a loose knot.
Place knots on prepared sheets. Cover loosely and let rise for 30–45 minutes.
Meanwhile, melt butter in a saucepan over low heat. Add garlic, salt, parsley, Italian seasoning, and red pepper flakes (if using). Let it simmer gently for 2–3 minutes, then remove from heat.
Brush knots lightly with olive oil. Bake for 12–15 minutes, or until golden brown.
Remove from oven and immediately brush generously with the garlic butter mixture.
Sprinkle with Parmesan and a pinch of salt if desired. Serve warm, ideally with marinara for dipping.
- Prep Time: 15 mins
- Cook Time: 15 mins
- Category: Snack
Gathering Your Garlicky Goodness
Here’s everything you’ll need to create this masterpiece. Don’t just think of this as a shopping list—think of it as your flavor roadmap! I’ve included my little chef insights and substitution tips to make this recipe your own.
- 2 lbs pizza dough (homemade or store-bought), risen and punched down: This is our blank canvas! I often grab a couple of 1 lb balls from the grocery store deli section for ease. Let it sit on the counter for about 30-60 minutes before you start to make it easier to work with. Chef Insight: If you can find “fresh” dough from a pizzeria or bakery, it often has a better texture and flavor than the canned versions.
- Olive oil, for brushing: A light brush before baking helps achieve that gorgeous golden-brown color. Any neutral olive oil works perfectly here.
- 1 cup (2 sticks) unsalted butter: Unsalted is key! It lets us control the salt level perfectly. This is the rich, decadent base of our glorious garlic butter sauce.
- 10–12 cloves garlic, finely minced or pressed: Don’t be shy! Fresh is absolutely non-negotiable for the best flavor. Pre-minced jarred garlic just can’t compete. Substitution Tip: If you’re a roasted garlic fan, you can substitute about 1/2 cup of creamy roasted garlic paste for a deeper, sweeter, mellower flavor.
- 2 teaspoons coarse salt: I prefer coarse kosher salt or sea salt because it dissolves beautifully and adds a cleaner saltiness than fine table salt.
- 4 tablespoons fresh parsley, finely minced: The fresh, grassy note that cuts through the richness. Please, please use fresh parsley for this—dried parsley will taste like little more than green dust. Chef Insight: If you have it, a tablespoon of fresh chopped chives or oregano mixed in with the parsley is a lovely upgrade.
- 1 teaspoon Italian seasoning (optional twist): My little secret weapon! This adds a subtle, complex herbaceous backbone. If you don’t have a blend, a pinch each of dried oregano, basil, and thyme will do the trick.
- ½ teaspoon crushed red pepper flakes (optional for heat): A pinch of heat makes everything nice! It creates the most delightful warm finish. Feel free to adjust or omit based on your spice preference.
- Garnish: grated Parmesan cheese, extra coarse salt (optional): The finishing touches! A snowy dusting of good Parm and a final pinch of flaky salt right after baking takes these from great to “can I have the recipe?!” status.
Let’s Get Knotty! Your Step-by-Step Guide
Ready to transform that simple dough into golden nuggets of joy? Follow these steps, and read my little hacks along the way—they make all the difference between a good garlic knot and a legendary one.
- Preheat and Prep: Preheat your oven to 400°F (200°C). This is crucial for that instant oven-spring, which gives our knots their airy texture. Line your baking sheets with parchment paper or give them a very light slick of olive oil. Chef Hack: Parchment paper is my best friend here. It prevents sticking without adding extra fat and makes cleanup an absolute dream.
- Divide and Conquer: Lightly flour your work surface and your hands. Place your pizza dough on the surface and divide it in half, then quarters, and keep going until you have 32 roughly equal pieces. They don’t have to be perfect! A kitchen scale is handy, but eyeballing it works just fine. Chef Insight: If the dough is sticky, a light dusting of flour on your hands and the dough balls will help, but try not to incorporate too much extra flour into the dough itself.
- The Art of the Knot: Take one piece of dough and roll it gently between your hands or on the counter into a rope about 6-8 inches long. Don’t stress about it being perfect—rustic is charming! Then, simply tie it into a loose knot, just like you’re tying the first step of tying your shoes. Tuck the ends underneath. Chef Hack: If the dough springs back and is hard to roll, let it rest for 5 minutes. The gluten just needs a quick nap to relax!
- The Second Rise (Patience is a Virtue!): Place your beautifully knotted dough pieces on the prepared baking sheets, leaving about an inch of space between them so they have room to puff up. Cover them loosely with a clean kitchen towel or a piece of plastic wrap that’s been lightly sprayed with oil. Let them rise in a warm, draft-free spot for 30-45 minutes. You’ll know they’re ready when they look puffy and have almost doubled. This step is what gives them that light, airy interior!
- Create the Liquid Gold (Garlic Butter): While the knots are rising, melt the butter in a small saucepan over LOW heat. We’re not trying to brown the butter here, just melt it gently. Once melted, add the minced garlic, salt, fresh parsley, Italian seasoning, and red pepper flakes (if using). Let it simmer ever-so-gently for 2-3 minutes. You should hear a soft sizzle and smell the garlic becoming fragrant. Do not let the garlic burn! Burnt garlic is bitter. Remove it from the heat and set aside. This infuses the butter with all that amazing flavor.
- Bake to Golden Perfection: Right before the knots go in the oven, give them a very light brush with olive oil. This promotes browning. Pop them into your preheated oven and bake for 12-15 minutes, or until they are beautifully golden brown on top. I like to rotate the pans halfway through for even baking.
- The Most Important Step: The Butter Bath! As soon as the knots come out of the oven, while they are still piping hot, use a pastry brush to drench them in that prepared garlic butter. I mean it—be generous! The hot dough will soak up all that flavor like a dream. This is the step that separates the amateurs from the pros.
- The Finishing Touches: Immediately after buttering, sprinkle with grated Parmesan cheese and an extra pinch of flaky salt if you like. This not only adds flavor but also makes them look incredibly inviting.
How to Serve These Garlicky Gems
These garlic knots are the ultimate team player. Serve them warm—I can’t stress “warm” enough!—piled high in a rustic basket or bowl. Of course, a side of warm marinara sauce for dipping is non-negotiable in my book. They are the perfect sidekick to a big, leafy salad and a bowl of pasta, fantastic alongside soups and stews (imagine dunking one into a creamy tomato soup!), and absolutely essential for any game-day spread or party platter. Honestly, they’re so good, I’ve been known to just eat a couple for a very happy lunch.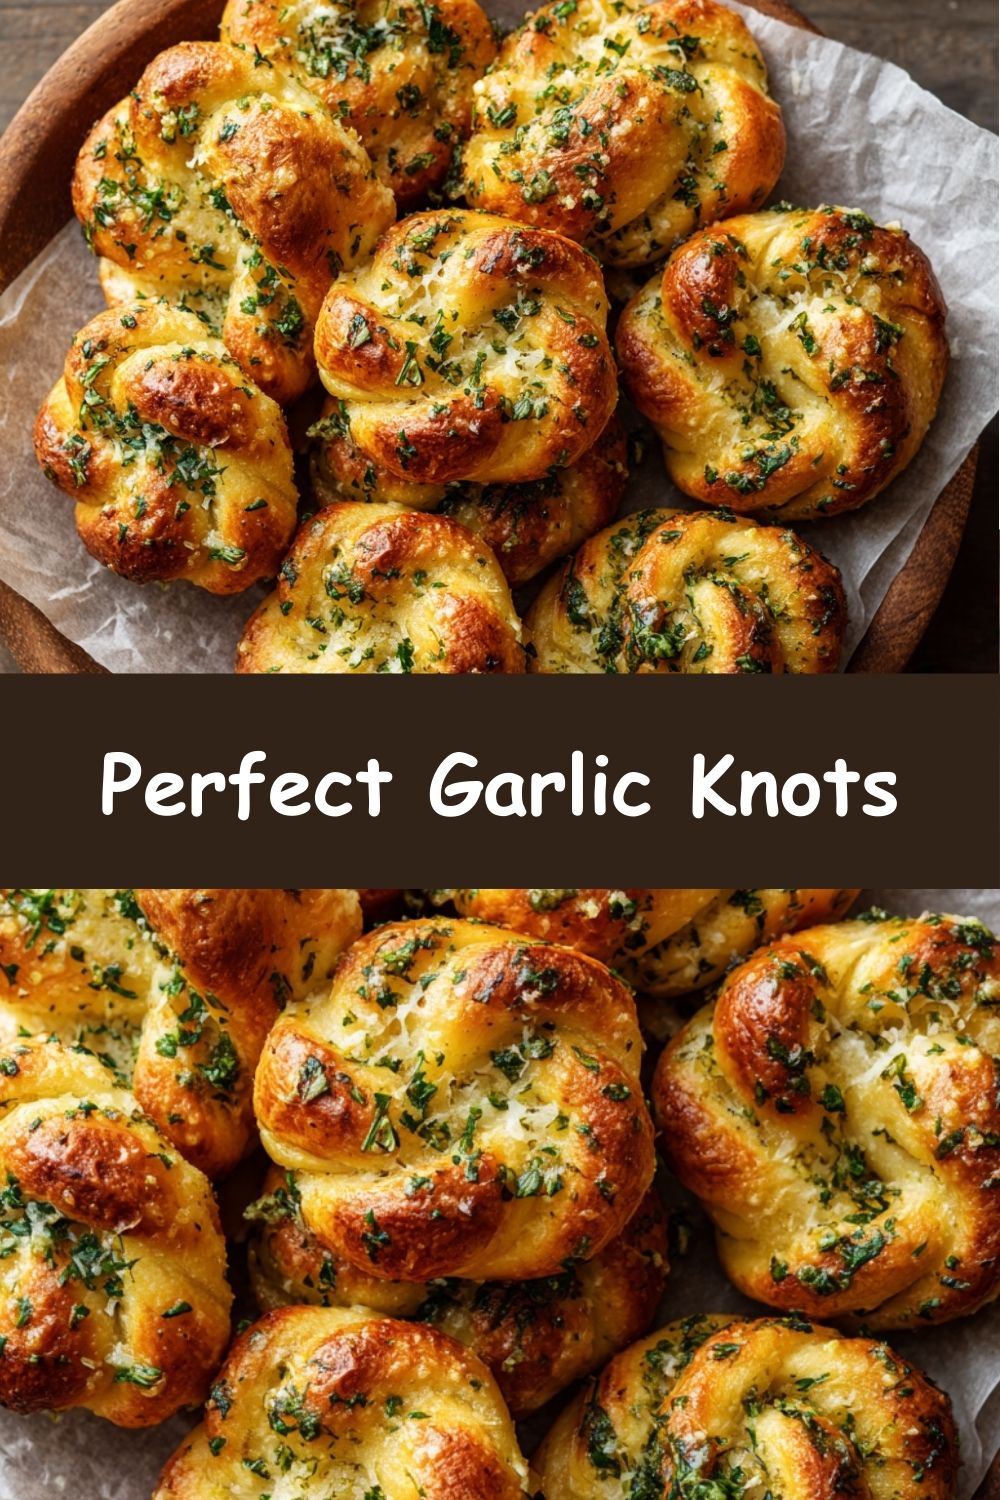
Mix It Up! Creative Twists on the Classic
Once you’ve mastered the basic recipe, the world is your garlicky oyster! Here are a few of my favorite ways to play with the formula:
- Cheesy-Stuffed Knots: Before you tie the knot, place a small cube of low-moisture mozzarella or a teaspoon of ricotta mixed with herbs in the center of the dough rope. Seal it up well before baking for a gooey, cheesy surprise inside.
- Everything Bagel Knots: Swap the garlic butter topping for a brush of beaten egg white and a generous sprinkle of everything bagel seasoning right before baking. You get all the savory flavor of an everything bagel in a soft, knot form.
- Vegan Delight: Use your favorite vegan pizza dough and substitute the butter with a high-quality vegan butter (like Miyoko’s or Melt). Skip the Parmesan garnish or use a vegan alternative. It works beautifully!
- Herb Garden Knots: Add 2 tablespoons of finely chopped fresh herbs like rosemary, thyme, or chives directly into the dough when you’re kneading it (if using homemade) or gently knead them into store-bought dough before shaping for an herby-infused bite.
- Spicy ‘Nduja Butter: For a serious flavor punch, add a tablespoon of soft ‘nduja (a spicy, spreadable Italian salami) to the butter as it melts. It will infuse the butter with a deep, meaty, spicy flavor that is absolutely addictive.
Clara’s Kitchen Confidential
This recipe has been a staple in my kitchen for years, and it’s evolved from a simple side to my go-to party trick. I’ll never forget the time I was making them for a big family dinner and, in my excitement, I accidentally used salted butter AND the full amount of salt. Let’s just say they were… well-seasoned! We still ate them, of course, but it was a good lesson in tasting as you go. Now, I always recommend starting with a little less salt in the butter, tasting it, and adding more if needed.
The other thing I’ve learned is that the “knot” shape is wonderfully forgiving. If your first few look a little abstract, don’t worry! They will taste just as incredible. In fact, I think the slightly misshapen, homemade-looking ones have the most character. The goal here is flavor and fun, not perfection. Every time I make these, the smell wafting through my house takes me right back to that little pizzeria, and that’s the real magic of cooking, isn’t it?
Your Garlic Knot Questions, Answered!
Q: Can I make these garlic knots ahead of time?
A: Absolutely! You have two great options. 1) Prepare up to the second rise: Shape the knots, place them on the baking sheet, cover them tightly with plastic wrap, and refrigerate for up to 24 hours. When you’re ready to bake, let them sit at room temperature for 30-60 minutes to finish rising, then bake as directed. 2) Freeze after baking: Bake and cool the knots completely (without the butter bath). Freeze them in a single layer on a baking sheet, then transfer to a freezer bag. To serve, reheat from frozen in a 350°F oven for 5-10 minutes until warm, THEN brush with the garlic butter (make the butter fresh).
Q: My dough is really sticky and hard to handle. What should I do?
A> This is common, especially with high-hydration doughs! Don’t panic. The key is to use a light hand with flour. Dust your work surface and your hands lightly with flour, but try to avoid kneading a ton of extra flour into the dough, as it can make the knots dense. If it’s still too sticky, let the dough rest for 5-10 minutes. This allows the gluten to relax, making it much easier to roll out.
Q: Why did my knots turn out dense and not fluffy?
A> The most likely culprit is over-handling the dough or skipping/shortening the second rise. When you’re shaping the knots, be gentle. You’re not trying to knead them, just shape them. And that second rise is non-negotiable for creating airy, light knots. Make sure they have puffed up nicely before they go into the oven. Also, check your oven temperature with an oven thermometer—an oven that runs cool can lead to dense results.
Q: Can I use garlic powder instead of fresh garlic?
A> While fresh garlic provides the best, brightest flavor, you can use garlic powder in a pinch. I would recommend using about 1 to 1.5 tablespoons of garlic powder. Whisk it into the melted butter and let it sit for a minute to “bloom” and dissolve. The flavor will be more muted and earthy compared to fresh garlic, but it will still be delicious.
Nutritional Information*
*This is an approximate calculation per garlic knot, based on the ingredients listed.
- Calories: ~120
- Fat: 6 g
- Carbohydrates: 14 g
- Protein: 3 g
- Sodium: 150 mg
Remember, balance > perfection! Enjoy these as part of a joyful, flavorful meal.
Garlic knots are proof that the simplest ingredients—dough, butter, garlic, and herbs—can transform into something truly magical. Whether you’re serving them alongside pasta, dunking them in marinara, or devouring them straight off the pan, these warm, garlicky bites never fail to bring joy to the table. With their golden exterior, pillowy interior, and irresistible buttery glaze, they’re more than just a side dish—they’re the moment everyone looks forward to. So, grab that dough, tie a few knots, and let your kitchen smell like happiness.