
Soft & Spiced Gingerbread Crinkle Cookies: Your New Holiday Obsession
Hey friends! Clara here. Is there anything that screams “holiday spirit” quite like the warm, spicy, and utterly comforting scent of gingerbread wafting through your kitchen? It’s the kind of aroma that wraps you in a cozy hug, promising soft, chewy cookies and memories in the making. Today, we’re diving headfirst into that feeling with my absolute favorite holiday cookie: these Soft and Spiced Gingerbread Crinkle Cookies.
Now, I know what you might be thinking. “Gingerbread can be tricky!” Maybe you’ve had a gingerbread man that could double as a hockey puck, or a cookie so spicy it made you cough. I’ve been there! But I promise you, this recipe is different. We’re creating cookies that are perfectly soft in the center, with just a hint of crispness at the edges, and loaded with a warm, balanced spice blend that sings rather than shouts.
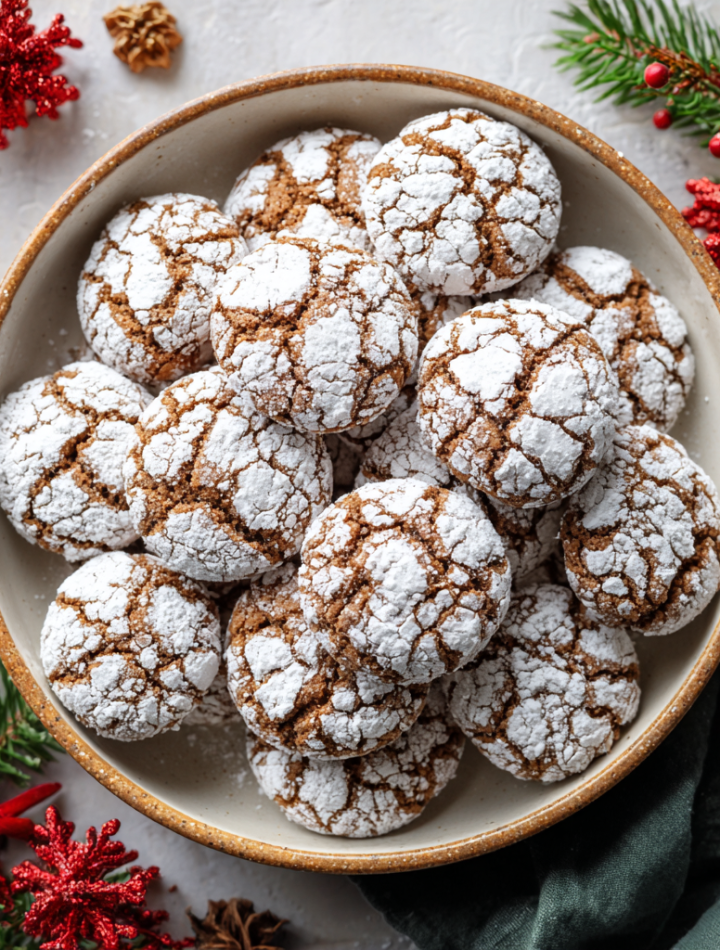
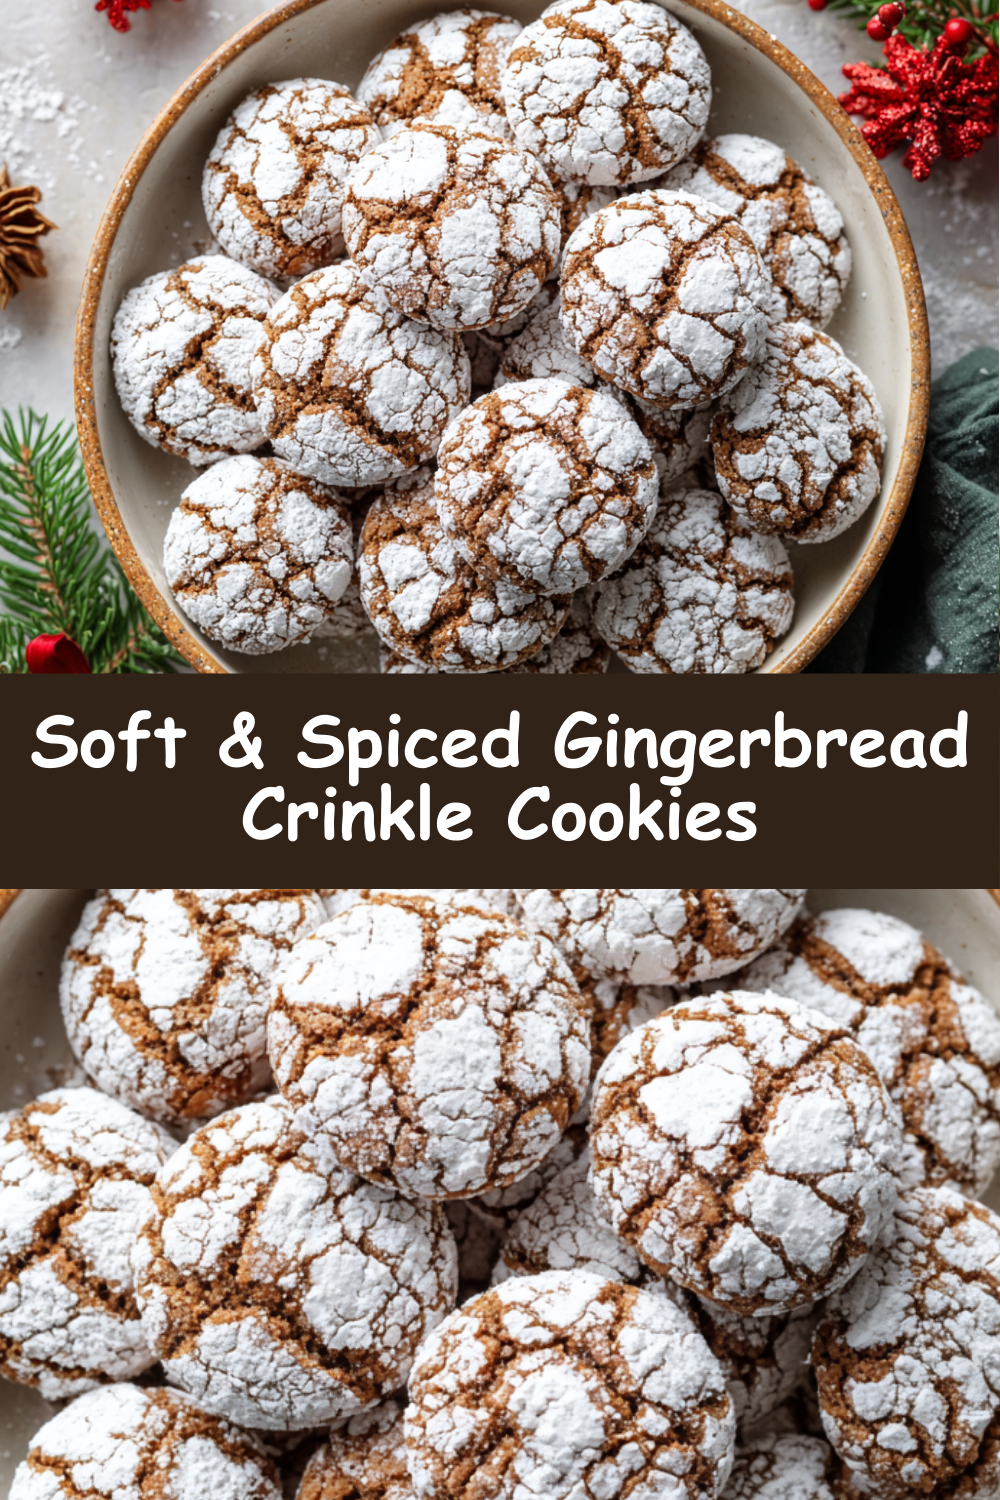
And let’s talk about that iconic crinkle look for a second. Coating the dough balls in a snowy blanket of powdered sugar before baking isn’t just for show (though they are stunningly festive). It creates this magical, crackly top that gives way to the most tender, molasses-rich interior. They’re the star of any cookie tray, the perfect partner for a mug of cold milk or a hot cup of coffee, and honestly, they make your whole house smell like a holiday dream. So, are you ready to bake up a little bit of magic? Let’s get our aprons on and create something truly special together.
A Cookie Tin Full of Memories
This recipe takes me right back to my grandma’s kitchen, a place that always seemed to be dusted with a light layer of flour and filled with the sound of a humming mixer. Every December, she’d declare it “Cookie Weekend,” and the entire house would transform into a bakery. My job, from the time I could stand on a stool, was to be the official dough-ball roller and sugar-duster.
I remember one year, I was probably seven, and I became utterly fascinated by the transformation. We’d roll these sticky, dark brown balls of dough, and I’d coat them so heavily in powdered sugar they looked like little ghosts. Then, we’d peer through the oven window together, watching the magic happen. The cookies would slowly puff up, and those beautiful cracks would start to appear, like a snowy landscape fracturing to reveal the rich earth beneath. Grandma would always say, “There they are, Clara! Their personalities are coming out!” She taught me that no two crinkles are ever the same, and that’s what makes them perfect. That sense of joyful anticipation, of creating something beautiful and delicious with my own hands, is the heart of this recipe for me. It’s more than a cookie; it’s a little piece of my history, and I’m so thrilled to share it with you.
Print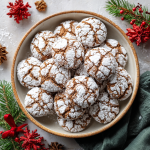
Soft and Spiced Gingerbread Crinkle Cookies
- Total Time: 25 minutes
- Yield: 24 cookies 1x
Description
These Gingerbread Crinkle Cookies are soft, chewy, and warmly spiced — the perfect holiday treat. They bake up with beautiful crinkles coated in powdered sugar, giving them a snowy, festive look that belongs on every Christmas cookie tray.
Ingredients
2 ¼ cups (270g) all-purpose flour
2 tsp ground ginger
1 tsp ground cinnamon
½ tsp ground cloves
½ tsp ground nutmeg
1 tsp baking soda
¼ tsp salt
¾ cup (170g) unsalted butter, softened
1 cup (200g) brown sugar, packed
1 large egg
¼ cup (60ml) molasses
2 tsp vanilla extract
½ cup (60g) powdered sugar, for coating
Instructions
Mix dry ingredients: In a medium bowl, whisk flour, spices, baking soda, and salt.
Cream butter & sugar: Beat butter and brown sugar until light and fluffy. Add egg, molasses, and vanilla; mix until smooth.
Combine: Gradually stir in dry ingredients until dough forms. Cover and chill for 30–45 minutes.
Shape: Scoop tablespoon-sized portions, roll into balls, and coat generously in powdered sugar.
Bake: Place on parchment-lined baking sheets and bake at 350°F (175°C) for 9–11 minutes until crinkled and just set.
Cool & enjoy: Let cookies cool on a wire rack.
- Prep Time: 15 minutes
- Cook Time: 10 minutes
- Category: Dessert
Nutrition
- Calories: 130
- Saturated Fat: 3g
- Carbohydrates: 20g
- Cholesterol: 20mg
Gathering Your Cookie Crew: The Ingredients
Before we start, let’s get familiar with our team players. Using simple, whole ingredients is key, and understanding their roles makes you a more confident baker! Here’s what you’ll need to make about 24 gorgeous cookies.
- 2 ¼ cups (270g) All-Purpose Flour: The foundation of our cookie! I like to fluff the flour in the bag, then spoon it into the measuring cup and level it off. This prevents accidentally using too much and ending up with dry cookies. For a gluten-free swap, a 1:1 GF flour blend works beautifully here.
- 2 tsp Ground Ginger: The star of the spice show! It provides that warm, peppery kick that defines gingerbread. Don’t be shy with it.
- 1 tsp Ground Cinnamon: The warm, sweet backbone of our spice blend. It pairs perfectly with the ginger and makes the whole kitchen smell incredible.
- ½ tsp Ground Cloves: A powerful spice, so a little goes a long way! It adds a deep, slightly bitter warmth that rounds out the flavor profile beautifully.
- ½ tsp Ground Nutmeg: This adds a subtle, nutty sweetness. If you have a whole nutmeg and a microplane, freshly grating it will take your cookies to the next level!
- 1 tsp Baking Soda: Our leavening agent! This is what gives the cookies their lift and helps create those lovely crinkles. Make sure it’s fresh for the best rise.
- ¼ tsp Salt: Never skip the salt! It’s the flavor enhancer that makes all the other spices and the sweetness pop. It balances everything out.
- ¾ cup (170g) Unsalted Butter, softened: For richness, tenderness, and that melt-in-your-mouth quality. “Softened” means it should give slightly when you press it, but not be oily or melted. If you forget to take it out ahead of time, you can cut it into chunks and it will soften faster. I use salted butter sometimes in a pinch, but then I reduce the added salt to just a pinch.
- 1 cup (200g) Brown Sugar, packed: Pack it firmly into your measuring cup! The molasses in the brown sugar adds moisture, chewiness, and a deep caramel flavor that white sugar just can’t provide.
- 1 large Egg: The binder that brings our dough together. It also adds structure and richness. Let it come to room temperature for a smoother dough.
- ¼ cup (60ml) Molasses: The soul of the gingerbread! This is non-negotiable for that classic, deep flavor. I prefer “light” or “original” molasses for a balanced taste; blackstrap can be too bitter. If you’re in a real bind, you could use dark corn syrup, but the flavor will be much milder.
- 2 tsp Vanilla Extract: The secret weapon! Vanilla might seem out of place, but it adds a wonderful warmth and complexity that enhances all the other spices.
- ½ cup (60g) Powdered Sugar, for coating: This is what creates our beautiful snowy effect! You’ll need extra for rolling the dough balls. Don’t use granulated sugar here—the powdery texture is essential for the crinkle.
Let’s Bake! The Step-by-Step Magic
Okay, team! This is where the fun begins. I’ll walk you through each step with all my favorite chef hacks to ensure cookie perfection. Preheat your oven to 350°F (175°C) and line your baking sheets with parchment paper. Trust me, parchment paper is a lifesaver for easy cleanup and preventing any sticking.
- Mix Your Dry Ingredients: In a medium-sized bowl, whisk together the flour, ginger, cinnamon, cloves, nutmeg, baking soda, and salt. Whisk it really well! This isn’t just about combining; it’s about aerating the flour and making sure those spices are evenly distributed so every single bite is perfectly spiced. Chef’s Hack: I sometimes give the mixed dry ingredients a quick smell – if it smells amazing, you’re on the right track!
- Cream the Butter & Sugar: In a larger bowl, using a hand mixer or a stand mixer with the paddle attachment, beat the softened butter and packed brown sugar together on medium speed. We’re not just mixing; we’re “creaming.” Beat it for a good 2-3 minutes, until the mixture becomes pale, fluffy, and almost looks like a light brown frosting. This step incorporates air, which is crucial for a tender cookie. Don’t rush it!
- Bring in the Wet Team: Reduce the mixer speed to low and add the egg, molasses, and vanilla extract. Mix just until everything is smoothly combined, scraping down the sides of the bowl as needed. The molasses can be sticky, so a rubber spatula is your best friend here. Your dough will now be a lovely, shiny brown.
- Combine Wet & Dry: Now, gradually add your bowl of dry ingredients to the wet ingredients. Mix on low speed until the flour just disappears. Do not overmix! As soon as you no longer see streaks of flour, stop the mixer. Overmixing develops the gluten in the flour and can lead to tough cookies. We want tender, chewy goodness!
- The Essential Chill Time: This might be the hardest part – patience! Cover the bowl with plastic wrap and chill the dough in the refrigerator for at least 30-45 minutes. Why? Chilling the dough solidifies the butter. This means the cookies won’t spread too much in the oven, and it allows the flavors to meld together beautifully. Chef’s Hack: If you’re impatient (like me!), you can pop the bowl in the freezer for 15-20 minutes instead. The dough should be firm to the touch.
- Shape & Sugar Coat: Place your powdered sugar for coating in a small bowl. Using a tablespoon-sized cookie scoop or a regular spoon, portion out the dough and roll it between your palms to form smooth balls. Now, roll each ball generously in the powdered sugar until it’s completely covered. I mean, really coat it! The first layer might seem to dissolve into the dough – that’s okay. Roll it a second time for an extra-thick, snowy coating that will create dramatic crinkles.
- Bake to Perfection: Place the sugar-coated dough balls on your prepared baking sheets, leaving about 2 inches between them because they will spread a little. Bake for 9-11 minutes. You’re looking for the cookies to be puffed up and covered in those beautiful cracks. The edges might look just set, but the centers will still seem soft. This is perfect! They will firm up as they cool. Remember, they continue to cook on the hot tray after you take them out, so slightly under-baking is the key to a soft, chewy center.
- The Cool Down: Let the cookies cool on the baking sheet for 5 minutes. This allows them to set enough to handle. Then, carefully transfer them to a wire rack to cool completely. This step is crucial for that perfect texture – it stops the cooking process and prevents the bottoms from getting soggy.
How to Serve These Holiday Stars
Once they’re cool, it’s time for the best part! Pile these snowy-topped gems high on a festive plate or a rustic wooden board. They are stunning all on their own, but for an extra-special touch, I love serving them with a glass of cold milk for the classic combo, or a mug of strong coffee to complement the spices. They also make incredible edible gifts! Tuck a stack into a cellophane bag tied with a ribbon, or layer them in a cookie tin with parchment paper. A homemade gift from the heart is the best kind of gift, don’t you think?
Get Creative! Fun Recipe Twists
Love the base recipe? Let’s play! Here are a few of my favorite ways to mix things up:
- Orange Zest Delight: Add the zest of one large orange to the dough when you add the wet ingredients. The bright, citrusy flavor cuts through the spice in the most incredible way.
- Spicy Kick: For those who love heat, add a tiny pinch of freshly ground black pepper or even a pinch of cayenne pepper to the dry ingredients. It sounds wild, but it enhances the warmth of the ginger beautifully.
- Lemon Glaze Drizzle: Whisk together ½ cup of powdered sugar with 1-2 tablespoons of fresh lemon juice until smooth. Drizzle this over the cooled cookies for a tangy, sweet finish.
- Vegan-Friendly Version: Use a plant-based butter stick and a flax egg (1 tbsp ground flaxseed mixed with 3 tbsp water, let sit for 5 mins). Just ensure your sugar is certified vegan.
- Chocolate Chip Gingerbread: Fold in ¾ cup of semi-sweet or dark chocolate chips after you’ve combined the dough. Because chocolate makes everything better!
Clara’s Kitchen Notes & Stories
This recipe has been a labor of love, and it’s evolved so much since my first attempt years ago. The first batch I ever made spread into one giant, flat gingerbread blob on the pan because I skipped the chilling step. It was delicious, but not exactly cookie-tray material! I learned the hard way that patience is a key ingredient.
Another funny story: one year, I was baking these for a party and ran out of powdered sugar for the coating. In a panic, I tried rolling them in granulated sugar. The result? Shiny, slick cookies with no crinkle in sight! They tasted fine, but they lost all their festive charm. It was a great reminder of how each ingredient has a specific job. Now, I always double-check my pantry before I start! Over time, I’ve tweaked the spice ratios to my perfect blend and learned that the second roll in powdered sugar is the secret to the most dramatic, beautiful cracks. I hope this recipe becomes a beloved tradition in your kitchen, just like it is in mine.
Your Gingerbread Cookie Questions, Answered!
I’ve gotten so many questions about this recipe over the years. Here are the most common ones to help you troubleshoot like a pro!
Q: My cookies didn’t crinkle much. What happened?
A: The most common culprits are not chilling the dough long enough, or not using enough powdered sugar. The dough needs to be firm and cold to crack properly as it bakes. Also, make sure you’re coating the dough balls very generously—a thick, snowy layer is what creates that signature look.
Q: Can I make the dough ahead of time?
A: Absolutely! This dough is great for making ahead. You can keep it covered in the fridge for up to 3 days. You can also scoop and roll the dough balls, place them on a baking sheet to freeze solid, then transfer them to a freezer bag. They’ll keep for up to 3 months! When you’re ready to bake, just roll the frozen dough balls in powdered sugar and add 1-2 minutes to the baking time.
Q: My cookies are too cakey/too flat. How can I fix this?
A: A cakey texture often means you may have over-measured the flour or over-mixed the dough after adding the flour. Remember: spoon and level your flour, and mix until *just* combined. If they’re too flat, the dough probably wasn’t chilled sufficiently, or your butter may have been too soft. Ensuring a proper chill is key for perfect thickness.
Q: What’s the best way to store these cookies?
A> To keep them soft and chewy, store the completely cooled cookies in an airtight container at room temperature. They’ll stay perfect for about 4-5 days. You can also freeze the baked cookies for up to 2 months. Just thaw them at room temperature when you’re ready to enjoy!
Nutritional Information
Here’s a general breakdown per cookie (approximate, based on 24 cookies):
- Calories: 130 kcal
- Fat: 5g
- Saturated Fat: 3g
- Cholesterol: 20mg
- Sodium: 95mg
- Carbohydrates: 20g
- Fiber: 0.5g
- Sugars: 12g
- Protein: 1.5