
Ditch the Boring Jello: Say Hello to Your New Favorite Creamy Dream
Hey there, my adventurous friend! Let’s talk about dessert for a second. Specifically, that moment when a sweet craving hits, but you’re committed to feeling your best. You’re staring into the fridge, hoping for a miracle—something that feels indulgent, creamy, and a little bit fancy, but won’t send your energy on a rollercoaster ride. Sound familiar? I’ve been there more times than I can count.
For the longest time, my “healthy” dessert options felt a bit… sad. A piece of fruit? Lovely, but not always what the soul needs. A complicated, 20-ingredient raw vegan tart? Absolutely delicious, but not exactly a Tuesday-night kind of situation. I needed a hero. A quick, dazzling, and downright delicious treat I could whip up with zero fuss.
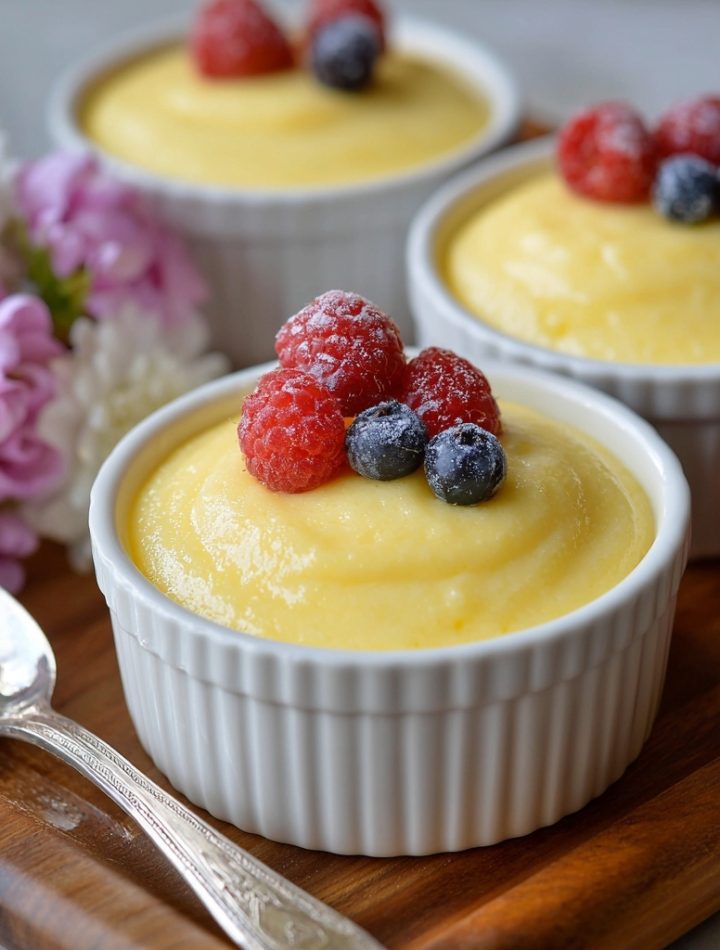
And then, one lazy Sunday, while staring at a box of sugar-free Jello and a carton of heavy cream, a little kitchen magic happened. I broke all the rules on the box, swapped cold water for rich, luxurious cream, and created something that made my eyes literally widen with delight. The result? These unbelievably Silky Sugar-Free Creamy Jello Custard Cups. They’re like if a classic Jello and a rich pot de crème had a beautiful, low-carb baby. They’re cool, smooth, and so satisfying, you won’t believe they’re keto-friendly and sugar-free. Get ready to fall in love with dessert all over again.
A Wobbly Start and a Creamy Revelation
This recipe actually has its roots in my grandma’s kitchen, though she’d probably get a kick out of this modern twist. She was the queen of Jello salads—the kind with fruit cocktail and a mysterious, creamy topping. As a kid, I was obsessed with the wobbly, jiggly magic of it all. I’d sit at her formica table, watching the sun catch the stained-glass colors of her creations, completely mesmerized.
Fast forward to my early days of figuring out this “healthy eating without hating life” thing. I was missing those simple, joyful desserts. One day, craving that nostalgic jiggle but wanting something richer, I decided to play. I remembered how grandma’s versions always had a creamy element, and I thought, “What if the cream was in the Jello, not just on top?” I held my breath as I poured the heavy whipping cream into the dissolved ruby-red strawberry Jello. It swirled together like a beautiful pink cloud. A few hours in the fridge later, I took a spoonful. It was a total lightbulb moment—creamy, decadent, and packed with flavor, but still light as air. That first bite took me right back to my grandma’s table, but it also felt excitingly, deliciously new. It was the perfect blend of nostalgia and nourishment.
Print
Sugar-Free Creamy Jello Custard Cups
- Total Time: 5 minutes
- Yield: serves 6
Description
Turn your regular sugar-free Jello into a silky, custard-like treat with one simple swap—heavy whipping cream instead of cold water. The result? A low-carb, keto-friendly dessert that’s rich, smooth, and totally crave-worthy. Perfect for meal prep or sweet snack attacks!
Ingredients
1 box sugar-free Jello (any flavor)
1 cup boiling water
1 cup heavy whipping cream (instead of cold water)
Instructions
Dissolve the Jello: In a bowl, whisk Jello mix into 1 cup of boiling water until fully dissolved (about 2 minutes).
Add Cream: Slowly stir in 1 cup of heavy whipping cream until well blended.
Pour & Chill: Divide into containers. Chill for 2–4 hours until set.
- Prep Time: 5 min
- Category: Dessert
Nutrition
- Calories: 120
- Fat: 11g
- Carbohydrates: 1g
Gather Your Ingredients: The Dream Team for Creaminess
Here’s the beautiful part: you only need three simple ingredients to create this masterpiece. Let’s break them down, because even in simplicity, there’s room for a little chef’s insight!
- 1 box (0.3 oz) Sugar-Free Jello, any flavor: This is our flavor powerhouse! I’m a huge fan of strawberry, raspberry, or lime for a bright, fruity kick. The sugar-free varieties use sweeteners like aspartame or stevia, which work perfectly here. Chef’s Insight: The flavor you choose will define the character of your custard cup. Go wild! Cherry makes a stunning dark pink dessert, while orange feels like a creamy dreamsicle.
- 1 cup Boiling Water: Non-negotiable for dissolving the Jello crystals completely. We need that hot water to work its magic and ensure our final texture is silky smooth, not grainy. Pro Tip: Just off the boil is perfect. No need to break out the thermometer, but make sure it’s truly bubbling.
- 1 cup Heavy Whipping Cream: This is the star of the show, the simple swap that changes everything! Instead of using cold water for the second liquid, we’re using rich, high-fat heavy cream. This is what transforms the wobbly gelatin into a dense, custard-like, and luxuriously smooth treat. Substitution Tip: For a dairy-free version, a full-fat, well-shaken canned coconut milk is my top choice. It adds a subtle coconut flavor that works beautifully with citrus or berry Jello. Avoid light coconut milk, as it won’t provide the same richness.
Let’s Make Some Magic: Your Step-by-Step Guide
Ready to see how five minutes of effort turns into a dessert you’ll be proud of? Let’s get mixing! I’ll walk you through each step with my favorite little hacks to ensure perfection.
- Dissolve the Jello Completely. Grab a medium-sized heatproof bowl and pour in your boiling water. Now, slowly sprinkle the entire packet of sugar-free Jello powder over the water while whisking continuously. Keep whisking for a solid two minutes. I know it seems like a long time, but this is the secret to a super smooth base! You shouldn’t see any tiny crystals lingering on your whisk or the sides of the bowl. Little Chef Hack: I like to use a bowl with a spout (like my trusty glass measuring cup) for this step. It makes pouring in the next step a total breeze and minimizes mess!
- The Grand Cream Addition. Now, slowly pour in that glorious cup of heavy whipping cream. Continue to whisk as you pour until everything is beautifully and uniformly combined. The mixture will change color, becoming a shade or two lighter and more opaque—that’s exactly what you want to see! It should look like a creamy, dreamy fruit milkshake. Watch Out For This: Don’t whisk too vigorously here; we’re not trying to whip the cream, just incorporate it. A gentle, steady stir is all you need.
- Pour & Chill to Perfection. This is where you get to be creative! You can pour the mixture into one larger serving dish, but I absolutely love portioning it out into individual cups or ramekins. It makes mealtime or snack time so easy and feels extra special. Divide the mixture evenly among 4-6 small cups or jars. Gently tap them on the counter to release any air bubbles. Now, cover them with plastic wrap or lids and carefully place them in the fridge. Let them chill for at least 2-4 hours, or until they are completely set. Pro Tip: For the ultimate set, I like to make these the night before I plan to serve them. Overnight chilling makes them firm, cool, and incredibly satisfying.
How to Serve Your Creamy Masterpiece
Presentation is part of the fun! When these beauties are set, it’s time to shine. I love serving them straight in their little jars or ramekins—it’s charming and effortless. For a fancy touch, right before serving, top them with a dollop of freshly whipped cream, a few fresh berries that match your Jello flavor, or a delicate sprinkle of citrus zest. A tiny, fresh mint leaf also adds a gorgeous pop of color and freshness. They’re perfect as a light dessert after dinner, a make-ahead snack for the week, or even as part of a brunch spread. They look like you spent hours, but we’ll keep our little secret!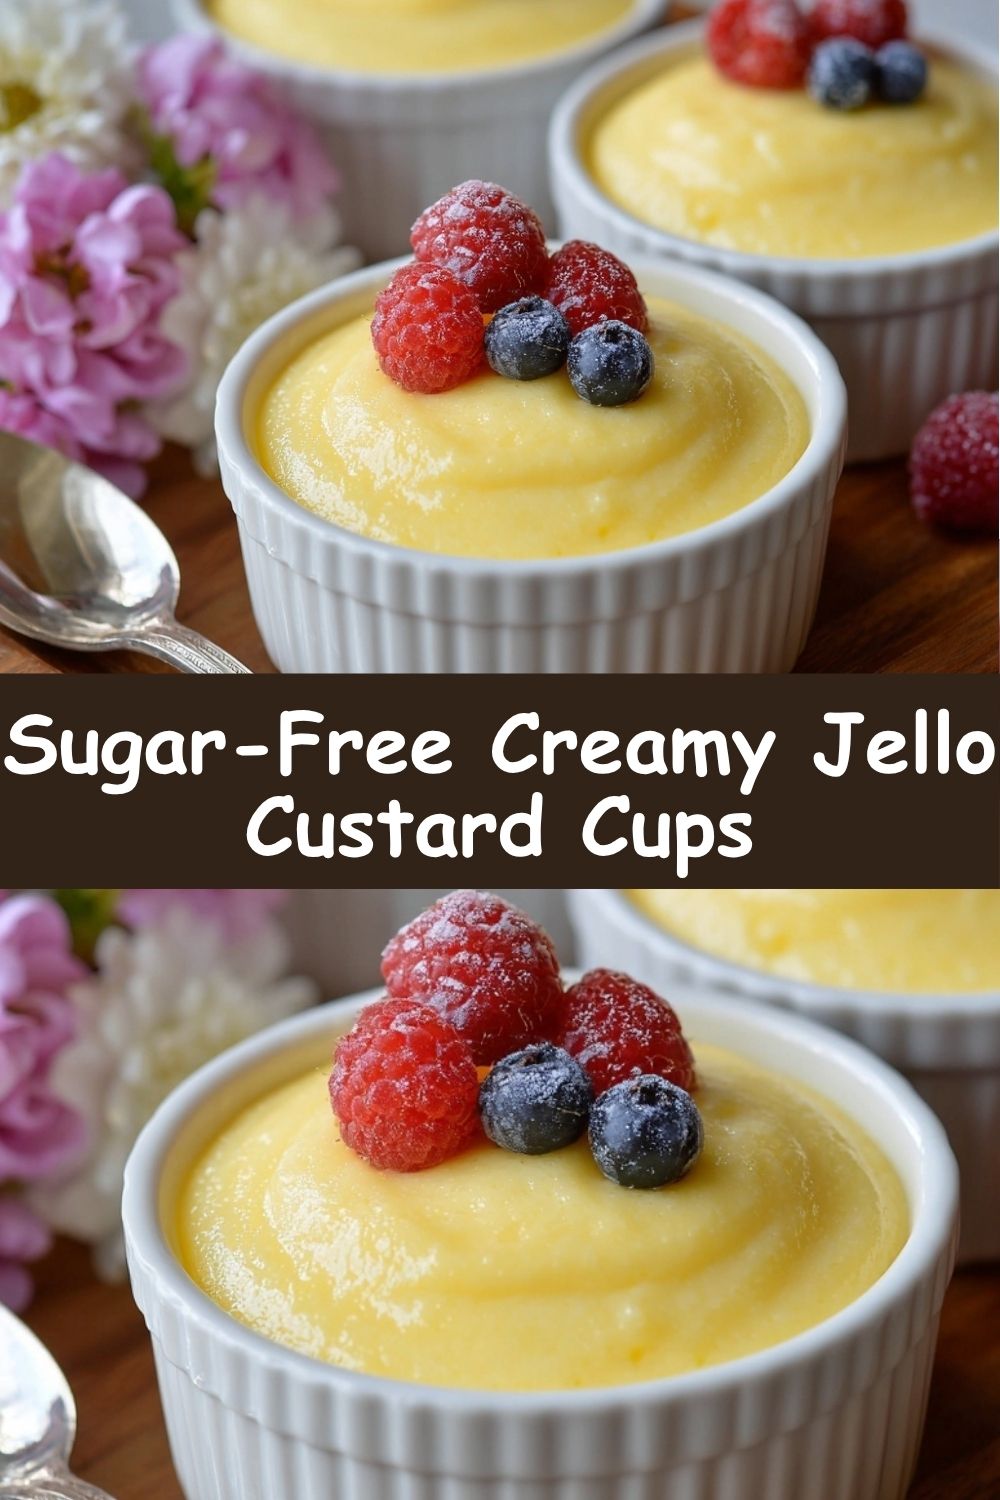
Play With Your Food: 5 Fun Twists to Try
The basic recipe is a dream, but the real fun begins when you start playing. Here are a few of my favorite ways to mix it up:
- Lemon-Vanilla Bliss: Use sugar-free lemon Jello. Add ½ teaspoon of real vanilla extract and the zest of one small lemon when you add the cream. It’s bright, sunny, and tastes like a creamy lemon bar!
- Toasted Coconut Delight: Use sugar-free coconut cream Jello (if you can find it) or vanilla. Use the canned coconut milk substitution. After pouring into cups, top with a sprinkle of unsweetened toasted coconut flakes before chilling.
- Chocolate Orange Indulgence: Use sugar-free chocolate Jello. Add the zest of half an orange and a tiny pinch of cinnamon when whisking. It’s a sophisticated, grown-up flavor combo.
- Berry Cheesecake Swirl: Before chilling, drop small spoonfuls of softened, sweetened cream cheese into the cups and use a toothpick to gently swirl it through the creamy Jello mixture.
- Layered Parfait: Make a batch and let it set. Then, layer it in a glass with fresh berries and a spoonful of Greek yogurt for a stunning and protein-packed parfait.
Clara’s Chef Notes & Kitchen Confessions
This recipe has become my go-to for so many occasions. I once brought a big tray of these in assorted colors to a potluck, and everyone assumed I’d picked them up from some fancy patisserie. I just smiled and said, “It’s a family recipe,” which isn’t entirely a lie! Over time, I’ve learned that the quality of your cream really does make a difference. Splurging on a good, high-quality organic heavy cream gives it an even richer, cleaner flavor.
One of my favorite kitchen fails-turned-wins was the time I accidentally grabbed the vanilla extract instead of the almond extract for a cherry batch. I was so bummed, but it turned out to be the most classic, delicious flavor. It reminded me that sometimes the best recipes are born from happy little accidents. This recipe is incredibly forgiving, so don’t be afraid to make it your own!
Your Questions, Answered!
I’ve made this recipe more times than I can count, and I’ve heard all your brilliant questions. Here are the answers to the most common ones.
Q: My custard cups are a bit watery or separated. What happened?
A: This usually happens for one of two reasons! First, the Jello might not have been fully dissolved in the boiling water. Make sure you whisk for the full two minutes. Second, if the mixture was whisked too vigorously when the cream was added, it can sometimes cause a slight separation. A gentle stir is key. Don’t worry, it’s still perfectly safe to eat and will taste great!
Q: Can I use a plant-based milk instead of heavy cream?
A: I don’t recommend using thin plant-based milks like almond or oat milk. They don’t have enough fat to create that custardy texture. Your best bet for a non-dairy version is, as mentioned, full-fat canned coconut milk. Shake the can well before using! It provides the necessary fat and creaminess.
Q: How long do these last in the fridge?
A> They keep beautifully! Stored in an airtight container, they’ll be perfect for 4-5 days. This is why I love them for meal prep—you can have a delicious, healthy dessert ready and waiting for you all week long.
Q: Can I make this with regular Jello if I’m not avoiding sugar?
A: Absolutely! The method works exactly the same. Just swap the sugar-free Jello for a regular box. The final dessert will be sweeter and contain sugar, but it will be just as creamy and delightful.
Quick Nutritional Breakdown
Please note: This is an estimate and can vary based on the specific brands of ingredients you use.
Per Serving (based on 4 servings): Calories: 120 | Fat: 11g | Carbohydrates: 1g | Sugar: 0g | Protein: 1g