
The Day Leftover Rice Became My Secret Dessert Weapon
Hey there, fellow flavor adventurers! Clara here, and I’ve got a confession: I used to hate wasting food. Like, staring guiltily at that lone scoop of leftover rice in the fridge kind of hate. But what if I told you that very scoop could transform into a dessert so luxuriously silky, so deeply chocolatey, it’ll make you forget it’s made from… rice? Enter my Rice Chocolate Mousse – the plant-based magic trick that’ll have you doing a happy dance in your kitchen slippers.
Picture this: velvety dark chocolate, cloud-like texture, zero dairy, and a secret ingredient that’s probably sitting in your fridge right now. This isn’t just “good for a healthy dessert” – it’s straight-up spoon-licking, eye-rolling indulgence. Whether you’re vegan, lactose-intolerant, or just a curious soul (hello, my kindred spirits!), this mousse is your ticket to guilt-free bliss. Ready to turn “meh” leftovers into “MORE, PLEASE”? Let’s dive in!
That One Time I Blended Rice and Changed My Life
So, rewind to my early blogging days. I’d just moved into a tiny apartment with a kitchen the size of a tea towel rack. One rainy Tuesday, I was determined to veganize a classic chocolate mousse. After my third batch of cashew cream curdled (RIP, expensive nuts), I was staring at a sad container of leftover jasmine rice. In a “why not?” moment fueled by desperation and dark chocolate, I tossed it in the blender with hot water. The result? A shockingly smooth, creamy base that made me yell, “NO WAY!” loud enough to startle my cat.
That accidental experiment became my kitchen eureka moment. Now, whenever I see leftover rice, I don’t see yesterday’s stir-fry side – I see tomorrow’s decadent dessert. It’s proof that the most extraordinary things often start with humble, unexpected beginnings. (And yes, my cat still side-eyes the blender.)
Print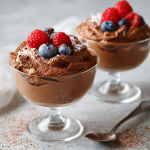
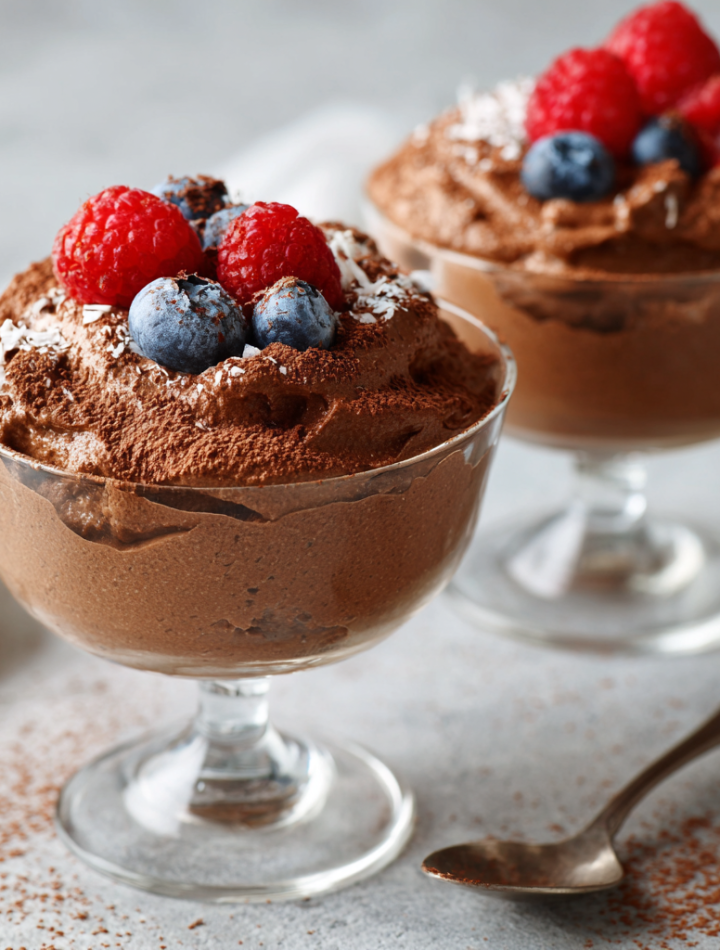
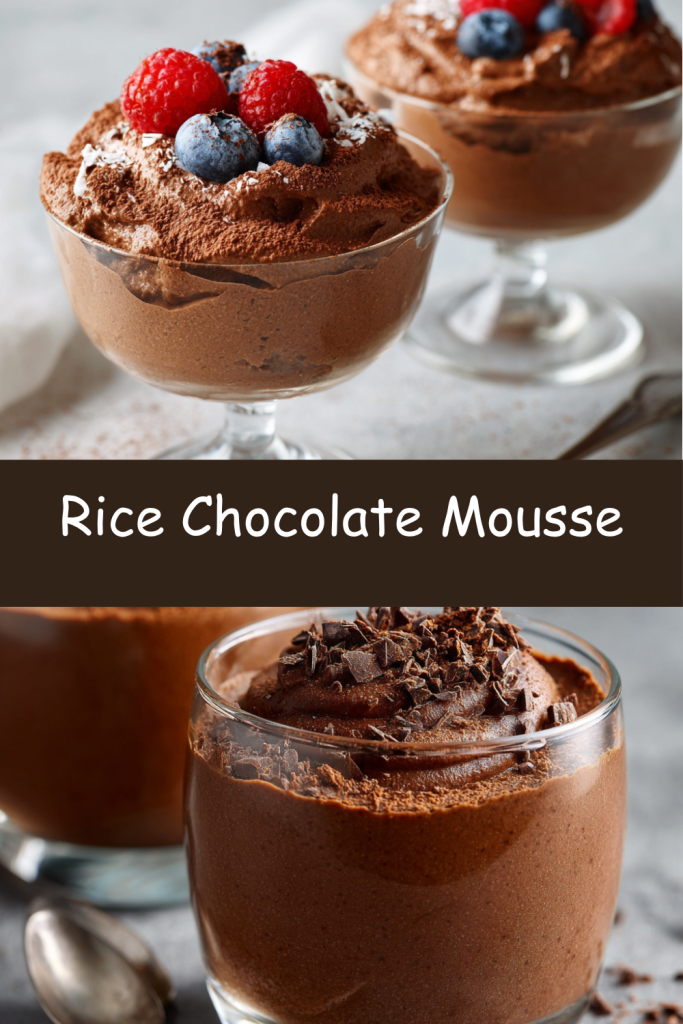
Rice Chocolate Mousse
- Total Time: 10 minutes
- Yield: serves 4
Description
A surprisingly rich and creamy dessert made with simple, plant-based ingredients—this rice chocolate mousse turns leftover rice into a silky, chocolatey dream. It’s dairy-free, easy to whip up, and tastes like pure indulgence with a clever twist.
Ingredients
1½ cups vegan dark chocolate, melted
1 tsp vanilla extract
1 cup leftover cooked rice (preferably no more than 1 day old)
½ cup hot water
Cocoa powder, for dusting
Instructions
Blend Base: In a blender or food processor, combine cooked rice, hot water, and vanilla extract. Blend until completely smooth and creamy.
Add Chocolate: Pour in melted chocolate and blend again until the mixture is thick, velvety, and fully combined.
Chill: Spoon into serving glasses or bowls and refrigerate for at least 1 hour to set.
Serve: Dust with cocoa powder just before serving. Add shaved chocolate or berries if desired.
- Prep Time: 10 min
- Category: Dessert
Nutrition
- Calories: ~250–300
- Fat: 20g
- Carbohydrates: 20g
- Protein: 3g
Your Chocolate Alchemy Toolkit
Gather these simple stars:
- 1½ cups vegan dark chocolate (chopped or chips): Quality matters! Go for 70%+ cacao – it gives that deep, grown-up chocolate vibe. (Chef’s hack: Trader Joe’s pound-plus bar is my wallet’s BFF.) No vegan chocolate? Semi-sweet works if dairy-free isn’t a must, but check labels!
- 1 tsp vanilla extract: The warm hug that amplifies chocolate’s richness. Pure extract > imitation. Feeling fancy? Swap in ½ tsp almond extract for a marzipan twist!
- 1 cup leftover cooked rice (preferably 1 day old): ANY rice works! White jasmine? Perfect. Brown rice? Nutty goodness. Sushi rice? Extra creamy. Avoid anything overly seasoned or greasy. Stale-ish rice blends smoother than fresh!
- ½ cup hot water: Just off the boil, please! It’s the magic wand that transforms rice into silk. Coffee lovers, swap water for hot espresso – it’s a game-changer.
- Cocoa powder (for dusting): The elegant finish. Dutch-processed is my fave for its smooth, less acidic kick.
Let’s Make Magic: Creamy Dream in 3 Steps
Step 1: Blend That Rice Into Oblivion! (2 mins)
Dump your rice, hot water, and vanilla into the blender. SECRET WEAPON ALERT: Blend for a full 1-2 minutes until it’s smoother than a jazz playlist. Scrape down the sides halfway through. If it looks gritty, blend longer! You want it pourable but thick, like heavy cream. (No blender? A food processor works, but may need an extra 30 secs!)
Step 2: Chocolate Fusion Station! (3 mins)
Melt your chocolate gently (microwave in 20-sec bursts or double boiler). Pour it into the blender while it’s still warm. Blend again on medium until it’s a unified, velvety dark pool. TIP: If your blender struggles, add 1 tbsp hot water. Taste! Want more vanilla? Now’s the time.
Step 3: Chill Out & Transform (1 hour + patience)
Pour the mousse into glasses or ramekins. DO NOT SKIP THIS: Tap them gently on the counter to release air bubbles. Pop them in the fridge uncovered (prevents condensation) for at least 1 hour. Pro-level patience? Overnight chilling makes it even richer.
Dress to Impress (Zero Effort Required)
Right before serving, dust the tops with cocoa powder like you’re Jackson Pollock making art. For extra ~pizzazz~, add fresh raspberries (their tartness cuts the richness), shaved chocolate curls, or a tiny sprinkle of flaky sea salt. Serve chilled with espresso spoons – because digging into mini glasses feels fancier! Perfect for dinner parties or solo Netflix binges (no judgment here).
Shake It Up! 5 Delicious Twists
1. Mocha Madness: Swap hot water for hot coffee or espresso. Hello, depth!
2. Peanut Butter Cup: Blend in 2 tbsp peanut butter with the chocolate. Top with crushed peanuts.
3. Orange Zest Fiesta: Add 1 tbsp orange zest with the vanilla. Dark choc + orange = timeless romance.
4. Minty Fresh: Substitute ¼ tsp peppermint extract for vanilla. Top with cacao nibs for crunch.
5. Protein Boost: Blend in 1 scoop chocolate plant protein powder (adds 5g protein/serving).
Clara’s Kitchen Confessions
This recipe is my rebellious child – it defies every “healthy dessert” stereotype. I’ve served it to die-hard dairy fans who demanded the recipe, then gasped when I revealed the secret. Over the years, I’ve learned: older rice = silkier mousse (fresh rice can be gluey), and blending patience is non-negotiable. Once, I tried rushing it and ended up with “chocolate rice pudding” (still tasty, but not mousse!). Now, I embrace the blender zen. It’s also evolved into my go-to dinner party rescue when I forget dessert – 10 minutes prep, 1 hour chill, and I look like a kitchen wizard.
Your Questions, Answered!
Q: My mousse turned out grainy! What went wrong?
A: Most likely, the rice wasn’t blended enough. Next time, blend the rice/water mix for a solid 2 minutes until completely smooth before adding chocolate. Also, ensure your rice wasn’t cooked in broth or heavily salted.
Q: Can I use something besides rice?
A: Rice is key for the starch that creates that creamy structure. Cauliflower or avocado won’t work here! For grain-free, try my cashew-based mousse instead.
Q: How long does it keep in the fridge?
A: Covered tightly, it’s happy for 3-4 days. The texture actually gets denser and fudgier – bonus!
Q: Can I freeze this mousse?
A: Absolutely! Freeze in airtight containers for up to 1 month. Thaw overnight in the fridge. It becomes almost like chocolate ice cream – delicious!
Nutritional Sunshine (Per Serving)
Serves: 4 | Prep: 10 mins | Chill: 1 hour | Total: ~1 hr 10 mins
Calories: ~275 | Fat: 20g (sat: 12g) | Carbs: 20g (fiber: 3g) | Protein: 3g
Note: Stats vary based on chocolate used. Using 70% dark chocolate and standard white rice.
Who knew that leftover rice could be the secret ingredient to a dessert so rich and indulgent? This vegan Rice Chocolate Mousse is a game-changer, turning humble pantry staples into a luxurious, guilt-free treat. Whether you’re looking to impress at a dinner party or simply satisfy a late-night craving, this dessert is sure to steal the show. With endless flavor variations and a silky texture, it’s more than just a healthy dessert—it’s a true kitchen magic trick. Enjoy it chilled, and let the chocolatey bliss take you to new heights!