
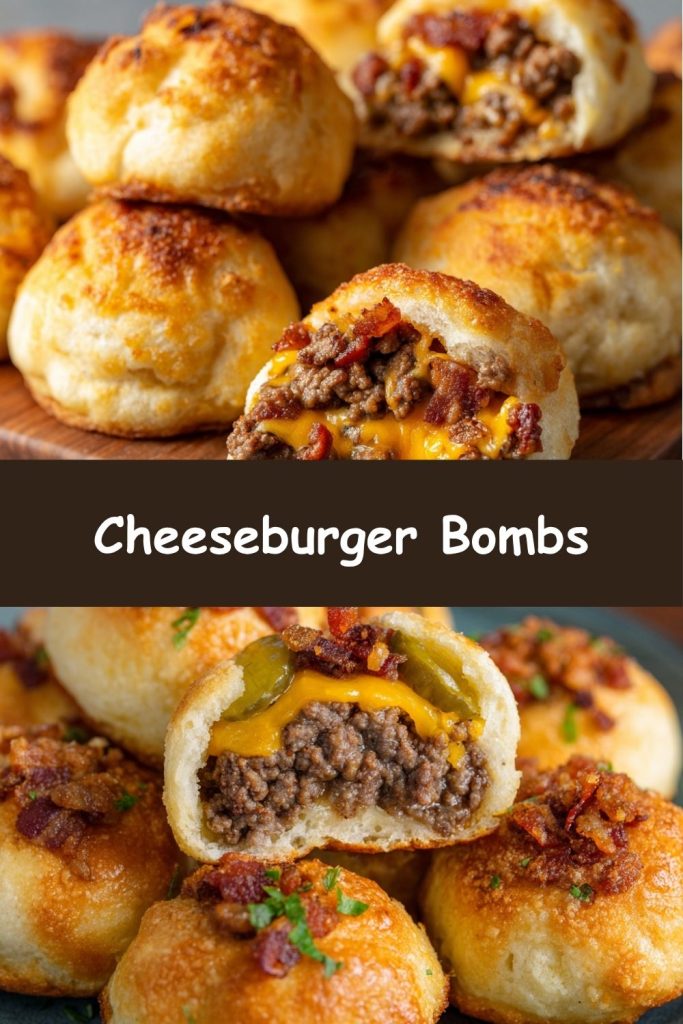
Cheeseburger Bombs: Your New Favorite Bite of Joy!
Hey foodie friend! Clara here, your partner-in-crime for turning kitchen adventures into pure deliciousness. Ever have one of those days where you’re craving a juicy cheeseburger but also want something handheld, playful, and maybe just a *little* extra? Enter: Cheeseburger Bombs! Imagine everything you adore about a classic burger—savory beef, crispy bacon, melty cheese, and that tangy pickle punch—all wrapped up in a warm, golden, buttery biscuit hug. These little flavor explosions are my go-to for game day madness, lunchbox surprises that make kids (and coworkers!) do happy dances, or those “I deserve something awesome” weeknight dinners. They’re ridiculously fun to make, impossible to resist fresh from the oven, and prove that feel-good food doesn’t mean sacrificing an ounce of flavor. Let’s ditch the ordinary and cook up some edible joy together—your taste buds are gonna throw a party!
Burgers, Biscuits & A Touch of Kitchen Chaos
Picture this: It was my nephew’s 10th birthday party, and I’d promised him “the coolest snack ever.” I envisioned elegant sliders… but my fridge held only canned biscuits and ground beef. Cue the kitchen panic! In a burst of “what if?” energy, I started stuffing biscuit dough with burger fillings, crossing my fingers tighter than I sealed those dough balls. When they emerged from the oven—golden, puffed, smelling like a dream—the kids descended like seagulls on fries. The birthday boy took one bite, cheeseburger goodness oozing out, and declared, “Aunt Clara, these are BOMBS!” (in the best way possible, obviously!). That messy, improvised moment sparked a family legend and became a staple on my blog. It reminded me that the best recipes often start with a little chaos and a whole lot of heart (and cheese… always cheese).
Print
Cheeseburger Bombs
- Total Time: 30 mins
- Yield: ~16 bombs
Description
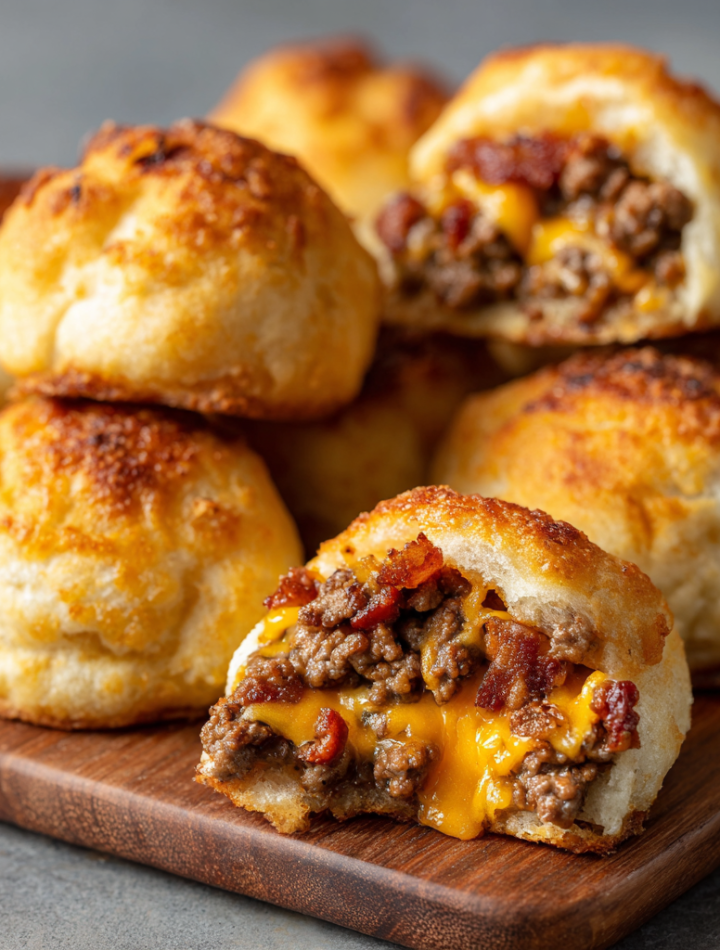
These golden, bite-sized cheeseburger bombs are filled with seasoned beef, gooey cheese, and wrapped in buttery garlic dough—then brushed with parmesan and parsley. They’re the perfect appetizer, game-day snack, or party favorite that disappears fast!
Ingredients
1 lb ground beef
1 cup shredded cheddar cheese
½ cup cream cheese, softened
1 can refrigerated biscuit dough (or pizza dough)
2 tbsp butter, melted
1 tsp garlic powder
2 tbsp grated Parmesan
1 tbsp chopped fresh parsley
Instructions
Cook the beef: In a skillet, brown the ground beef. Drain excess fat and stir in cream cheese until melted and creamy. Let cool slightly.
Add cheddar: Mix shredded cheddar into the beef mixture.
Form bombs: Flatten each biscuit or dough piece. Scoop a spoonful of filling into the center, fold dough over, and pinch to seal into a ball.
Bake: Place seam-side down on a lined baking sheet. Bake at 375°F (190°C) for 12–15 mins, or until golden.
Brush & serve: Mix melted butter with garlic powder and brush over warm bombs. Sprinkle with Parmesan and parsley.
- Prep Time: 15 mins
- Cook Time: 15 mins
- Category: Snack
Nutrition
- Calories: ~180 per bomb
- Fat: 12g
- Carbohydrates: 12g
- Protein: 8g
Your Cheeseburger Bomb Toolkit
Gather these simple stars! (Makes 8 glorious bombs):
- 1 pound ground beef (80/20 blend is perfect!): The hearty soul! Leaner blends work but 80/20 keeps it juicy. Chef’s Swap: Ground turkey or chicken for a lighter twist, or plant-based crumbles for a veggie win!
- 8 slices bacon, cooked & crumbled: Smoky, crispy magic! Chef’s Hack: Bake your bacon on a sheet pan at 400°F for 15-20 mins – way less mess!
- 1 cup shredded cheese (sharp cheddar or a cheddar/jack blend): The gooey glue! Pre-shredded is fine, but block cheese you shred yourself melts dreamier. Flavor Adventure: Try pepper jack for a kick or gouda for smokiness!
- 8 pickle coins (dill chips!): The essential tangy crunch! Don’t skip these – they cut through the richness perfectly.
- 1 can refrigerated biscuits (8 count, regular size): The cozy blanket! These are our easy-button dough. Pro Insight: Let them sit at room temp for 5-10 mins – they’re easier to stretch!
- 2 tbsp melted butter: Golden glow master! Brushing this on = next-level flavor and color.
- Garlic powder, salt & pepper to taste: Flavor superheroes! I use about 1 tsp garlic powder, 3/4 tsp salt, and 1/2 tsp pepper in the beef. Taste as you go!
Let’s Build Some Bomb-tastic Bites!
Ready for the fun part? Follow these steps for guaranteed golden, cheesy success:
- Fire Up the Oven & Skillet: Preheat your oven to 375°F (190°C). Grab a skillet and get it heating over medium-high heat. Chef’s Pep Talk: “Preheating is non-negotiable, friends! It gives our bombs the perfect puff and crisp start.”
- Brown That Beautiful Beef: Crumble the ground beef into the hot skillet. Cook it up, breaking it into small bits, until no pink remains. Drain off any excess grease – we want flavor, not a grease pool! Now, sprinkle in your garlic powder, salt, and pepper. Stir like you mean it! Chef’s Hack: “Drain the beef efficiently by spooning it onto a plate lined with paper towels. Easy cleanup!”
- Prep the Doughy Stage: Pop open that biscuit can (ahh, that satisfying *thwump*!). Separate the biscuits. On a lightly floured surface (or right on the counter!), gently flatten and stretch each biscuit into a circle about 4-5 inches wide. Chef’s Tip: “Use your fingertips, not a rolling pin! Biscuit dough is tender – we want to coax it, not crush it.”
- Stuff It Like a Pro: Time for assembly! Spoon a heaping tablespoon of your seasoned beef onto the center of each biscuit circle. Top with a generous pinch of shredded cheese, a sprinkle of those glorious bacon crumbles, and crown it all with one tangy pickle coin. Chef’s Secret: “Slightly mound the filling but keep a good dough border – this makes sealing MUCH easier!”
- Seal the Flavor Deal: This is crucial! Gather the edges of the biscuit dough up and over the filling. Pinch, pinch, pinch those edges together firmly to create a tight seal, forming a little dough ball. No filling left behind! Chef’s Mantra: “Pinch with purpose! A good seal keeps the cheesy lava inside where it belongs.” Place each bomb seam-side down on an ungreased baking sheet. Give them a little space to puff – they’ll be BFFs soon enough!
- Butter Up for Brilliance: Brush the tops generously with that melted butter. Want extra oomph? Sprinkle a tiny extra pinch of garlic powder over the top. Chef’s Whisper: “That butter wash isn’t just vanity – it creates an irresistible golden, slightly crispy crust!”
- Bake to Golden Perfection: Slide that baking sheet into your preheated oven. Bake for 12-15 minutes. You’re looking for gorgeous, deep golden brown tops and maybe even a hint of cheesy goodness bubbling out the sides. Chef’s Watch-Out: “Ovens vary! Start checking at 12 minutes. They’re done when they look like edible sunshine.”
- Resist… Then Devour! (Mostly): Let the bombs cool for just 5 minutes on the baking sheet. They’re molten lava inside! Chef’s Confession: “I *always* burn my tongue testing one too soon. Learn from my mistakes! That 5-minute wait is torture but worth it.”
Showtime: Serving Your Masterpieces!
Presentation is part of the fun! Pile these golden beauties high on a rustic wooden board or a fun, colorful platter. They scream “share me!” For the full burger experience, serve them with small bowls of ketchup, mustard, and maybe my fave quick burger sauce: mix equal parts mayo and ketchup with a dash of garlic powder and pickle juice! They’re fantastic alongside a simple green salad, crispy sweet potato fries, or just solo as the ultimate grab-and-go delight. See that cheese pull? That’s your moment of glory – capture it!
Mix It Up: Your Bomb, Your Rules!
Get creative with these tasty twists:
- Pizza Bomb Blast: Swap the beef for cooked Italian sausage, use mozzarella cheese, and add a teaspoon of marinara & a pepperoni slice inside! Skip the pickle.
- Breakfast Bomb: Fill with cooked scrambled eggs, crumbled breakfast sausage, and shredded cheddar. Add a tiny dot of maple syrup inside before sealing!
- BBQ Ranch Crunch: Toss the cooked beef with 2 tbsp BBQ sauce. Use colby jack cheese and add a few crispy fried onions inside. Serve with ranch for dipping!
- Veggie Lover’s Dream: Use seasoned black beans or lentils instead of beef. Add sautéed mushrooms, onions, and bell peppers. Pepper jack cheese kicks it up!
- Everything Bagel Swagger: Before baking, brush with butter and sprinkle heavily with Everything Bagel Seasoning. Instant flavor upgrade!
Clara’s Corner: Bombs Away Wisdom
These little guys have come a long way since that chaotic birthday party! I tried using fancy homemade dough once – disaster. The canned biscuits are the MVP for ease and that perfect fluffy-yet-sturdy texture. My biggest lesson? DON’T OVERSTUFF. I learned the hard way during a live demo (RIP my clean oven). A rogue, over-ambitious bomb erupted like cheesy Vesuvius! Laughter ensued, and it still tasted amazing, but lesson learned: show restraint with the filling. Over time, I’ve found adding the pickle coin *on top* of the cheese helps create a moisture barrier, making sealing easier. These bombs are forgiving, though. Even if they leak a little cheesy goodness, it just becomes “flavor caramelization” – that’s my story, and I’m sticking to it! Making them with friends or kiddos is half the joy. Turn on some tunes, embrace the mess, and make food memories.
Cheeseburger Bomb SOS: Your Questions Answered!
Let’s tackle those kitchen hiccups before they happen:
- Q: Help! My bombs burst open in the oven! What did I do wrong?
A: The #1 culprit is usually overfilling (been there!) or not sealing tightly enough. Ensure you have a good 1/2-inch border of dough when you add filling, and pinch that seam like your delicious dinner depends on it! Also, make sure your filling isn’t scalding hot when you add it to the dough – warm is fine, hot can make the dough sticky and harder to seal. - Q: Can I make these ahead of time? Game day is chaos!
A: Absolutely! You have two great options: 1) Prep the filling: Cook the beef/bacon up to 2 days ahead, store covered in the fridge. Assemble the bombs cold – just add 1-2 mins to the bake time. 2) Assemble & Freeze (Raw): Build the bombs, place them seam-side down on a baking sheet, freeze solid (1-2 hours), then transfer to a freezer bag. Bake straight from frozen, adding 5-8 minutes to the bake time. Watch for that golden brown color! - Q: My cheese didn’t melt very much inside. How do I get that ooey-gooey pull?
A: A couple of tricks: 1) Shred your own cheese! Pre-shredded cheese has anti-caking agents that hinder melting. 2) Place the cheese strategically: Put some cheese *under* the hot beef to help it start melting instantly, and some on top. 3) Don’t overbake: Pull them out as soon as they’re golden brown. The residual heat keeps melting the cheese inside. - Q: Can I use something other than canned biscuits?
A: While canned biscuits are ideal for convenience and texture, you can try: Homemade Drop Biscuit Dough (make it slightly stiffer), or Refrigerated Pizza Dough (roll it thin and cut circles). Crescent roll dough works but is thinner and richer – watch baking time closely! Avoid puff pastry – it’s too delicate.
Nourishment Notes (Because Balance is Cool!)
While these are pure comfort food joy, here’s a general idea per bomb (approximate, based on specific ingredients used):
- Calories: ~310
- Protein: ~13g (Fuel for fun!)
- Carbohydrates: ~23g (Hello, fluffy biscuit!)
- Fat: ~19g (Where all that flavor lives!)
Remember: These are estimates. Using leaner beef, turkey bacon, or reduced-fat cheese will alter the numbers. Enjoy them mindfully as part of your delicious, balanced life!
Cheeseburger Bombs prove that comfort food can be playful, practical, and downright magical. From that first buttery bite to the cheesy, pickle-kissed center, they bring joy to every table they hit—whether it’s a birthday bash, a casual dinner, or just a craving-fueled kitchen adventure. These golden bites are easy to make, endlessly adaptable, and always a crowd-pleaser. So go ahead—embrace the cheesy chaos, pinch those dough seams tight, and serve up some edible joy. Your inner kid (and actual kids) will thank you.