The Cozy, Chocolatey, Pepperminty Magic We All Deserve This Season
Hey there, my festive friend! Is there anything that quite captures the spirit of the holidays like the duo of rich, dark chocolate and cool, refreshing peppermint? It’s the flavor of twinkling lights, of cozy sweaters, of gathering with loved ones and feeling that special, warm glow. And today, we’re bottling up all that magic into one incredible, show-stopping loaf: my Chocolate Peppermint Bread.
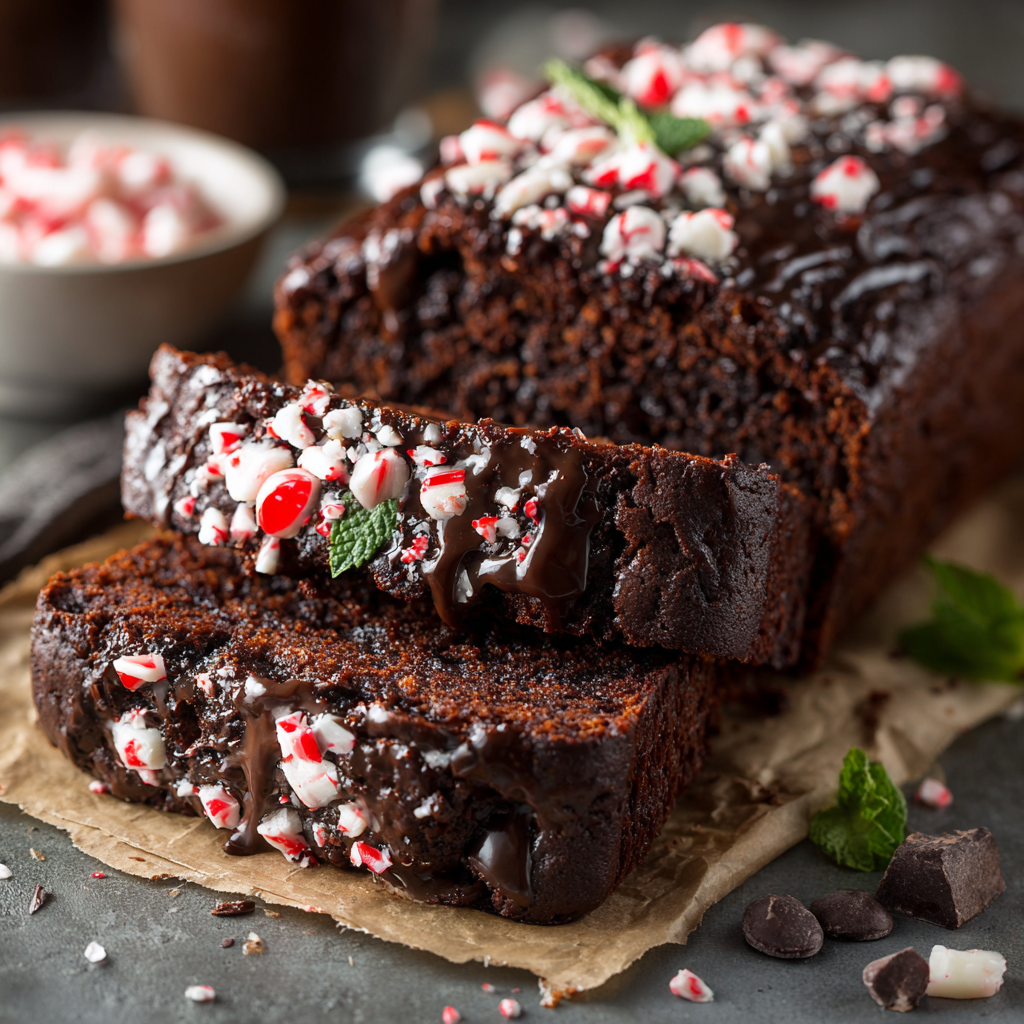
This isn’t just any quick bread. Oh no. This is a rich, fudgy, deeply chocolatey masterpiece that’s studded with melty dark chocolate chips and infused with just the right amount of peppermint zing. It’s then crowned with a simple, yet stunning, glaze and a festive avalanche of crushed candy canes. The best part? This recipe makes two gorgeous loaves. One for your kitchen table to enjoy with a hot cup of coffee, and one to gift to a neighbor, friend, or host—spreading that holiday cheer far and wide.
I promise you, this recipe is designed for joy, not stress. We’re using simple ingredients and my favorite chef hacks to create something that looks and tastes like it came from a fancy bakery. So, tie on your favorite apron, put on some holiday tunes, and let’s bake something that will make your entire house smell like a winter wonderland.
A Sweet Slice of Memory
This recipe always takes me right back to my grandma’s kitchen, with its checkered curtains and the constant, gentle hum of the oven. Every December, she’d embark on her “Great Holiday Bake Off,” filling tins with cookies, bars, and breads. But her chocolate peppermint loaf was the crown jewel, the one she’d wrap in cellophane and tie with a big red ribbon for special guests.
I remember standing on a wobbly stool next to her, my job was to unwrap the candy canes and carefully place them in a zip-top bag. She’d hand me a rolling pin and say, “Alright, Clara, give ’em a good whack!” I’d smash them with more enthusiasm than finesse, sending tiny red and white shards everywhere. She’d just laugh, her eyes twinkling, and say, “A little extra glitter never hurt anyone.” That feeling of being her little sous chef, surrounded by the smells of chocolate and peppermint, is pure holiday happiness for me. This recipe is my homage to her—a little more updated, but with all the same heart.
Print
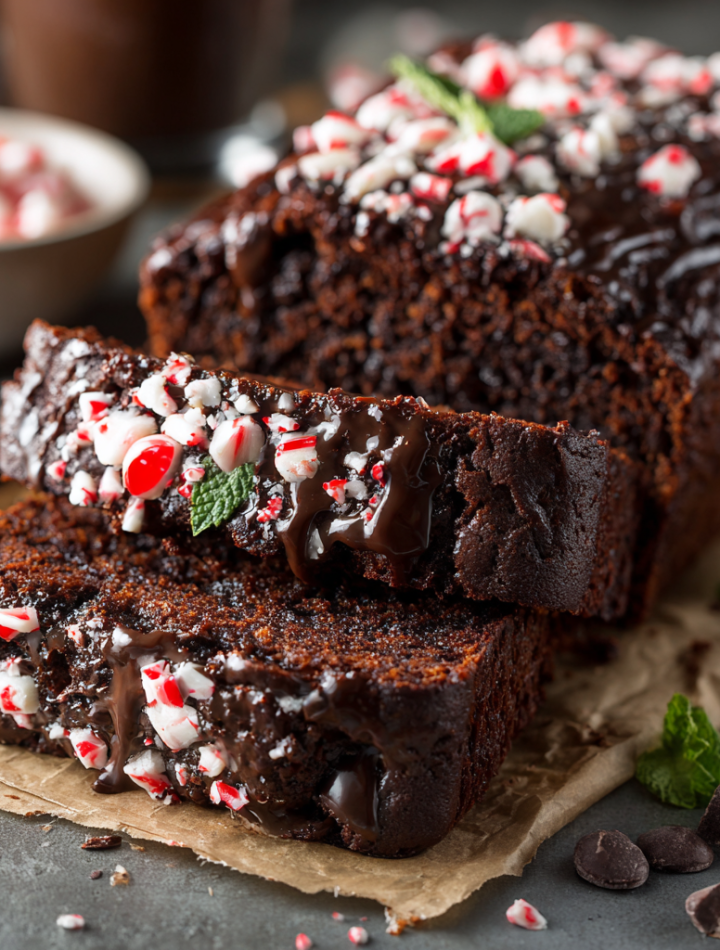
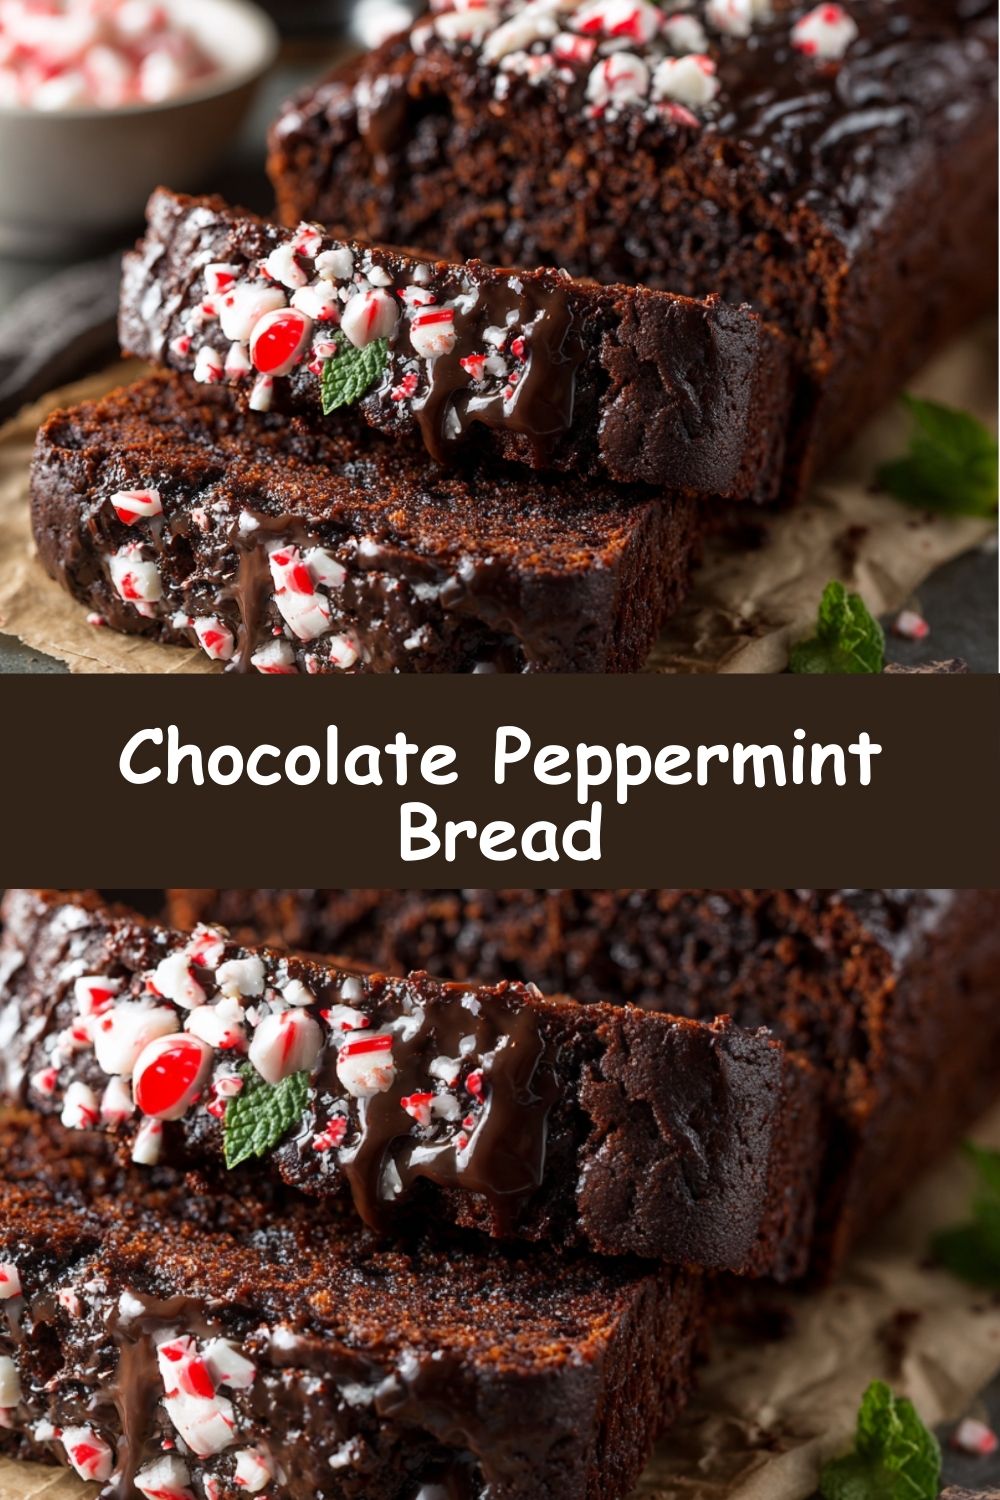
Chocolate Peppermint Bread
- Total Time: 1h
- Yield: 16 1x
Description
This rich and fudgy peppermint loaf is pure holiday magic! With cocoa, dark chocolate chips, peppermint, and a crushed candy cane glaze, it’s perfect for cozy gatherings or festive gifting. Bonus: this recipe makes 2 loaves—because one is never enough!
Ingredients
Bread:
2 sticks butter, softened
⅔ cup white sugar
1 ⅓ cups brown sugar
6 eggs
½ tsp peppermint extract
2 ⅔ cups flour
1 ⅓ cups cocoa powder
4 tsp baking powder
2 tsp baking soda
2 tsp espresso powder
1 ½ cups milk
1 cup dark chocolate chips
¼ tsp salt
Frosting:
4 cups powdered sugar
8 tbsp milk
½ tsp peppermint extract
2 tbsp Greek yogurt
6 tbsp crushed candy canes
Optional Twists:
Add ½ tsp vanilla or swirl in peppermint ganache
Mix in Andes mints or peppermint bark
Instructions
Preheat oven to 350°F. Line two 8×4 pans with parchment.
Cream butter, sugars, then beat in eggs + extracts.
Mix dry ingredients and combine with wet alternately with milk.
Fold in chocolate chips. Pour into pans.
Bake 45–55 mins. Cool completely.
Mix frosting. Drizzle over cooled loaves. Top with crushed candy canes.
- Prep Time: 10 minutes
- Cook Time: 50 min
- Category: Dessert
Nutrition
- Calories: 320
Gathering Your Holiday Baking Squad
Here’s everything you’ll need to create two loaves of pure bliss. I’ve included my favorite notes and substitutions to make this recipe work for you!
- 2 sticks (1 cup) butter, softened – This is the base of our rich, tender crumb. Pro Tip: “Softened” means cool to the touch but your finger can leave a gentle indent. If you forgot to take it out of the fridge, cube it and let it sit for 15-20 minutes! For a dairy-free version, a high-quality plant-based butter works wonderfully.
- ⅔ cup white sugar + 1 ⅓ cups brown sugar – The white sugar gives structure, while the brown sugar brings that gorgeous molasses depth and moisture. Don’t pack the brown sugar too tightly!
- 6 large eggs – They act as a binder and provide lift. Make sure they’re at room temperature for the best emulsion with the butter and sugar.
- ½ tsp peppermint extract – The star of the show! A little goes a long way. Be sure it’s peppermint extract, not mint extract, for that classic candy cane flavor.
- 2 ⅔ cups all-purpose flour – The foundation. For a slightly denser, whole-grain option, you can swap up to 1 cup for whole wheat pastry flour.
- 1 ⅓ cups cocoa powder – Use natural, unsweetened cocoa powder for the best flavor. This is where that deep, fudgy chocolate intensity comes from!
- 4 tsp baking powder + 2 tsp baking soda – Our dynamic leavening duo! They work together to give this dense loaf a beautiful rise. Check the dates on your containers to ensure they’re active.
- 2 tsp espresso powder (optional but amazing) – My secret weapon! It doesn’t make the bread taste like coffee; it just deepens and enhances the chocolate flavor exponentially. Highly recommend!
- ¼ tsp salt – Crucial for balancing all the sweetness and making the flavors pop.
- 1 ½ cups milk – Whole milk will give you the richest result, but any milk you have on hand (dairy or non-dairy like oat or almond) will work perfectly.
- 1 cup dark chocolate chips – Because more chocolate is always the answer. I prefer dark to balance the sweetness, but semi-sweet or milk chocolate would also be delicious.
For the Festive Glaze:
- 4 cups powdered sugar – Sifted if you want an ultra-smooth glaze, but it’s not totally necessary.
- 8 tbsp milk – Start with 6 tablespoons and add more until you reach your desired drizzling consistency.
- ½ tsp peppermint extract – A little more peppermint punch for the top!
- 2 tbsp Greek yogurt (or sour cream) – This is my hack for a glaze with a little tang and body that sets nicely without being rock-hard. You can omit it and use all milk if needed.
- 6 tbsp crushed candy canes – For that iconic holiday crunch and look. About 4-5 standard candy canes will do the trick!
Let’s Bake Some Magic: Step-by-Step
Ready? Let’s do this! Read through all the steps once before you begin—it’s the chef’s secret to a smooth, enjoyable baking experience.
Step 1: Preheat & Prep
Fire up your oven to 350°F (175°C). This is our sweet spot for baking this loaf through without burning the top. Now, take your two 8×4 inch loaf pans and line them with parchment paper. I like to cut a strip that fits the length and hangs over the two long sides—this creates a “sling” that makes removing the baked loaves an absolute breeze! A quick spritz of cooking spray on the exposed ends helps the parchment stick. Chef Hack: No parchment? Just grease and flour the pans thoroughly.
Step 2: Cream the Good Stuff
In a large bowl, use a hand mixer or stand mixer fitted with the paddle attachment to cream together the softened butter, white sugar, and brown sugar. Beat it on medium-high speed for a good 2-3 minutes, until it becomes light, fluffy, and pale in color. This step is key for incorporating air and giving our bread structure. Now, beat in the eggs one at a time, making sure each is fully incorporated before adding the next. Finally, mix in the peppermint extract. Your kitchen should already be smelling amazing.
Step 3: The Dry Team
In a separate, medium-sized bowl, whisk together all your dry ingredients: the flour, cocoa powder, baking powder, baking soda, espresso powder, and salt. Whisking is important here—it ensures the leavening agents and salt are evenly distributed throughout the flour, so you don’t get any bitter pockets in your final bake.
Step 4: The Grand Combine
With your mixer on low speed, begin adding the dry ingredients to the wet butter-sugar-egg mixture. Add about one-third of the dry mix and let it just combine. Then, pour in half of the milk. Repeat: another third of the dry ingredients, the rest of the milk, and finally the last of the dry ingredients. Stop mixing as soon as the last streaks of flour disappear. A few lumps are okay! Chef Hack: Over-mixing is the enemy of a tender quick bread. It develops gluten and can make it tough.
Step 5: The Chocolate Finale
Take a spatula and gently fold in the dark chocolate chips. This is also the time to make sure you’ve scraped the bottom of the bowl to incorporate any hidden pockets of flour.
Step 6: Pan & Bake
Divide the beautiful, thick batter evenly between your two prepared pans. Use your spatula to smooth the tops. Pop them into your preheated oven and bake for 45-55 minutes. You’ll know they’re done when a toothpick inserted into the center comes out with a few moist crumbs attached (not wet batter). The tops will be domed and will have a slight spring back when gently pressed. Chef Hack: Ovens can vary, so start checking at the 45-minute mark!
Step 7: The Test of Patience
Remove the loaves from the oven and let them cool in their pans on a wire rack for at least 20 minutes. Then, using your parchment paper slings, carefully lift them out and let them cool completely on the rack. I know, I know… it’s hard to wait. But glazing a warm loaf will lead to a melty, sad mess. Let’s let them cool completely for the perfect finish.
Step 8: Glaze & Glitter
Once the loaves are completely cool, make your glaze. In a medium bowl, whisk together the powdered sugar, 6 tablespoons of milk, peppermint extract, and Greek yogurt. Whisk until smooth. If it’s too thick to drizzle, add the remaining milk, a teaspoon at a time, until it reaches a lovely, pourable consistency. Drizzle this glorious white glaze generously over the tops of both loaves. Immediately, and I mean immediately, sprinkle the crushed candy canes over the glaze so they stick. Now, step back and admire your handiwork!
How to Serve This Holiday Hero
This bread is a star all on its own! For serving, I love to slice it into thick, generous pieces that show off the fudgy crumb and chocolate chips. It’s perfect with a hot mug of coffee for a festive breakfast, alongside a scoop of vanilla bean ice cream for a decadent dessert, or simply placed on a beautiful platter as the centerpiece of your holiday dessert table. The red and white candy cane pieces against the dark chocolate and white glaze are just so pretty—it’s edible holiday decor!
Mix It Up! Creative Twists
Feel like playing? Here are some delicious ways to make this recipe your own:
- Peppermint Swirl: Before baking, swirl ½ cup of peppermint baking chips or finely chopped peppermint bark through the batter with a knife for a marbled effect.
- Andes Mint Magic: Swap the dark chocolate chips for chopped Andes mints. The green layer inside creates a fun, festive look!
- Vanilla Bean Vibes: Add the seeds from one vanilla bean or 1 tsp of vanilla extract to the batter for an extra layer of warmth.
- Gluten-Free Gift: Use a 1:1 gluten-free all-purpose flour blend in place of regular flour. The result is just as fudgy and delightful.
- Ganache Drizzle: Feeling extra? Instead of the powdered sugar glaze, drizzle the cooled loaves with a simple dark chocolate ganache and then add the candy canes. Wowza.
Clara’s Kitchen Notes
This recipe has been through many iterations in my kitchen! The first time I made it, I was so excited that I glazed the loaves the second they came out of the oven. The glaze melted into a transparent, sticky puddle—it was delicious but… not the winter wonderland look I was going for. Lesson learned: patience is a virtue in baking!
I also started adding the espresso powder after a friend, a professional pastry chef, tasted it and said, “This is great! But you know what would make the chocolate sing?” She was right. It’s now my non-negotiable secret ingredient. And the Greek yogurt in the glaze? That was a happy accident when I was out of cream cheese but wanted a glaze with a little more tang and substance. It worked perfectly and has been a staple ever since. Don’t be afraid to make a recipe your own—that’s where the real magic happens!
Your Questions, Answered!
Q: My bread sunk in the middle! What happened?
A: This usually means it needed just a few more minutes in the oven or your leavening agents (baking powder/soda) might be old. The center might have been ever-so-slightly underbaked, causing it to collapse as it cooled. Next time, test with a toothpick—it should have moist crumbs, not wet batter. Also, check the expiration dates on your baking powder and soda!
Q: Can I freeze this Chocolate Peppermint Bread?
A: Absolutely! It freezes like a dream. Wrap the completely cooled, unglazed loaves tightly in plastic wrap and then in foil. They’ll keep for up to 3 months. Thaw overnight at room temperature, then whip up the fresh glaze and add the candy canes right before serving.
Q: My glaze is too thin/too thick. Help!
A: No worries, glazes are very forgiving! Too thin? Whisk in more powdered sugar, a quarter cup at a time. Too thick? Add more milk, a teaspoon at a time, until it reaches a drizzle-able consistency. You want it to be like a thick syrup.
Q: The candy canes on my glaze melted and got sticky. Why?
A> The glaze might have been too warm when you applied it, or the bread itself might have retained some heat. The sugar in the candy canes dissolves when it touches moisture and heat. Always ensure both the bread and the glaze are at room temperature before assembling. If your kitchen is very warm, you can pop the glazed loaf in the fridge for 10 minutes to help the glaze set quickly around the candy pieces.
Nutritional Information*
*This is an estimate per slice, assuming the recipe yields 16 generous slices total (8 per loaf).
Per Serving: Calories: ~320 | Fat: 12g | Saturated Fat: 7g | Carbohydrates: 52g | Fiber: 2g | Sugar: 38g | Protein: 5g
Well, that’s it, my friend! You are now armed with everything you need to create the most unforgettable Chocolate Peppermint Bread this holiday season. I am so incredibly glad you chose to bake this with me. From my kitchen to yours, happy holidays and happy baking!
With love and a sprinkle of candy cane crumbs,
Clara