
Your New Go-To Cozy Apple Crisp (It’s a Double Batch, Get Excited!)
Hey there, my fellow flavor explorer! Can you smell it? That unmistakable, heart-hugging aroma of cinnamon and baked apples wafting through the house? It’s the official scent of cozy season, and today, we’re making the ultimate vessel for that magic: my Extra-Large, Super-Cozy Apple Crisp.
Now, I’m a firm believer that a dessert shouldn’t just taste good; it should feel good. It should be the kind of thing you can whip up without a fancy degree in pastry arts, the kind of dish you proudly plunk down in the middle of a table full of friends, and the kind of comfort food that leaves you glowing with happiness, not weighed down with sugar. This apple crisp is that dessert. We’re not just making a small pan for a quiet night in (though no judgment if you keep it all for yourself—I’ve been there!). We’re going big—a glorious double batch designed for sharing, for potlucks, for freezing half for a future-you emergency, or for justifying eating it for breakfast three days in a row. We’re adding a few of my secret twists to take it from classic to absolutely legendary. So, grab your favorite mixing bowl and let’s create some kitchen magic that’s 100% worth licking the spoon.
The Apple Doesn’t Fall Far From The Tree
This recipe always takes me right back to my grandma’s kitchen, a place that smelled perpetually of yeast and wisdom. She wasn’t a “fancy” cook, but she was a real one. Her apple crisp was a fall ritual. I’d sit at her worn wooden table, my legs swinging from the chair, “helping” by sneaking thin slices of tart Granny Smith apples while she mixed the crumbly oat topping with her hands. She’d tell me the secret wasn’t in the recipe card, but in the pinch of salt and the handful of oats—you just “feel it” when it’s right. Her version was simple, humble, and perfect. My twist on it—with its toasted pecans and maple syrup—is my way of tipping my hat to her. It’s the same soul-warming comfort, just with a little extra crunch and a deeper, richer flavor that I know she’d absolutely approve of. It’s more than a dessert; it’s a delicious heirloom.
Print
Cozy Apple Crisp
- Total Time: 1 hour 10 minutes
- Yield: 10–12 1x
Description
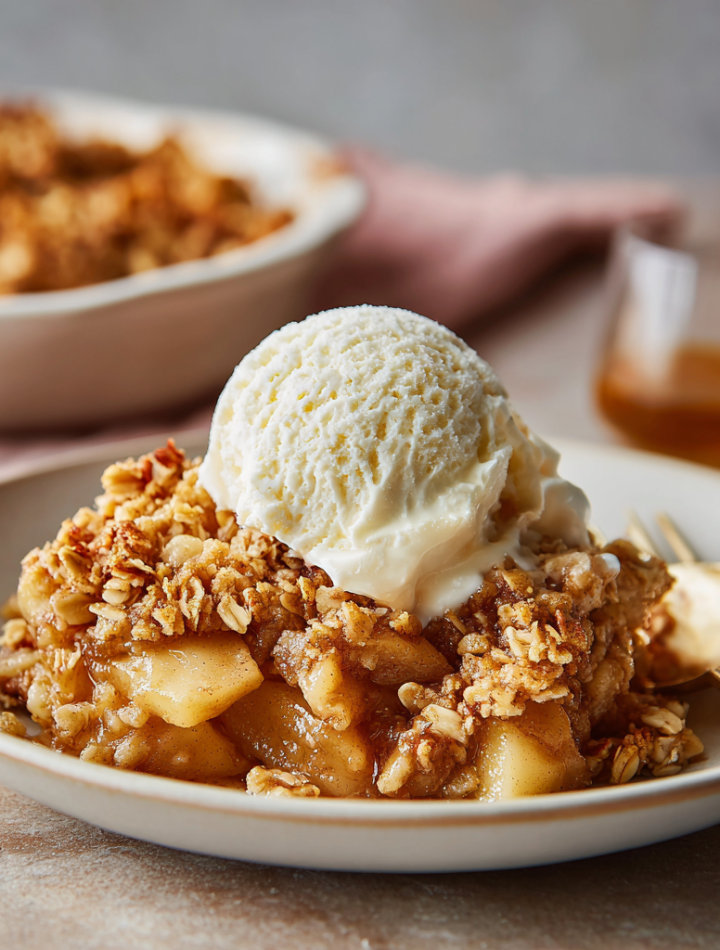
Fall’s favorite dessert, turned up a notch. This extra-large, extra-cozy apple crisp is everything you want from an autumn bake: warm spiced apples, golden buttery oat topping, and just enough sweet crunch. We’ve doubled the batch so there’s plenty to go around—and added a few twists like toasted pecans and maple for a deeper, richer flavor.
Ingredients
For the Filling:
12 medium apples (Honeycrisp, Granny Smith, or a mix), peeled, cored, sliced
1/2 cup granulated sugar
1/2 cup packed light brown sugar
2 tsp ground cinnamon
1/2 tsp ground nutmeg
2 tbsp lemon juice
1/4 cup all-purpose flour
Twist: 2 tbsp maple syrup (optional, adds depth)
For the Topping:
2 cups old-fashioned rolled oats
1 cup all-purpose flour
1 cup packed light brown sugar
1/2 cup granulated sugar
1/2 cup granulated sugar
1 tsp ground cinnamon
1/2 tsp salt
1 cup (2 sticks) unsalted butter, cold and cubed
Twists:
1/2 cup chopped toasted pecans or walnuts
Pinch of cardamom or ginger for extra warmth
To Serve:
Vanilla ice cream or whipped cream
Drizzle of warm caramel or maple syrup (optional)
Instructions
Preheat oven to 350°F (175°C). Grease a 9×13 baking dish or two 8×8 pans.
In a large bowl, toss sliced apples with sugars, spices, lemon juice, flour, and maple syrup (if using). Pour into baking dish.
In another bowl, combine oats, flour, sugars, cinnamon, salt, and nuts (if using). Add cold butter and cut in with fingers or pastry cutter until crumbly.
Sprinkle topping evenly over apples.
Bake for 45–55 minutes, until top is golden and filling is bubbling.
Let cool slightly, then serve warm with vanilla ice cream and optional drizzle.
- Prep Time: 20 minutes
- Cook Time: 50 min
- Category: Snack
Nutrition
- Calories: 400
- Sugar: 35g
- Fat: 18g
- Carbohydrates: 60g
- Fiber: 4g
Gather Your Glow-Getting Ingredients
Here’s everything you’ll need to create this autumnal masterpiece. Remember, using great ingredients is the first step to a phenomenal result! Don’t stress if you’re missing something—I’ve got substitution ideas for you.
For the Incredibly Spiced Apple Filling:
- 12 medium apples (I love a 50/50 mix of Honeycrisp and Granny Smith) – The Honeycrisp brings honeyed sweetness and they hold their shape beautifully, while the Granny Smith gives us that necessary tangy punch! Sub: Try Braeburn, Pink Lady, or Gala!
- 1/2 cup granulated sugar – This is our base sweetener to balance the tart apples.
- 1/2 cup packed light brown sugar – The molasses in brown sugar adds a deep, caramel-like flavor that white sugar just can’t match.
- 2 tsp ground cinnamon – The quintessential cozy spice. Non-negotiable!
- 1/2 tsp ground nutmeg – Nutmeg is cinnamon’s best friend; it adds a warm, nutty depth.
- 2 tbsp lemon juice – A little acid keeps the apples from browning and brightens up the whole filling. Sub: Apple cider vinegar in a pinch!
- 1/4 cup all-purpose flour – This is our thickening agent, so our filling is gloriously gooey, not watery.
- TWIST: 2 tbsp maple syrup (optional but highly recommended) – This is my secret weapon! It adds a complex, earthy sweetness that makes the flavor profile so much more interesting.
For the Legendary Buttery Oat Topping:
- 2 cups old-fashioned rolled oats – These give us the perfect chewy, hearty texture. Don’t use quick oats or it’ll turn mushy!
- 1 cup all-purpose flour – The structure for our crispy, crumbly topping.
- 1 cup packed light brown sugar – For sweetness and that lovely molasses flavor in every bite.
- 1/2 cup granulated sugar – Helps the topping get super crispy and golden.
- 1 tsp ground cinnamon – Because we can never have too much cinnamon.
- 1/2 tsp salt – Chef’s insight: Salt is crucial here! It balances all the sweetness and makes the flavors pop. Don’t skip it.
- 1 cup (2 sticks) unsalted butter, cold and cubed – COLD is the key word here! It ensures we get those perfect, craggy crumbs and a flaky texture.
- TWIST: 1/2 cup chopped toasted pecans or walnuts – Toasting nuts is a game-changer. It unlocks their oils and gives a massive boost of flavor and crunch.
- TWIST: A pinch of cardamom or ginger – For those who are truly adventurous! A tiny pinch of cardamom adds a beautiful, floral warmth.
The Icing on the Cake (To Serve):
- Vanilla ice cream or whipped cream – The hot-cold contrast is a religious experience. I’m just saying.
- Drizzle of warm caramel or maple syrup – For maximum indulgence. Go for it!
Let’s Build Our Cozy Masterpiece, Step-by-Step
Ready? This is the fun part. Put on some music, maybe pour yourself a little cider, and let’s get baking.
Step 1: Preheat and Prep. Fire up your oven to a cozy 350°F (175°C). This is the perfect temperature to cook the apples through and get that topping gloriously golden without burning. Grab your 9×13 inch baking dish (or two 8×8 pans if you’re planning to freeze one!) and give it a light coating of butter or a spritz of cooking spray. Chef’s Hack: Lining the bottom with a sliver of parchment paper makes cleanup a dream, but it’s not essential.
Step 2: The Apple Party. In your largest bowl—seriously, use the biggest one you have—toss together the sliced apples, both sugars, cinnamon, nutmeg, lemon juice, flour, and that magical maple syrup. Get your hands in there and mix it all up until every single apple slice is coated in that spicy, sugary goodness. This is where the flavor foundation is built! Let it sit for a few minutes while you make the topping—you might see some liquid start to pull out, which is exactly what we want for a saucy filling.
Step 3: Create the Crumbly, Crispy Topping. In a separate large bowl, whisk together the oats, flour, both sugars, cinnamon, salt, and your toasted nuts and extra spice if you’re using them. Now, for the main event: the cold butter. Scatter the cubed butter over the dry mixture. Now, use your fingertips, a pastry cutter, or even two forks to “cut” the butter into the dry ingredients. You’re looking for a mix of textures—some pea-sized bits, some sandy crumbs, and some larger clumps. Those clumps are GOLD—they’ll bake into the most delicious, buttery morsels. Pro Tip: If your hands get warm, pop the bowl into the fridge for 5 minutes to re-chill the butter. We want it cold!
Step 4: Assemble with Love. Pour your beautifully spiced apple mixture into your prepared baking dish and spread it into an even layer. Now, take handfuls of that glorious oat topping and sprinkle it evenly over the apples. Don’t press it down! We want it loose and craggy so the heat can circulate and make every nook and cranny crisp up.
Step 5: Bake to Perfection. Slide your masterpiece into the preheated oven and let the magic happen for 45-55 minutes. You’ll know it’s done when your entire home smells like heaven, the topping is a deep, golden brown, and you can see the thick, bubbly apple juices peeking around the edges. If the topping is browning too quickly, you can loosely tent it with a piece of aluminum foil for the last 10-15 minutes of baking.
Step 6: The Hardest Part—Wait! I know, I know. It’s torture. But please, let the crisp rest for at least 20-30 minutes after pulling it out of the oven. This allows the bubbling filling to thicken up properly. If you dig in immediately, it’ll be super runny. Trust me, this patience pays off in texture big time.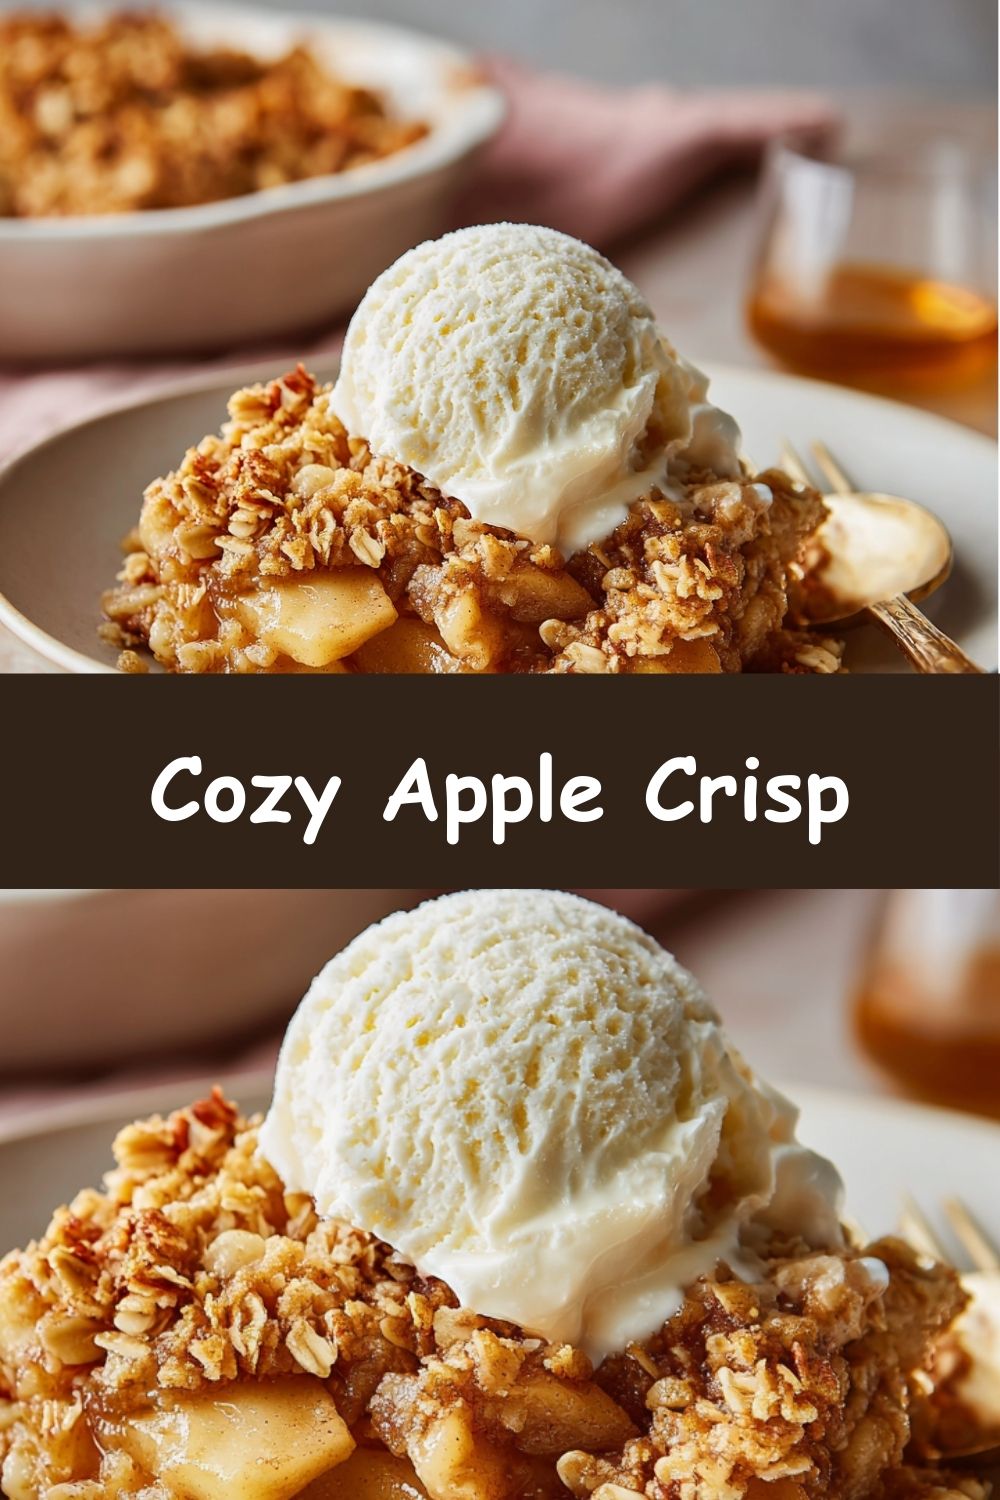
How to Serve This Beauty
Okay, time for the grand finale! Scoop a generous portion of the warm crisp into a bowl. The topping should be crisp and the apples tender. Now, crown it with a giant, melting scoop of high-quality vanilla ice cream. The contrast of the hot crisp and cold ice cream is everything. For the ultimate over-the-top moment, add a drizzle of warm caramel sauce or even a little extra maple syrup. Serve it with a smile—you just made something incredible.
Make It Your Own: Delicious Variations
This recipe is a fantastic canvas for your creativity! Here are a few ways to play with it:
- Vegan & Dairy-Free: Swap the butter for an equal amount of cold, solid coconut oil or a high-quality plant-based butter stick. Serve with coconut whipped cream!
- Gluten-Free Friends: Use a 1-to-1 gluten-free all-purpose flour blend in both the filling and the topping. Ensure your oats are certified gluten-free.
- Pear & Ginger: Swap half the apples for ripe pears and add 1 tablespoon of freshly grated ginger to the filling for a zingy twist.
- Berry Apple: Add a cup of fresh or frozen cranberries to the apple filling for a gorgeous tartness and pop of color.
- Individual Servings: Divide the filling and topping among ramekins or mason jars for adorable personal-sized crisps. Reduce the baking time to about 25-30 minutes.
Clara’s Chef Notes & Kitchen Stories
This recipe has been through it all with me! I once, in a frantic pre-guest cleanup, tried to pour the apple filling directly from the bowl into the pan and created a cinnamon-sugar waterfall all over my floor. My dog thought it was the best day ever. Lesson learned: slow and steady wins the race.
Over the years, I’ve learned that the type of apple truly matters. A mix is always best for balance. I’ve also started toasting the oats for the topping for about 10 minutes in the oven before mixing them in—it adds an incredible nutty flavor and extra crunch, but it’s an optional step for my extra-obsessed bakers (you know who you are!). Most importantly, this recipe is about joy. Don’t stress about perfection. A little extra cinnamon? Great! A handful of extra pecans? Even better! Cooking is your playground.
Your Apple Crisp Questions, Answered!
Q: My topping got soft/soggy after baking. What happened?
A: The most common culprit is not baking it long enough! Those bubbling juices at the edges are your visual cue that the filling is hot enough to thicken properly. If it’s still soggy, it might also be that your butter was too warm when you made the topping, or the dish was too crowded. A 9×13 is perfect for a double batch—any smaller and the steam can’t escape, making the topping steam instead of crisp.
Q: Can I make this apple crisp ahead of time?
A: Absolutely! You have two great options:
1. Assemble and refrigerate: Prep the entire crisp, cover it tightly, and keep it in the fridge for up to 24 hours before baking. You might need to add 5-10 minutes to the baking time since it’s going in cold.
2. Freeze it: This is why the double batch is genius! Assemble the crisp in a freezer-safe pan, wrap it in a few layers of plastic wrap and foil, and freeze for up to 3 months. Bake from frozen, adding 20-30 minutes to the baking time, and tent the topping with foil if it browns too quickly.
Q: My filling is too watery. How can I fix it?
A: First, ensure you’re using the right thickener (flour) and letting the crisp rest after baking—this is crucial! If it’s still runny, your apple variety might be extra juicy. Next time, you can add an extra tablespoon of flour to the filling. If you’re in a pinch with a baked crisp, a little scoop of cornstarch mixed with water and stirred into the filling (then baked for a few more minutes) can help tighten it up.
Q: Can I use a different sweetener, like all maple syrup or coconut sugar?
A> You can! For a less refined option, you can replace the white and brown sugars in the filling with 1 cup of coconut sugar. For the topping, using all liquid sweeteners is tricky as it changes the texture. I’d recommend sticking with granulated sugars for the topping to guarantee that perfect crispness.
Nourishment Note (Because I’m Curious Like That!)
While this is absolutely a treat, it’s made with whole food ingredients! Apples are packed with fiber and vitamin C, oats are a fantastic whole grain, and nuts provide healthy fats and protein. It’s a dessert you can feel good about enjoying. The estimated nutritional information per serving (assuming 12 servings) is approximately: Calories: ~400 | Carbs: 60g | Fat: 18g | Sugar: 35g | Fiber: 4g
Prep Time: 20 min | Cook Time: 50 min | Servings: 10-12
There you have it! The coziest, most shareable apple crisp that’s sure to become a new fall tradition in your home. I’d love to hear how it turns out for you!