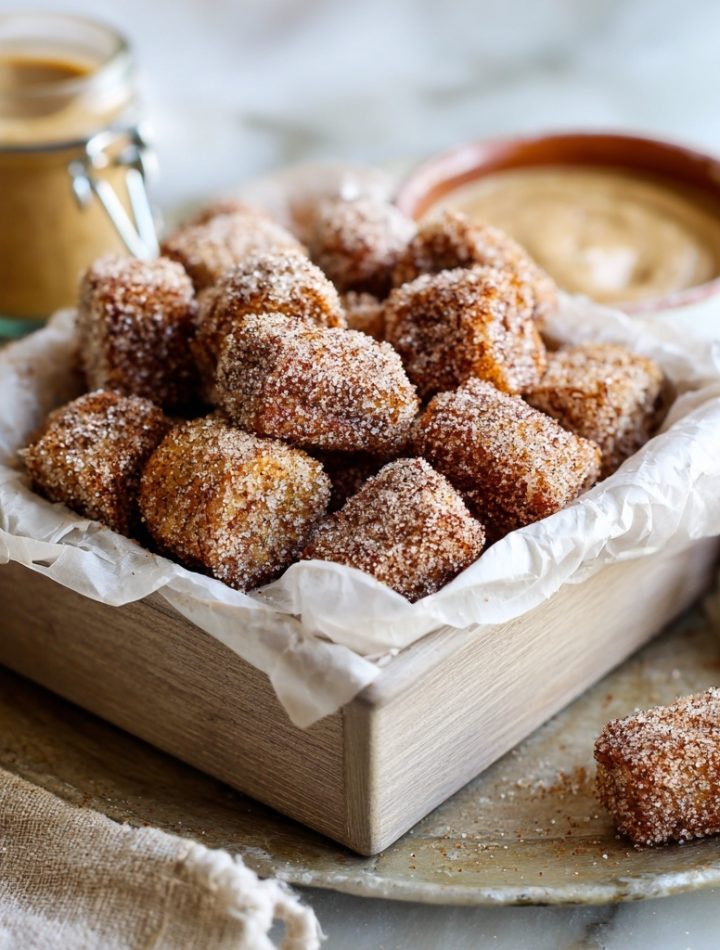
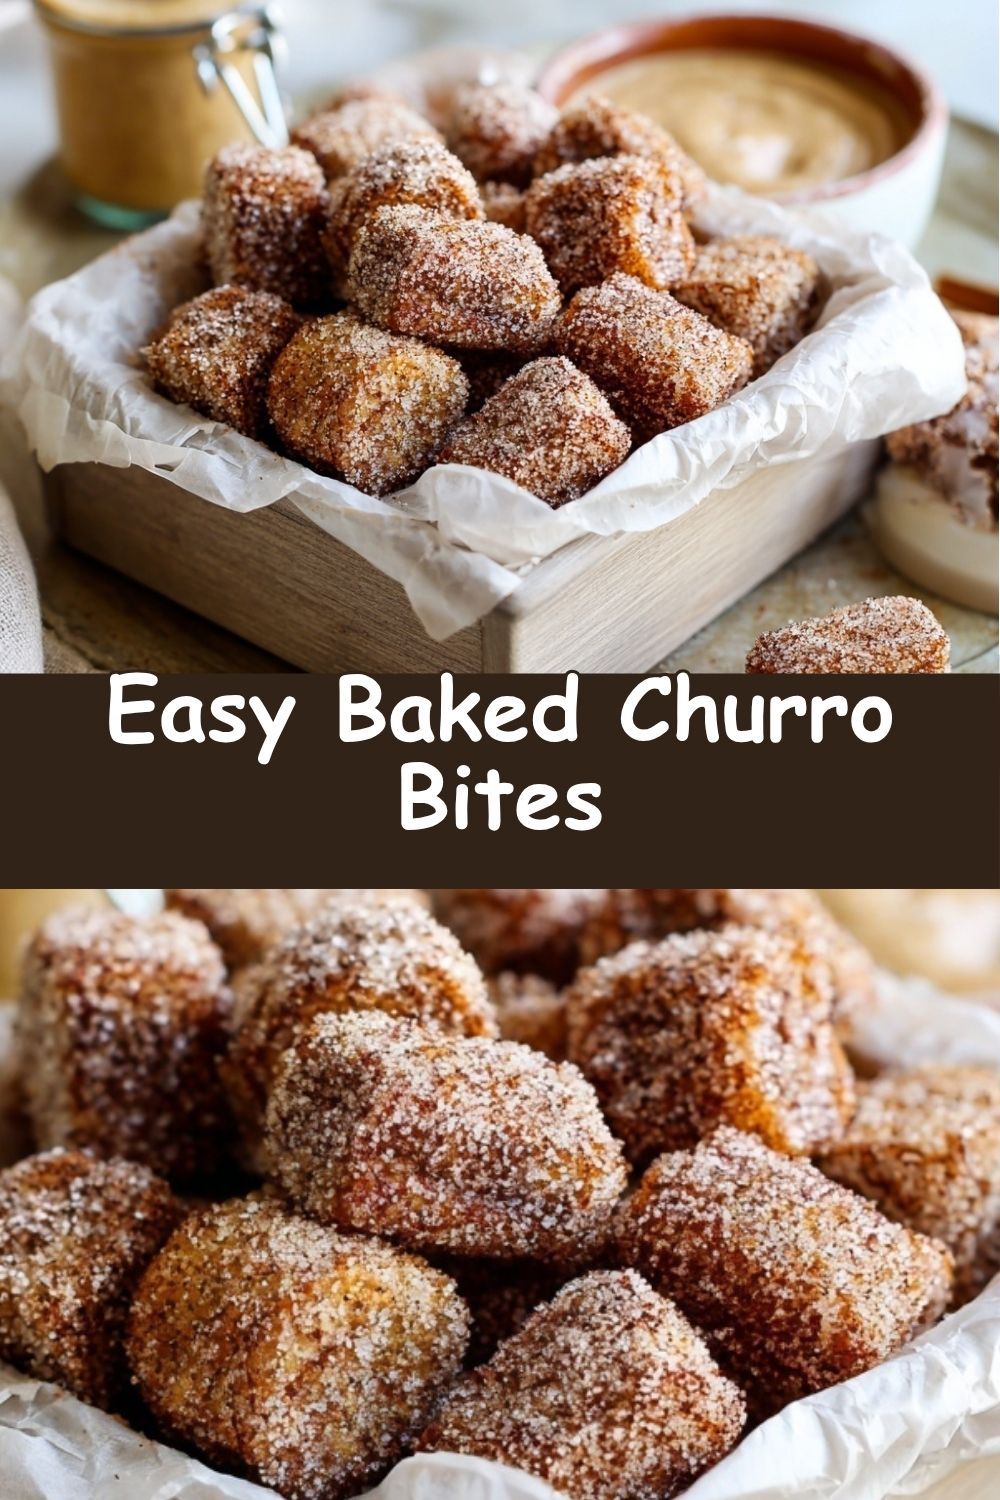
Easy Baked Churro Bites – Light, Crispy & Cinnamon-Sweet
Who Says “Healthy” Can’t Be a Party in Your Mouth?
Let’s be real for a second. Is there anything more universally joyful than a churro? That warm, cinnamon-sugar hug, that satisfying crunch giving way to a soft, pillowy center… it’s pure magic. But traditionally, that magic comes with a side of a bubbling vat of oil and that heavy, “oh boy, I definitely just ate a churro” feeling afterwards.
For the longest time, I thought a truly great churro was something I had to save for a county fair or a special trip to a Mexican restaurant. My home kitchen? It was a fryer-free zone, and I was okay with that. But my cravings weren’t. I’d find myself wistfully dreaming of that cinnamon-sugar dust, wishing for a way to capture that essence without the deep-frying fuss and calorie bomb.
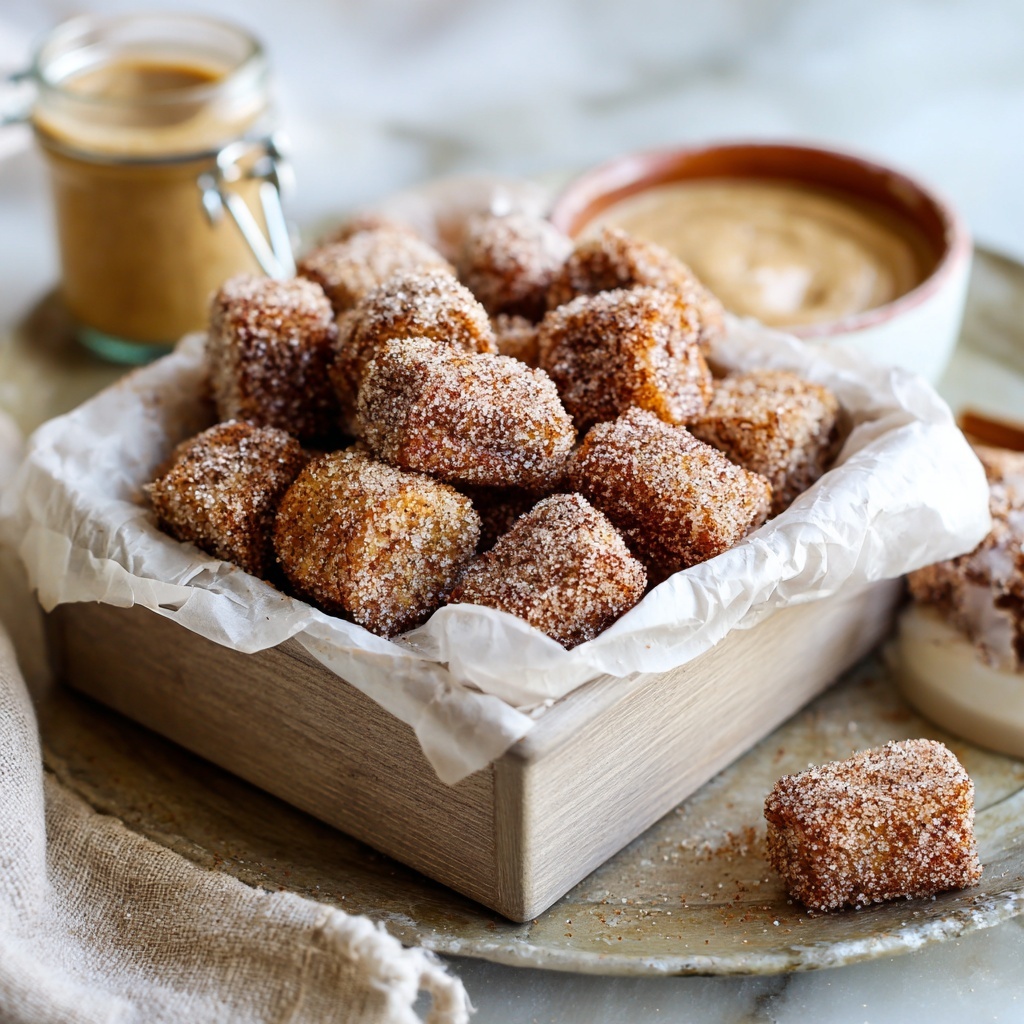
Well, my fellow flavor adventurers, I’m thrilled to tell you that after many, *many* delicious experiments (my kitchen notes were a glorious, floury mess), we’ve cracked the code. These Baked Churro Bites are my new go-to for a sweet treat that makes you feel just as good as it tastes. They’re soft and airy on the inside, with a delightfully crisp exterior, and they get a generous roll in that iconic cinnamon-sugar coating we all adore. They’re bite-sized, bake in under 25 minutes, and are guaranteed to make your kitchen smell like a dreamy, cozy bakery. Let’s ditch the guilt and turn up the flavor!
Print
Easy Baked Churro Bites : Light, Crispy & Cinnamon-Sweet
- Total Time: 35 mins
- Yield: About 24 bites 1x
Description
These healthy baked churro bites are the perfect answer to a sweet craving without the deep-fryer guilt. Soft on the inside, crisp on the outside, and rolled in a light cinnamon-sugar coating, they’re easy to whip up and even easier to love. Ideal for family nights, brunch tables, or party trays—these little treats are just the right mix of cozy and crowd-pleasing.
Ingredients
1 cup water
2 tablespoons unsalted butter
1 tablespoon granulated sugar
¼ teaspoon salt
1 cup all-purpose flour (can sub gluten-free 1:1 blend)
2 large eggs
1 teaspoon vanilla extract
For the Coating:
¼ cup granulated sugar
1 teaspoon ground cinnamon
Optional: melted coconut oil or butter (light brushing to help sugar stick)
Instructions
Preheat oven to 375°F (190°C) and line a baking sheet with parchment paper.
In a saucepan, bring water, butter, sugar, and salt to a simmer over medium heat.
Add flour and stir vigorously until a dough forms and pulls away from the sides. Remove from heat.
Let dough cool slightly, then beat in eggs one at a time, followed by vanilla. Mix until smooth.
Transfer dough to a piping bag fitted with a large star tip (or use a zip-top bag with the corner cut off).
Pipe 1-inch rounds onto the baking sheet.
Bake for 20–22 minutes or until golden brown and puffed.
While warm, lightly brush with melted butter or oil and toss in cinnamon sugar. Serve warm.
- Prep Time: 15 mins
- Cook Time: 20 mins
- Category: breakfast
Nutrition
- Calories: 140
- Sugar: 8 g
- Fat: 5 g
- Carbohydrates: 20 g
A Spanish Stall and a Spark of Inspiration
My love affair with churros started not in a fancy restaurant, but at a rickety little stall tucked away on a side street in Barcelona. I was 19, backpacking with friends, and completely wide-eyed. The air was cool, but we were huddled together, clutching paper cones filled with long, twisted, fried dough that was impossibly hot and dusted in sugar. We dipped them into tiny cups of thick, rich hot chocolate that was practically pudding. I remember taking that first bite—the crackle of the sugar, the steam rising from the tender inside—and thinking, “This is it. This is pure, unadulterated joy.”
That memory became my benchmark. For years, any churro I tried was measured against that perfect Barcelona moment. And my home attempts? They never quite lived up. They were either too greasy, too dense, or just… missing the soul. This recipe is my love letter to that memory. It’s my way of bringing that feeling of discovery and shared happiness into our everyday lives, but in a way that’s a little lighter, a lot easier, and just as full of heart. We’re not trying to replicate the fried original; we’re creating a beautiful, baked version that stands proudly on its own delicious merits.
Gathering Your Churro-Making Squad
One of the best things about this recipe is how simple the ingredient list is. You likely have most of this in your pantry right now! Here’s the lowdown on what we’re using and why each component is a star player.
- 1 cup water: This is the base of our dough and creates the steam that helps the churros puff up beautifully in the oven. Simple, but mighty!
- 2 tablespoons unsalted butter: This adds that irreplaceable rich flavor and helps create a tender texture. Chef’s Insight: Using unsalted lets us control the salt level perfectly. If you only have salted, just reduce the added salt in the dough by a tiny pinch.
- 1 tablespoon granulated sugar + ¼ teaspoon salt: This dynamic duo! The sugar adds a touch of sweetness to the dough itself, while the salt balances it all out and makes the flavors pop. Never underestimate the power of salt in a dessert!
- 1 cup all-purpose flour: The backbone of our churro bites. It gives the dough structure. Substitution Tip: For a gluten-free version, a 1:1 gluten-free baking blend (like Bob’s Red Mill or King Arthur) works like an absolute charm here. I’ve tested it, and the results are fantastic!
- 2 large eggs: Our binding agents and superstars for richness and lift. They give the churros their beautiful color and soft, airy interior. Pro Tip: Make sure your eggs are at room temperature! They’ll incorporate into the dough much more smoothly, preventing you from overmixing.
- 1 teaspoon vanilla extract: The secret weapon for depth of flavor! It adds a warm, aromatic note that makes these churros taste incredibly gourmet.
For the Iconic Coating:
- ¼ cup granulated sugar + 1 teaspoon ground cinnamon: The classic, the legend, the reason we’re all here. This is what transforms our baked dough puffs into official CHURROS. Feel free to adjust the cinnamon to your taste—I sometimes add an extra half teaspoon because I love it!
- Optional: melted coconut oil or butter (for brushing): A very light brush of either right when the churros come out of the oven helps the cinnamon-sugar mixture stick like a dream. It’s the little hack that makes a big difference!
Let’s Create Some Magic: The Step-by-Step Guide
Don’t let the piping bag scare you! This process is actually super fun and satisfying. Think of it as your edible Play-Doh fun factory moment. Let’s walk through it together.
- Preheat and Prep: First things first, get that oven heating to a toasty 375°F (190°C). This is crucial for getting that initial “oven spring” that makes our churros puff up. Line a baking sheet with parchment paper. Little Chef Hack: If you have a non-stick mat, that works great too, but parchment is my go-to for easy cleanup. No greasing needed!
- The Simmering Start: In a medium saucepan, combine your water, butter, that 1 tablespoon of sugar, and the salt. Bring it to a lively simmer over medium heat, stirring occasionally until the butter is fully melted. You’ll see little bubbles dancing around the edges—that’s your cue!
- The “Panade” Power Move: Now, reduce the heat to low and dump in the entire cup of flour all at once. Start stirring—vigorously!—with a wooden spoon. The mixture will look a bit crazy at first, but keep going. Within about a minute, it will come together into a smooth ball of dough that pulls away cleanly from the sides of the pan. This step cooks the flour and creates the structure. When you see a thin film of dough on the bottom of the pan, you’ve nailed it. Take it off the heat and let it cool for 5-7 minutes. Why we wait: If the dough is too hot, it’ll cook the eggs when we add them, and we don’t want scrambled eggs in our churros!
- Incorporate the Eggs (& Vanilla!): Now, we’re switching to a hand mixer or a lot of arm power with a wooden spoon. Add the eggs one at a time, beating thoroughly after each addition until the egg is fully incorporated. The dough might look a bit slippery and separated at first, but trust the process! Keep beating until it’s smooth and shiny. Now, beat in the vanilla extract. You should have a gorgeous, sticky, pipe-able dough that holds its shape.
- The Piping Party: Scoop your dough into a piping bag fitted with a large open-star tip (a Wilton 1M or 4B is perfect). If you don’t have a piping bag, a heavy-duty zip-top bag with a ½-inch corner cut off will work in a pinch—you just won’t get the classic ridged lines. Hold the bag perpendicular to the baking sheet and pipe out 1-inch long “bites.” I like to use a pair of kitchen scissors that I’ve sprayed with a little oil to snip the dough cleanly from the tip. Give them a little space on the pan—they’ll puff up!
- Bake to Golden Perfection: Slide your tray into the preheated oven and bake for 20-22 minutes. Don’t open the oven door before the 18-minute mark! We need that steady heat to set their structure. They’re done when they’re beautifully puffed and have a lovely golden-brown color. They should feel light and airy, not heavy.
- The Signature Coating: While the churros are baking, mix your ¼ cup of sugar and cinnamon in a shallow bowl. As soon as the churros come out of the oven, use a pastry brush to *very lightly* brush them with a tiny bit of melted butter or coconut oil. Then, while they’re still warm, toss them gently in the cinnamon-sugar mixture until they’re evenly coated. This is the best part—your kitchen will smell incredible.
How to Serve These Sunny Little Bites
Presentation is part of the fun! I love piling these warm churro bites high in a rustic wooden bowl or a colorful ceramic one. For a real showstopper, serve them with little dipping pots on the side. A small ramekin of rich, dark chocolate ganache for dipping is a no-brainer. For a fruity twist, a warm raspberry or strawberry coulis is divine. And for the ultimate nostalgic treat, you can’t beat a side of dulce de leche for dipping. They’re perfect with a cup of strong coffee for brunch or a glass of cold milk for an after-dinner treat that feels special but is secretly a breeze.
Mix It Up! Your Churro, Your Rules
The basic recipe is a dream, but the adventure doesn’t stop there! Here are a few of my favorite ways to play with the formula:
- Chocolate Chip Surprise: Fold ¼ cup of mini chocolate chips into the dough right before piping. You get little pockets of melted chocolate in every bite!
- Orange-Zest Zing: Add the zest of one small orange to the dough along with the vanilla. The citrus fragrance paired with the cinnamon sugar is next-level refreshing.
- “Chai-urro” Spice: Replace the cinnamon in the coating with a chai spice blend. Think cinnamon, cardamom, ginger, and a pinch of cloves. So cozy!
- Vegan-Friendly Twist: Use vegan butter and swap the eggs for two “flax eggs” (2 tbsp ground flaxseed mixed with 6 tbsp water, left to gel for 5 minutes). The texture will be slightly denser but still utterly delicious.
Clara’s Kitchen Confessions & Notes
This recipe has seen some… interesting iterations in my test kitchen. The first time I made it, I was so excited I forgot to let the dough cool before adding the eggs. Let’s just say I ended up with churro bites with tiny, cooked eggy bits—not my finest hour, but a valuable lesson! Another time, I tried piping them directly onto a baking sheet without parchment, convinced my non-stick pan was, well, non-stick. They were delicious, but half of them decided to become permanent residents of the baking sheet. We learn by doing, right?
Over time, I’ve found that the key to the absolute best texture is not to underbake them. A deep golden brown color ensures that crisp exterior we’re after. And if you’re making these for a party, you can totally pipe them ahead of time and keep the tray in the fridge for an hour before baking. They might need an extra minute or two in the oven straight from the fridge. This recipe is wonderfully forgiving and adaptable, just like we are in the kitchen!
Your Churro Questions, Answered!
I’ve gotten so many wonderful questions about this recipe over the years. Here are the most common ones to help you on your churro-making journey.
Q: My dough was too runny to pipe. What happened?
A: This usually means the dough wasn’t cooked long enough in the saucepan, or the eggs were added while the dough was still too hot. Make sure you stir that flour in until a firm ball forms and a film develops on the pan bottom, and let it cool adequately. If it’s still a bit sticky, you can pop the piping bag in the fridge for 15-20 minutes to firm up.
Q: My churros came out a bit soft, not crispy. How can I fix that?
A: A soft exterior usually points to under-baking or not letting the oven fully preheat. Make sure your oven is at a true 375°F and bake them until they are a rich, golden brown. You can also turn off the oven when they’re done, crack the door open, and let them sit inside for 5 extra minutes to dry out a bit more.
Q: Can I make these ahead of time?
A: Absolutely! They are best served the day they are made, but you can revive them beautifully. Let them cool completely after baking but *before* coating in sugar. Store in an airtight container. To reheat, pop them in a 350°F oven for 5-8 minutes until warm and crisp, then toss them in the cinnamon sugar. This method keeps the coating from getting soggy.
Q: I don’t have a piping tip. Can I just make little balls?
A: You can! You’ll lose the classic churro ridges, but the flavor will be all there. Just use a small cookie scoop or two spoons to portion out teaspoon-sized balls of dough onto the baking sheet. They’ll bake up into lovely, round, puffier versions—think mini cream puff shells!
Nourishment Note
While I’m all about feel-good food and not counting every single digit, I know it’s helpful to have a guide. This is an estimate for about 5-6 churro bites, based on the recipe making 24 total. Remember, these are baked, not fried, so they’re naturally lighter!
- Calories: 140
- Fat: 5g
- Carbohydrates: 20g
- Sugar: 8g
- Protein: 3g
- Sodium: 100mg
Prep Time: 15 minutes | Bake Time: 20 minutes | Total Time: 35 minutes | Yield: About 24 delicious bites