
Let’s Make Some Sweet, Sprinkle-Filled Magic!
Hey there, my fellow curious cook! Have you ever found yourself standing in line at Starbucks, gazing longingly into that glass case at the perfect, pastel-hued cake pops? They’re like tiny edible orbs of joy, perched proudly on their little sticks, promising a bite-sized burst of pure celebration. I’ll let you in on a little secret: I used to treat myself to one as a “well-done-you-made-it-through-Tuesday” reward more often than I’d like to admit.
But one day, my inner food adventurer got the best of me. I thought, “Clara, you can roast a whole squash, ferment your own kimchi, and whip up a mean tahini dressing… surely you can crack the code on a cake pop!” And let me tell you, the journey was even more fun—and delicious—than I imagined.
This easy Starbucks Cake Pop recipe is my love letter to joyful, uncomplicated baking. We’re not aiming for stiff, intimidating pastry-chef perfection here. We’re aiming for soft, sweet, perfectly dippable bites of happiness that you made with your own two hands. This is a recipe for birthday parties, for baby showers, for “just because” Tuesdays, and for getting your hands a little messy in the best way possible. So, tie on your favorite apron, and let’s turn your kitchen into the most fun pop-up bakery in town!
A Little Cake Pop Nostalgia
My very first memory of a cake pop isn’t from a coffee shop—it’s from my niece’s fifth birthday party. She had decided she wanted a “princess ball” themed party, and her brilliant mom (my sister) had spent the entire night before the party, up to her elbows in pink candy melts, trying to create a fleet of perfectly spherical, glittery cake pops. They were… charmingly lopsided. Some had a few too many sprinkles, and one or two had a distinct lean to them.
But when she presented them to the table of wide-eyed five-year-olds, you would have thought she’d unveiled the crown jewels. The sheer delight on their faces! They didn’t see imperfections; they saw magic wands and fairy orbs of pure sugar. That’s the spirit I want to bring into this recipe. It’s not about creating a flawless, factory-made replica. It’s about the fun of the process, the joy of sharing something you made, and the little bit of magic that happens when cake, frosting, and sprinkles come together. Every time I make a batch now, I think of those giggling princesses and remember that a little bit of whimsy is the most important ingredient of all.
Gathering Your Cake Pop Toolkit
Here’s the beautiful part: you don’t need a pantry full of obscure ingredients to create bakery-level cake pops. We’re using a couple of clever shortcuts to make this process a total breeze. This is a double batch because, trust me, you’ll want plenty to share (or not share… no judgment here!).
- 2 boxes vanilla cake mix (plus the required eggs, oil & water) – This is our brilliant base! Using a box mix gives us a consistent, moist, and fluffy crumb every single time. It’s the ultimate kitchen hack for a busy cook. Chef’s Insight: I often use a “butter recipe” golden vanilla mix for a little extra richness.
- ⅔ cup French vanilla frosting – This is the “glue” that holds our pops together. The creamy sweetness binds the cake crumbs into a pliable dough. Substitution Tip: Any vanilla or cream cheese frosting works wonderfully. Store-bought is perfect for ease, but if you have a favorite homemade buttercream, this is a great place to use it!
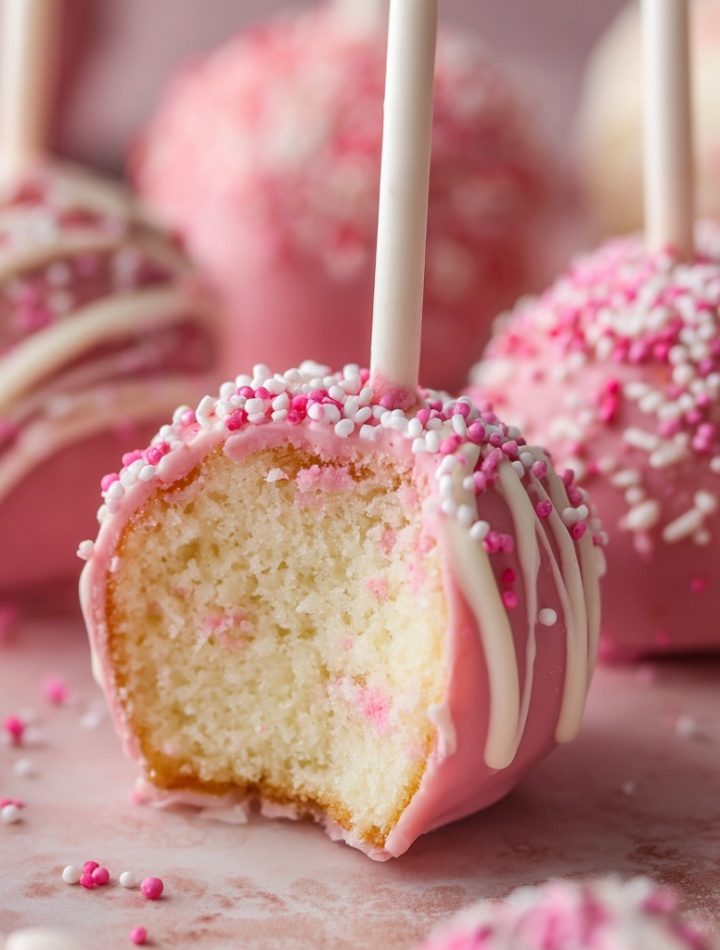
- 2 bags (12 oz each) light pink candy melts – The secret to that signature Starbucks candy shell! Candy melts, or candy wafers, are designed to melt smoothly and harden with a beautiful snap. Chef’s Insight: You can find these in the baking aisle at most craft stores or supermarkets. White chocolate chips can be used, but they often require a bit of oil to thin them and don’t set as firmly.
- White sprinkles (for decoration) – The finishing touch! Those tiny white nonpareils are iconic, but this is your chance to get creative. Jimmies, sanding sugar, even tiny heart sprinkles would be adorable.Print

These Cinnamon Sugar Cream Cheese Roll-Ups are the ultimate comfort treat—crunchy on the outside, soft and creamy on the inside, and coated in a cinnamon-sugar hug. They’re quick to assemble and bake to golden perfection. You can even take them up a notch with fresh fruit, chocolate, or a dash of warm spices. Ideal for brunch, dessert, or late-night cravings, they’re the kind of bite-sized indulgence that disappears fast.
- Total Time: 35 mins
- Yield: 16 roll-ups 1x
Description
These Cinnamon Sugar Cream Cheese Roll-Ups are the ultimate comfort treat—crunchy on the outside, soft and creamy on the inside, and coated in a cinnamon-sugar hug. They’re quick to assemble and bake to golden perfection. You can even take them up a notch with fresh fruit, chocolate, or a dash of warm spices. Ideal for brunch, dessert, or late-night cravings, they’re the kind of bite-sized indulgence that disappears fast.
Ingredients
Scale16 slices soft sandwich bread (white or whole wheat)
16 oz cream cheese, softened
½ cup granulated sugar
1 tsp vanilla extract
Pinch of salt
½ cup unsalted butter, melted
½ cup granulated sugar (for coating)
4 tsp ground cinnamon
Optional Twists
Mini chocolate chips or Nutella
Thin apple or banana slices
Strawberry or raspberry jam
Chopped pecans or walnuts
Dash of nutmeg or cardamom in the coating
Instructions
Preheat oven to 375°F (190°C). Line a baking sheet with parchment.
In a bowl, beat together cream cheese, ½ cup sugar, vanilla, and salt until smooth.
Cut crusts off the bread and flatten each slice with a rolling pin.
Spread 1 tablespoon of the cream cheese mixture on each slice. Add any optional fillings.
Roll up tightly into logs.
Mix the remaining ½ cup sugar with cinnamon.
Dip each roll in melted butter, then roll in the cinnamon-sugar mixture.
Place seam-side down on the baking sheet.
Bake for 18–20 minutes until golden brown and crisp.
Serve warm with powdered sugar, maple syrup, or fresh fruit.
- Prep Time: 15 mins
- Cook Time: 20 mins
- Category: Dessert
Nutrition
- Sugar: 10 g
- Sodium: 160 mg
- Carbohydrates: 18 g
Optional Flavor Twists (Get Creative!)
- 1 tsp almond or coconut extract – Stir this into your cake batter or frosting blend for a subtle, sophisticated flavor that takes these beyond basic vanilla.
- Mini chocolate chips or extra sprinkles – Mixed right into the cake-frosting blend for little bursts of texture and color in every bite.
- ½ tsp freeze-dried strawberry powder – Blitz some freeze-dried strawberries in a blender and add the powder to your cake crumbs. It gives a gorgeous pink color and a natural fruity flavor!
- Marshmallow cream or Nutella – For a surprise center! When rolling your balls, press a small dollop into the middle and encase it completely with the cake mixture. It’s a gooey, delightful secret.
Let’s Get Rolling: Your Step-by-Step Cake Pop Guide
Okay, friends, this is where the fun begins. Put on some good music, clear some counter space, and let’s dive in. Remember, a little mess is just a sign of a good time!
- Bake & Cool the Cake: First things first, bake both cake mixes according to the package directions in a 9×13 inch pan. I like to line my pan with parchment paper for super easy removal. Let the cake cool completely. I mean it! If the cake is even slightly warm, it will turn into a greasy, mushy mess when you mix in the frosting. Patience is your best friend here. Chef’s Hack: To speed things up, you can bake the cake the night before, let it cool on the counter, and then proceed with the recipe the next day.
- The Great Crumble & Mix: Once your cake is totally cool, it’s time to get tactile! Break the cake into large chunks and place them in a large mixing bowl. Now, using your impeccably clean hands (or a stand mixer with the paddle attachment on low speed), crumble the cake into fine, even crumbs. It should resemble coarse sand. Now, add your frosting, a few spoonfuls at a time, and mix it in. You may not need the entire ⅔ cup! Stop when the mixture holds together when you pinch it—like a soft, slightly sticky Play-Doh. It should be moist enough to roll without cracking, but not so wet that it’s greasy.
- Forming Your Perfect Little Spheres: Using a small cookie scoop or a tablespoon, portion out the mixture. Then, roll each portion between your palms to form a smooth, tight 1-inch ball. Place them on a baking sheet lined with parchment paper as you go. Don’t worry about them being geometrically perfect; a little character is a good thing! Chef’s Hack: If the mixture is sticking to your hands, lightly dampen them with a bit of water or wear disposable food-safe gloves.
- The All-Important Chill Session: This step is non-negotiable! Pop the entire baking sheet of cake balls into the refrigerator for at least 1 hour, or into the freezer for 20-30 minutes. They need to be very firm to the touch. This chilling step prevents them from falling apart or sliding off the stick when we dip them later.
- Melt, Dip & Stick: Now, melt your first bag of candy melts according to the package instructions. I like to use a tall, narrow microwave-safe glass or cup—it creates a deep pool of candy for easy dipping. Take a cake pop stick and dip the very tip (about ½ inch) into the melted candy. Then, immediately push the stick about halfway into a chilled cake ball. The melted candy acts like edible glue, securing the stick firmly in place. Let this set completely before moving on. This is your “anchor” dip!
- The Grand Finale: Coating & Sprinkling! Now for the magic! Holding the stick, quickly and gently dip the entire cake ball into the melted candy. Submerge it completely, then slowly lift it out. Gently tap your wrist (or swirl the pop) over the cup to let the excess candy drip off. This is the key to avoiding a thick, lumpy coating and a puddle of candy at the base. Act fast now! Before the shell sets, hold your pop over a plate and shower it with your chosen sprinkles. The world is your sprinkle oyster!
- Setting & Storing: To let your beautiful creations dry without getting a flat side, you need to stand them upright. The easiest way is to stick them into a block of styrofoam, a cardboard box with holes poked in it, or a specialty cake pop stand. Let them set at room temperature until the shell is completely hard. Once set, you can store them in a single layer in an airtight container in the fridge for up to a week. They taste fantastic chilled!
How to Serve Your Cake Pop Masterpieces
Presentation is half the fun! For a party, I love sticking my finished cake pops into a large cake that I’ve covered with sprinkles, creating a gorgeous, edible centerpiece. For a more casual feel, arrange them upright in a simple jar filled with sugar or dried beans to hold them in place. You can also lay them gently on their sides on a beautiful platter lined with parchment paper. However you choose to display them, just be prepared for the chorus of “You made these?!”—it’s the best sound in the world.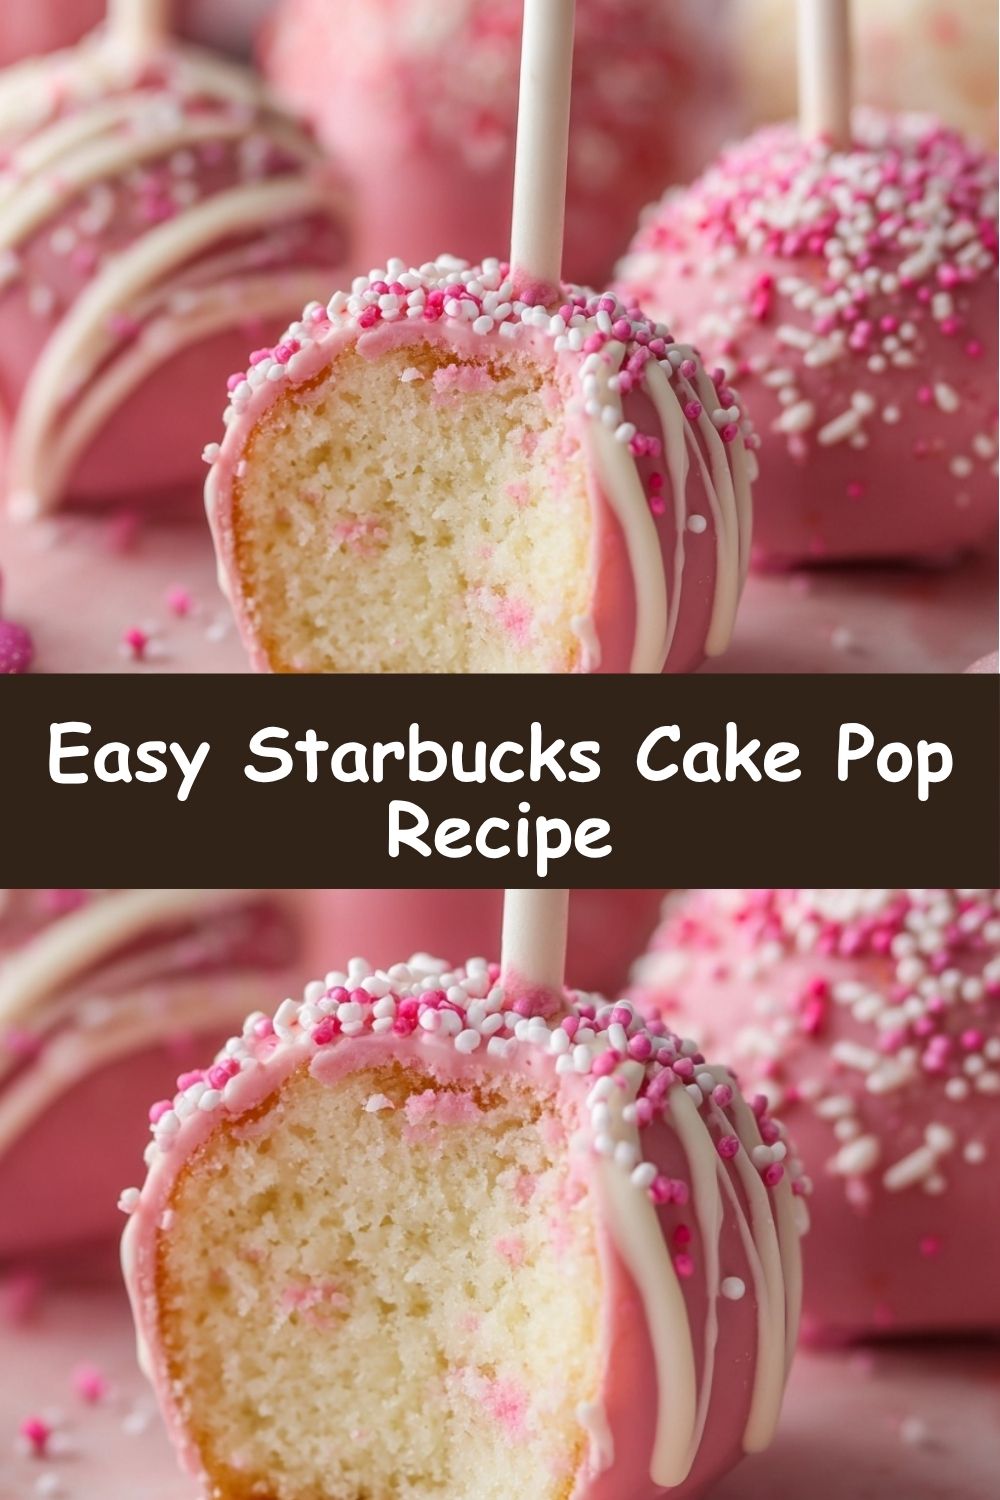
Mix It Up! Fun Flavor Twists
Once you’ve mastered the classic, the playground of possibilities opens up! Here are a few of my favorite ways to mix things up:
- Chocolate Lover’s Dream: Use a chocolate cake mix and chocolate frosting. Dip in dark candy melts and roll in crushed Oreos.
- Lemon Bliss: Use a lemon cake mix and lemon frosting. Dip in yellow candy melts and roll in crushed shortbread cookie crumbs.
- Cookies & Cream: Mix crushed Oreos into your vanilla cake blend. Dip in white candy melts and finish with more Oreo crumbs.
- Funfetti Fiesta: Use a funfetti cake mix and stir an extra tablespoon of rainbow jimmies into the cake-frosting blend for maximum confetti power!
- Dairy-Free Delight: Use a vegan cake mix and frosting, and look for dairy-free candy melts or chocolate coating.
Chef’s Notes & Kitchen Confessions
This recipe has seen many iterations in my kitchen. The first time I made them, I was so impatient I skipped the full chill time. Let’s just say I ended up with a bowl of “cake pop soup” and a few very sad, naked cake balls floating in a sea of pink candy. It was a delicious, if messy, lesson learned!
Over time, I’ve learned that the texture of your cake-frosting blend is everything. If it’s too dry, the balls will crack. If it’s too wet, they’ll be heavy and dense. The sweet spot is truly that “play-doh” consistency. Don’t be afraid to get your hands in there and feel the mixture—it’s the best way to tell. This recipe is a wonderful starting point, but make it your own. Add that dash of almond extract, hide that Nutella center, and create a sprinkle combination that makes your heart sing. That’s where the real magic happens.
Cake Pop FAQs & Troubleshooting
I’ve answered a lot of cake pop questions over the years! Here are the most common ones to help you on your way.
Why did my cake pops crack after dipping?
This is almost always a temperature issue! If your cake balls are too cold (straight from the freezer) and your candy coating is too hot, the thermal shock causes the shell to crack. The fix: make sure your cake balls are chilled but not frozen solid, and let your melted candy coating cool slightly before dipping. It should be fluid but not piping hot.
My candy coating is too thick! How do I thin it out?
Candy melts can be stubborn. The best way to thin them is with a specialty product called “candy melt thinning oil” or paramount crystals. If you don’t have that, you can add a tiny, *tiny* amount of neutral oil (like coconut or canola)—start with ½ teaspoon per bag of melts and stir vigorously. Adding too much oil can prevent the shell from setting properly.
My cake pops keep falling off the stick! Help!
This is usually due to one of three things: 1) The cake balls weren’t chilled enough before dipping. 2) You didn’t use the initial “anchor dip” of candy on the stick before inserting it. 3) The coating was too thick, making the pop too heavy for the stick. Revisit the chilling and anchoring steps, and ensure your coating is thin enough to drip off easily.
Can I make these ahead of time?
Absolutely! They are perfect for making ahead. Once fully set, store them in an airtight container in the refrigerator for up to a week. You can also freeze them for up to a month. Just let them thaw in the refrigerator before serving.
A Quick Nutritional Note
While these are definitely a treat, I always believe in knowing what you’re enjoying! This is an estimate for one classic vanilla cake pop, based on the ingredients listed. Remember, variations will change these numbers.
Per Cake Pop (approx.): ~150 calories | 7g fat | 20g carbs | 1g protein