
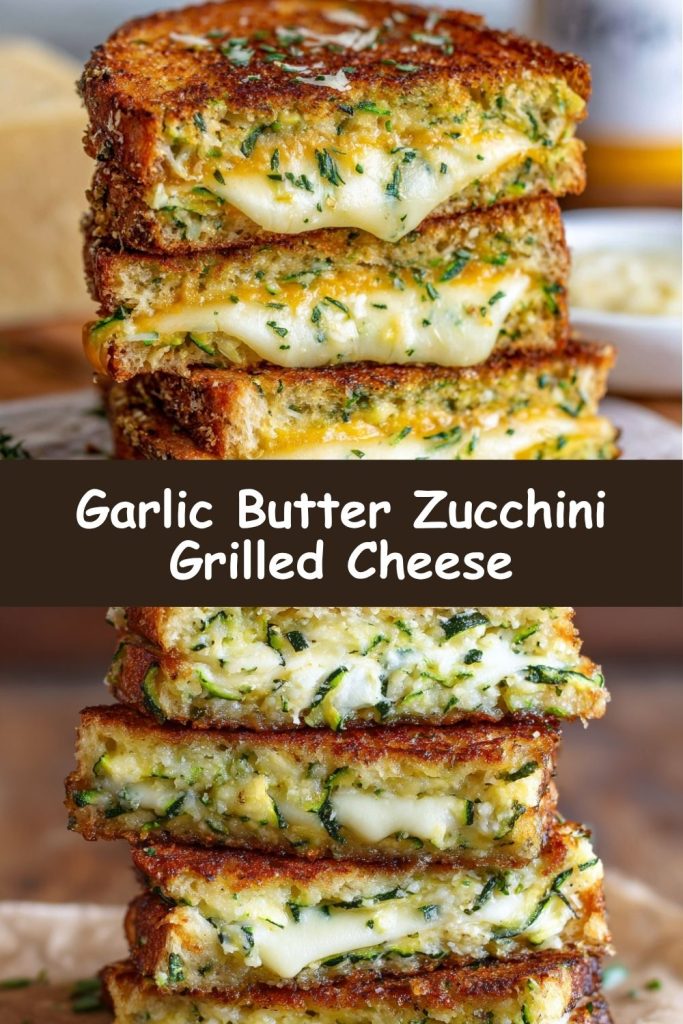
Garlic Butter Zucchini Grilled Cheese: Your New Guilty-Free Obsession!
Hey there, kitchen adventurers! Clara here, your veggie-whispering recipe accomplice. Raise your hand if you’ve ever craved grilled cheese so intensely you could taste that crispy, buttery, oozy magic… only to remember your jeans are staging a peaceful protest? 🙋♀️ Same, friend. That exact tug-of-war between comfort food cravings and feeling amazing inspired this little miracle: the Garlic Butter Zucchini Grilled Cheese. Forget FOMO! This isn’t some sad, limp “diet” sandwich. We’re talking golden, crispy zucchini “bread” hugging molten cheddar, all slathered in garlic butter that’ll make you close your eyes and sigh. It’s low-carb, gluten-free, packed with sneaky-good zucchini, and tastes like pure, unapologetic indulgence. Seriously, it’s the kind of magic that makes healthy eating feel like a delicious secret you’re thrilled to be in on. Ready to turn that zucchini lurking in your fridge into the star of your next cheesy masterpiece? Let’s get sizzling!
The Zucchini Epiphany: A Tale of Cheese & Redemption
Picture this: It’s pouring rain, my sweatpants are my uniform, and my soul needs grilled cheese. But my energy levels? Kaput. My usual sourdough felt like it’d weigh me down for days. I spotted a lone zucchini rolling around the veggie drawer – looking a bit forlorn, honestly. Inspiration struck like lightning! What if…? Cue the messy kitchen chaos. First attempt? Let’s just say “zucchini pancake soup” wasn’t the goal. But then came the magic combo: squeezing that zucchini like it owes you money (seriously, game-changer!), adding punchy Parmesan for grip, and that glorious garlic butter sizzle. The moment I bit into that crispy-edged, cheesy wonder, I did a happy dance right there at the stove. My partner wandered in, eyed it suspiciously (he’s Team Carb), took one bite, and said, “Wait… is this ZUCCHINI?!” with genuine shock and delight. That’s the moment I knew this recipe was blog-worthy gold. It’s proof that comfort food can hug you back without the heavy feeling!
Print
Garlic Butter Zucchini Grilled Cheese
- Total Time: 40 mins
- Yield: 2–3 1x
Description
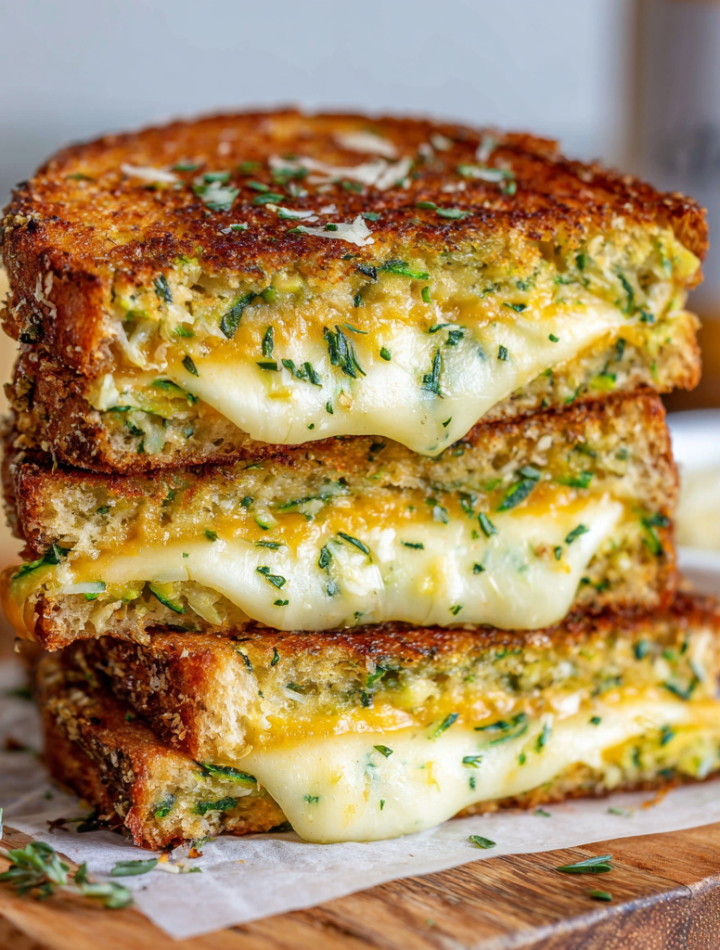
Crispy, cheesy, and a little bit sneaky—this Garlic Butter Zucchini Grilled Cheese sneaks veggies into gooey grilled goodness. Zucchini becomes the crisp “bread” in this low-carb, gluten-free twist that’s loaded with melty cheddar and savory garlic butter.
Ingredients
2 cups grated zucchini (squeezed dry)
1 large egg
½ cup freshly grated Parmesan
¼ cup cornstarch
Salt and pepper, to taste
2 tbsp garlic butter (or regular butter + minced garlic)
1–2 cups shredded Cheddar cheese
Instructions
Preheat oven to 400°F (200°C). Line a baking sheet with parchment paper.
Make zucchini dough: In a bowl, mix zucchini, egg, Parmesan, cornstarch, salt, and pepper.
Form squares: Divide the mixture into 4–6 mounds and flatten into bread-sized squares.
Bake for 20–25 minutes until golden and firm. Let cool slightly.
Assemble sandwiches: Spread garlic butter on one side of each zucchini slice. Add cheddar between two slices (buttered side out).
Grill on skillet until cheese is melted and both sides are crispy golden.
Slice and serve hot!
- Prep Time: 15 mins
- Cook Time: 25 mins
- Category: breakfast
Nutrition
- Calories: ~320
- Fat: 22g
- Carbohydrates: 10g
- Protein: 15g
Gather Your Cheesy, Veggie-Loaded Arsenal
- 2 cups grated zucchini (squeezed DRY!): Our star “bread”! Chef’s Insight: Squeezing is non-negotiable – use a nut milk bag, cheesecloth, or just your super-strong hands. Wet zucchini = sad, soggy slices. Trust me, I learned the hard way!
- 1 large egg: The binder that holds our veggie dream together. Room temp blends easier!
- ½ cup freshly grated Parmesan: Adds salty, umami depth AND helps absorb moisture. Sub Tip: Pre-grated won’t melt as well. Fresh is best here!
- ¼ cup cornstarch: Our crispy secret weapon! Locks in moisture and creates that perfect golden crust. Sub Tip: Arrowroot powder works great for paleo friends.
- Salt and pepper, to taste: Season your zucchini base well – it builds flavor layers!
- 2 tbsp garlic butter: Flavor BOOM! Chef’s Hack: Melt 2 tbsp regular butter + 2 finely minced garlic cloves. Feeling fancy? Add a pinch of parsley!
- 1–2 cups shredded Cheddar cheese: Melty, gooey bliss! Sub Tip: Sharp cheddar is my fave, but try Gruyère, Monterey Jack, or a smoky Gouda! Shred it yourself – pre-shredded has anti-caking agents that don’t melt as smoothly.
Let’s Build Your Crispy, Cheesy Masterpiece!
- Preheat & Prep: “Wake up your oven! Crank it to 400°F (200°C). Line a baking sheet with parchment paper – trust me, cleanup is a breeze.”
- The Great Zucchini Squeeze: “Grate that zucchini! Now comes the workout: Pile it into a clean kitchen towel, cheesecloth, or nut milk bag. Twist and SQUEEZE over the sink like you’re wringing out a wet swimsuit. Get aggressive! You want it as dry as possible. Seriously, this is the crispy-slice foundation.”
- Mix the Magic Dough: “In a bowl, combine your bone-dry zucchini, the egg, grated Parmesan, cornstarch, a good pinch of salt, and a few cracks of pepper. Mix it up with a fork or your hands until it looks like a sticky, green-flecked batter. Don’t overmix!”
- Shape Your “Bread”: “Divide the mixture into 4-6 equal mounds on your prepared sheet. Flatten each mound firmly with your fingers or a spatula into rectangles or squares about 1/4-inch thick – think slightly thinner than a standard slice of bread. Pro Tip: Make them neat around the edges for better grilling later!”
- Bake to Golden Perfection: “Slide that tray into the hot oven. Bake for 20-25 minutes. You want them firm to the touch and beautifully golden brown, especially around the edges. Let them cool on the sheet for 5 minutes – they firm up more as they cool. Chef’s Watch-Out: They might seem soft straight out of the oven, but cooling is key!”
- Garlic Butter Bliss & Assembly: “While slices cool, make your garlic butter (if you haven’t already). Lightly spread garlic butter on one side of each zucchini slice – this becomes your glorious outer crust! Place a generous pile of shredded cheddar on the unbuttered side of one slice. Top with another slice, buttered side facing OUT. Cheese in the middle, butter on the outside – yes!”
- Skillet Sizzle: “Heat a non-stick skillet or griddle over medium heat. No extra butter needed (thanks to our garlic butter coating!). Carefully place your sandwiches in the skillet. Cook for 3-4 minutes per side, pressing down GENTLY with a spatula, until the cheese is gloriously melted and the zucchini “bread” is deep golden brown and crispy. Hack Alert: Cover the skillet with a lid for the last minute to really melt the cheese fast!”
- The Grand Finale: “Transfer your masterpieces to a cutting board. Let them rest for just a minute (melty cheese is lava-hot!). Slice diagonally because it’s fancier, and watch that cheese pull!”
Plating Up Pure Comfort
Slide that gorgeous, golden sandwich onto a bright plate – the contrast makes it pop! Let the cheese ooze out the sides photogenically. Keep it simple: a light, tangy side salad (think lemon vinaigrette) cuts the richness perfectly. For ultimate cozy vibes, dunk it into a warm bowl of creamy tomato soup. Garnish? Maybe a tiny sprinkle of fresh parsley or chives if you’re feeling extra, but honestly? Just dive in. That first crispy, cheesy, garlicky bite needs no adornment!
Shake Up Your Sandwich Game!
- Pizza Party: Swap cheddar for mozzarella, add pepperoni slices and a spoonful of marinara inside before grilling. Basil on top after cooking? Yes, please!
- Mushroom & Swiss Bliss: Sauté sliced mushrooms with thyme. Layer with Swiss cheese inside the sandwich. Gourmet vibes instantly!
- Spicy Southwest Kick: Mix a pinch of cumin and chili powder into the zucchini dough. Use pepper jack cheese and add a few slices of pickled jalapeños inside. Boom!
- Caprese Dream: Fresh mozzarella slices, a juicy tomato slice, and a basil leaf inside. Drizzle with balsamic glaze after grilling. Summer in a sandwich!
- Protein Power-Up: Add a layer of thinly sliced deli turkey, ham, or leftover roasted chicken inside with your cheese. Instant hearty meal!
Clara’s Kitchen Confessions & Wisdom
Okay, real talk? My first batch of these zucchini slices looked like abstract art, not rectangles. Shape perfection is overrated! Focus on getting them evenly thick. This recipe is also my fridge clean-out hero. Got a bit of bell pepper or corn? Finely chop and mix it into the zucchini dough! Over the years, I’ve learned the cooling step is sacred – rushing leads to breakage. And don’t be shy with the cheese! The melty goodness is what makes the zucchini “bread” shine. The funniest fail? I once forgot the cornstarch. Let’s just say I ended up with zucchini scramble… tasty, but not sandwich material! This recipe is forgiving. Embrace the mess, squeeze that zucchini like it stole something, and celebrate that crispy, cheesy victory. It’s earned!
Your Zucchini Grilled Cheese Questions, Solved!
Q: Help! My zucchini slices are soggy/split. What went wrong?
A: Sogginess almost always traces back to inadequate squeezing! Really wring out every drop. Splitting usually means the slices were too thin or handled too soon after baking. Ensure they’re at least 1/4-inch thick and let them cool completely on the baking sheet – they firm up significantly. Cornstarch is key too – don’t skip it!
Q: Can I prep the zucchini slices ahead?
A: Absolutely! Bake the zucchini slices, let them cool completely, then store them layered between parchment paper in an airtight container in the fridge for up to 2 days. When ready, assemble with cheese and grill! They might take an extra minute per side to heat through.
Q: Can I freeze these?
A: You can freeze the baked (and cooled) zucchini slices! Freeze them flat on a tray first, then transfer to a freezer bag. Thaw in the fridge before assembling and grilling. Freezing the assembled sandwich isn’t recommended – the texture suffers.
Q: Is there a substitute for cornstarch?
A: Yes! Arrowroot powder is a great 1:1 substitute. Almond flour (about 1/3 cup) can work in a pinch for a grain-free option, but the slices might be slightly more delicate. Tapioca starch is another option.
Nourishment Notes (Because Feeling Good Matters!)
This recipe is naturally low-carb and gluten-free, packing a veggie punch! Here’s the skinny per serving (assuming recipe makes 3 servings):
- Calories: ~320 kcal
- Protein: ~15g (Hello, cheese and egg!)
- Fat: ~22g (The good, satisfying kind!)
- Carbs: ~10g (Mostly from the zucchini and a touch of cornstarch)
- Fiber: ~2g (Thanks, zucchini!)
Prep Time: 15 minutes | Cook Time: 25 minutes | Total Time: 40 minutes | Servings: 2-3
There you have it, friends—your new favorite way to enjoy grilled cheese without the guilt! This Garlic Butter Zucchini Grilled Cheese is the perfect blend of crispy, cheesy, garlicky goodness, and it’s packed with veggie power. Whether you’re craving a quick lunch, a light dinner, or a fun snack, this recipe will not only satisfy your comfort food cravings but also leave you feeling fantastic.
The best part? You can customize it with endless variations like pizza-style, Caprese, or even a spicy Southwest kick. So, next time you’re in the mood for something indulgent yet healthy, reach for that zucchini, get your cheese melting, and let this guilt-free grilled cheese steal the show!
There you have it, friends—your new favorite way to enjoy grilled cheese without the guilt! This Garlic Butter Zucchini Grilled Cheese is the perfect blend of crispy, cheesy, garlicky goodness, and it’s packed with veggie power. Whether you’re craving a quick lunch, a light dinner, or a fun snack, this recipe will not only satisfy your comfort food cravings but also leave you feeling fantastic.