Spooky, Sweet, and Seriously Adorable: Let’s Make Ghost Mochi!
Hey there, my fellow flavor adventurer! Have you ever seen a treat so cute you almost (almost!) didn’t want to eat it? That’s the magic of these little ghost mochi. Imagine this: a plump, juicy strawberry, hugged by a blanket of smooth, sweet red bean paste, all wrapped up in a soft, chewy, and slightly sweet mochi blanket. Then, we give it a personality with a simple, spooky little face. The result? A treat that’s as fun to make as it is to devour, and it’s guaranteed to make everyone at your Halloween gathering go, “Aww… and then, “OMG, what is this deliciousness?!”
I know what you might be thinking. “Mochi? That seems… tricky.” But trust me, your friendly neighborhood curious cook Clara is here to tell you that this recipe is our little secret. It’s surprisingly simple, uses a microwave for the dough (no fancy steamers required!), and is basically a edible art project. It’s the perfect way to add a touch of whimsical, not-too-scary charm to your Halloween spread. So, tie on your apron, grab your cutest bowl, and let’s create something that’s nourishing for the soul and a total party for your taste buds. Get ready for some sticky fingers and happy hearts!
The Day I Met My First Mochi
My love affair with mochi didn’t start in a fancy kitchen or a pastry class. Nope. It started in a cramped, buzzing Japanese convenience store during a rain-soaked trip to Tokyo. I was jet-lagged, hungry, and completely overwhelmed by the wall of colorful, plastic-wrapped treats. I pointed at random, and my prize was a soft, squishy packet containing a dusted white ball. I took one bite and my world just… paused. The initial resistance gave way to an impossibly soft, chewy texture, giving way to a sweet, creamy red bean center. It was a texture I’d never experienced and a flavor I instantly adored.
I must have looked like a complete fool, standing there in the 7-Eleven doorway, my eyes wide with wonder, utterly captivated by this simple treat. That moment of unexpected joy, of discovering a new favorite thing in the most ordinary place, is the feeling I try to bring to every recipe here at Unknown. These ghost mochi are my playful, spooky-spirited homage to that first bite. They capture that magical chewy texture and sweet bean heart, but adding the fresh strawberry and the cute ghost face makes it our own little creation. It’s about taking something traditional and giving it a twist that makes you smile.
Print
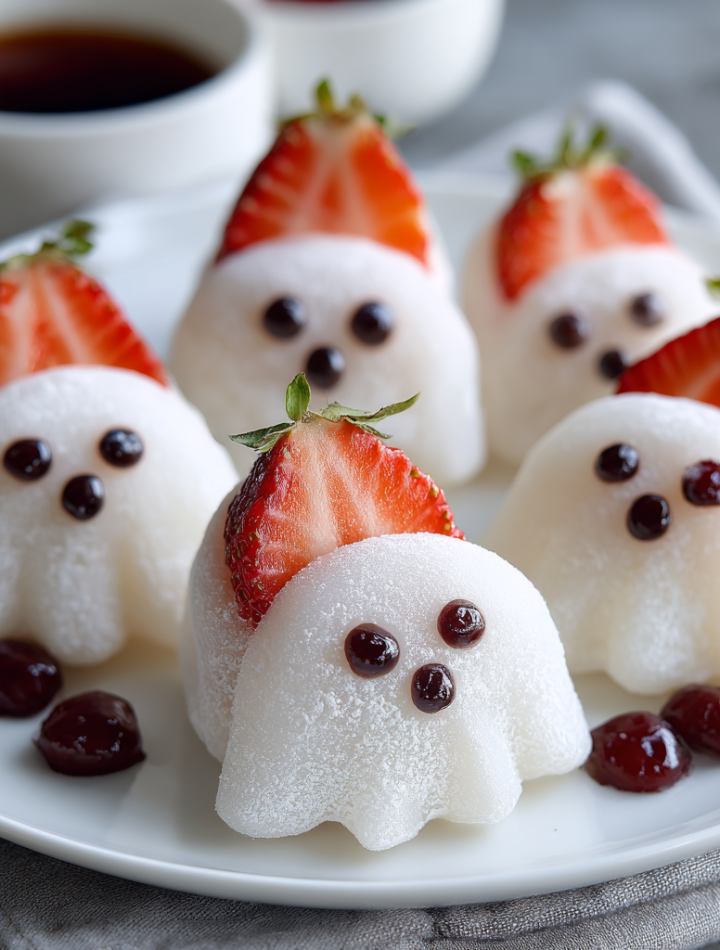
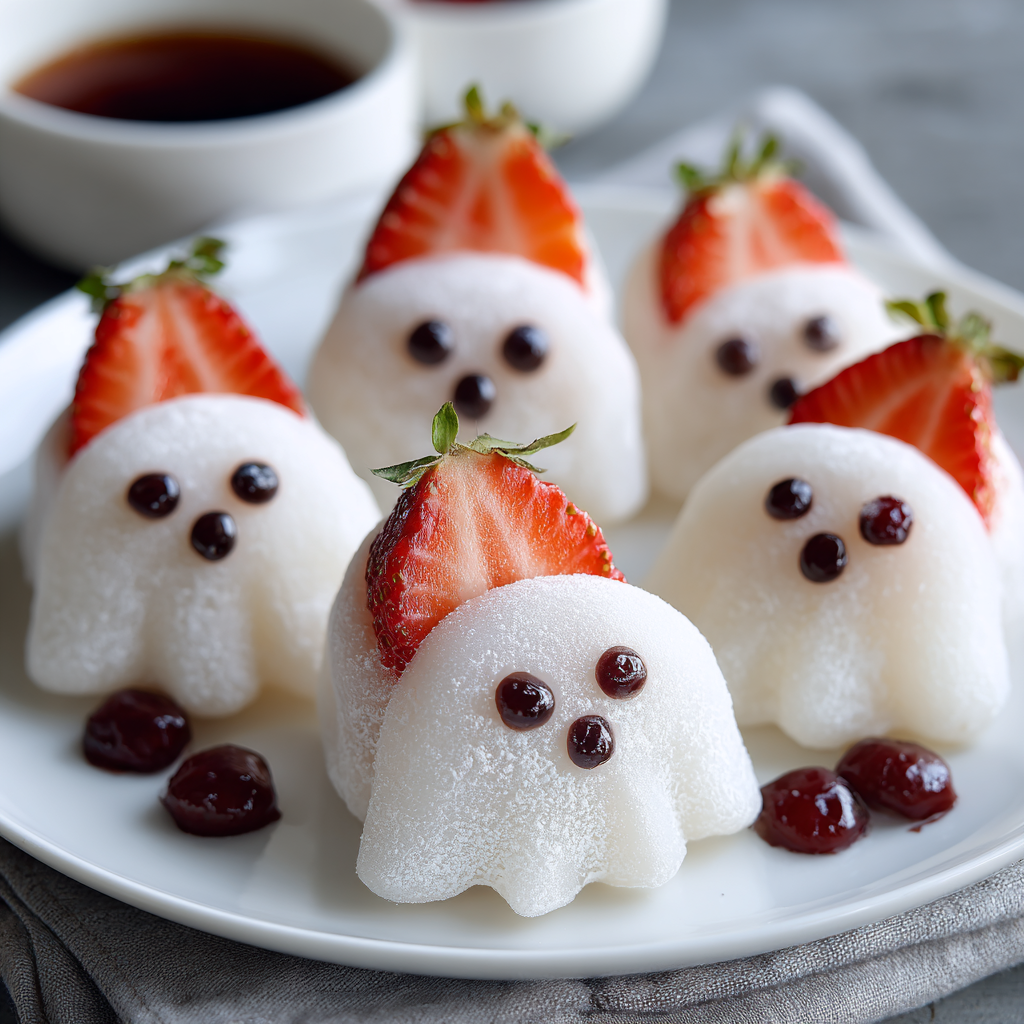
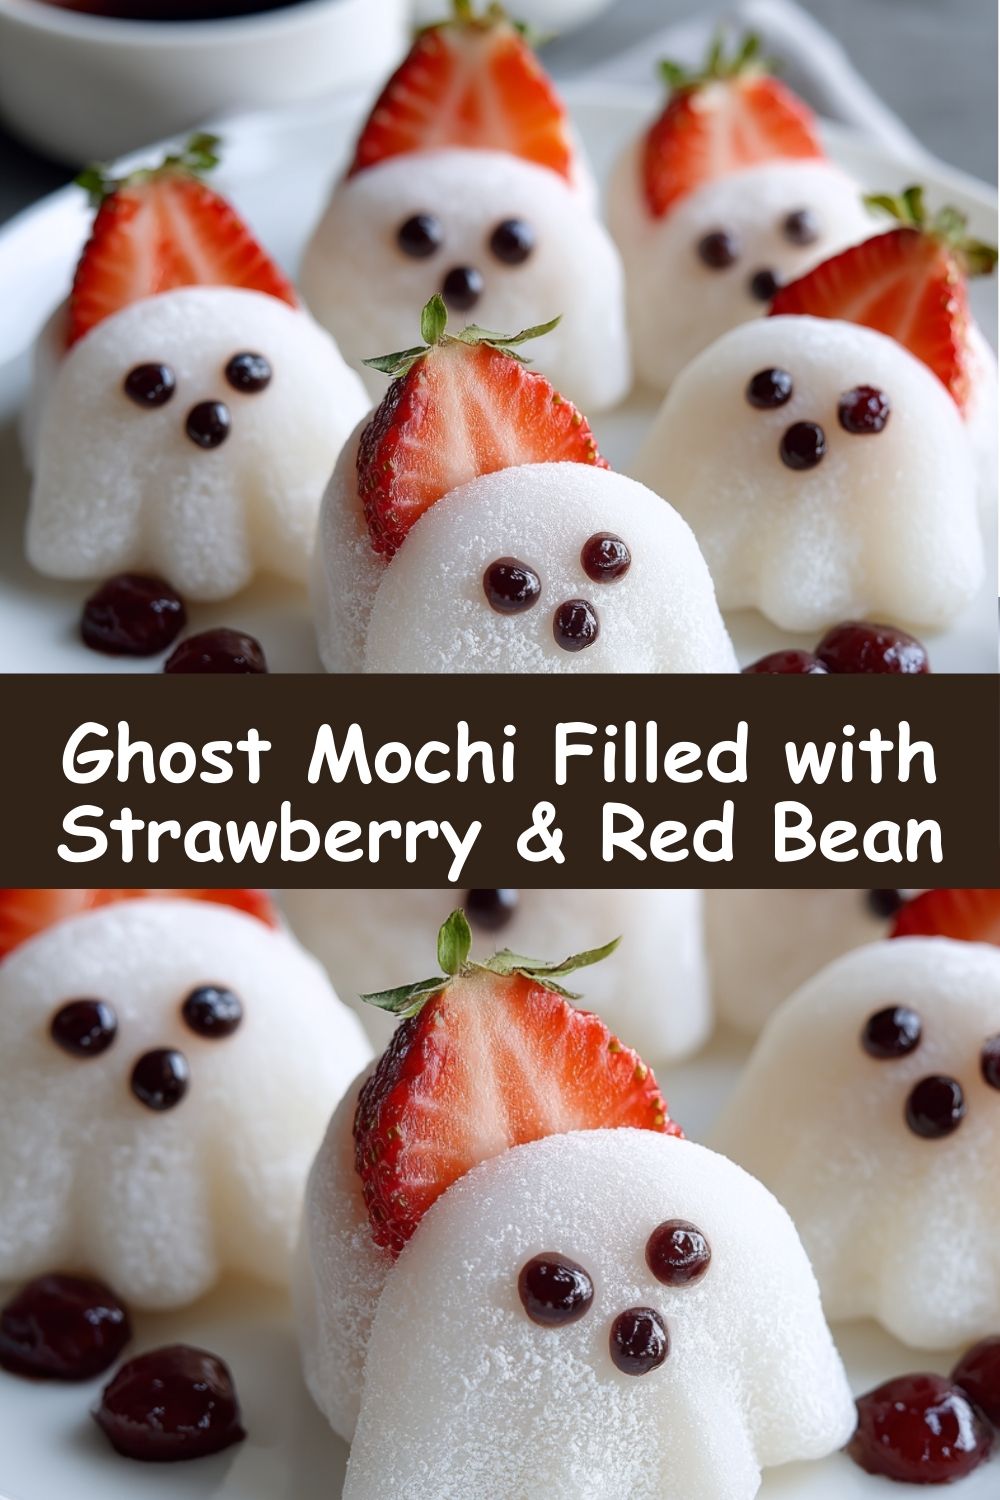
Ghost Mochi Filled with Strawberry & Red Bean
- Total Time: ~40 min
- Yield: 6 mochi 1x
Description
These adorable ghost mochi are chewy, sweet, and hiding a delicious surprise inside. Each soft rice dough wrapper encases a juicy strawberry and smooth red bean paste, while a simple ghost face adds a spooky touch. It’s a hauntingly cute Japanese-inspired treat perfect for Halloween.
Ingredients
6 fresh strawberries, hulled
6 tbsp sweet red bean paste (anko)
1 cup glutinous rice flour (mochiko)
1/4 cup sugar
2/3 cup water
Cornstarch (for dusting)
Melted dark chocolate or black food gel (for faces)
Instructions
Wrap each strawberry in 1 tbsp red bean paste, covering the berry completely. Freeze for 15 minutes.
In a microwave-safe bowl, mix rice flour, sugar, and water until smooth.
Cover and microwave for 2 minutes. Stir, then microwave 1 more minute until thick and sticky.
Dust a clean surface with cornstarch. Turn out the mochi dough and divide into 6 portions.
Flatten each piece into a circle. Place a red bean-wrapped strawberry in the center, pointed side down.
Pinch and seal the dough around the base, letting excess dough drape like a ghost.
Use melted chocolate or food gel to dot on eyes and a mouth.
Chill slightly before serving.
- Prep Time: 25 mins
- Cook Time: 15 mins
- Category: Dessert
Nutrition
- Calories: 140
- Fat: 1g
- Carbohydrates: 31g
- Fiber: 1g
- Protein: 2g
Gathering Our Ghostly Crew: The Ingredients
Here’s everything you need to summon these adorable little specters. Don’t worry if some ingredients are new to you—I’ve got all the tips and swaps you need right here!
- 6 fresh strawberries, hulled: Look for berries that are medium-sized, firm, and have a nice pointed end—it makes the ghost shape so much cuter! If strawberries aren’t in season, you can try this with a whole, pitted cherry or even a small slice of mango or peach, but pat it very dry.
- 6 tbsp sweet red bean paste (anko): This is the classic sweet filling! You’ll find it canned or vacuum-sealed at most Asian grocery stores. It comes in smooth (koshian) or chunky (tsubuan)—either works great here! Chef’s Insight: If red bean isn’t your thing, you can swap in an equal amount of white chocolate ganache, sweetened cream cheese, or even Nutella!
- 1 cup glutinous rice flour (mochiko): This is the star! Don’t be fooled by the name—it’s gluten-free. “Glutinous” refers to its gorgeous, glue-like sticky quality. Mochiko is a specific brand that’s perfect and widely available. This is non-negotiable; regular rice flour won’t work!
- 1/4 cup sugar: Just a bit to sweeten the mochi dough itself. I use regular granulated sugar.
- 2/3 cup water: This is what we’ll use to bring our dough together. Simple!
- Cornstarch (for dusting): This is your best friend. Mochi dough is incredibly sticky. A generous dusting of cornstarch on your hands and work surface is the only way to handle it without turning into a ghost yourself! Potato starch also works beautifully.
- Melted dark chocolate or black food gel (for faces): For the cute ghost faces! Melted chocolate in a piping bag (or a zip-top bag with a tiny corner snipped off) gives you the most control. If you’re a decorating pro, food gel works too!
Let’s Get Spectral: Making the Ghost Mochi Step-by-Step
Ready for the fun part? Let’s do this! Read through all the steps first—it’s a fast process once you start.
- Wrap & Freeze: Take a hulled strawberry and completely envelop it in about 1 tablespoon of red bean paste. Smooth it into a nice, even layer around the berry. The pointed end of the strawberry will become the top of our ghost! Place all six wrapped berries on a parchment-lined plate or tray and pop them into the freezer for a solid 15 minutes. This is a crucial step! It firms up the bean paste, making it infinitely easier to wrap in the hot mochi dough later. Chef’s Hack: If your bean paste is too sticky to handle, lightly wet your hands with cold water.
- Make the Mochi Dough: In a microwave-safe bowl (glass is best!), whisk together the glutinous rice flour (mochiko) and sugar. Gradually pour in the water and whisk until you have a smooth, lump-free batter. It will look like thin pancake batter. Cover the bowl with a lid or plastic wrap. Microwave on high for 2 minutes.
- Cook & Stir: Carefully remove the bowl (it will be hot!). Give the mixture a very good stir with a wet spatula. It will be partially cooked and look a bit gloopy. Re-cover it and microwave for another 1 minute. Now it should be fully cooked—translucent, thick, and incredibly sticky and elastic! If it still looks wet in the center, give it another 15-30 seconds. Chef’s Commentary: Watching the plain batter transform into that classic, stretchy mochi dough is pure kitchen magic every single time.
- Turn Out & Divide: Liberally dust a clean counter or a large cutting board with cornstarch. Also, dust your hands! Scrape the hot mochi dough onto the surface. It’s lava-hot, so be careful. Dust the top of the dough with more cornstarch. Using a bench scraper or a knife, divide the dough into 6 equal portions. Work quickly while it’s warm, as it’s easier to handle.
- Shape & Fill: Take one portion of dough. With your well-dusted fingers, gently press and flatten it into a circle about ⅛-inch thick, making the edges slightly thinner than the center. Retrieve your frozen red bean-strawberry bundles. Place one bundle, pointed (strawberry) end down, right in the center of your mochi circle.
- Pinch & Drape: This is the ghost-making moment! Gently gather the edges of the mochi up and around the filling. Pinch the seams together at the base to seal it completely. Now, here’s the trick: don’t try to smooth it down. Let the excess dough drape naturally down from the sealed base to create the ghost’s wispy, flowing form. Place your finished ghost seam-side down on a cornstarch-dusted tray. Repeat with the remaining dough and filling.
- Draw the Faces: Let your ghosts cool and set for about 10 minutes. If you used melted chocolate for the faces, it needs a slightly cool surface to set on. Using a piping bag with a tiny tip (or that zip-top bag with a corner snipped off), carefully dot on two eyes and a little “o” or “w” mouth for each ghost. So much personality in just a few dots!
- Chill & Serve: Pop them in the fridge for just about 10-15 minutes to let everything set completely. This also makes them wonderfully chewy and refreshing to eat!
How to Serve Your Hauntingly Cute Creation
Presentation is half the fun! Arrange your little ghost mochi family on a dark slate platter or a piece of black parchment paper—it makes their white bodies and cute faces really pop. For a party, scatter a few autumn leaves or black and orange sprinkles around them to set the scene. They’re perfect as a standalone treat with a cup of green tea or as the show-stopping finale to a Halloween dinner party. Serve them slightly chilled for the best chewy texture!
Spooky & Sweet Twists: Recipe Variations
Feel like playing mad scientist? Here are some fun ways to mix it up!
- Matcha Ghosts: Add 1 tablespoon of high-quality matcha powder to the dry mochiko and sugar mixture for a gorgeous green-colored, earthy-flavored ghost.
- Chocolate Haunting: Swap the red bean paste for a thick chocolate hazelnut spread or a ball of sweetened mascarpone cheese.
- Fruity Phantom: Not a strawberry fan? Use a whole, pitted lychee or a small wedge of ripe, firm mango inside instead.
- Vegan-Friendly Spirits: Ensure your sugar is vegan-friendly and use a dairy-free chocolate for the faces. The mochi itself is naturally vegan!
- Pumpkin Spice Specters: Mix a tablespoon of pumpkin pie spice into the red bean paste for a cozy autumn flavor explosion.
Clara’s Chef Notes & Kitchen Stories
Oh, the stories I have from testing these little guys. The first time I made them, I thought I could skip the cornstarch. Big mistake. Huge. I ended up with mochi dough fused to my fingers, the counter, and even a stray measuring spoon—I looked like I was being consumed by a marshmallow monster. Lesson learned: respect the cornstarch!
This recipe has evolved so much. I started by trying to steam the dough the traditional way, which works but takes forever. The microwave method is a total game-changer for speed and ease. I’ve also found that the short freeze on the filling is the absolute key to a clean wrap. The beauty of this recipe is its playfulness. Don’t stress if your ghosts are all slightly different shapes and sizes—that just gives them more character! The most important thing is that they’re made with joy and eaten with gusto.
Ghost Mochi FAQs: Your Questions, Answered!
Q: My mochi dough was too sticky and impossible to handle. What happened?
A: This almost always means you need more cornstarch! Don’t be shy with it—dust your surface, your hands, your rolling pin, and the dough itself liberally. The dough is supposed to be incredibly sticky right out of the microwave; the cornstarch is your barrier. Also, ensure you cooked it long enough. An undercooked dough will be wetter and harder to manage.
Q: Can I make these ahead of time?
A: You can assemble them up to a day ahead. Keep them stored in a single layer in an airtight container in the fridge. The mochi will firm up in the fridge but will soften to its perfect chewy texture again after about 10-15 minutes at room temperature. I’d recommend drawing the faces on the day you plan to serve them for the sharpest look.
Q: My mochi cracked when I tried to wrap it. How do I prevent that?
A: Cracking usually means the dough has cooled down too much and started to firm up. Work as quickly as you can with the warm dough. If it does cool and crack, you can try to gently warm it in your hands (dusted in cornstarch!) to make it pliable again. Also, make sure you’re rolling it out to a large enough circle so it can easily encompass the filling.
Q: I can’t find glutinous rice flour. What can I use?
A: Unfortunately, there’s no direct substitute for glutinous rice flour (mochiko) if you want that authentic, stretchy, chewy mochi texture. Regular rice flour, almond flour, or all-purpose flour will not work. It’s available in the baking or international aisle of most well-stocked supermarkets or any Asian grocery store.
Nutritional Info (Per Mochi Ghost)
This is a rough estimate and can vary based on specific ingredients used.
- Calories: 140
- Fat: 1g
- Carbohydrates: 31g
- Sugar: 12g
- Protein: 2g
- Fiber: 1g
Prep time: 25 min | Chill time: 15 min | Total time: ~40 min | Yield: 6 adorable mochi ghosts