Spooky, Sweet, and Seriously Easy: Graveyard Oreo Nutella Mousse Cups
Hey, my spooky-season squad! Clara here, and I am absolutely buzzing with excitement to share this recipe with you. Halloween is hands-down my favorite holiday. It’s not just about the costumes and the crisp autumn air; it’s about the magic. It’s the one night of the year where we get to be playful, a little bit mischievous, and transform the ordinary into something extraordinary.
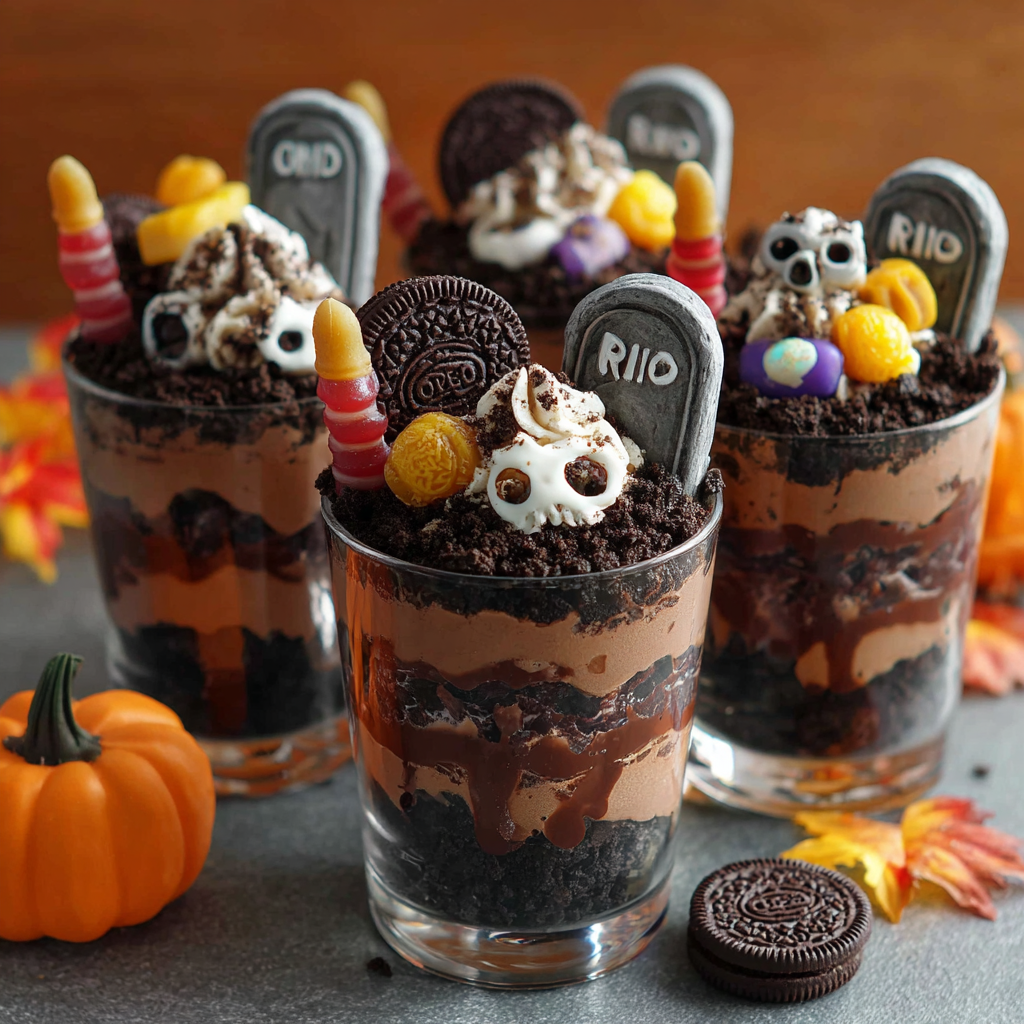
And that, my friends, is exactly what we’re doing in the kitchen today. We’re taking a few simple, delicious ingredients and turning them into a show-stopping dessert that’s equal parts creepy and crave-worthy. I’m talking about my Graveyard Oreo Nutella Mousse Cups. Imagine this: the creamiest, dreamiest, chocolate-hazelnut mousse you’ve ever tasted, hiding under a layer of crunchy, dark “dirt.” It’s topped with edible tombstones, gummy worms crawling out of the earth, and all sorts of spooky surprises.
The best part? There’s zero baking involved. These cups come together in about 20 minutes of active kitchen time, making them the ultimate last-minute lifesaver for Halloween parties, school events, or a fun family decorating night. So, grab your favorite mixing bowl and let’s whip up a dessert that’s so fun, it’s almost scary. Let’s make some magic!
A Graveyard Tradition: More Than Just a Dessert
This recipe always takes me right back to my very first Halloween in my own apartment. I was broke, but desperately wanted to host a party. A store-bought cake felt like a cop-out, and my oven was… let’s just say ‘unpredictable.’ I needed something foolproof, festive, and fantastic.
I stared into my pantry and saw a jar of Nutella and a sleeve of Oreos. Lightbulb moment! I whipped the cream by hand (a serious arm workout, let me tell you), folded in the Nutella, and layered it all in some old jam jars I’d saved. For tombstones, I broke pieces of graham crackers and scrawled “RIP” with a toothpick dipped in melted chocolate. It was messy, imperfect, and an absolute hit.
My friends couldn’t stop laughing at the wobbly tombstones and the gummy worms I’d “buried” halfway. That night, surrounded by friends in silly costumes, eating this ridiculously good dessert, I realized this was it. This was the feeling I wanted to create with my food: joy, connection, and a whole lot of deliciousness. This graveyard cup became my little Halloween tradition, and every year I add a new spooky twist. It’s a sweet reminder that the best creations often come from a little bit of necessity and a whole lot of heart.
Print
Graveyard Oreo Nutella Mousse Cups
- Total Time: 15 minutes
- Yield: 12–14 cups 1x
- Diet: Vegetarian
Description
Graveyard Oreo Nutella Mousse Cups are spooky no-bake Halloween treats made with creamy Nutella mousse and Oreo ‘dirt’, topped with edible decorations like cookie tombstones and gummy worms—fun, fast, and perfect for parties or kid-friendly decorating.
Ingredients
- 1L double cream (4 cups heavy whipping cream)
- 300g Nutella (about 1 cup)
- 40 Oreo cookies, crushed
- Optional toppings:
- Oval biscuits (for tombstones)
- Gummy worms
- Chocolate skulls
- Candy eyes
- Mini pumpkins
- Whipped cream
Instructions
- In a large bowl, whip the cream until soft peaks form.
- Add Nutella and continue whipping until smooth and thick.
- Spoon or pipe mousse into clear cups, filling them ¾ full.
- Top each with a thick layer of crushed Oreos to resemble dirt.
- Insert an oval biscuit vertically into each cup as a tombstone.
- Decorate with gummy worms, chocolate skulls, candy eyes, or mini pumpkins.
- Chill until ready to serve.
Notes
- Use black food gel or icing to write R.I.P. on tombstone cookies.
- Make ahead and store covered in the fridge for up to 2 days.
- For extra texture, layer mousse and Oreos twice.
- Substitute Nutella with melted chocolate for a different flavor.
- Prep Time: 15 minutes
- Cook Time: 0 minutes
- Category: Dessert
- Method: No-Bake
- Cuisine: American
Nutrition
- Serving Size: 1 cup
- Calories: 420
- Sugar: 24g
- Sodium: 160mg
- Fat: 32g
- Saturated Fat: 18g
- Unsaturated Fat: 12g
- Trans Fat: 0g
- Carbohydrates: 32g
- Fiber: 2g
- Protein: 4g
- Cholesterol: 70mg
Keywords: Halloween dessert, Nutella mousse cups, graveyard cups, Oreo dirt cups, no bake Halloween treats, spooky mousse dessert
Gathering Our Ghoulish Ingredients
Here’s the beautiful part: this recipe requires minimal ingredients for maximum impact. You probably have most of this already! Let’s break it down.
- 1 Liter Double Cream (or 4 cups Heavy Whipping Cream): This is the foundation of our cloud-like mousse. The high fat content is what allows it to whip up into stiff, glorious peaks that hold their shape. Chef’s Insight: Make sure your cream is ICE cold. I even pop my bowl and whisk attachments in the freezer for 15 minutes before I start. It makes the whipping process faster and gives you a more stable mousse.
- 300g Nutella (about 1 cup): Our flavor superstar! Its rich, chocolate-hazelnut profile is pure magic. Substitution Tip: Not a Nutella fan? Any chocolate-hazelnut spread will work, or you can swap it for a smooth peanut butter for a peanut butter cup vibe!
- 40 Oreo Cookies, crushed: This is our “dirt” layer, and it provides the most wonderful crunchy contrast to the smooth mousse. Chef’s Hack: Don’t bother scraping out the cream filling! Toss the whole cookies into a food processor and pulse until you have fine crumbs. The cream filling just adds more deliciousness. You can also place them in a zip-top bag and crush them with a rolling pin—a great way to release a little stress!
- Optional Toppings (The Fun Part!):
- Oval Biscuits (like Milano Cookies): Perfect for our edible tombstones.
- Gummy Worms: A classic! I love the ones that are half-buried, crawling out of the dirt.
- Chocolate Skulls, Candy Eyes, Mini Pumpkins: Raid the Halloween aisle! These little extras really tell a story.
- Whipped Cream: For a little extra “ghostly” mist effect.
- Edible Marker or Melted White Chocolate: For writing “RIP” on your tombstones.
Building Our Edible Graveyard: A Step-by-Step Guide
Okay, team! Let’s get our hands dirty (figuratively, of course… mostly). This process is simple, but I’ve got some key tips to ensure your mousse is perfect every single time.
- Whip It Good: Pour your ice-cold double cream (or heavy whipping cream) into your chilled mixing bowl. Using an electric hand mixer or a stand mixer fitted with the whisk attachment, start whipping on medium-high speed. We’re looking for soft peaks. What does that mean? When you lift the whisk out of the cream, the peak will form but then its tip will gently curl over. It should look smooth and billowy. This usually takes about 2-3 minutes. Watch it closely! You don’t want to go too far and start making butter.
- The Nutella Embrace: Now, add your entire cup of Nutella to the whipped cream. Here’s my pro tip: if your Nutella is super thick and straight from the pantry, microwave it for just 10-15 seconds to slightly soften it. This makes it much easier to fold in and prevents you from deflating all that beautiful air you just whipped into the cream. Start your mixer on low speed to initially incorporate the Nutella, then ramp it up to medium-high. Whip for another 1-2 minutes until the mixture is thick, smooth, and holds stiff peaks. It should be luxurious and spoonable, not runny.
- Choose Your Vessel: Grab your clear cups! I love using clear plastic or glass dessert cups because you can see all the gorgeous layers. It really adds to the graveyard effect. You can also use a large trifle dish to make one big graveyard!
- The First Layer – Mousse: Spoon or pipe your Nutella mousse into each cup, filling them about 3/4 of the way full. Leaving that space at the top is crucial for our “dirt” and decorations! If you’re piping, a large star tip gives a really cool, textured look that resembles rising earth.
- The “Dirt” Layer: Generously spoon your crushed Oreos over the top of the mousse. Press it down gently with the back of your spoon to create a flat, solid layer of dirt. Don’t be shy here—the more texture, the better!
- Decorate Your Graveyard: This is where you unleash your inner artist! Take your oval biscuit and press it vertically into the Oreo dirt to create a tombstone. Use an edible marker or a toothpick dipped in melted white chocolate to carefully write “RIP” on it. Add gummy worms—bury one end under the dirt and let the other end crawl out. Scatter a few candy eyes, place a chocolate skull, or add a mini pumpkin. There are no rules! Get creative and have fun with it.
- The Chill: Once your masterpieces are assembled, pop them in the refrigerator to chill for at least an hour before serving. This allows the mousse to set firmly, making each spoonful cool and perfectly structured.
How to Serve These Spooky Sensations
Presentation is everything with this dessert! Line them up on a platter and scatter a few extra crushed Oreos and loose gummy worms around the base of the cups to continue the theme. For a real party vibe, set up a “decorating station” with bowls of all the different toppings and let your guests build their own graveyard cups. It’s such a fun activity for kids and adults alike! Serve them straight from the fridge with a small spoon for the perfect bite of creamy, crunchy, spooky goodness.
Spooky Twists & Dietary Swaps
Want to mix it up? Here are a few of my favorite ways to customize these cups:
- Boozy Adult Version: Add a tablespoon of hazelnut liqueur (like Frangelico) or coffee liqueur (like Kahlúa) to the mousse along with the Nutella for a sophisticated kick.
- Chocolate Pudding Layer: For extra decadence, spoon a layer of prepared chocolate pudding into the bottom of the cup before adding the mousse. It adds a wonderful depth of flavor and a different texture.
- Pumpkin Spice Twist: Fold 1 teaspoon of pumpkin pie spice into the cream before whipping for a seasonal flavor that pairs beautifully with the chocolate.
- Dairy-Free Delight: Use a chilled can of full-fat coconut cream (the solid part only) and whip it as you would regular cream. Swap the Nutella for a dairy-free chocolate-hazelnut spread and use vegan Oreos and candy.
- Gluten-Free Ghosts: Simply use gluten-free chocolate sandwich cookies for the dirt and ensure your toppings are certified gluten-free!
Chef’s Notes: Tales from the Crypt… er, Kitchen
This recipe has seen some things, you guys. One year, in a fit of enthusiasm, I decided to make a quadruple batch for a huge party. My stand mixer was working so hard I thought it might lift off the counter! Lesson learned: don’t overfill your mixer bowl. Whip in batches for the best results.
The recipe has evolved, too. I used to just dollop the mousse, but I’ve found piping it makes for a much neater and more dramatic presentation. I’ve also learned that the quality of your cream really matters. Splurge on the good, high-fat stuff—it’s worth it for that luxurious mouthfeel.
Most importantly, this isn’t a dessert for perfectionists. The wonky tombstone with the smudged “RIP” has more character. The cup with five gummy worms emerging from it tells a better story. Embrace the messy, spooky fun of it all. That’s where the real magic is.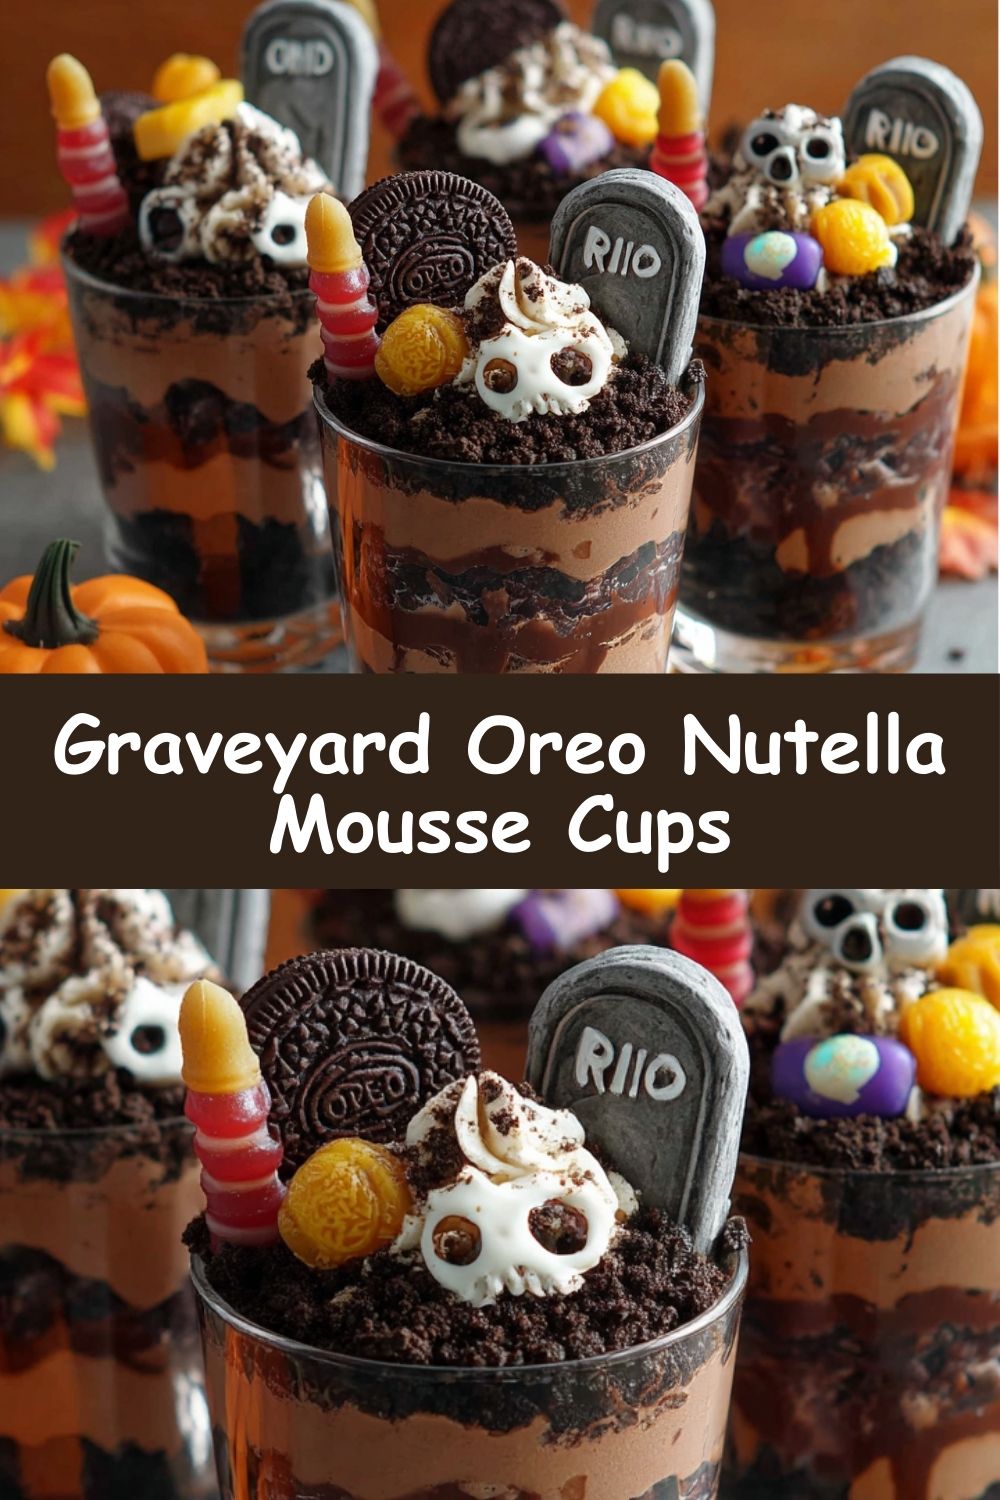
FAQs & Spooky Troubleshooting
Q: My mousse is runny and won’t hold its shape. What happened?
A: Ah, the classic culprit! This almost always means either A) your cream wasn’t cold enough, or B) you under-whipped it. Your cream and equipment need to be very cold to achieve stiff peaks. If it’s runny, pop the whole bowl back in the fridge for 20 minutes and then try whipping it again. If that fails, you can gently fold in a tablespoon of instant pudding powder (cheesecake or vanilla flavor works well) to help stabilize it.
Q: Can I make these ahead of time?
A: Absolutely! You can assemble the entire dessert (minus any whipped cream topping that might weep) up to 24 hours in advance. Keep them covered in the fridge. The Oreo “dirt” might soften a tiny bit the longer it sits, but it’s still delicious. I actually think the flavors meld together beautifully overnight.
Q: My Nutella was too thick and deflated my cream! How do I prevent this?
A: Great question! This is a common pitfall. As mentioned in the instructions, gently warming the Nutella for just 10-15 seconds in the microwave makes it much easier to incorporate. Always start mixing on low speed to avoid splashing and to gently combine the two before whipping them together into submission.
Q: I can’t find oval cookies for tombstones. Any other ideas?
A> No problem! Get creative. You can use:
- Piece of a Hershey’s Cookies ‘n’ Creme bar
- A rectangular piece of white chocolate bark
- A Nilla Wafer or a Biscoff cookie
- Even a large, flat piece of broken-up Oreo! The world is your spooky oyster.
Nutritional Info (Approximate, per cup)
Remember, friends, it’s all about balance! This is a celebratory treat, so enjoy it mindfully and with joy.
Calories: 350 | Fat: 28g | Carbs: 26g | Sugar: 18g | Protein: 4g | Fiber: 1g