Spooky, Gooey, and So Much Fun: Your New Favorite Halloween Treat!
Hey there, my fellow kitchen adventurers! Clara here. Is there anything that truly captures the pure, unadulterated joy of childhood quite like a Rice Krispie Treat? That perfect snap, the melt-in-your-mouth marshmallow cloud, the way they stick to your fingers in the best way possible… it’s a universal love language. But what happens when you take that beloved classic and give it a full-blown, spooky-season makeover? Magic, my friends. Pure, delicious, and incredibly fun magic.
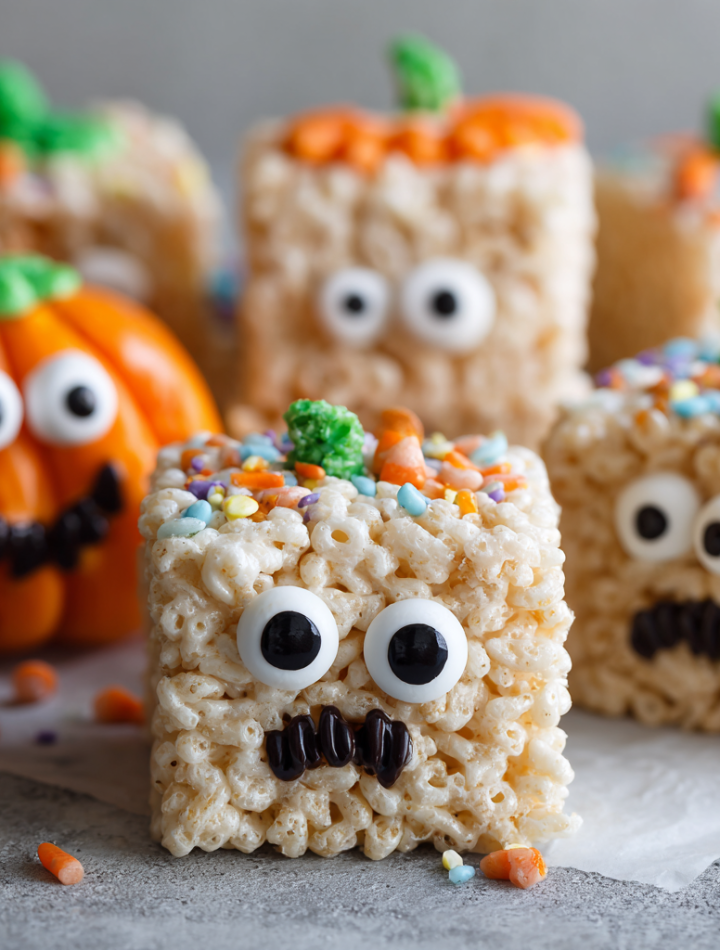
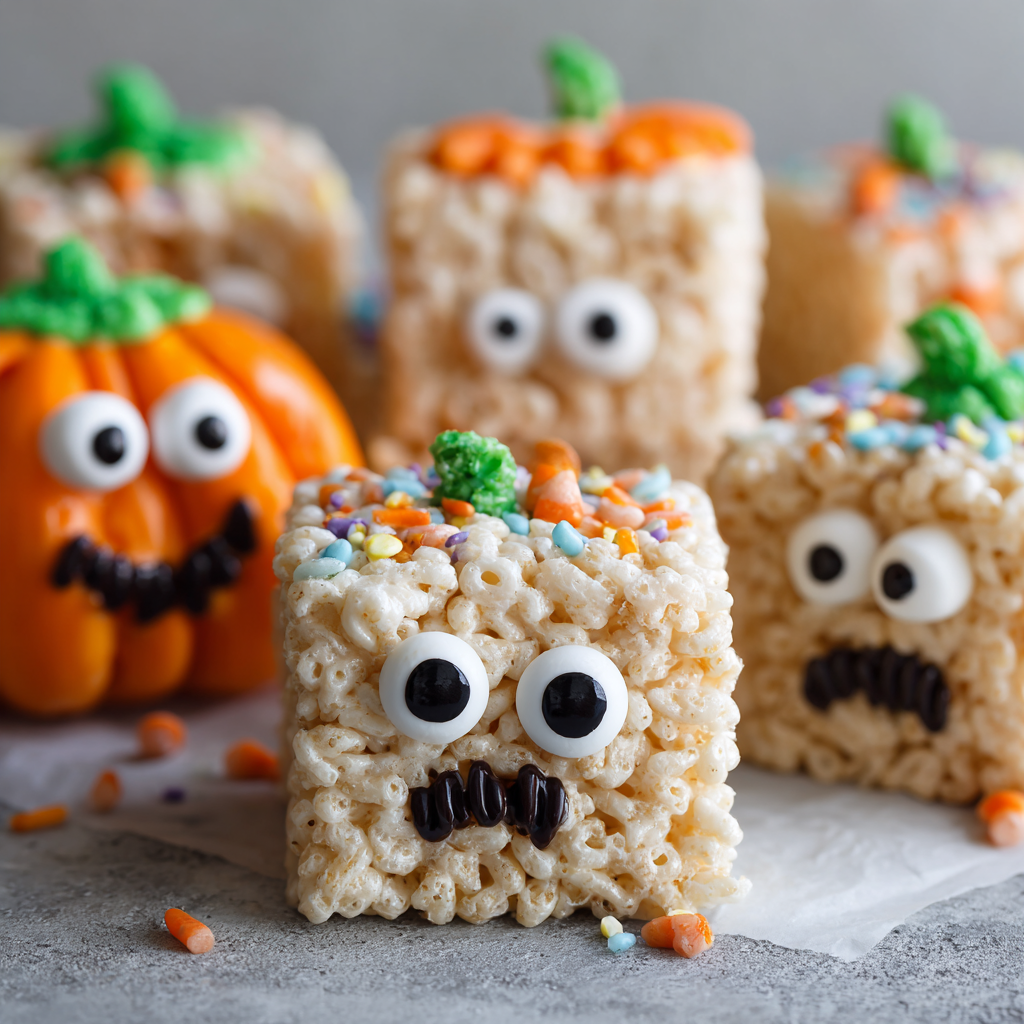
These aren’t just any Rice Krispie Treats. These are Halloween Rice Krispie Treats—your new secret weapon for parties, school events, or just a seriously fun night in with the family. The best part? We’re ditching the oven. That’s right, this is a gloriously no-bake situation, meaning more time for decorating and less time cleaning up. We’re talking vibrant orange pumpkins, silly green monsters, and adorable mummy-wrapped bars, all ready to make everyone’s eyes light up. So, grab your biggest saucepan and your favorite spooky sprinkles. Let’s create a treat that’s as nourishing for our inner child as it is a total showstopper for the season!
A Marshmallow Melody: My First Kitchen “Boo!”
This recipe takes me right back to my grandma’s linoleum-floored kitchen, the smell of melting butter and sugar hanging in the air like a sweet ghost. I was about seven, tasked with my first “solo” culinary mission: stirring the marshmallows. I remember the sheer concentration, my tongue poked out, watching the white puffs slowly collapse into a glossy, lava-like river. My grandma, the ultimate kitchen wizard, would then produce a tiny bottle of red and yellow food coloring. With a few dramatic drops and a swirl of her wooden spoon, she transformed our simple snack into a pot of molten orange gold.
We didn’t have fancy candy eyes back then. Our monsters were decorated with raisin smiles and chocolate chip warts. But the act of creating something playful, something that made my friends gasp with delight when I brought them to our school party, sparked a tiny flame in me. It was my first taste of how food could be more than just fuel; it could be a canvas for joy, a edible piece of art that brings people together. That feeling is exactly what I want to share with you today. Let’s make some new, spook-tacular memories together!
Gathering Your Spooky Spell Ingredients
Simplicity is the name of the game here! These are pantry staples that come together to create something truly special. Here’s what you’ll need:
- 6 cups Rice Krispies cereal: The star of the show! That iconic snap and light texture are irreplaceable. Chef’s Insight: For a slightly healthier twist, you can use a brown rice crispie cereal—it works just as well and adds a nice, nutty undertone.
- 1 bag (10 oz / 280 g) marshmallows: The glue that holds our spooky dreams together. Standard white mini marshmallows melt the fastest and most evenly. Substitution Tip: Vegan friends, you can absolutely use Dandies or other vegan marshmallows with perfect results!
- 4 tablespoons unsalted butter: This adds richness and helps create that wonderfully soft, chewy texture. Using unsalted lets you control the salt level. Substitution Tip: For a dairy-free version, your favorite plant-based butter (like Miyoko’s or Earth Balance) works beautifully.
- ½ teaspoon salt: Don’t skip this! Salt is the secret weapon that cuts the overwhelming sweetness and makes all the flavors pop. It’s the difference between “good” and “where-have-you-been-all-my-life” good.
- Food coloring (orange, green, or black gel): This is where the magic happens! Chef’s Insight: I highly recommend using gel food coloring instead of liquid. The color is more vibrant and intense, and it won’t water down your marshmallow mixture, keeping the texture perfectly chewy.
- For Decorating: The fun part! Think candy eyes, Halloween-themed sprinkles, and melted chocolate (white, dark, or milk) for drizzling. Let your creativity run wild!Print

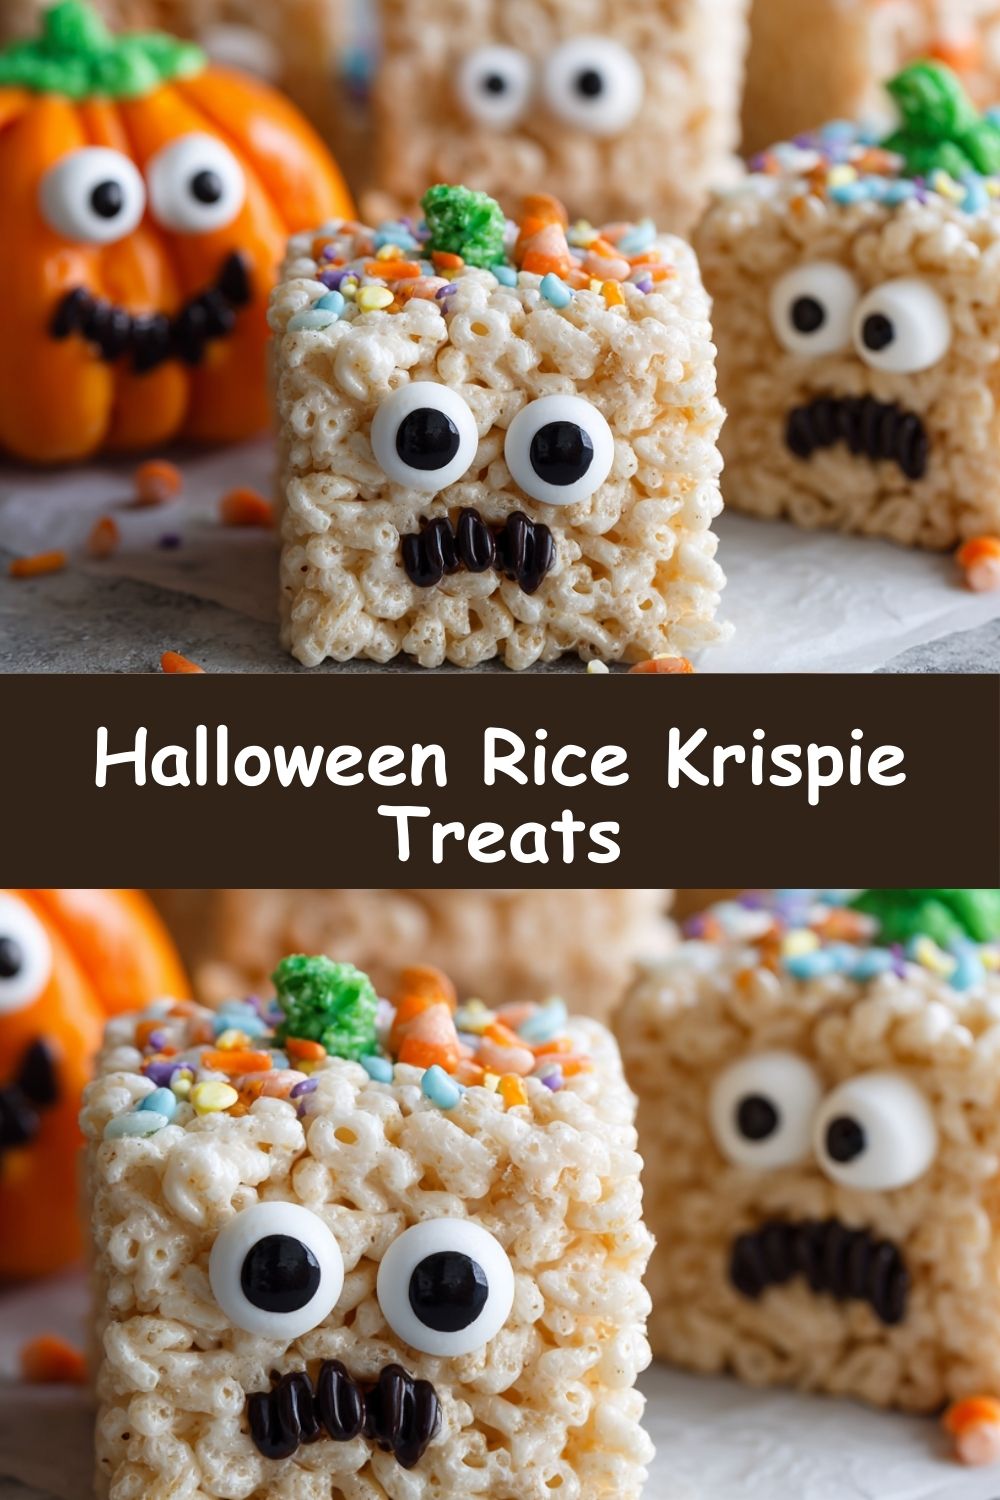
Halloween Rice Krispie Treats
- Total Time: 15 minutes
- Yield: 12–16 treats 1x
- Diet: Vegetarian
Description
A classic childhood favorite with a spooky twist! These Halloween Rice Krispie treats are soft, chewy, and fun to decorate. Whether you make them into pumpkins, mummies, or monster bars, they’re the perfect no-bake dessert for parties, trick-or-treat gatherings, or school celebrations.
Ingredients
Scale- 6 cups Rice Krispies (or similar puffed rice cereal)
- 1 bag (10 oz / 280 g) marshmallows
- 4 tablespoons unsalted butter
- ½ teaspoon salt
- Food coloring (orange, green, or black)
- Candy eyes, sprinkles, or melted chocolate (for decorating)
Instructions
- In a large saucepan, melt butter over low heat.
- Add marshmallows and stir until completely melted and smooth.
- Remove from heat and stir in food coloring of choice.
- Mix in Rice Krispies until evenly coated.
- Press mixture into a greased or parchment-lined pan or shape into desired Halloween figures while still warm.
- Decorate with candy eyes, sprinkles, or drizzled melted chocolate as desired. Let cool before serving.
Notes
- Grease hands or use wax paper to press treats into the pan without sticking.
- For pumpkins, roll into balls and add a pretzel stick and green icing leaf.
- Use white chocolate and candy eyes to make mummy bars.
- Store in an airtight container at room temperature for up to 3 days.
- Prep Time: 10 minutes
- Cook Time: 5 minutes
- Category: Dessert, Snack
- Method: No-Bake, Assembly
- Cuisine: American
Nutrition
- Serving Size: 1 treat
- Calories: 160
- Sugar: 12g
- Sodium: 115mg
- Fat: 4g
- Saturated Fat: 2.5g
- Unsaturated Fat: 1g
- Trans Fat: 0g
- Carbohydrates: 30g
- Fiber: 0g
- Protein: 1g
- Cholesterol: 10mg
Keywords: Halloween Rice Krispie treats, spooky cereal bars, no-bake Halloween dessert, marshmallow cereal bars, Halloween kids treat
Weaving Your Edible Magic: Step-by-Step
Ready to get your hands a little sticky? Let’s do this! The process is quick, so have all your ingredients measured and ready to go (this is called mise en place—fancy chef talk for “everything in its place”).
- Prepare Your Pan: Before you even think about turning on the stove, grab your 9×13 inch baking pan. Lightly grease it with butter or line it with parchment paper, leaving a little overhang on two sides. This is your golden ticket to easily lifting the whole slab out later for clean cutting. Trust me, this little step saves so much frustration!
- Melt the Butter: Place your large saucepan over low heat. Add the 4 tablespoons of butter and let it melt slowly. We’re not trying to brown it here, just gently melt it. Low and slow is the key to preventing any scorching later on.
- The Marshmallow Cloud: Once the butter is melted, add the entire bag of marshmallows and that ½ teaspoon of salt. Stir constantly with a sturdy wooden spoon or a silicone spatula. You’ll watch them go from solid puffs to a gooey, lumpy mess, and finally into a smooth, glorious, white lava. This should take about 5-7 minutes. Chef’s Hack: Seriously, keep the heat low. High heat is the enemy of smooth marshmallows and will lead to a tough, chewy final product.
- Color Burst! Remove the saucepan from the heat immediately once the marshmallow is smooth. Now, add your gel food coloring. For classic pumpkins, I use about 10 drops of red and 12 drops of yellow—mix it right in the pot! For monsters, green is fantastic, and for a eerie vibe, a little black goes a long way. Stir vigorously until the color is completely uniform.
- Bring in the Cereal: Now, dump all 6 cups of Rice Krispies cereal into the marshmallow lava. Using your spatula, gently but quickly fold the cereal into the marshmallow until every single piece is thoroughly coated. It might seem like a lot of cereal at first, but keep folding—it will all come together!
- Press and Shape: Immediately transfer the mixture to your prepared pan. Here’s another pro tip: lightly grease your hands with butter or cooking spray! This prevents the sticky mess from adhering to you. Press the mixture evenly into the pan. Don’t smash it down too hard, or you’ll make the treats dense. Just a firm, even press will do.
- Let’s Decorate! This is the best part! If you’re making bars, let the mixture cool for just 5-10 minutes until it’s firm enough to touch but still slightly warm. Then, press on candy eyes, sprinkles, or get creative with drizzled melted chocolate to make mummy wraps or spider webs. If you’re shaping pumpkins, let the mix cool just enough to handle, then grease your hands and roll into balls. Use a little piece of green licorice or a green M&M for the stem, and draw on lines with melted chocolate!
- The Final Wait: Let the treats cool completely in the pan at room temperature. I know it’s tempting, but cutting into them while they’re warm will make a messy, gooey disaster (a delicious one, but not a clean one!). Give them a good 1-2 hours to set up perfectly.
Plating Your Spooky Masterpieces
Once your treats are completely cool and cut, the presentation is half the fun! For a party, arrange them on a large, dark slate board or a rustic wooden platter to make the vibrant colors pop. Scatter a few extra candy eyes and sprinkles around the plate for a festive touch. If you’ve made pumpkin shapes, stack a few in a small tower with a little “leaf” of mint for a cute centerpiece. For individual servings at a kids’ table, place each treat in a small, colorful cupcake liner—it keeps things neat and adds to the party vibe!
Spooky Swaps & Creative Twists
The fun doesn’t stop with orange! This recipe is a perfect canvas for your imagination.
- Monster Mash-Up: Divide the marshmallow mixture into two batches. Color one green and one purple. Press them into the pan in a swirled pattern and decorate with an assortment of candy eyes for a monster bar party!
- Chocolate Cauldron: Stir ¼ cup of cocoa powder into the melted marshmallows along with the butter for a chocolate base. Decorate with orange sprinkles and white chocolate drizzle.
- Boo-nana Ghosts: Okay, a slight detour! Shape the mixture into small ghost shapes while warm. Once set, dip the bottom in melted white chocolate and add two mini chocolate chips for eyes.
- Add-In Adventure: Fold in ½ cup of Halloween M&Ms, crushed Oreo cookies (“dirt”), or even mini chocolate chips into the cereal mixture for extra texture and flavor.
- Gluten-Free Ghouls: Ensure your cereal is a certified gluten-free puffed rice brand, and you’re all set! This recipe is naturally GF-friendly.
Chef’s Notes: Lessons from a Sticky Kitchen
This recipe has seen many Halloweens in my kitchen, and it has evolved from a simple slab of treats into a full-blown decorating session. One year, I was so excited to make mummies I melted the white chocolate on too high a heat, causing it to seize up into a grainy mess. My “mummies” looked like they had been through a snowstorm! Lesson learned: always melt chocolate gently in short bursts in the microwave, stirring in between. Another time, I tried to use all-natural plant-based food coloring. The color was much more muted, a soft peach instead of a vibrant orange. It was still delicious, but it taught me that for that classic Halloween vibe, gel coloring is worth it. Don’t be afraid to get messy, laugh when a candy eye goes crooked, and remember that anything homemade, especially made with joy, is always perfect.
Your Questions, Answered!
Q: My treats turned out really hard. What did I do wrong?
A: The most common culprit is overheating the marshmallows. Cooking them over too high heat or for too long cooks out the moisture and makes them set up very hard. Always use low heat and remove the pan as soon as the marshmallows are melted and smooth.
Q: Why are my treats too soft and chewy?
A: This usually means you may have under-measured the cereal or used a marshmallow that’s too fresh or has a different texture. Using a heaping cup of cereal can help. Also, ensure you’re using standard marshmallows and not jumbo or stale ones (stale ones won’t melt properly!).
Q: Can I make these ahead of time?
A: Absolutely! They are the perfect make-ahead treat. Once cooled and cut, store them in an airtight container at room temperature for up to 3 days. If you’ve decorated with chocolate, they might last a day or two less if it’s humid.
Q: Help! Everything is sticking to my hands and the spoon!
A: Grease is your best friend! Liberally greasing your spatula, pan, and hands with butter or cooking spray makes the process infinitely easier. You can also lightly wet your hands with water to press the mixture in, but greasing works best.
Nutritional Nibble
Let’s keep it real—these are a fun, occasional treat! The approximate nutrition per serving (1/12th of the recipe) is about 150 calories, 1g protein, 30g carbohydrates, and 4g fat. The joy and creativity they spark are their own form of nourishment!