Let’s Get Cheesy: The Ultimate Homemade Mac and Cheese
Hey there, my fellow flavor adventurer! Clara here, from my cozy kitchen to yours. Let’s be real, we all have that one dish that feels like a warm, delicious hug. The one that makes you close your eyes and sigh with pure, unadulterated joy. For me, and maybe for you too, that dish is a big, bubbling, gloriously golden pan of homemade mac and cheese.
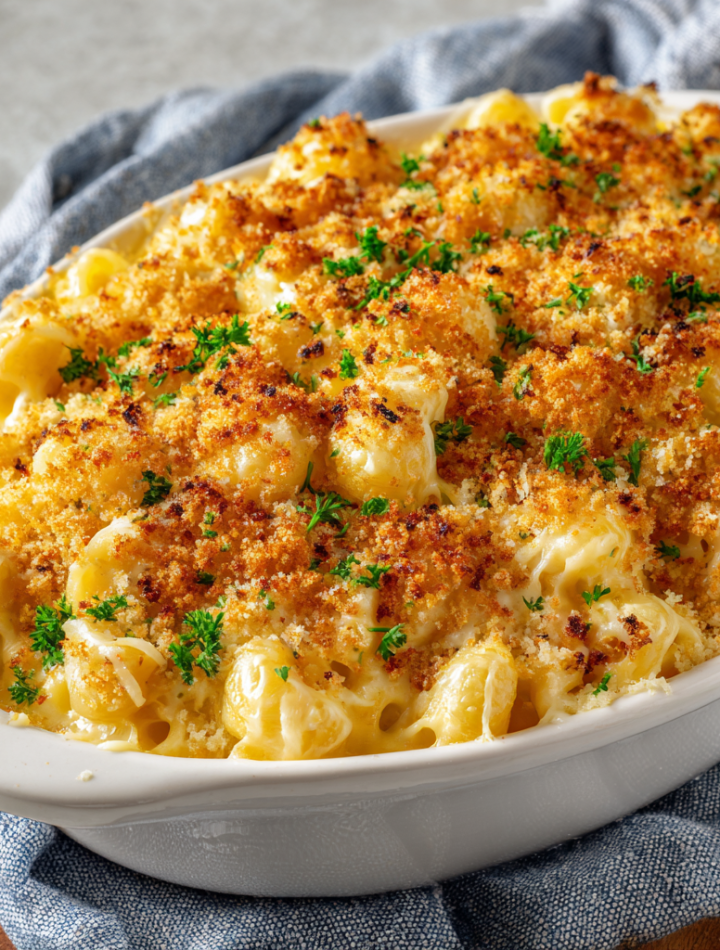
We’re not talking about the kind from a blue box (though hey, no judgment—we’ve all been there on a busy Tuesday!). We’re talking about the real deal. The kind that starts with a buttery roux, gets luxuriously creamy with a river of sharp cheddar cheese, and finishes with that irresistible, buttery breadcrumb crunch that you can hear from across the room. This is the mac and cheese of potlucks, family gatherings, and “I just need some comfort food” nights. It’s a labor of love, but I promise you, every single whisk and stir is absolutely worth it. So, grab your favorite wooden spoon and let’s cook up a batch of pure, cheesy magic that’s totally worth licking the spoon—and the bowl!
The Mac and Cheese That Started It All
My love affair with this dish started in my grandma’s kitchen. Her house always smelled like a combination of fresh linen, garden roses, and whatever incredible thing she was baking that day. But the best days were mac and cheese days. She’d let me stand on a wobbly wooden stool, tasked with the “very important job” of slowly sprinkling in the shredded cheese while she whisked the white sauce like a wizard casting a spell. I remember watching, wide-eyed, as the stark white sauce magically transformed into a vibrant, velvety orange river. She’d always let me have the first taste from the spoon, and it was pure heaven—so hot it would make me gasp, but so good I couldn’t wait for the next bite. That ritual, that shared moment of creating something beautiful and delicious together, is baked into the very DNA of this recipe for me. It’s not just food; it’s a feeling. It’s the feeling of being loved, of being part of something warm and wonderful. And that’s the feeling I hope this recipe brings to your kitchen, too.
Print
Homemade Mac and Cheese
- Total Time: 55 mins
- Yield: 8 servings 1x
Description
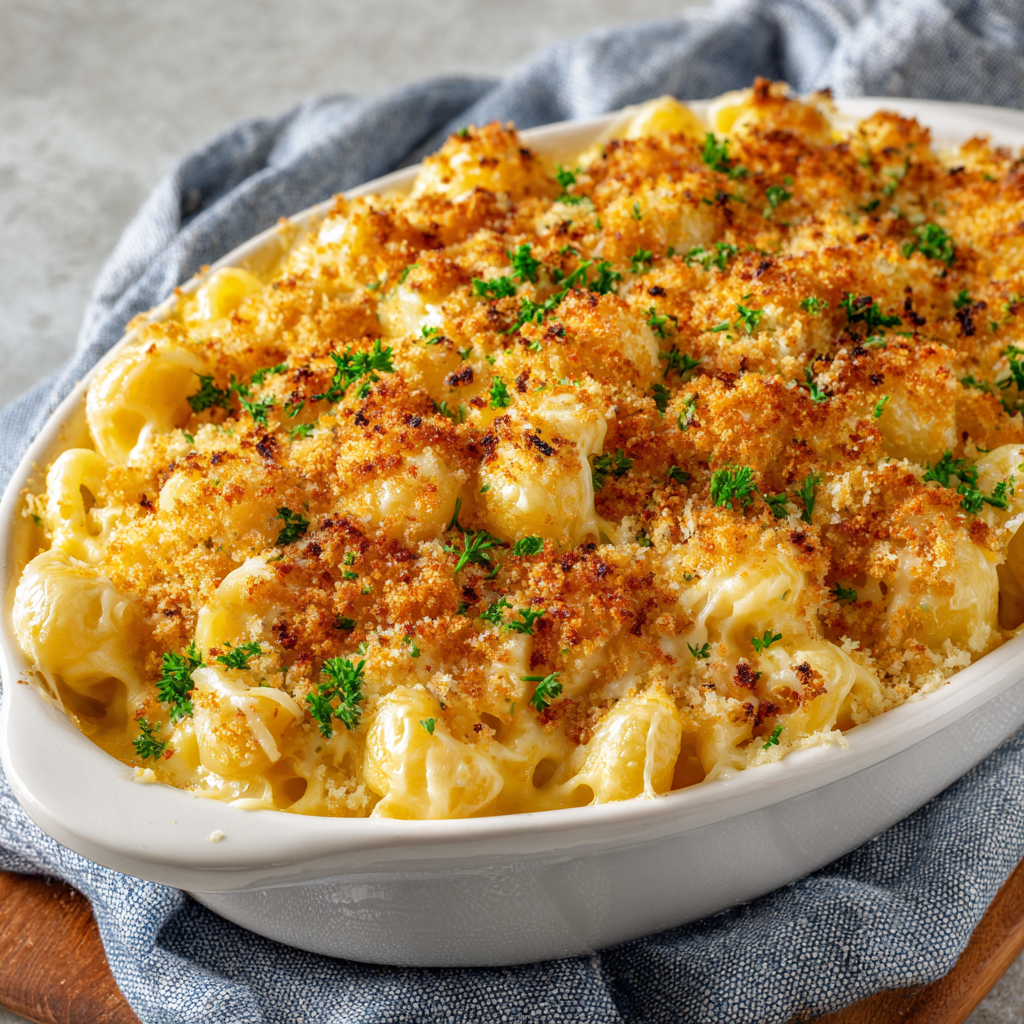
This rich, creamy homemade mac and cheese starts with a classic roux-based cheese sauce and finishes with a buttery, golden breadcrumb topping. Doubling the batch makes it perfect for family dinners, potlucks, or just having leftovers worth fighting over. And with a few flavor twists? Pure comfort food magic.
Ingredients
Macaroni and Cheese:
1 lb (16 oz) elbow macaroni
½ cup salted butter
6 tbsp all-purpose flour
5 cups milk (plus more if needed for creaminess)
4 cups shredded sharp Cheddar cheese
1 cup finely grated Parmesan cheese
Salt and black pepper, to taste
Bread Crumb Topping:
4 tbsp salted butter
1 cup dry bread crumbs
¼ tsp ground paprika
Flavor Twist Options (choose 1–2):
Add 1 tsp Dijon mustard or ¼ tsp cayenne for depth and heat
Mix in 1 cup cooked bacon or pancetta bits
Use a blend of cheeses (Gruyère, smoked gouda, or fontina)
Stir in 1 cup caramelized onions or roasted garlic
Top with crushed Ritz crackers or seasoned panko for extra crunch
Instructions
Preheat oven to 350°F (175°C). Cook macaroni just until al dente, then drain.
In a large saucepan, melt butter. Whisk in flour and cook 1–2 mins. Slowly whisk in milk and cook until thickened.
Stir in Cheddar and Parmesan until melted and smooth. Season with salt and pepper.
Combine pasta with cheese sauce. Pour into a greased 9×13-inch baking dish.
In a skillet, melt butter for topping, add breadcrumbs and paprika. Toast until golden, then sprinkle over mac and cheese.
Bake 20–25 mins until bubbly and golden on top.
- Prep Time: 10 minutes
- Cook Time: 45 mins
- Category: Dinner, Main Course
Nutrition
- Calories: 450
- Fat: 25g
- Carbohydrates: 40g
- Protein: 18g
Gathering Your Cheesy Arsenal
Here’s everything you’ll need to create this masterpiece. The beauty of mac and cheese is in its simplicity, so using quality ingredients really makes all the difference!
- 1 lb (16 oz) elbow macaroni: The classic vessel for all that cheesy goodness. Their little tubes are perfect for trapping the sauce. Chef’s Insight: Don’t overcook it! We’re going for al dente (meaning it still has a slight bite) because it will continue to cook in the oven.
- ½ cup salted butter: The rich, flavorful base of our roux. This is the foundation of our sauce, so let’s make it a good one.
- 6 tbsp all-purpose flour: Our thickening agent. Whisking this with the butter creates the roux that gives the sauce its body and prevents it from being runny.
- 5 cups milk: Whole milk is my go-to for the creamiest, richest result, but 2% works well too! Have a little extra on hand just in case we need to thin the sauce later.
- 4 cups shredded sharp Cheddar cheese: The star of the show! I highly recommend buying a block and shredding it yourself. Pre-shredded bags contain anti-caking agents that can make your sauce grainy and less smooth. Sharp cheddar gives that classic, tangy flavor we all crave.
- 1 cup finely grated Parmesan cheese: The secret weapon! Parmesan adds a salty, nutty depth that takes the flavor to a whole new level.
- Salt and black pepper, to taste: Essential for making all the flavors pop. We’ll season at the end so we can get it just right.
For That Irresistible Topping:
- 4 tbsp salted butter: Melted and tossed with the breadcrumbs for maximum flavor and crunch.
- 1 cup dry bread crumbs: Panko will give you an extra-light, super-crispy crunch, while traditional breadcrumbs offer a more classic, finer texture.
- ¼ tsp ground paprika: Just a hint for a beautiful golden color and a tiny, warm background note.
Crafting Your Cheesy Masterpiece, Step-by-Step
Alright, team, let’s do this! Read through all the steps once before you start—it makes the process feel like a smooth, cheesy dance.
- Preheat and Pasta: First things first, preheat your oven to 350°F (175°C). This gives it plenty of time to get to the perfect temperature. Now, bring a large pot of well-salted water to a rolling boil. Cook your elbow macaroni according to the package directions, but shave off 1-2 minutes from the recommended time. We want it al dente! Once it’s done, drain it and let it hang out in the colander. Chef’s Hack: Don’t rinse the pasta! The starchy surface helps the cheese sauce cling to every nook and cranny.
- Master the Roux: In a large saucepan or Dutch oven, melt your ½ cup of butter over medium heat. Once it’s foamy, sprinkle in the flour. Now, whisk, whisk, whisk! Cook this mixture for a full 1-2 minutes. You’ll know it’s ready when it smells a bit toasty and looks pale golden. This step cooks out the raw flour taste and is the non-negotiable secret to a smooth sauce.
- Whisk in the Milk: Now, slowly pour in your milk, just a splash at a time at first, whisking constantly. This is the key to avoiding lumps! Once you’ve incorporated the first cup, you can add the rest in a steadier stream. Keep whisking until the mixture is smooth. Let it cook, stirring often, for 5-7 minutes, or until it thickens enough to coat the back of a spoon. Chef’s Commentary: Be patient here! This is where the sauce base develops its body.
- The Big Cheese Melt: Turn the heat down to low. Now, for the best part! Gradually add your shredded cheeses, one handful at a time, stirring with your whisk or a wooden spoon until each addition is fully melted and incorporated before adding the next. This patience ensures a perfectly emulsified, silky sauce instead of a greasy, broken one. Once all the cheese is melted in, season with a good pinch of salt and black pepper. Taste it! Does it need more pepper? More salt? Adjust now.
- Combine and Conquer: Add your drained pasta to the glorious cheese sauce. Gently fold it all together until every single piece of macaroni is smothered in cheesy love. If the sauce seems a little too thick, add a splash of extra milk to loosen it up. Pour this beautiful mixture into a greased 9×13-inch baking dish and spread it out evenly.
- Create the Crunchy Topping: In a small skillet, melt the 4 tablespoons of butter for the topping. Add the breadcrumbs and paprika and stir until everything is combined and the crumbs are toasted to a light golden brown. This toasting step is a GAME CHANGER—it brings out an incredible nutty flavor. Sprinkle this over the mac and cheese in an even layer.
- Bake to Perfection: Slide your dish into the preheated oven and bake for 20-25 minutes, or until the topping is deeply golden and the edges are bubbly and furious. I like to put it under the broiler for the last minute or two for extra color and crunch—just don’t walk away!
- The Hardest Part: Wait! I know, I know. It’s torture. But let your mac and cheese rest for about 5-10 minutes after pulling it out of the oven. This allows the sauce to set slightly, making it creamier and preventing a volcanic eruption of cheese lava when you scoop into it.
How to Serve This Beauty
This mac and cheese is a glorious centerpiece all on its own, but I love serving it straight from the baking dish for that rustic, family-style vibe. Use a big spoon to scoop out generous portions, making sure you get plenty of that crispy top and gooey center. It’s rich, so I like to pair it with something fresh and green to balance it out—a simple arugula salad with a lemony vinaigrette or some quick steamed broccoli are my go-to sides. And please, serve it hot! This is comfort food at its peak.
Get Creative: Flavor Twists & Swaps
Once you’ve mastered the classic, the world is your cheesy oyster! Here are a few of my favorite ways to mix it up:
- Spice It Up: Whisk 1 teaspoon of Dijon mustard or a ¼ teaspoon of cayenne pepper into the sauce for a fantastic depth of flavor and a subtle kick.
- Meaty Marvel: Fold in 1 cup of cooked, crumbled bacon or diced pancetta for a salty, savory punch.
- Cheese Blends: Swap out 2 cups of the cheddar for something fun like nutty Gruyère, smoky Gouda, or ultra-creamy Fontina.
- Veggie Delight: Stir in 1 cup of caramelized onions or a few cloves of roasted garlic for a sweet, mellow, and sophisticated twist.
- Top Crunch: Use crushed Ritz crackers or seasoned panko mixed with the butter for your topping for an extra buttery, extra crunchy experience.
Clara’s Chef Notes & Kitchen Stories
This recipe has been a living, breathing thing in my kitchen for years. It’s evolved from my grandma’s original (which used Velveeta for that super-smooth melt, bless her heart) to this from-scratch version. My biggest kitchen fail with it? The time I was chatting with a friend and dumped all the cheese in at once without taking the sauce off the heat. It seized up and got so grainy and oily—a true tragedy! That’s how I learned the golden rule: low heat and gradual addition is everything.
I also love to double the batch and freeze one for a future me who will be very, very grateful. To freeze, assemble the mac and cheese with the topping in a disposable aluminum pan, wrap it tightly in plastic wrap and foil, and freeze for up to 3 months. Bake from frozen, covered, for about an hour, then uncover and bake until bubbly. It’s a lifesaver!
Your Mac and Cheese Questions, Answered!
Q: My cheese sauce turned out grainy/oily. What happened?
A: This is usually caused by two things: too high heat or adding the cheese too quickly. Cheese sauces are delicate! Always melt your cheese over low heat and add it gradually, letting each handful fully melt and incorporate into the sauce base before adding more. Using pre-shredded cheese can also contribute to graininess.
Q: Can I make this ahead of time?
A: Absolutely! You can assemble the entire dish (without baking) up to a day ahead. Cover it tightly and keep it in the fridge. When you’re ready, you may need to add 5-10 minutes to the baking time since it will be going into the oven cold. You can also make the topping ahead and store it separately in a bag at room temperature.
Q: My sauce seems too thick before I even add the pasta. Help!
A: No problem! This is an easy fix. Just whisk in a little more warm milk, a splash at a time, until it reaches your desired consistency. The sauce will thicken a bit more when baked, so I like mine just a tiny bit looser than seems right at this stage.
Q: What’s the best way to reheat leftovers?
A: The microwave is quick but can make the pasta a bit soft. For best results, reheat it in the oven at 350°F in an oven-safe dish, covered with foil, until warmed through. You can sprinkle a tiny bit of water or milk over the top before reheating to keep it moist.
Nutritional Information*
*This is an estimate provided for informational purposes only. Actual values will vary based on specific ingredients used.
Per Serving (1 of 8): Approximately 480 calories, 26g fat, 40g carbohydrates, 18g protein.