Let’s Bake a Little Christmas Magic: The Hot Cocoa Cake of Your Dreams
Hey there, my festive friend! Clara here, coming to you from a kitchen that currently smells like a happy collision of a chocolate factory and Santa’s workshop. Can you smell it? Rich, dark cocoa, a whisper of vanilla, and that unmistakable sparkle of holiday excitement in the air. If you’ve ever curled up with a steaming mug of hot chocolate, piled high with marshmallows, and wished you could somehow turn that exact feeling into a cake… well, my fellow curious cook, you are in for the most delightful treat.
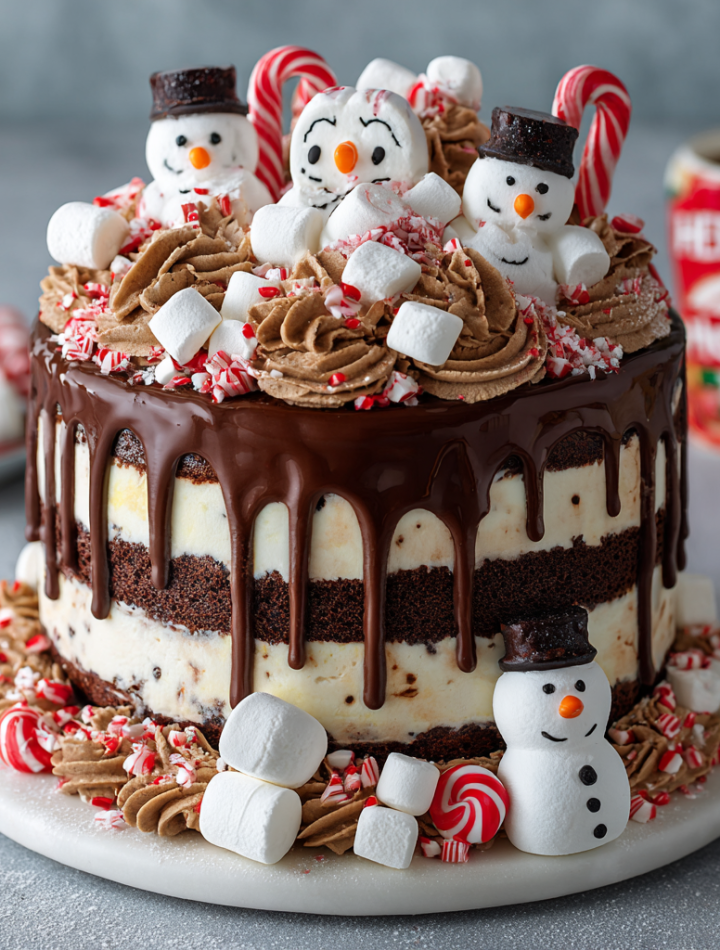
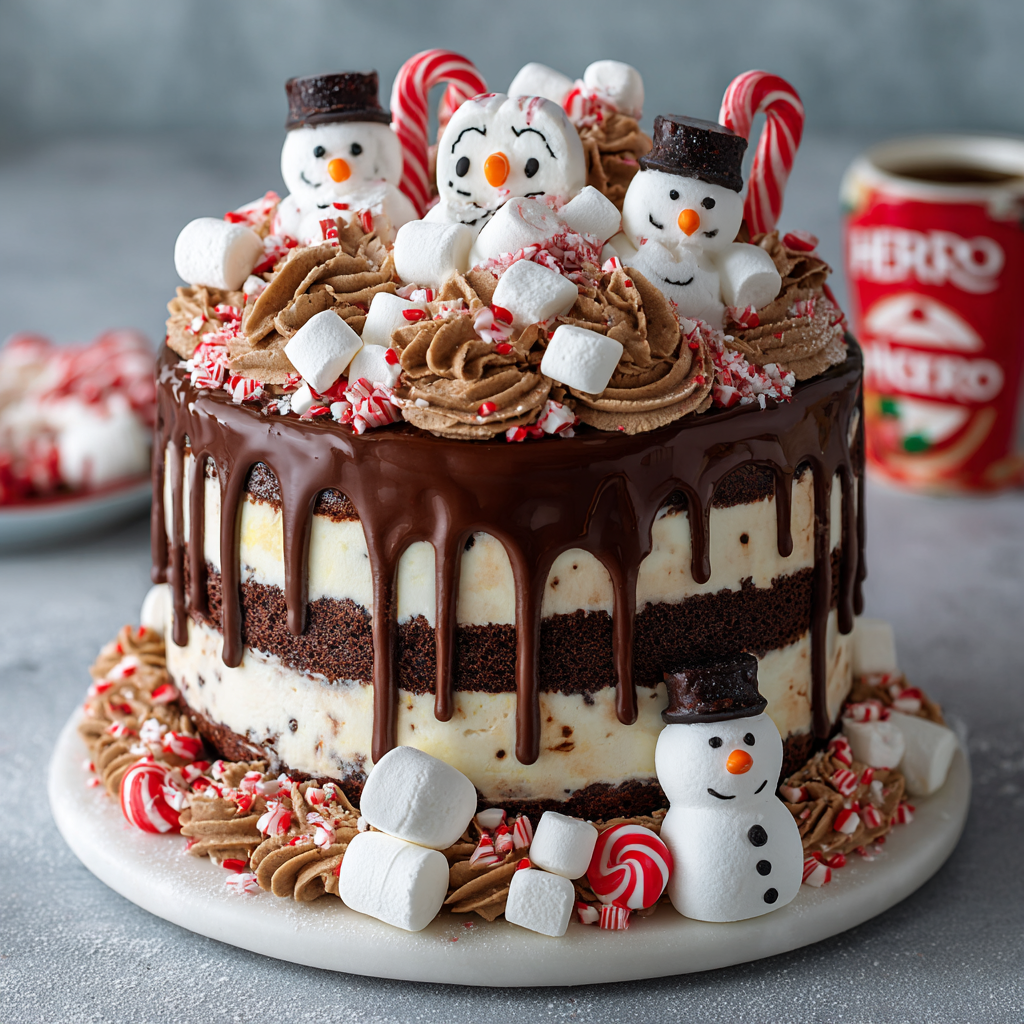
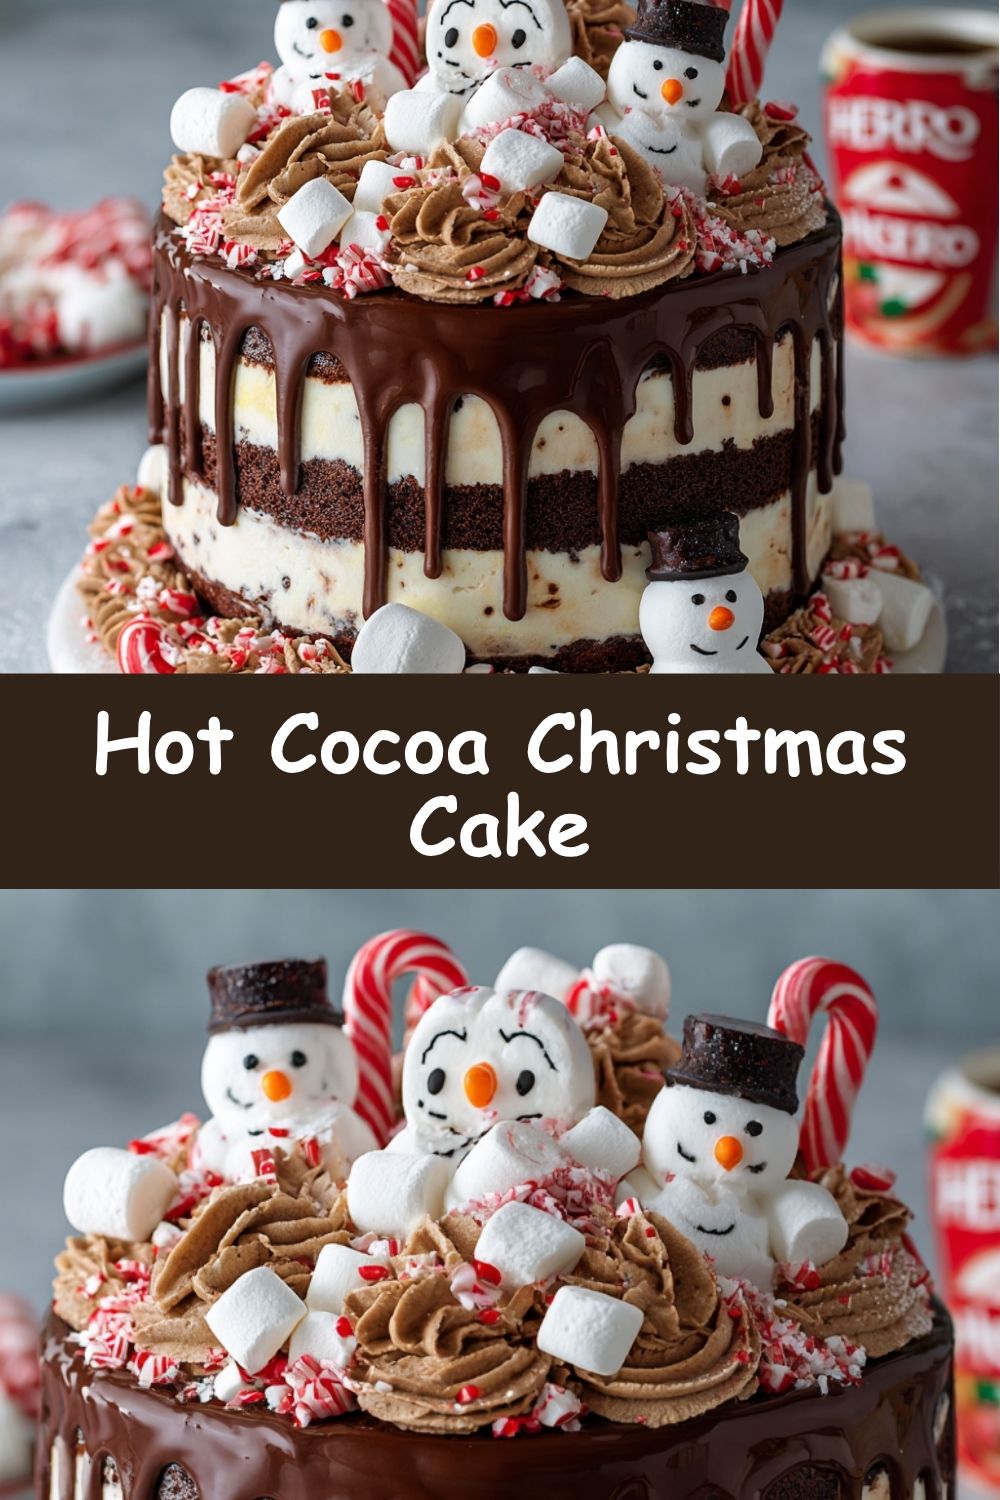
I’m talking about our showstopping Hot Cocoa Christmas Cake. This isn’t just a dessert; it’s a centerpiece, a conversation starter, and a giant, edible hug. Imagine layers of the most tender, moist chocolate cake you’ve ever sunk a fork into, all swaddled in a cloud of silky, not-too-sweet cocoa buttercream. Then, we take it to the next level with a glossy, dripping chocolate ganache that’s as smooth as a new Christmas vinyl. And the pièce de résistance? A playful little family of marshmallow snowmen perched on top, surrounded by a crunchy, festive blanket of crushed peppermint.
I know what you might be thinking: “Clara, that looks complicated!” But I promise you, with a few down-to-earth tips and a sprinkle of holiday spirit, this cake is totally within your reach. We’re going to build this beauty together, step-by-step. So, preheat that oven, put on your favorite holiday playlist, and let’s create something that’s not just nourishing for the body (hello, soul-nourishing chocolate!), but an absolute joy to make and share. Ready to make some magic? Let’s go!
A Spoonful of Nostalgia: Why This Cake Feels Like Home
This cake, for me, is pure, unadulterated nostalgia. It takes me right back to being ten years old, watching the first snowfall of the year dust our backyard in sugar-fine white. My mom had one rule on the first truly cold day of December: mandatory hot cocoa. She’d heat the milk in a little saucepan, and we’d watch, mesmerized, as the chocolate shavings swirled into a deep, dark pool. But the best part was always the toppings. We’d have a whole “hot cocoa bar” setup with mini marshmallows, a candy cane for stirring, and if we were really lucky, a single, giant marshmallow that would toast to a perfect golden brown over the stove burner.
I wanted to capture that exact feeling—the warmth, the sweetness, the playful joy—in a cake. The marshmallow snowmen are my grown-up, slightly more artistic version of those toasted marshmallows. The crushed candy canes are that festive stirrer. And that rich chocolate cake? That’s the soul-warming hug from the mug itself. Every time I make this cake, I’m not just baking; I’m bottling up a little bit of that childhood magic and sharing it with everyone at the table. It’s a reminder that the best holiday traditions are the ones that make your eyes light up.
Print
Hot Cocoa Christmas Cake
Description
This stunning Christmas cake is inspired by everyone’s favorite winter drink—hot cocoa! Layers of moist chocolate cake are frosted with silky cocoa buttercream, topped with a glossy chocolate drip, and decorated with playful marshmallow “snowmen.” Crushed peppermint candies and mini candy canes add the perfect holiday crunch.
Ingredients
Cake Base:
Your favorite chocolate cake recipe (or box mix baked in 3 layers)
Chocolate buttercream frosting
Chocolate Drip:
1 cup semi-sweet chocolate chips
1/2 cup heavy cream (heat & pour over chocolate, stir until smooth)
Decorations:
Large marshmallows (for snowmen)
Mini candy canes & crushed peppermint
Mini marshmallows for “snow”
Orange candy melts or fondant (for noses)
Black edible marker or melted chocolate (for faces)
Instructions
Stack & frost chocolate cake layers with cocoa buttercream. Smooth the sides.
Add drip glaze: Pour chocolate ganache over the top, letting it drip naturally down the sides.
Decorate base: Pipe swirls of frosting around the bottom and press in peppermint candies, candy cane pieces, and marshmallows.
Make marshmallow snowmen: Draw faces with edible marker or chocolate, attach candy noses, and pile on top for a playful winter scene.
Finish with a dusting of crushed peppermint for sparkle.
- Category: Dessert
Gathering Your Cocoa-Cozy Ingredients
Here’s your grocery list for joy! I’ve included some of my favorite chef insights and easy swaps to make this cake your own. Don’t stress about perfection—this is about flavor and fun!
- Your Favorite Chocolate Cake Recipe (for 3 x 6-inch rounds or 2 x 8-inch rounds): This is your canvas! Use your go-to from-scratch recipe, or my not-so-secret weapon: a doctored box mix. (My hack? Replace the water with hot coffee—it makes the chocolate flavor sing—and use melted butter instead of oil. You’ll thank me later!)
- For the Cocoa Buttercream:
- 1 ½ cups (3 sticks) Unsalted Butter, room temperature: The foundation of our fluffy cloud. It needs to be soft but not melted for the perfect texture.
- 4-5 cups Powdered Sugar: We’ll add this gradually to avoid a sugar snowstorm in your kitchen.
- ¾ cup Unsweetened Cocoa Powder: Use a good-quality one! This is where the deep chocolate flavor comes from.
- ⅓ cup Heavy Cream or Milk: Cream makes it extra luxurious, but milk works beautifully too.
- 2 tsp Vanilla Extract: The flavor enhancer. It rounds out all the chocolatey notes.
- A pinch of Salt: This is non-negotiable! It cuts the sweetness and makes the chocolate taste more, well, chocolatey.
- For the Glossy Chocolate Drip:
- 1 cup Semi-Sweet Chocolate Chips: The higher the quality, the shinier your drip will be.
- ½ cup Heavy Cream: When heated and poured over the chips, it creates a magical, pourable ganache.
- For the Adorable Decorations:
- Large Marshmallows: These are our snowman bodies. The sturdier, the better!
- Mini Marshmallows: For creating a snowy landscape around the base.
- Peppermint Candies & Mini Candy Canes: For that classic holiday crunch and pop of red-and-white color.
- Orange Candy Melts or a bit of Fondant: To craft tiny, cute carrot noses for our snowmen.
- Black Edible Marker OR Melted Chocolate in a Piping Bag: For drawing on the snowmen’s faces. The marker is foolproof!
Let’s Build Our Cocoa Masterpiece: Step-by-Step
Okay, team! This is where the fun really begins. Read through all the steps once before you start, and remember: baking is an adventure, not a perfection contest. Let’s do this!
- Bake & Cool Your Cake Layers.First things first, bake your chocolate cake according to your chosen recipe or box mix directions. My pro-tip for flat cake layers (no domes!)? Once you pour the batter into your parchment-lined and greased pans, give the pans a few good taps on the counter to release air bubbles. I also like to use bake-even strips—they’re a game-changer! Once baked, let the cakes cool in their pans for about 10 minutes before turning them out onto a wire rack to cool completely. I’m serious about completely! Warm cake will melt your frosting, and we want sharp, beautiful layers.
- Whip Up the Dreamiest Cocoa Buttercream.In the bowl of a stand mixer (or using a hand mixer), beat the room-temperature butter on medium-high speed for a full 3-5 minutes. You want it to be pale, fluffy, and almost whipped. This is the secret to a buttercream that isn’t heavy! Now, with the mixer on low, gradually add the powdered sugar, one cup at a time. Once it’s all incorporated, add the cocoa powder, vanilla, and that all-important pinch of salt. Turn the mixer to medium and beat for another 2 minutes. Finally, stream in the heavy cream and beat on high for another 1-2 minutes until it’s incredibly light, smooth, and spreadable. Taste it. You’re a chef—quality control is part of the job!
- Stack, Fill, and Crumb Coat.Place your first cake layer on your cake stand or serving plate. Dollop a generous amount of buttercream on top and spread it evenly to the edges with an offset spatula. Repeat with the remaining layers. Now, for the “crumb coat”: apply a very thin layer of frosting all over the entire cake. This doesn’t need to be pretty! Its job is to trap any loose crumbs so your final layer of frosting is pristine. Pop the whole cake in the fridge for at least 20-30 minutes to let this layer set firm.
- Create the Final Frosted Look.Once the crumb coat is firm, take the cake out of the fridge. Pile on the remaining buttercream and use your spatula to smooth it over the top and sides. I love a “semi-naked” look for this cake, where you can just barely see the cake through the frosting—it feels rustic and chic. But if you love a thick, pristine coat, go for it! This is your creation. Once you’re happy, pop it back in the fridge to chill while we make the drip.
- Master the Chocolate Drip.Place your chocolate chips in a heatproof bowl. Heat the heavy cream in a small saucepan over medium heat until it just begins to simmer—you’ll see little bubbles around the edges. Do not let it boil. Immediately pour the hot cream over the chocolate chips. Let it sit for one minute to melt the chocolate, then slowly whisk until it’s completely smooth and glossy. Let it cool for about 5-10 minutes. It should be warm but not hot. To test the consistency, drip a little down the side of a glass. If it runs right down, it’s too thin (let it cool more). If it’s thick and globby, it’s too cool (warm it for 5 seconds in the microwave).
- Apply the Drip & Decorate!Take your chilled cake out of the fridge. Pour a good amount of the ganache onto the center of the cake and use the back of a spoon to gently push it to the edges, encouraging it to drip naturally down the sides. Don’t overthink this—the irregular drips look beautiful! Now, for the fun part. Pipe a border of buttercream swirls around the base of the cake and press in the crushed peppermints, mini candy cane pieces, and mini marshmallows. Use your remaining buttercream to create little “snow piles” on top of the cake to anchor your snowmen.
- Assemble the Marshmallow Snowmen.Take your large marshmallows. Using your black edible marker or melted chocolate, draw on cute little faces—dots for eyes, a smile, maybe even some rosy cheeks! For the nose, roll a tiny piece of orange candy melt or fondant into a carrot shape and stick it on with a dab of frosting or melted chocolate. Gently place your finished snowmen on the buttercream “snow piles” on top of the cake. Finish with a light dusting of the finest peppermint crumbs over everything for a touch of snowy sparkle.
How to Serve This Slice of Holiday Joy
This cake is the star of the show, so let it shine! Present it on a simple cake stand—a white or rustic wood one works beautifully. When it’s time to serve, use a sharp knife dipped in hot water and wiped dry for the cleanest slices. I love serving this with a cold glass of milk for the kids or a rich cup of coffee for the adults. The contrast is just *chef’s kiss*. It’s the perfect grand finale for your Christmas feast or the main event for a cozy holiday movie night.
Make It Your Own: Fun Flavor Twists!
Feel like playing? Here are a few ways to customize your Hot Cocoa Cake:
- Mocha Madness: Add 1-2 tablespoons of instant espresso powder to your cake batter and your buttercream for a deep mocha flavor.
- Peppermint Patty: Add ½ teaspoon of peppermint extract to your chocolate buttercream and use crushed peppermint Oreos around the base for a double-mint crunch.
- Orange Zest Zing: Add the zest of one orange to your cake batter for a chocolate-orange combo that’s a classic holiday duo.
- Dairy-Free Delight: Use your favorite vegan chocolate cake recipe, vegan butter for the frosting, and coconut milk in both the frosting and ganache. The decorations are already mostly dairy-free!
- Gingerbread Spice: Add a teaspoon of gingerbread spice blend to your cake batter for a warm, spiced undertone.
Clara’s Kitchen Confidential: A Few Final Thoughts
This recipe has evolved so much since the first time I tried it. The first attempt… well, let’s just say my drip was more of a chocolate mudslide, and my snowmen looked like they’d been in a blizzard! But that’s the beauty of baking. You learn, you laugh, and you eat the delicious evidence. My biggest lesson? Patience with the cooling steps is everything. A cold cake is your best friend when it comes to frosting and dripping.
I also used to be so intimidated by decorating, but the marshmallow snowmen are the most forgiving, fun part. If you mess up a face, just flip the marshmallow over! No one will know. The goal here isn’t a flawless, fondant-covered bakery cake. It’s a homemade, heartfelt, and slightly whimsical creation that’s bursting with love and flavor. That’s the kind of baking that truly makes your soul—and your taste buds—dance.
Your Questions, Answered!
I’ve gotten so many DMs about this cake over the years! Here are the most common questions and how to solve them.
Q: My ganache is too thick/too thin! Help!
A: This is the #1 question! Ganache can be finicky. If it’s too thick and won’t drip, it has cooled too much. Gently reheat it in 5-second bursts in the microwave, stirring between each, until it’s pourable again. If it’s too thin and runs right off the cake, it’s too warm. Let it sit at room temperature for a few more minutes to thicken up. The glass test is your best friend here!
Q: Can I make any parts of this cake ahead of time?
A> Absolutely! This is a fantastic make-ahead dessert. You can bake the cake layers up to 2 days in advance, wrap them tightly in plastic wrap, and store them at room temperature or in the freezer. The buttercream can be made ahead and stored in an airtight container in the fridge for a week, or the freezer for 3 months. Just let it come to room temperature and re-whip it before using. You can fully assemble the cake (minus the fresh candy cane decorations, which can get soft) a day ahead and store it, covered, in the fridge.
Q: My cake layers sunk in the middle. What happened?
A> Oh, I’ve been there! This is usually due to one of three things: 1) The oven door was opened too early, causing a temperature shock. 2) The cake was underbaked. Use that toothpick test—it should come out with a few moist crumbs, not wet batter. 3) There was too much leavening (baking soda/powder) in the recipe. If you’re using a new recipe, stick with trusted sources.