
Let’s Bake Some Magic: Mini Pie Cookies That Steal the Show!
Hey there, my fellow flavor explorer! Have you ever been to a gathering, seen a stunning dessert table, and thought, “Wow, I wish I could make something that adorable”? Or maybe you’ve found yourself in a classic dessert dilemma: team pie or team cookie? Well, my friend, prepare to have your world (and your dessert plate) utterly rocked. Today, we’re throwing that choice out the kitchen window and making the most delightfully deceptive treat: Mini Pie Cookies!
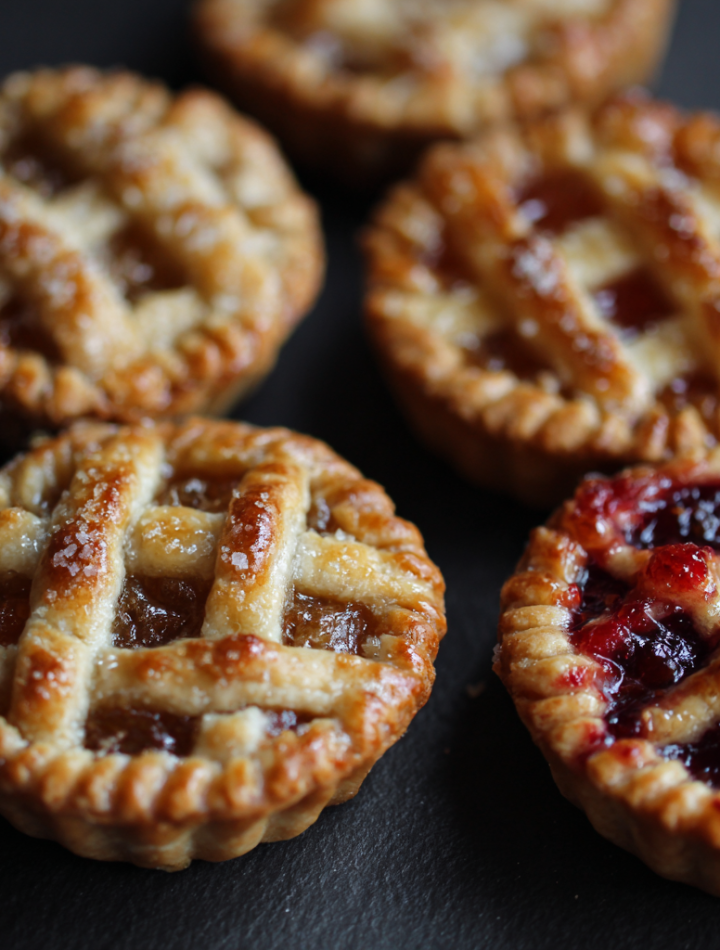
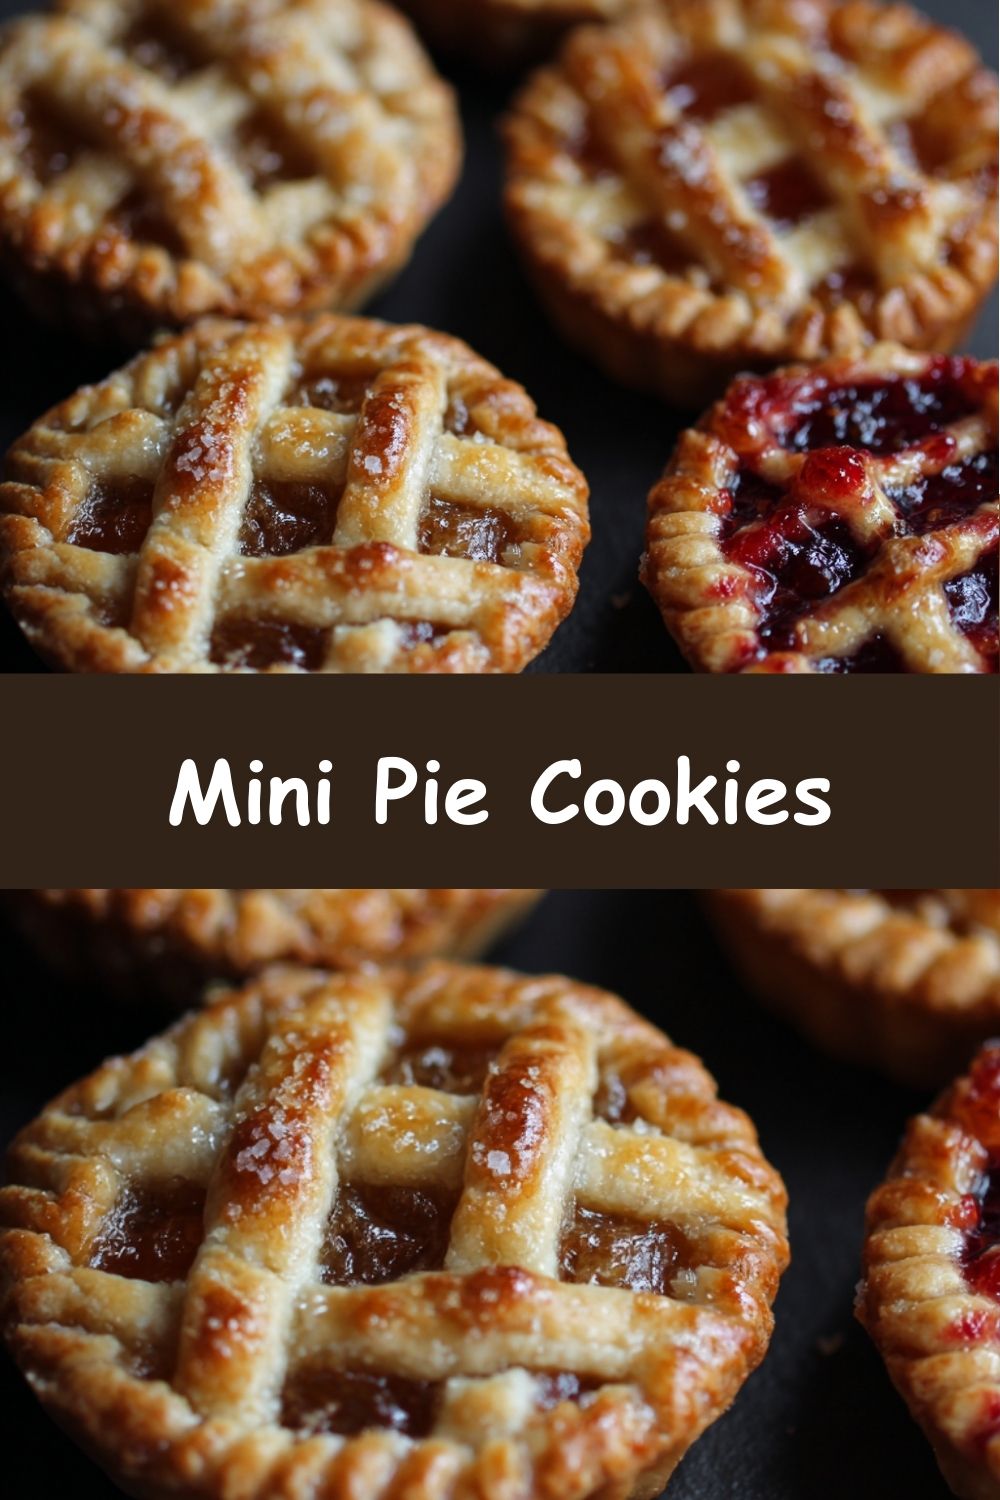
Imagine this: a soft, buttery sugar cookie base, acting as the perfect canvas. On top, a swirl of frosting transforms into a gorgeous, miniature pie—complete with flaky-looking crust, vibrant fruit fillings, and even a dollop of whipped cream. We’re talking tiny blueberry pies, cheerful cherry delights, and cozy little pumpkin patches, all in one bite-sized cookie. They are the ultimate conversation starter, the star of any holiday dessert spread, and honestly, just a pure joy to make. They look like you spent hours in a professional bakery, but I’m going to let you in on all my chef secrets to make the process fun, easy, and completely foolproof. So, tie on your favorite apron, put on a good playlist, and let’s turn your kitchen into a mini pie factory. Trust me, your inner child (and all your future guests) will thank you.
A Slice of Nostalgia: My First Baking Victory
These cookies take me right back to my grandma’s linoleum-floored kitchen. I was about seven years old, wrapped in an apron that was basically a quilt on me, and I was her official “Pie Crust Crimper.” Now, my crimping was… abstract. Let’s just say those pie edges looked less fluted and more like they’d been attacked by a very enthusiastic dinosaur. But I felt so important. Years later, when I was first finding my feet in the kitchen, I tried to recreate her famous cherry pie. It was a disaster. The filling was runny, the crust was tough, and I may or may not have cried over the sink. But from that flop, a idea was born: what if I could capture the essence of pie—that nostalgic, heartwarming feeling—without the pressure of a perfect lattice top? That’s how the first batch of these mini pie cookies came to be. They’re my happy medium: all the cozy, festive vibes of pie, with the playful, forgiving nature of a cookie. They’re a tribute to my grandma and a high-five to anyone who’s ever had a baking fail that turned into something brilliant.
Print
Mini Pie Cookies
- Total Time: ~1 hr 15 min
- Yield: 24 cookies 1x
Description
These sugar cookies are decorated to look like mini pies—blueberry, cherry, and pumpkin! Perfect for Thanksgiving dessert tables or festive parties.
Ingredients
2 ¾ cups flour
1 tsp baking powder
½ tsp salt
1 cup butter, softened
1 ½ cups sugar
1 egg
2 tsp vanilla
Frosting/Decoration:
4 cups buttercream or royal icing
Food coloring: red, blue, orange, ivory/tan
Piping bags with basketweave, round, and star tips
Instructions
Preheat oven to 350°F (175°C). Whisk flour, baking powder, and salt. In another bowl, cream butter and sugar until fluffy. Beat in egg and vanilla. Add dry ingredients.
Roll dough ¼-inch thick, cut into 3-inch circles, place on lined trays. Bake 8–10 min. Cool fully.
Tint frosting: red for cherry, blue for blueberry, orange for pumpkin, ivory for crust.
Spread colored frosting in centers for “pie filling.”
Pipe ivory crust around edges with a basketweave or star tip. For lattice pies, crisscross strips over filling.
Add white frosting “whipped cream” dollops for pumpkin pies. Optional: sprinkle fruit pies with sanding sugar.
Optional Twists
Add cinnamon to cookie dough for warmth.
Swap cream cheese frosting for tang.
Try chocolate frosting for “chocolate pie.”
- Prep Time: 25 minutes
- Cook Time: 10 minutes
- Category: Dessert
Nutrition
- Calories: 190
- Fat: 9g
- Carbohydrates: 26g
- Protein: 3g
Gathering Your Mini Pie Toolkit
Here’s everything you’ll need to create these edible masterpieces. Don’t stress about perfection—baking is about joy, not precision! This recipe makes about 24 show-stopping cookies.
For the Sugar Cookie Base:
- 2 ¾ cups all-purpose flour: The foundation of our cookie! It gives structure. For a slightly more tender cookie, you can swap in ½ cup of cake flour for ½ cup of the all-purpose.
- 1 tsp baking powder: Our little leavening agent that gives the cookies a gentle rise and soft texture, making them the perfect sturdy-yet-soft base for our decorations.
- ½ tsp salt: Do not skip this! Salt is the flavor enhancer that makes the sweet butter and sugar truly sing. It balances everything out.
- 1 cup (2 sticks) unsalted butter, softened: The key to a fabulously chewy and flavorful cookie. “Softened” means it should give slightly when you press it, not be melted or rock hard. This creams best with the sugar for that fluffy texture we crave.
- 1 ½ cups granulated sugar: Sweetness and, when creamed with the butter, it helps create air pockets for a lovely texture.
- 1 large egg: The binder that brings our dough together. Make sure it’s at room temperature to emulsify properly with the butter and sugar.
- 2 tsp vanilla extract: The aromatic soul of the cookie. Use the real stuff—it makes a world of difference! For a fun twist, try almond extract.
For the Decoration & “Pie” Illusion:
- 4 cups buttercream or royal icing: This is your “play-doh”! Buttercream is softer, richer, and easier to eat. Royal icing dries rock hard, which is great for packaging and structure, but has a different texture. I prefer American buttercream for its taste and spreadability.
- Gel food coloring: red, blue, orange, ivory/tan: Use gel, not liquid! Gel colors give you vibrant hues without watering down your frosting. Red for cherry, blue for blueberry, orange for pumpkin, and ivory/tan for that perfect golden “crust” color.
- Piping bags fitted with tips: A basketweave tip (like Wilton #47) is MAGIC for creating that woven pie crust look. A round tip (like #3 or #5) is great for lattice lines and details. A star tip (like Wilton #18) can create a beautiful crimped edge and whipped cream dollops.
- Optional: Sanding sugar for a sparkly, sugary finish on the fruit “fillings.”
Let’s Build Some Edible Art: Step-by-Step
Ready to create? Follow these steps and you’ll have a tray of gorgeous mini pies in no time. Read through all the steps once before you start—it’s my number one chef hack for a smooth baking experience!
- Preheat and Prep: Fire up your oven to 350°F (175°C). Line your baking sheets with parchment paper or silicone mats. This is non-negotiable for preventing sticking and ensuring even baking! Chef’s Hack: If you have dark-colored baking sheets, reduce the oven temp by 25 degrees to prevent the bottoms from over-browning.
- Combine the Dry Team: In a medium bowl, whisk together your flour, baking powder, and salt. Whisking is better than sifting here—it incorporates air and ensures the leavening and salt are evenly distributed throughout the flour. Set this aside.
- Cream the Butter and Sugar: In a large bowl, use an electric mixer (hand or stand) to cream together the softened butter and granulated sugar. Beat it on medium-high speed for a full 2-3 minutes, until it becomes light, pale, and fluffy. This step is crucial for texture! You’re incorporating air, which is what gives us that soft, cake-like cookie.
- Incorporate the Wet Ingredients: Beat in the egg and vanilla extract until they are fully blended and the mixture looks smooth. Scrape down the sides of the bowl with a spatula to make sure everything is homogenous.
- Bring It All Together: Gradually add your flour mixture to the wet ingredients, mixing on low speed just until the flour disappears. Do not overmix! Overworking the dough at this stage can lead to tough cookies. The dough might seem a bit soft—that’s perfect.
- Roll and Cut: On a lightly floured surface, roll your dough to about ¼-inch thickness. This is the ideal thickness—sturdy enough to hold the frosting but not too thick to bake evenly. Use a 3-inch round cookie cutter (or even the rim of a glass!) to cut out your circles. Place them on your prepared baking sheets about 2 inches apart.
- Bake to Perfection: Bake for 8-10 minutes. You’re looking for the edges to be set and just barely starting to turn a light golden brown. The centers might still look a tiny bit soft—that’s good! They will continue to cook on the hot tray out of the oven. Chef’s Hack: For perfectly round cookies, immediately after taking them out of the oven, take a round cookie cutter slightly larger than your cookies and swirl it around any cookies that spread a little. This neatens them right up!
- The Cool Down: Let the cookies cool on the baking sheet for 5 minutes before transferring them to a wire rack to cool completely. I know it’s tempting, but do not frost warm cookies! The frosting will melt into a puddle of sadness. Patience is key here.
- Frosting Prep: While the cookies cool, divide your buttercream or royal icing into separate bowls. Tint them: one red, one blue, one orange, and one ivory/tan. Spoon each color into a piping bag fitted with your chosen tips. I use the basketweave or star tip for the ivory (crust), and usually just keep the colored frostings in bags with a small corner snipped off for the “filling.”
- Decorate!
- The Filling: First, pipe or spread your colored frosting in the center of each cookie to act as the pie filling. Leave a clear border around the edge for the “crust.”
- The Crust: Using your ivory frosting in the basketweave or star tip, pipe a beautiful border around the edge of the cookie. If you’re using a basketweave tip, press gently, pull slightly, and repeat to create the woven effect. For a lattice top, use a round tip to pipe straight lines across the colored filling in one direction, then pipe another set of lines perpendicular to the first.
- Finishing Touches: For the pumpkin pies, add a small star-tip dollop of white frosting for “whipped cream.” For the berry pies, a light sprinkle of sanding sugar over the wet “filling” adds a gorgeous, sparkly finish that looks like sugar crystals!
How to Serve Your Mini Masterpieces
Presentation is part of the fun! Arrange these cookies on a large wooden board or a vintage cake stand for that rustic, bakery-fresh feel. Group them by “flavor” to create a stunning visual impact. They are the perfect finger-food dessert for Thanksgiving, Christmas parties, bake sales, or any gathering where you want to hear gasps of delight. Pair them with a hot cup of coffee, a glass of cold milk, or even a dessert wine for the adults. They’re a complete showstopper all on their own!
Get Creative: Endless Flavor Twists!
The best part about this recipe is how adaptable it is. Don’t be afraid to play!
- Spiced Dough: Add 1 tsp of cinnamon or pumpkin pie spice to the dry ingredients for a warmly spiced cookie base that pairs perfectly with all the frostings.
- Tangy Twist: Swap the vanilla buttercream for a cream cheese frosting. The slight tang is incredible with the sweet cookie and fruit “fillings.”
- Chocolate Dream: Create a “chocolate cream pie” version by using chocolate frosting for the filling and a vanilla crust. You could even roll the cookie dough in cocoa powder before baking for a chocolate cookie base!
- Nutty Crunch: After piping the crust border, gently press finely chopped pecans or walnuts into the wet icing for a nutty “crumble” topping effect.
- Lemon Meringue: Use yellow frosting for the filling and pipe tall, swoopy white “meringue” peaks with a star tip. Lightly toast the tips with a kitchen torch if you’re feeling fancy!
From My Kitchen to Yours: Chef’s Notes
This recipe has evolved so much since that first batch! I initially tried to pipe entire tiny pies out of frosting, which was… a structural nightmare. Lesson learned: the cookie base is everything. Another funny fail: I once used liquid red food coloring for a cherry pie batch. The color was weak, and I used almost the entire bottle, which resulted in… let’s just say very *enthusiastically* red cookies that slightly stained everyone’s lips. Hence, the gel coloring rule—learn from my mistakes! The beauty of these cookies is that they don’t have to be perfect. A wobbly lattice or a slightly off-center dollop of cream just adds to their homemade charm. Embrace the imperfections; they taste just as good. I always make a double batch because they disappear faster than I can say “pie.”
Your Questions, Answered!
Q: My frosting is too runny and isn’t holding its shape. What did I do wrong?
A: This usually means your buttercream was too warm, or you可能 have used too much liquid (like milk or vanilla) when making it. Pop the bowl of frosting into the refrigerator for 15-20 minutes to firm up. For royal icing, you may have added too much water. Thicken it up by adding more sifted powdered sugar, a tablespoon at a time.
Q: Can I make the cookie dough ahead of time?
A: Absolutely! This dough is great for make-ahead magic. You can wrap the disk of dough tightly in plastic wrap and refrigerate it for up to 3 days. You can also freeze it for up to 3 months. Just let it thaw in the fridge overnight before rolling it out.
Q: How do I store these decorated cookies?
A: If you used buttercream, store them in a single layer in an airtight container at room temperature for up to 2 days, or in the fridge for up to 5 days (let them come to room temp before serving for the best texture). If you used royal icing, they can be stored at room temperature in an airtight container for much longer—up to 2 weeks.
Q: My cookies spread too much and lost their round shape. How can I prevent this?
A: The most common culprits are: 1) Butter was too soft or melted. 2) The dough was overmixed after adding the flour. 3) The baking sheet was too warm when you put the dough on it. Always ensure your butter is just softened, mix until *just* combined, and use cool baking sheets (you can even pop the cut-out dough on the sheet into the fridge for 10 minutes before baking to really firm up the butter).
Nutritional Information (Approximate, per cookie)
Calories: 190 kcal | Carbohydrates: 26g | Protein: 3g | Fat: 9g
Please note: This is a rough estimate based on the ingredients used and can vary significantly based on specific brands and decoration amounts. These are a treat, so enjoy them mindfully and joyfully!
Prep Time: 25 min | Bake Time: 10 min | Decorating Time: 30-40 min | Total Time: ~1 hr 15 min | Yield: 24 cookies