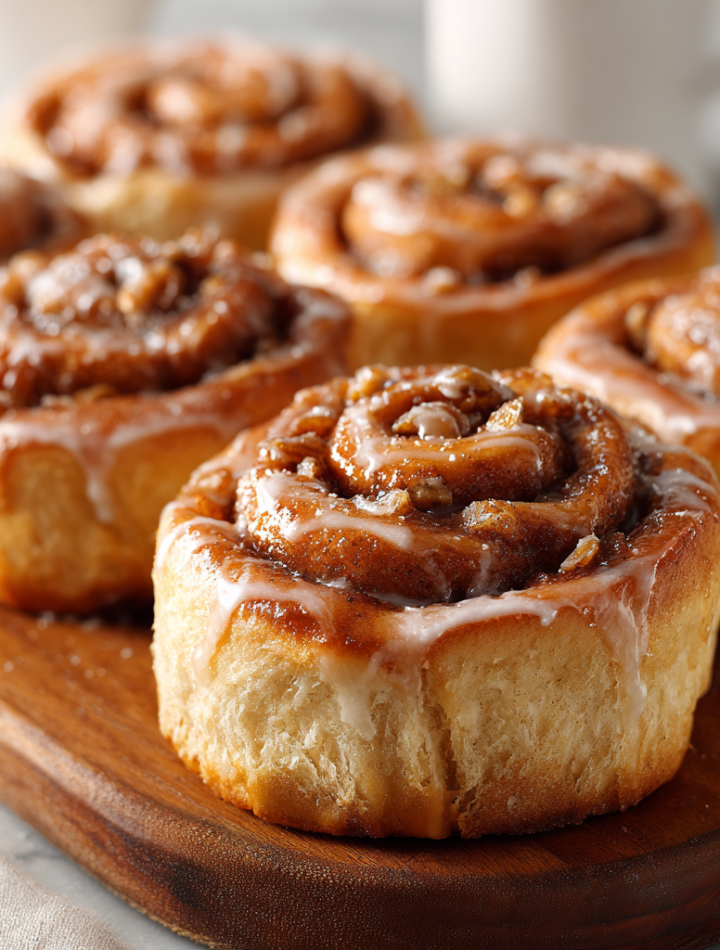

The Magical 90-Minute Cinnamon Roll: Your New Brunch Superpower
Hey there, my fellow flavor adventurer! Let’s be real for a second. Is there anything in this world that smells more like pure, unadulterated happiness than a pan of cinnamon rolls baking in the oven? That warm, spicy, sugary aroma that wafts through the entire house, promising a gooey, fluffy, melt-in-your-mouth experience? It’s the universal scent of weekend mornings, cozy celebrations, and “I-love-you” baked right in.
But here’s the classic dilemma: traditional cinnamon roll recipes often ask for a serious time commitment. You’re looking at multiple rises, hours of waiting, and let’s be honest, sometimes my craving just can’t wait that long! I used to think a speedy cinnamon roll was a myth—a delicious legend whispered among bakers. That is, until I cracked the code.
This, my friend, is the recipe that changed the game for me. These are our Ninety-Minute Cinnamon Rolls, and they are 100% the real deal. We’re talking from zero to warm, pillowy, cinnamon-swirled perfection in just about an hour and a half. No compromising on flavor, no skipping the fluffiness—just a clever, kitchen-hacker approach that delivers a double batch of pure joy. So, tie on your apron, preheat that oven, and let’s turn your kitchen into the heart of the home, faster than you ever thought possible.
The Snow Day That Started It All
I’ll never forget the first time I successfully pulled these off. It was a snowed-in Saturday morning, the kind where the world outside your window looks like a shaken snow globe. My then-boyfriend (now husband!) was visiting, and we had a serious hankering for something warm and sweet. The problem? All my go-to recipes required a patience I simply did not possess that morning.
I scoured my messy notebook of kitchen experiments, determined to make it work. I remember the skeptical look he gave me when I promised, “We’ll be eating homemade cinnamon rolls before the next round of snow starts.” I used instant yeast for the first time, kept the dough soft and a little sticky, and shamelessly shortened the rise times. The result? We were curled up on the couch, plates balanced on our knees, devouring the most incredible, warm, gooey cinnamon rolls while watching the snow fall. That moment of cozy, impromptu success cemented this recipe as a forever favorite in my book. It’s proof that the best memories don’t always require all day to make—sometimes, 90 minutes is all you need.
Print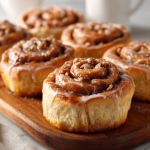
Ninety-Minute Cinnamon Rolls
- Total Time: 1 hr 30 mins
Description
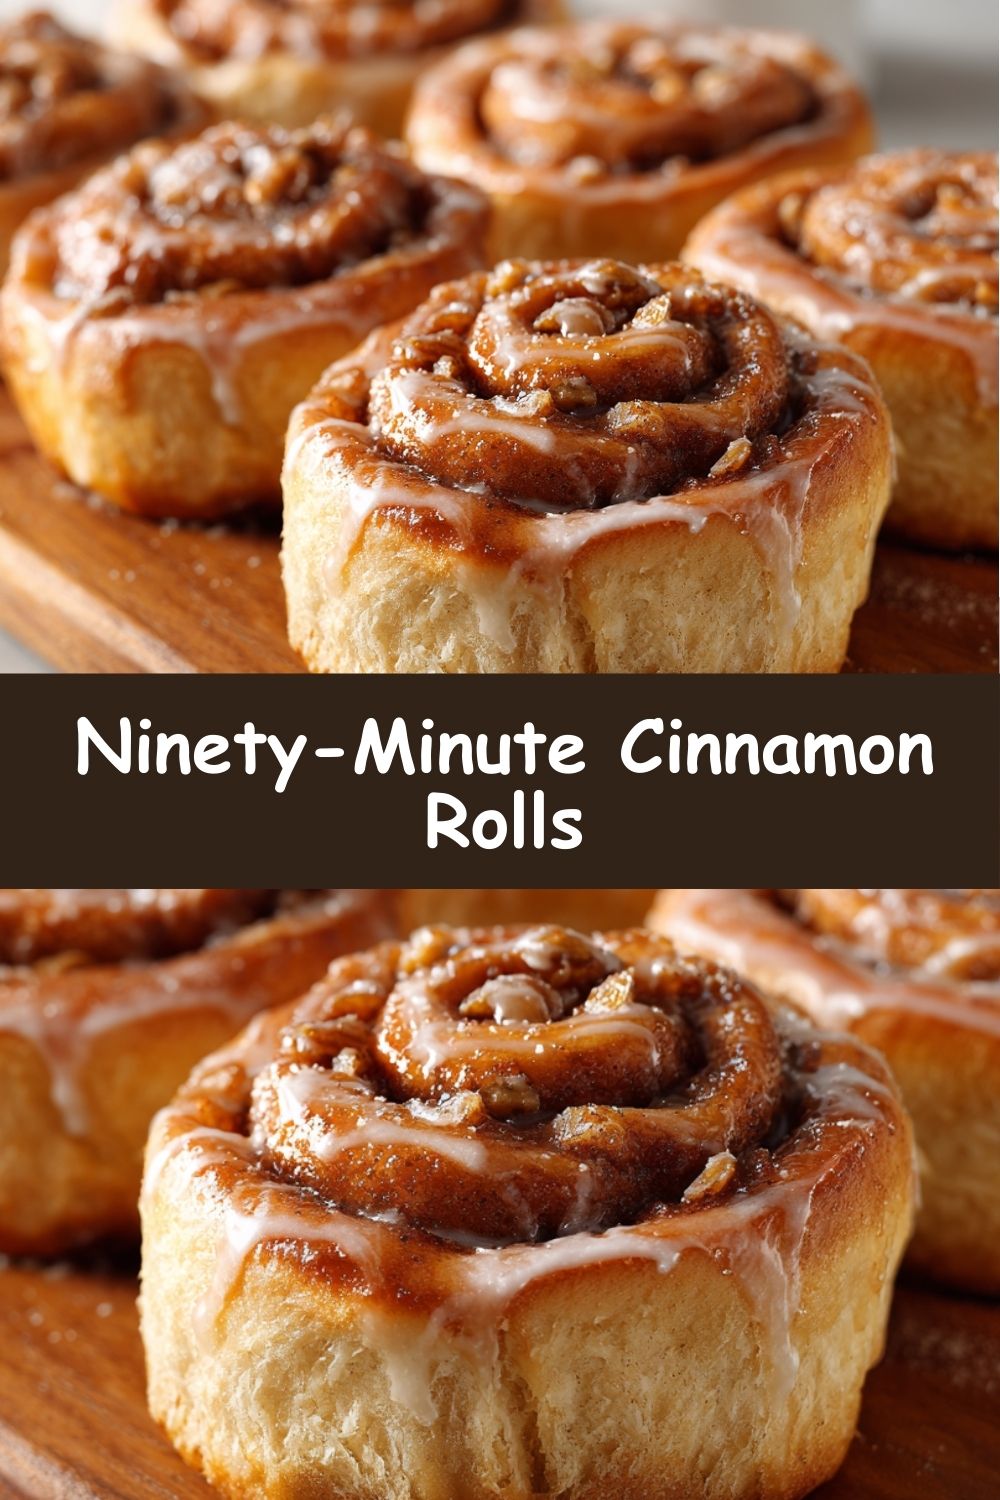
These fast and fluffy cinnamon rolls are your go-to for homemade comfort—ready in just 90 minutes. This double batch makes 24 pillowy rolls swirled with cinnamon-sugar goodness. Add a few flavorful twists to make them extra special, whether for breakfast, brunch, or a cozy dessert.
Ingredients
Dough:
1½ cups milk
½ cup margarine or butter, softened
6½ cups all-purpose flour
½ cup white sugar
2 (.25 oz) packets instant yeast
1 tsp salt
½ cup warm water
2 large eggs
Filling:
2 cups packed brown sugar
1 cup margarine or butter, softened
2 tbsp ground cinnamon
1 cup raisins (optional)
Add ½ tsp cardamom or nutmeg to the filling for warmth
Mix in chopped pecans or walnuts for crunch
Spread a thin layer of orange marmalade under the filling
Use golden raisins or dried cranberries for a fruity bite
Optional Glaze:
2 cups powdered sugar
2–3 tbsp milk
½ tsp vanilla or maple extract
Instructions
Warm milk and butter until just melted. In a large bowl, combine 3 cups flour, sugar, yeast, and salt. Add warm milk, water, and eggs. Mix until smooth, gradually adding remaining flour to form a soft dough.
Knead dough for 5–7 minutes until smooth. Cover and let rise 30–40 minutes.
Roll dough into two rectangles (about 12×8 inches each). Spread softened butter, then sprinkle with brown sugar, cinnamon, and raisins or other twists.
Roll tightly from the long edge, slice into 12 rolls per log.
Place in greased pans, cover, and let rise 15–20 minutes. Preheat oven to 375°F (190°C).
Bake for 20–25 minutes until golden. Cool slightly, then drizzle with glaze if desired.
- Prep Time: 25 minutes
- Cook Time: 25 minutes
- Category: Dessert
Nutrition
- Calories: 270–310
- Fat: 10g
- Carbohydrates: 35g
Gathering Your Cinnamon Roll Crew
Here’s the dream team of ingredients that makes this magic happen. Don’t be intimidated by the list—it’s mostly pantry staples! This recipe makes a generous 24 rolls, perfect for a crowd or for stashing some in the freezer for future-you (you’re welcome).
For the Dough:
- 1½ cups milk – Whole milk is my go-to for the richest, softest dough, but 2% works great too! We’re warming it to help activate the yeast.
- ½ cup margarine or butter, softened – I’m a butter girl through and through, but margarine will give you a slightly softer, more classic “mall-style” roll. Your choice!
- 6½ cups all-purpose flour – The foundation of our fluffy empire. I always fluff my flour with a spoon before measuring to avoid a dense dough.
- ½ cup white sugar – Just enough sweetness to feed the yeast and make the dough itself irresistible.
- 2 (.25 oz) packets instant yeast – The SECRET WEAPON! Instant yeast (or rapid-rise) doesn’t need to be proofed separately, which shaves off precious time.
- 1 tsp salt – The essential flavor balancer. Never skip it!
- ½ cup warm water – Aim for around 110°F (43°C)—warm to the touch but not hot. Too hot will kill the yeast.
- 2 large eggs – Our binding agents that add incredible richness and help create that beautiful, tender crumb.
For That Epic Filling:
- 2 cups packed brown sugar – Dark brown sugar gives a deeper molasses flavor, but light brown works perfectly too. Pack it firmly into your measuring cup!
- 1 cup margarine or butter, softened – Seriously softened. This needs to be spreadable so it creates that iconic, gooey layer.
- 2 tbsp ground cinnamon – Use the good stuff! Fresh, fragrant cinnamon makes all the difference.
- 1 cup raisins (optional) – I know, I know, the great raisin debate. Love ’em or leave ’em! They add little bursts of chewy sweetness.
For the Simple Glaze (Optional but Highly Recommended):
- 2 cups powdered sugar – Sifted to avoid lumps in your beautiful glaze.
- 2–3 tbsp milk – Add one tablespoon at a time until you reach your desired drizzling consistency.
- ½ tsp vanilla or maple extract – A splash of vanilla is classic, but maple extract? Game. Changer.
Let’s Build Some Deliciousness: Your Step-by-Step Guide
Ready to rock? Follow these steps and you’ll be a cinnamon roll hero in no time. I’m sharing all my best tips along the way!
Step 1: Warm Things Up. In a small saucepan or the microwave, warm the milk and the ½ cup of butter just until the butter is melted and the mixture is warm to the touch (again, about 110°F). You don’t want it hot, or you’ll scramble your eggs in the next step! Set it aside for a moment.
Step 2: Mix the Dry Squad. In the bowl of your stand mixer (or a very large bowl if mixing by hand), combine 3 cups of the flour, the white sugar, instant yeast, and salt. Give it a quick whisk to combine everyone.
Step 3: Create the Batter. Pour the warm milk/butter mixture, the warm water, and the eggs into the dry ingredients. Using the paddle attachment on your mixer (or a sturdy wooden spoon), beat on medium speed for about 2 minutes until the batter is smooth and shiny. It will be loose and sticky—that’s perfect!
Step 4: Form the Dough. Switch to your dough hook attachment. Gradually add in the remaining 3½ cups of flour, about a cup at a time, until the dough starts to pull away from the sides of the bowl and forms a soft, slightly sticky ball. Chef’s Hack: You may not need all the flour! Humidity affects dough. Stop adding when the dough is soft and tacky but doesn’t completely stick to your clean, floured finger.
Step 5: Knead to Perfection. Knead the dough with the mixer on low speed for 5-7 minutes, or for 8-10 minutes by hand on a floured surface, until it’s incredibly smooth and elastic. It should feel like a soft, plump pillow.
Step 6: The Quick Rise. Place your beautiful dough ball back into a lightly greased bowl, turn it over to grease the top, and cover the bowl with a clean kitchen towel or plastic wrap. Let it rest in a warm, draft-free spot for 30-40 minutes. It won’t quite double, but it will get nice and puffy! (This is where we save so much time).
Step 7: Roll It Out. Once risen, punch the dough down and divide it in half. On a floured surface, roll one half into a rectangle about 12×8 inches. Don’t stress about it being perfect!
Step 8: The Filling Fun. Spread half of the softened 1 cup of butter evenly over the entire rectangle, leaving a tiny border at one long edge (this helps seal the roll). In a separate bowl, mix the brown sugar and cinnamon. Sprinkle half of this mixture generously over the butter, then scatter with raisins if you’re using them.
Step 9: Roll & Slice. Starting from the long edge opposite the clean border, tightly roll the dough into a log. Pinch the seam to seal. Using a sharp knife, dental floss, or a bench scraper, slice the log into 12 equal rolls. Chef’s Hack: Unflavored dental floss is my secret weapon for clean cuts without squashing the roll! Just slide it under the log, cross the ends over the top, and pull.
Step 10: Pan & Rise Again. Place the 12 rolls, cut-side up, in a greased 9×13 inch pan. They should be cozy and touching. Repeat the process with the other half of the dough. Cover the pans and let the rolls rise for a final 15-20 minutes while you preheat your oven to 375°F (190°C).
Step 11: Bake to Golden Bliss. Bake for 20-25 minutes, or until the tops are a beautiful golden brown and the centers are cooked through. Your house will smell AMAZING.
Step 12: Glaze & Gaze. Let the rolls cool in the pan for about 10-15 minutes. Whisk together the glaze ingredients and drizzle it over the warm rolls. Serve immediately and accept your compliments!
How to Serve These Beauties
These cinnamon rolls are a showstopper all on their own, but presentation is part of the fun! I love serving them right from the baking pan for a rustic, family-style feel. For a special touch, you can place a warm roll on a simple white plate with a drizzle of extra glaze and a light dusting of cinnamon. They are best served warm, when the glaze melts into all the nooks and crannies. Pair them with a strong cup of coffee, a cold glass of milk, or even a side of fresh fruit to cut through the sweetness. Pure brunch bliss!
Mix It Up! Flavorful Twists & Swaps
Once you master the base recipe, the world is your cinnamon-y oyster! Here are a few of my favorite riffs:
- Spice It Up: Add ½ tsp of cardamom or nutmeg to the cinnamon-sugar filling for an incredibly warm, aromatic depth.
- Go Nuts: Mix in ½ cup of chopped toasted pecans or walnuts with the filling for a wonderful crunch.
- Citrus Zing: Before adding the butter and sugar, spread a very thin layer of orange or lemon marmalade over the dough. It adds a bright, fruity note that cuts the sweetness.
- Berry Good: Swap the raisins for dried cranberries or chopped dried cherries for a tart, fruity bite.
- Cream Cheese Dream: Whisk 4 oz of softened cream cheese into the glaze, along with a tablespoon of the milk, for a classic, tangy cream cheese frosting.
Clara’s Kitchen Notes & Funny Stories
This recipe has evolved so much from my first snow-day experiment! I’ve learned that the stickier the dough, the softer the roll, so don’t be afraid of a little tackiness. I also had a hilarious kitchen fail once where I accidentally used garlic powder instead of cinnamon in the filling (they were next to each other in identical jars!). We took one bite and… well, let’s just say it was a savory surprise we still laugh about. LABEL YOUR SPICES, FOLKS!
Over time, I’ve found that letting the rolls cool slightly before glazing helps the glaze set up nicely instead of just melting into a puddle. But if you’re a die-hard puddle-of-glaze fan, I support you 100%. The best part of cooking is making the recipe your own. This is a forgiving, friendly dough—so play, experiment, and have fun with it!
Your Cinnamon Roll Questions, Answered!
Q: Can I make these the night before?
A: Absolutely! You have two great options. 1) Refrigerator Rise: After placing the sliced rolls in the pan, cover them tightly and pop them in the fridge overnight. In the morning, take them out, let them sit on the counter for 30-60 minutes to finish rising, and then bake as directed. 2) Bake & Reheat: Bake them fully the day before, let them cool completely, and don’t glaze them. Store covered at room temp. The next morning, warm them, covered with foil, in a 300°F oven for 10-15 minutes, then glaze and serve.
Q: My dough didn’t rise very much. What happened?
A: The most common culprit is old yeast. Yeast has a shelf life! Test it by sprinkling a pinch in some warm water with a pinch of sugar. If it doesn’t foam within 10 minutes, it’s time for a new jar. Other reasons could be liquid that was too hot (which kills the yeast) or a drafty, too-cold rising spot. Try placing your covered bowl of dough in an oven that’s been turned off but was warmed by the pilot light or for just a minute.
Q: My rolls are dense, not fluffy. Why?
A: This usually points to two things: either the yeast was old (see above!), or you added too much flour. It’s tempting to keep adding flour until the dough is completely non-stick, but a soft, slightly sticky dough is what we’re aiming for. Next time, try using a light hand with the last cup of flour and trust the process!
Q: Can I freeze these?
A: Yes, they freeze beautifully! The best method is to freeze them after baking and cooling but before glazing. Wrap individual rolls or the whole pan tightly in plastic wrap and then foil. They’ll keep for 2-3 months. To serve, thaw at room temp and warm in the oven, then add your glaze. You can also freeze the un-baked, shaped rolls in the pan. Thaw overnight in the fridge, then let them rise and bake as usual.
Nutritional Information (Per Roll, without glaze)
Calories: ~270-310 | Fat: 10g | Carbohydrates: 40g | Protein: 4g
Please note: This is an approximate estimate based on the ingredients used and will vary slightly with specific brands, optional ingredients, and substitutions.