Protein Cinnamon Rolls: The Glow-Up Your Brunch Deserves
Okay, let’s be real for a second. Is there anything in this world that smells more like pure, unadulterated joy than a batch of cinnamon rolls baking in the oven? That warm, sugary, spiced aroma that wraps around your kitchen like a cozy blanket? It’s the official scent of weekend mornings, slow sips of coffee, and happy bellies. But then… there’s the classic cinnamon roll crash. You know the one. That wave of sluggishness that hits about 20 minutes after you’ve devoured that glorious, gooey spiral, leaving you wondering if the bliss was worth the carb-coma.
For the longest time, I thought I had to choose. I could either have the soul-satisfying comfort of a homemade cinnamon roll, or I could have the sustained energy and glow-from-within feeling that comes from a protein-packed meal. It felt like an impossible trade-off. But what if I told you we could have it all? What if I told you we could create a cinnamon roll that’s not just a fleeting treat, but actual fuel? A roll so fluffy, so decadently spiced, and slathered with such a dreamy frosting that you’d never guess it’s secretly a powerhouse of goodness?
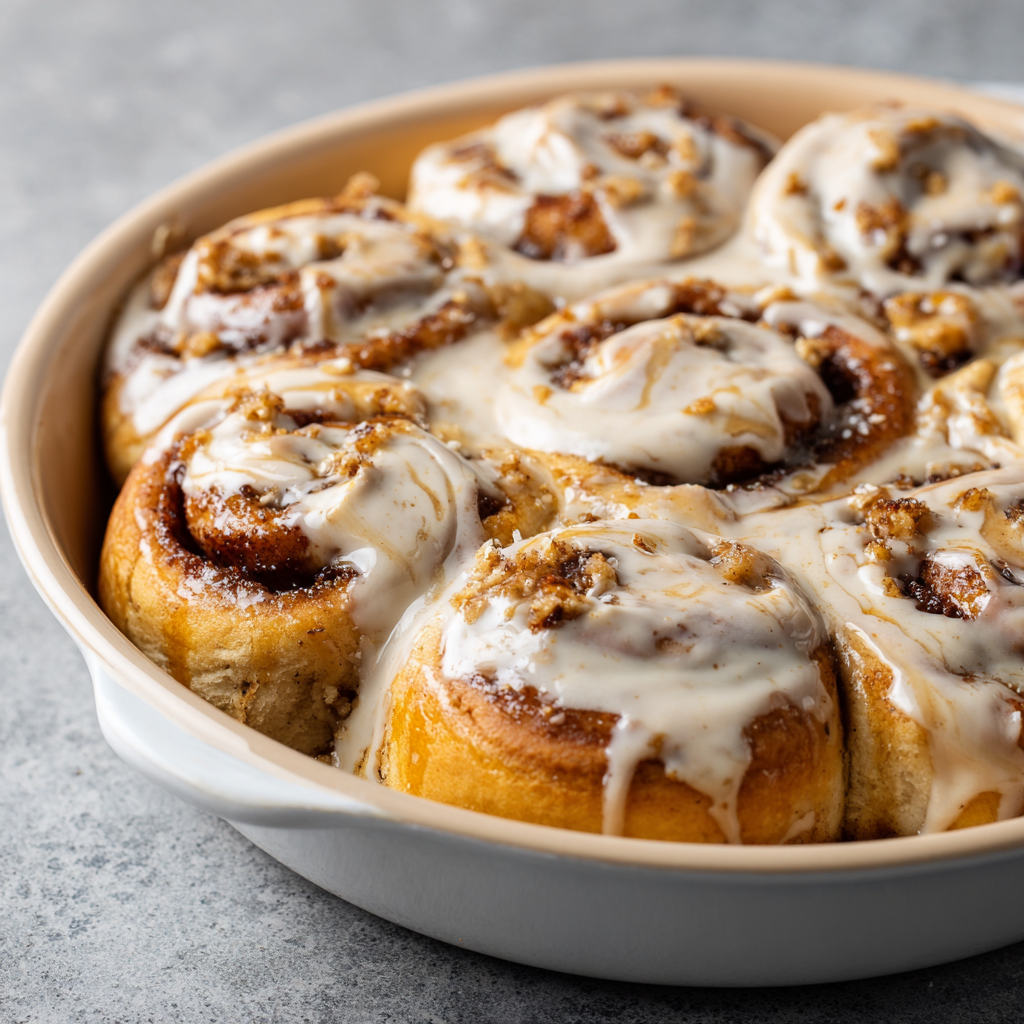
Friends, meet the recipe that changed my brunch game forever: my High-Protein, Low-Sugar Cinnamon Rolls. These beauties are everything. They’re soft, they’re gooey, and each one packs a whopping 15+ grams of protein. We’re using a clever, protein-enriched dough, a maple-kissed cinnamon filling that uses less sugar but all the flavor, and a cream cheese frosting that gets a sneaky boost (and a hint of espresso magic!). This is for those mornings when you want to indulge without the crash, for a post-workout treat that actually tastes like a celebration, and for proving that healthy, feel-good food can absolutely make your taste buds dance. Let’s bake something that loves you back!
A Tale of Two Rolls: My Cinnamon Roll Awakening
My love affair with cinnamon rolls started in my grandma’s kitchen. She’d make them from scratch, a whole-day affair that filled the house with the most incredible smell. I’d sit on the counter, legs swinging, “helping” by sneaking pinches of the brown sugar-cinnamon mixture. Those rolls were pure, sugary love. But as I got older and my body started to protest such intense sugar rushes, I found myself avoiding them, thinking they were a relic of my past.
The real turning point came a few years ago. I’d just finished a tough morning workout and was absolutely craving that warm, comforting flavor. I stared at a sad, dry “protein bar” and felt so defeated. Why did “healthy” have to feel like a punishment? Right then, I had a kitchen epiphany. What if I took the soul of my grandma’s recipe—the soft, yeasted dough, the warming spice, the creamy frosting—and gave it a nourishing twist? I pulled out my flour, my favorite vanilla protein powder, and got to work. The first batch was… interesting. Let’s just say hockey pucks could have been softer. But I kept tweaking, balancing the flour and protein, until I finally pulled a tray of golden, risen, *perfectly* fluffy rolls from the oven. That first bite, warm from the oven with a swipe of frosting, was a revelation. It tasted like childhood comfort, but it left me feeling energized and amazing. It was the best of both worlds, and I knew I had to share it with you.
Print
Protein Cinnamon Rolls (High-Protein, Low-Sugar Twist)
- Total Time: 33 minutes
- Yield: 6–8 rolls 1x
Description
These Protein Cinnamon Rolls offer a high-protein, low-sugar twist on the classic favorite. Made with Greek yogurt and protein powder in the dough, and lightly sweetened with a cinnamon filling, they’re perfect for fitness-friendly breakfasts or post-workout snacks without sacrificing flavor.
Ingredients
- Dough:
- 1 cup plain Greek yogurt
- 1 cup self-rising flour (or 1 cup all-purpose flour + 1 ½ tsp baking powder + ¼ tsp salt)
- 1 scoop (about 30g) vanilla or unflavored protein powder
- Filling:
- 2 tbsp melted coconut oil or light butter
- 2 tbsp brown sugar or sugar substitute (like erythritol)
- 1 tbsp ground cinnamon
- Glaze:
- ½ cup powdered sweetener (or powdered sugar)
- 1–2 tbsp unsweetened almond milk or regular milk
- ½ tsp vanilla extract
Instructions
- Preheat oven to 350°F (175°C) and grease a small baking dish or muffin tin.
- In a bowl, mix Greek yogurt, self-rising flour, and protein powder until a soft dough forms.
- Lightly flour a surface and roll dough into a rectangle.
- Brush with melted coconut oil, then sprinkle with cinnamon and sweetener evenly.
- Roll up tightly from the long edge and slice into 6–8 rolls.
- Place in the prepared dish and bake for 15–18 minutes until golden.
- Mix glaze ingredients and drizzle over slightly cooled rolls.
Notes
- Use flavored protein powder (like cinnamon roll or vanilla) to enhance the taste.
- For extra sweetness, mix a little sweetener into the dough.
- Store in the fridge for up to 4 days; reheat in the microwave before serving.
- Add chopped nuts or raisins to the filling if desired.
- Make it dairy-free by using plant-based yogurt and milk alternatives.
- Prep Time: 15 minutes
- Cook Time: 18 minutes
- Category: Breakfast
- Method: Baking
- Cuisine: American
Nutrition
- Calories: 140
- Sugar: 3g
- Saturated Fat: 2g
- Unsaturated Fat: 3g
- Fiber: 2g
Gathering Your Glow-Up Ingredients
Here’s the cast of characters that makes this magic happen. Don’t be intimidated by the list—a lot of it is pantry staples! I’ve included my favorite tips and swaps for each to make it your own.
For the Protein-Packed Dough:
- 4 cups all-purpose flour: The reliable base for our fluffy structure. For a whole-grain boost, you can swap up to half for white whole wheat flour.
- ⅔ cup flax meal (optional but awesome!): This is my secret weapon for added fiber, omega-3s, and a lovely, slightly nutty flavor. If you don’t have it, just use an equal amount of additional flour.
- 1½ cups vanilla protein powder: The star of the show! I recommend a whey-casein blend or a good plant-based vanilla powder for the best texture. This is what gives our rolls that incredible protein boost.
- ½ cup sugar (or coconut sugar): Just a bit to feed the yeast and add a hint of sweetness to the dough. Coconut sugar works beautifully for a less refined option.
- 2 tsp salt: Crucial for balancing all the flavors. Don’t skip it!
- 1½ cups milk: I use whole milk for richness, but any milk you love works perfectly.
- 6 tbsp butter, cubed: For that irresistible, tender crumb. I use unsalted so we control the salt level.
- 4½ tsp instant yeast (2 packets): Our little miracle workers that make the dough rise to fluffy perfection.
- 2 eggs, room temp: They add richness and help bind everything together. Pro tip: if you forget to take them out, just place the cold eggs in a bowl of warm water for 5 minutes!
For That Gooey, Maple-Cinnamon Filling:
- 12 tbsp (1½ sticks) butter, softened: The key here is *softened*, not melted. It should be spreadable for the perfect layer.
- 1 cup brown sugar: Less than traditional recipes, but trust me, it’s plenty! It creates that classic gooeyness.
- 2 tbsp cinnamon: Go for the good stuff! The aroma is everything.
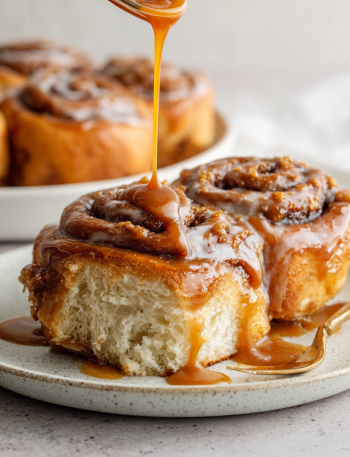
- Optional: 2 tbsp maple syrup: This is my little cheat for extra depth of flavor and moisture without loading up on more sugar.
For the Espresso-Kissed Cream Cheese Frosting:
- 16 oz cream cheese, softened: The tangy, creamy base of our frosting. Full-fat gives the best texture, but low-fat works too.
- 1 cup vanilla protein powder: Yes, more protein! It blends beautifully into the frosting, making it thick and delicious.
- ½ cup powdered sugar: Just enough to sweeten the deal. You can adjust to your taste.
- ½ cup milk: To get the frosting to that perfect, drizzling consistency.
- Optional: 1 tsp espresso powder + 1 tbsp maple syrup: My favorite chef’s hack! The espresso powder doesn’t make it taste like coffee, it just deepens the vanilla flavor and makes it taste even more incredible. Highly recommend!
Let’s Bake! Your Step-by-Step Guide to Fluffy Perfection
Ready to create some magic? Follow these steps, and you’ll be a cinnamon roll pro in no time. I’ve tucked my favorite kitchen hacks right in here with you.
Step 1: Wake Up the Yeast & Make the Dough
First, we need to get our yeast nice and active. In a small saucepan or in the microwave, gently warm the milk and cubed butter until the butter is just melted and the mixture is lukewarm to the touch (about 110°F/43°C). You should be able to comfortably dip your finger in. If it’s too hot, it will kill the yeast, so when in doubt, go cooler! Pour this warm mixture into the bowl of a stand mixer (or a large mixing bowl if you’re kneading by hand). Sprinkle the yeast and the ½ cup of sugar over the top. Give it a quick stir and let it sit for 5-10 minutes. You should see a foamy, frothy layer form on top—that’s how you know your yeast is alive and happy!
Step 2: Bring the Dough Together
Once your yeast mixture is foamy, add the room-temperature eggs and give it a quick mix with the paddle attachment. Now, in a separate bowl, whisk together your all-purpose flour, flax meal (if using), vanilla protein powder, and salt. This ensures everything is evenly distributed. With the mixer on low, gradually add the dry ingredients to the wet ingredients until a shaggy dough forms. Now, switch to the dough hook attachment. Knead on medium speed for about 5-7 minutes, until the dough is smooth, elastic, and slightly tacky but not sticky. If you’re kneading by hand, turn the dough out onto a floured surface and knead for 8-10 minutes. It’s a great arm workout! The dough should feel soft and smooth when it’s ready.
Step 3: The First Rise (Let it Breathe!)
Lightly grease a large bowl with a bit of oil or cooking spray. Place your beautiful ball of dough into the bowl, turning it once to coat it lightly in oil. This prevents it from drying out. Cover the bowl with a clean kitchen towel or plastic wrap and place it in a warm, draft-free spot. I like to turn my oven on to the “warm” setting for just a minute, then turn it off and place the bowl inside. Let the dough rise for about 1 hour, or until it has doubled in size. This is the perfect time to clean up and make the filling!
Step 4: Create the Cinnamon-Sugar Filling
While the dough is rising, make the filling. In a medium bowl, use a spatula to mix the softened butter, brown sugar, cinnamon, and optional maple syrup until it becomes a smooth, spreadable paste. Set this aside. Having your butter properly softened is key here—if it’s too cold, it’ll be hard to spread and might tear the dough.
Step 5: Roll, Fill, and Create the Swirls
Once the dough has doubled, punch it down gently to release the air. Turn it out onto a lightly floured surface. Here’s a pro tip: divide the dough in half. Working with half the dough at a time is much easier! Roll one half out into a roughly 12×16 inch rectangle. Don’t worry about it being perfect. Spread half of the cinnamon filling evenly over the entire surface, leaving about a ½-inch border along one of the long edges (this will help it seal). Now, starting from the long edge opposite the border, slowly and tightly roll the dough into a log. Use a sharp serrated knife, dental floss, or a piece of thread to cut the log into 12 equal slices. (The floss trick: slide a piece of floss under the roll, cross it over the top, and pull—it gives you clean cuts without squishing the rolls!). Repeat with the second half of the dough.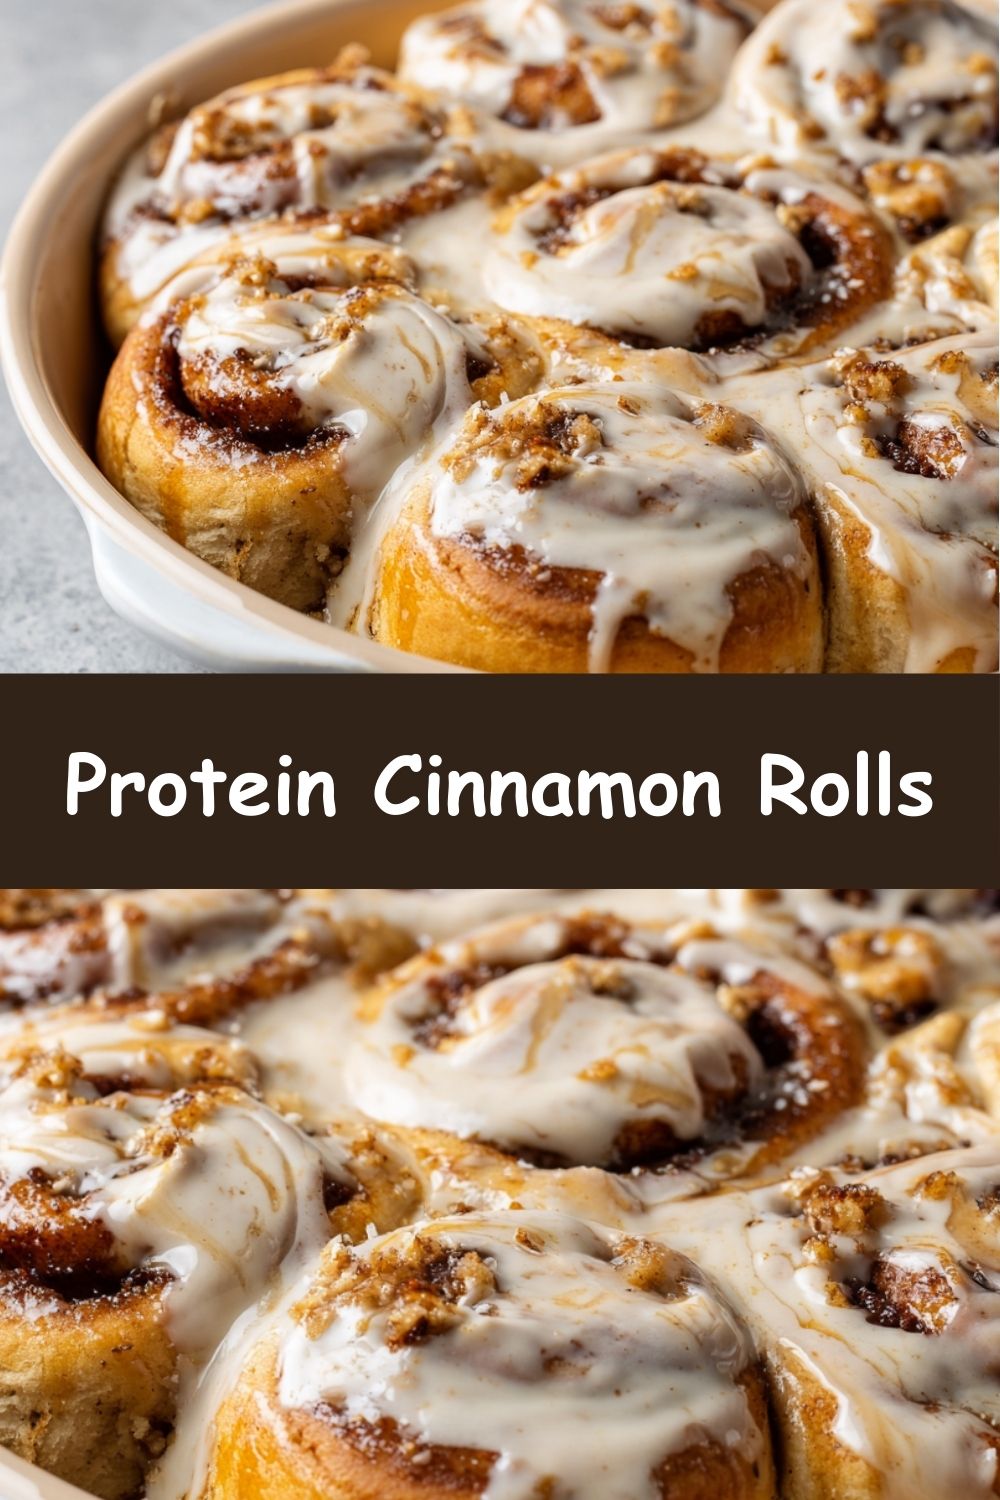
Step 6: The Second Rise & Bake to Golden Bliss
Place the 24 rolls into two greased 9×13 inch baking pans (or a similar size). Cover the pans with a towel and let them rise again in a warm place for about 30 minutes. They should look nice and puffy. Meanwhile, preheat your oven to 350°F (175°C). Once risen, bake the rolls for 22-25 minutes, or until they are golden brown on top and sound hollow if you tap them. Your kitchen will smell like heaven!
Step 7: Whip Up the Dreamy Frosting
While the rolls are baking, make the frosting. In a medium bowl, use an electric hand mixer (or a stand mixer with the whisk attachment) to beat the softened cream cheese until smooth. Add the vanilla protein powder, powdered sugar, milk, and the optional espresso powder and maple syrup. Beat until everything is combined and you have a smooth, creamy frosting. If it’s too thick, add a splash more milk. Too thin? A bit more protein powder.
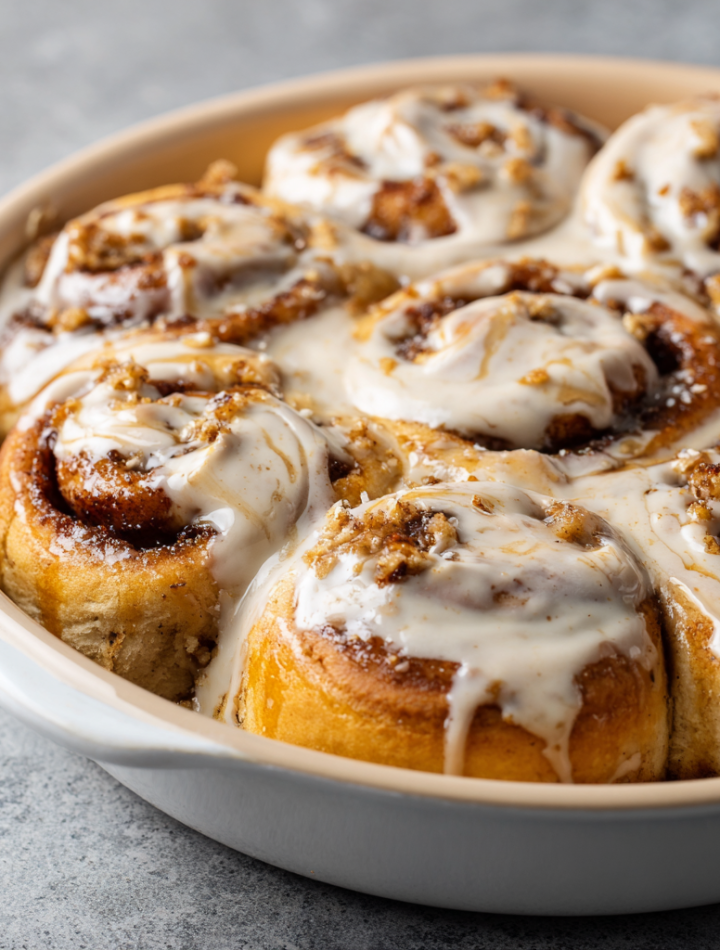
Step 8: The Grand Finale – Frost and Devour!
As soon as the rolls come out of the oven, let them cool in the pan for just about 5 minutes. Then, spread the frosting generously over the warm rolls. The warmth will slightly melt the frosting, creating an irresistible glaze. Now, try to wait at least 10 minutes before diving in… if you can!
How to Serve Your Masterpiece
These protein cinnamon rolls are a showstopper all on their own, but presentation is part of the fun! I love pulling the whole pan to the table and letting everyone dig in family-style. For a prettier plate, use a spatula to carefully transfer one or two rolls to a plate, drizzling a little extra frosting over the top. A light dusting of extra cinnamon or a few chopped pecans on top adds a lovely touch. And of course, a hot cup of coffee or a cold glass of milk is the non-negotiable, perfect pairing. Enjoy them warm for the ultimate gooey experience!
Mix It Up! 5 Delicious Twists on the Classic
Once you’ve mastered the base recipe, the fun really begins! Here are a few of my favorite ways to switch things up:
- Apple Pie Roll: Add 1 cup of finely chopped apples (tossed in a tsp of cinnamon) over the butter filling before rolling.
- Chocolate Hazelnut Dream: Swap the cinnamon filling for a mixture of 1 cup chocolate protein powder, ½ cup softened butter, and ¼ cup chopped toasted hazelnuts.
- Vegan Friendly: Use plant-based protein powder, your favorite vegan butter, flax eggs (2 tbsp ground flax + 6 tbsp water), and vegan cream cheese. It works like a charm!
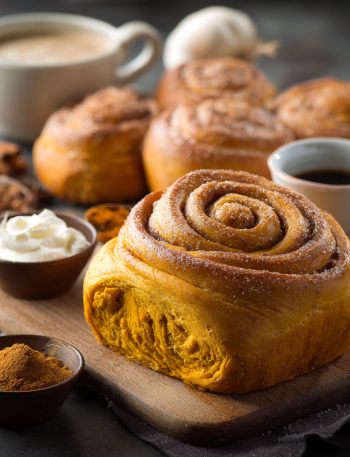
- Pumpkin Spice Latte: Add ½ cup of canned pumpkin puree to the dough and use pumpkin pie spice in the filling. Add a pinch of pumpkin spice to the frosting, too!
- Lemon Blueberry Bliss: Use unflavored or vanilla protein powder and add the zest of one lemon to the dough. Sprinkle 1 cup of fresh blueberries over the cinnamon filling before rolling.
Clara’s Kitchen Confidential
This recipe has been a labor of love, and it’s evolved so much since that first hockey-puck batch! The biggest lesson I learned? Don’t be scared of the protein powder. It behaves differently than flour, so the dough might feel a bit softer or stickier at first. Trust the process and knead it until it becomes smooth. The addition of the flax meal was a happy accident one day when I was out of whole wheat flour, and now I’ll never go back—it adds such a wonderful texture.
I also have a funny confession: the espresso powder in the frosting was a complete “oops” moment. I meant to grab the cinnamon, but in my early-morning baking haze, I grabbed the wrong jar. I almost threw out the whole batch, but my husband (the brave taste-tester) convinced me to try it. It was a revelation! It just makes the vanilla flavor *pop* in a way I can’t explain. So sometimes, the best recipes come from happy little kitchen mistakes. Don’t be afraid to experiment!
Your Questions, Answered!
Q: My dough didn’t rise very much. What went wrong?
A: The most common culprit is the yeast. Either the liquid was too hot and killed the yeast, or the yeast was old. Always test your yeast by making sure it gets foamy in the first step. Also, make sure your rising spot is warm enough—a cold, drafty kitchen can slow down the rise significantly.