Let’s Turn Snack Time into a Spooktacular Adventure!
Hey there, my fellow flavor-seekers! Clara here, back in the Unknown kitchen and buzzing with excitement because we’ve officially entered the most whimsical, creative, and downright fun time of the year. The air is getting crisp, the leaves are putting on their final fiery show, and everywhere you look, there’s a little hint of magic—and maybe a plastic skeleton or two. That’s right, Halloween is creeping up on us, and my kitchen has fully embraced the spirit. Or should I say, spirits?
But here’s the thing: I firmly believe that holiday treats should be just as much about the experience as they are about the flavor. They should be about laughter, about little hands helping to create something magical, and about the pure, unadulterated joy of digging into a dessert that’s as fun to look at as it is to eat. That’s where these unbelievably easy, no-bake Pumpkin Patch Pudding Cups swoop in to save the day.
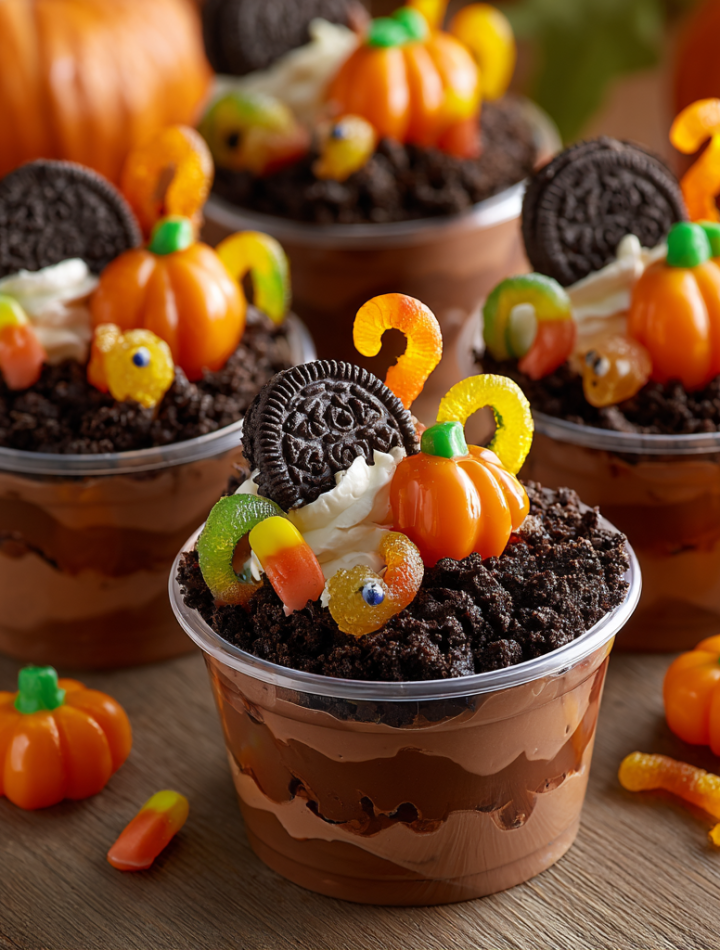
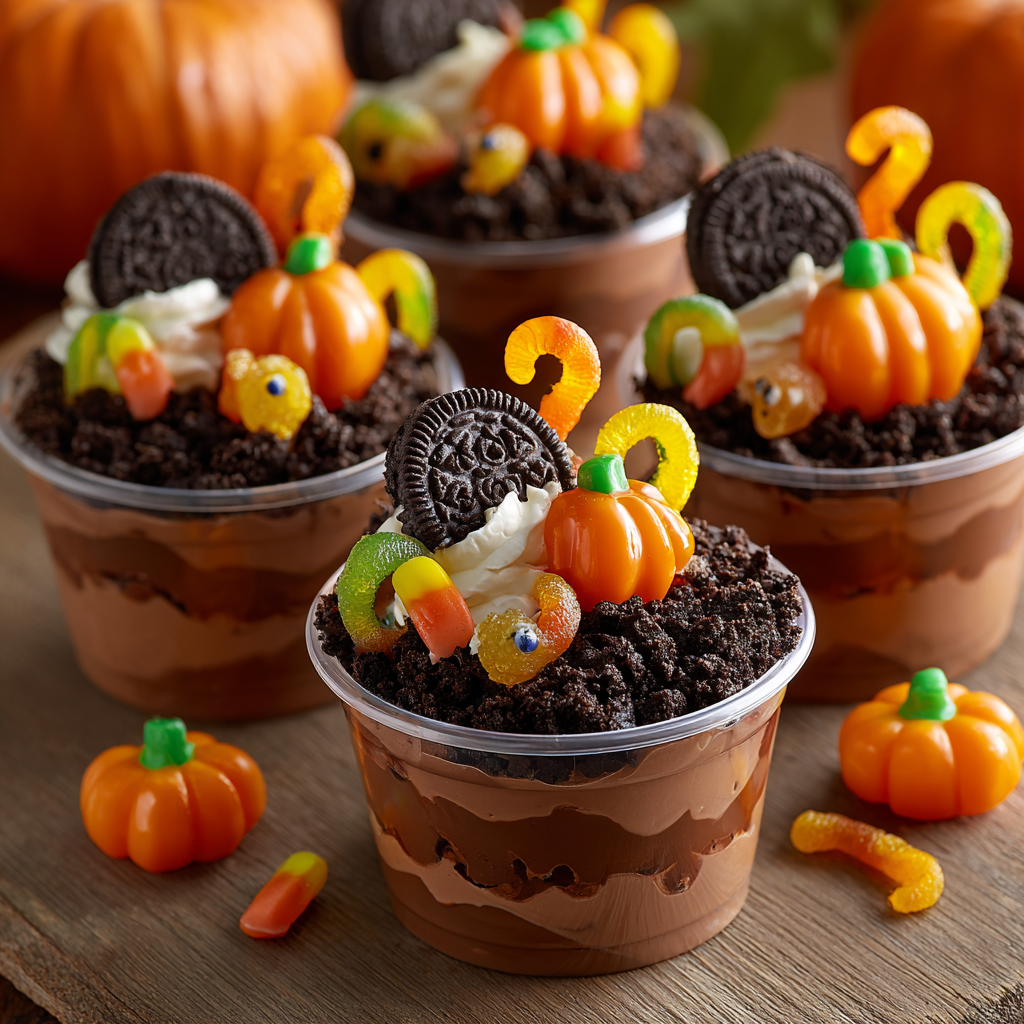
Imagine this: creamy, dreamy chocolate pudding, a crunchy layer of “dirt” made from crushed Oreos, and a cute little pumpkin patch sprouting right out of your cup, complete with wiggly gummy worms. It’s a scene straight out of a garden ghoul’s dream, and I promise you, it will make everyone’s eyes light up—from the tiniest trick-or-treaters to the grown-ups who are just kids at heart. So, grab your favorite mixing spoon (the one that’s perfect for licking, of course), and let’s cook up some memories together.
A Patch of Pudding & A Whole Lot of Love
This recipe takes me right back to my first Halloween in my own apartment. I was determined to host a party, but my culinary skills were, let’s say, a work in progress. The thought of baking a complicated cake filled me with more terror than any horror movie. I needed something foolproof, festive, and fast.
I raided my pantry and found a box of chocolate pudding mix, some leftover Oreos from a baking mishap, and a handful of gummy worms I’d been snacking on. On a whim, I started layering them in my only clear cups—the ones I used for smoothies. I topped it all with a few orange jelly candies I found at the corner store. I remember setting them out on the table, thinking they looked a little silly, but my friends absolutely lost their minds! They were the hit of the party. It wasn’t about fancy technique or expensive ingredients; it was about pure, simple, playful joy. That’s the spirit I want to bring to your kitchen today. No stress, just fun.
Print
Pumpkin Patch Pudding Cups
- Total Time: 10 minutes
- Yield: 4 to 6 cups 1x
- Diet: Vegetarian
Description
Turn snack time into a playful Halloween delight with these Pumpkin Patch Pudding Cups. Layers of creamy chocolate pudding and crushed Oreos create a fun “dirt” effect, topped with candy pumpkins and gummy worms for a festive finish. Whether you’re hosting a party or making a quick treat with the kids, these no-bake cups deliver smiles in every spoonful.
Ingredients
- 2 cups chocolate pudding (store-bought or homemade)
- 12 Oreo cookies, crushed
- 4 to 6 candy pumpkins
- 4 to 6 gummy worms
- Whipped cream (optional)
- Clear plastic cups or small jars
Instructions
- Crush Oreos into fine crumbs using a food processor or by hand in a sealed bag.
- Fill each cup about three-quarters full with chocolate pudding.
- Sprinkle a thick layer of crushed Oreos over the pudding to resemble dirt.
- Add candy pumpkins on top and tuck in a gummy worm or two for a fun garden look.
Notes
- Chill pudding cups before serving for a firmer texture.
- Top with whipped cream for added sweetness and visual appeal.
- Use chocolate graham crackers as a nut-free alternative to Oreos.
- Let kids assemble their own for a fun, hands-on activity.
- Best served within a few hours of assembling.
- Prep Time: 10 minutes
- Cook Time: 0 minutes
- Category: Dessert, Snack
- Method: No-Bake, Assembly
- Cuisine: American
Nutrition
- Serving Size: 1 cup
- Calories: 240
- Sugar: 22g
- Sodium: 190mg
- Fat: 10g
- Saturated Fat: 4g
- Unsaturated Fat: 5g
- Trans Fat: 0g
- Carbohydrates: 35g
- Fiber: 1g
- Protein: 3g
- Cholesterol: 10mg
Keywords: pumpkin patch pudding cups, Halloween pudding cups, no-bake Halloween dessert, Oreo dirt cups, kid-friendly Halloween treat
Gathering Your Pumpkin Patch Supplies
The beauty of this recipe is its beautiful simplicity. You likely have most of this in your pantry right now! Here’s what you’ll need to create your own edible garden:
- 2 cups chocolate pudding – You can absolutely use the instant kind from a box (just whisk with cold milk) or get fancy with a homemade version using real chocolate and custard. Chef’s Insight: For a richer, deeper flavor, try using dark chocolate pudding! It makes the “dirt” layer really pop.
- 12 Oreo cookies, crushed – The classic black cookie is our “dirt.” Cream filling and all! Substitution Tip: Need a gluten-free version? Any gluten-free chocolate sandwich cookie will work perfectly here. For a less sweet option, try using chocolate graham crackers.
- 4 to 6 candy pumpkins – These are the stars of our patch! You can find these little orange candies in the seasonal aisle of any grocery store. Chef’s Insight: If you can’t find pumpkins, orange M&M’s or even clementine segments (pat them dry!) make a cute and tasty alternative.
- 4 to 6 gummy worms – For that classic “eww, awesome!” factor. Substitution Tip: For a gelatin-free version, look for vegan gummy worms made with pectin instead of gelatin. They’re just as wiggly and delicious!
- Whipped cream (optional) – Because a cloud on top of your dirt patch is never a bad idea. A dollop adds a lovely creamy contrast. Use the canned stuff for ease or make your own!
- Clear plastic cups or small jars – Presentation is key! The clear vessels let you see all the beautiful, messy layers, which is half the fun.
Building Your Edible Masterpiece, Step-by-Step
Alright, let’s get our hands dirty! Well, not literally. But we are about to make a glorious mess, and I’m here for it.
- Crush Those Cookies! First up, we need to make our “dirt.” Toss your Oreos into a food processor and pulse until they resemble fine, dark soil. No food processor? No problem! This is a fantastic job for little helpers. Place the cookies in a sealed zip-top bag, press out the air, and let your kids go to town with a rolling pin or the bottom of a heavy glass. It’s a great way to get out any pre-Halloween excitement! Chef’s Hack: For an extra-muddy texture, don’t pulse the cookies too much. A few bigger chunks mixed in make it feel more realistic.
- The Pudding Foundation. Now, grab your clear cups. Using a spoon, fill each cup about three-quarters of the way full with your prepared chocolate pudding. This is our rich, delicious base layer. Try to get it as level as you can, but don’t stress about it being perfect. We’re going for a garden, not a laboratory experiment! Chef’s Hack: If you want super clean layers, you can pipe the pudding in using a large piping bag or even a zip-top bag with the corner snipped off.
- The Big Sprinkle. Here comes the fun part! Take a generous handful of your Oreo “dirt” and sprinkle a thick, even layer over the pudding. You want to cover all the chocolatey goodness completely. This is what gives our pumpkin patch its authentic look. Don’t be shy with it!
- Plant Your Garden. Now for the decorations! Gently press your candy pumpkins into the Oreo dirt. Space them out like they’re growing in a little row. Then, take your gummy worms and tuck them partially under the dirt, letting them peek out and wiggle across the surface. Get creative with their positions—some can be crawling out, others can be burrowing in. Chef’s Hack: For an extra touch, you can use a tiny bit of green icing and a piping tip to draw little vines connecting your pumpkins!
- The Final Flourish (Optional). If you’re feeling extra, add a fluffy swirl of whipped cream on top. It looks like a delicious little cloud hovering over your pumpkin patch. You can even add one more gummy worm crawling over the whipped cream peak!
And that’s it! See? I told you it was easy. You’ve just created a dessert that’s bursting with personality and Halloween cheer.
How to Serve Up These Spooky Sweets
Presentation is everything with these cuties! Line them up on a platter or a rustic wooden board to create a whole pumpkin patch display. For an extra festive touch, scatter a few real autumn leaves (make sure they’re clean and non-toxic!) or some Halloween sprinkles around the bases of the cups. Hand them out with a spoon and watch the smiles appear. They’re the perfect individual treat for a party—no slicing or serving required!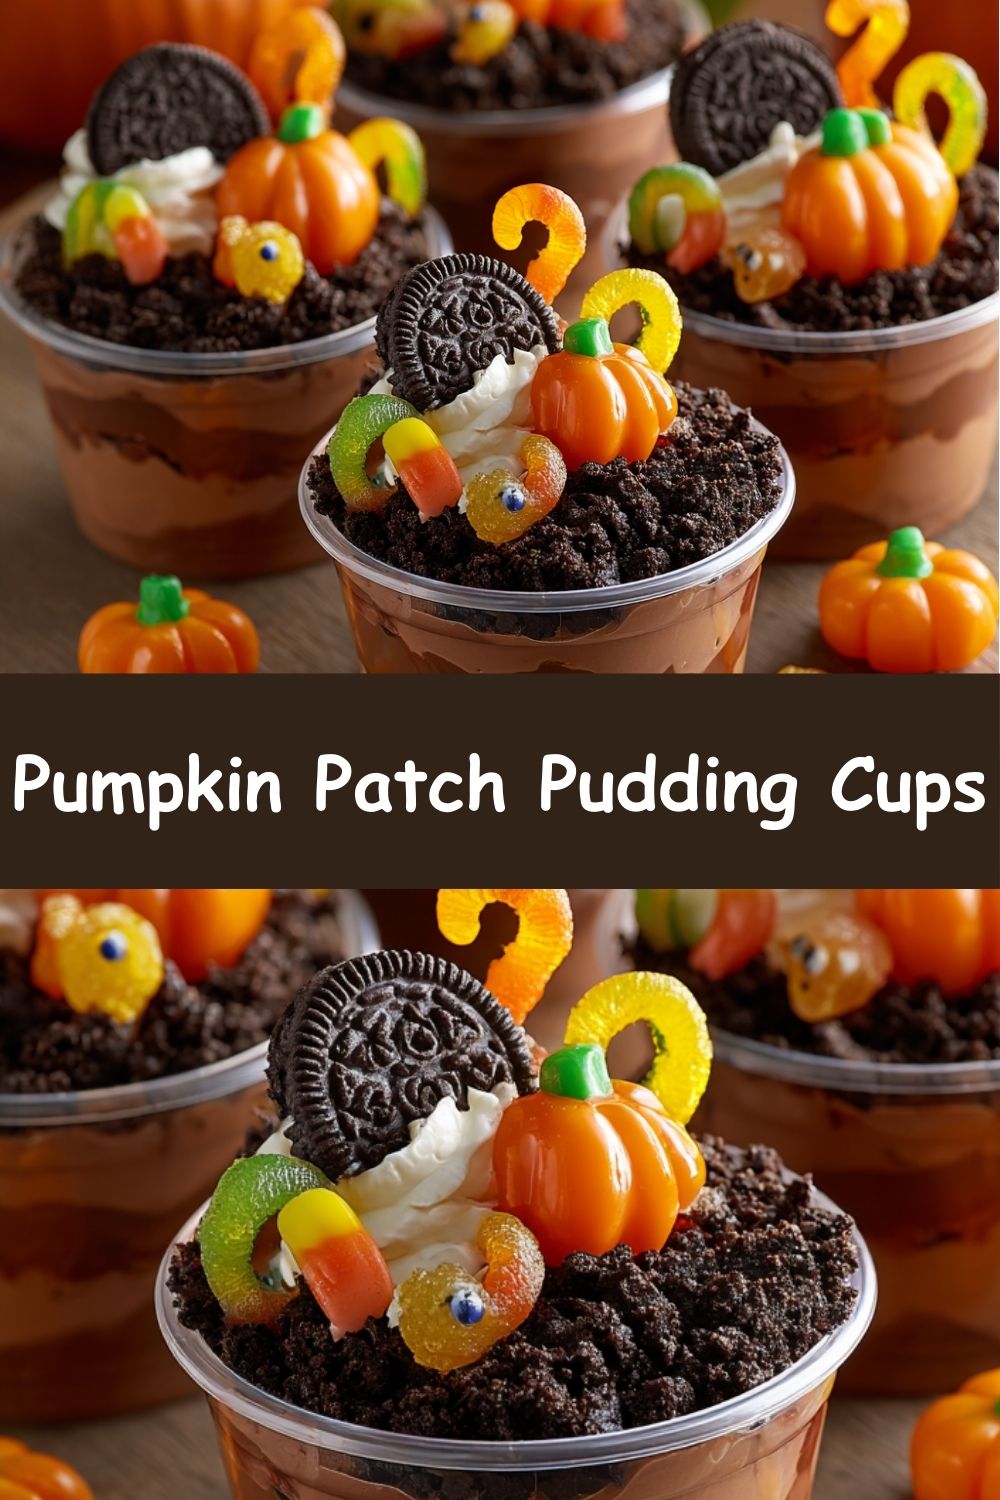
Mix It Up! Endless Pumpkin Patch Possibilities
The best recipes are like a blank canvas, waiting for your personal touch. Here are a few ways to make this treat your own:
- Cookie Dough Dirt: Use blended chocolate chip cookies instead of Oreos for a different kind of “dirt” and vanilla pudding as your base.
- Boo-berry Patch: Swap the chocolate pudding for vanilla or cheesecake-flavored pudding, and use crushed golden Oreos or graham crackers for dirt. Top with blueberry “ghosts” (draw eyes on blueberries with a food-safe marker) instead of pumpkins.
- Dairy-Free Delight: Use your favorite plant-based milk to make the pudding, and opt for vegan sandwich cookies and gelatin-free gummy worms.
- Protein Power-Up: Use chocolate protein pudding as the base layer for a treat that fuels your trick-or-treating adventures.
- Zombie Apocalypse: Go big! Use a large trifle dish to make one giant pumpkin patch. Double all the ingredients and let everyone dig in.
From My Kitchen to Yours: A Few Parting Thoughts
This recipe has evolved from a last-minute party save into a yearly tradition in my home. One of my favorite memories is of my niece, her face smudged with chocolate and Oreo crumbs, proudly announcing she “grew the best pumpkins ever.” That’s the magic of cooking—it’s not just about the food, it’s about the stories you create while making it.
Over the years, I’ve learned to embrace the mess. The crumbs on the floor, the whipped cream on the nose—it’s all part of the fun. I’ve also learned that the best “hack” is to have all your ingredients prepped and ready to go before you call the kids in. It makes the assembly process smooth and joyful for everyone. So, put on some spooky music, embrace the chaos, and enjoy every minute of it.
Your Questions, Answered!
Q: Can I make these ahead of time?
A: You can, but with a caveat! You can prepare the pudding and crush the Oreos a day in advance (store separately in the fridge and an airtight container, respectively). However, I highly recommend assembling the cups no more than a few hours before serving. If the Oreo crumbs sit on the pudding for too long (like overnight), they will soften and lose their delightful “dirt” texture.
Q: My pudding is too runny! How do I fix it?
A> If you’re using a boxed mix, make sure you’re whisking it for the full recommended time, usually about 2 minutes. This allows the thickeners to fully activate. Then, let it set in the fridge for the full time listed on the box. If it’s still runny, you can try folding in a tablespoon of whipped cream or a spoonful of Greek yogurt to help thicken it up.
Q: The gummy worms are really stiff. Any tips?
A> Absolutely! If your gummies have been in the pantry for a while, they can get a little tough. A quick fix is to let them sit in a bowl of warm water for a minute or two before using. They’ll become much more pliable and easier to “bury” in your dirt.
Q: I can’t find candy pumpkins. What else can I use?
A> Don’t fret! Get creative. Orange slices, mandarin orange segments (pat them VERY dry), orange jelly beans, or even pumpkins cut from orange fruit leather or Starbursts work wonderfully. It’s all about the orange color and the fun.
Quick Nutrition Note
While these are definitely a fun treat, it’s all about balance, right? The nutritional info below is an estimate per serving (assuming 4 servings with whipped cream). For a lighter version, try using sugar-free pudding and reduced-fat Oreos. Remember, it’s not about perfection—it’s about enjoying a festive moment!
Prep Time: 10 minutes | Servings: 4 | Calories: 255 | Total Fat: 9g | Saturated Fat: 3.5g | Carbohydrates: 41g | Sugars: 29g | Protein: 3g | Fiber: 1g
Contains: dairy, gluten, gelatin