Forget Everything You Thought You Knew About Cinnamon Rolls
Hey there, my fellow flavor adventurer! Have you ever stared into your oven window, watching a batch of cinnamon rolls rise and bubble, and felt your heart do a little happy dance? There’s something truly magical about that moment, the warm, sweet scent of cinnamon and sugar weaving its way through your entire home, promising something incredible is just minutes away.
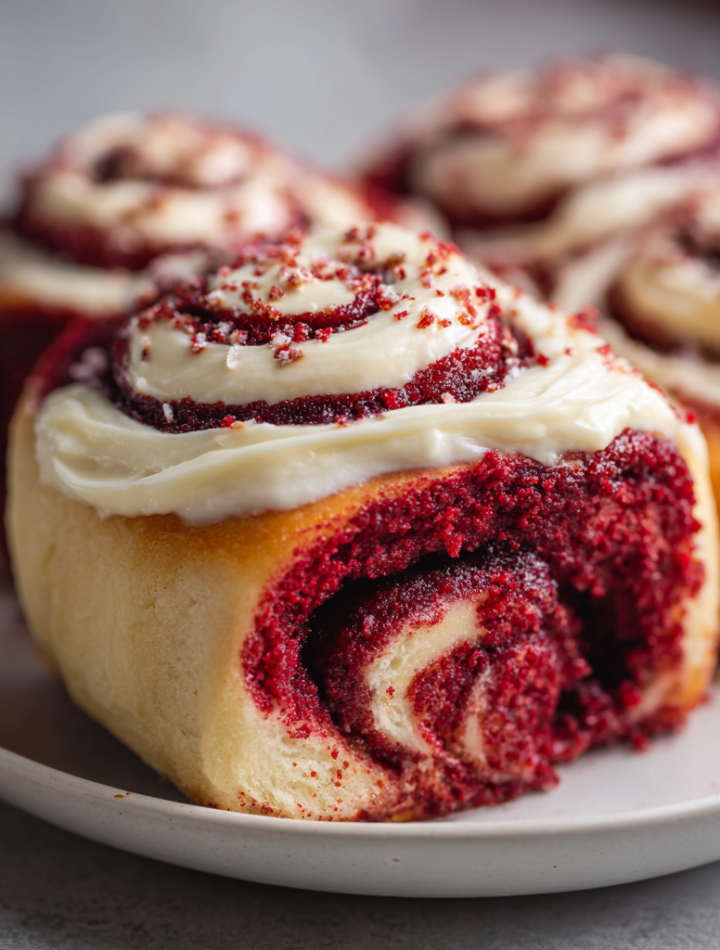
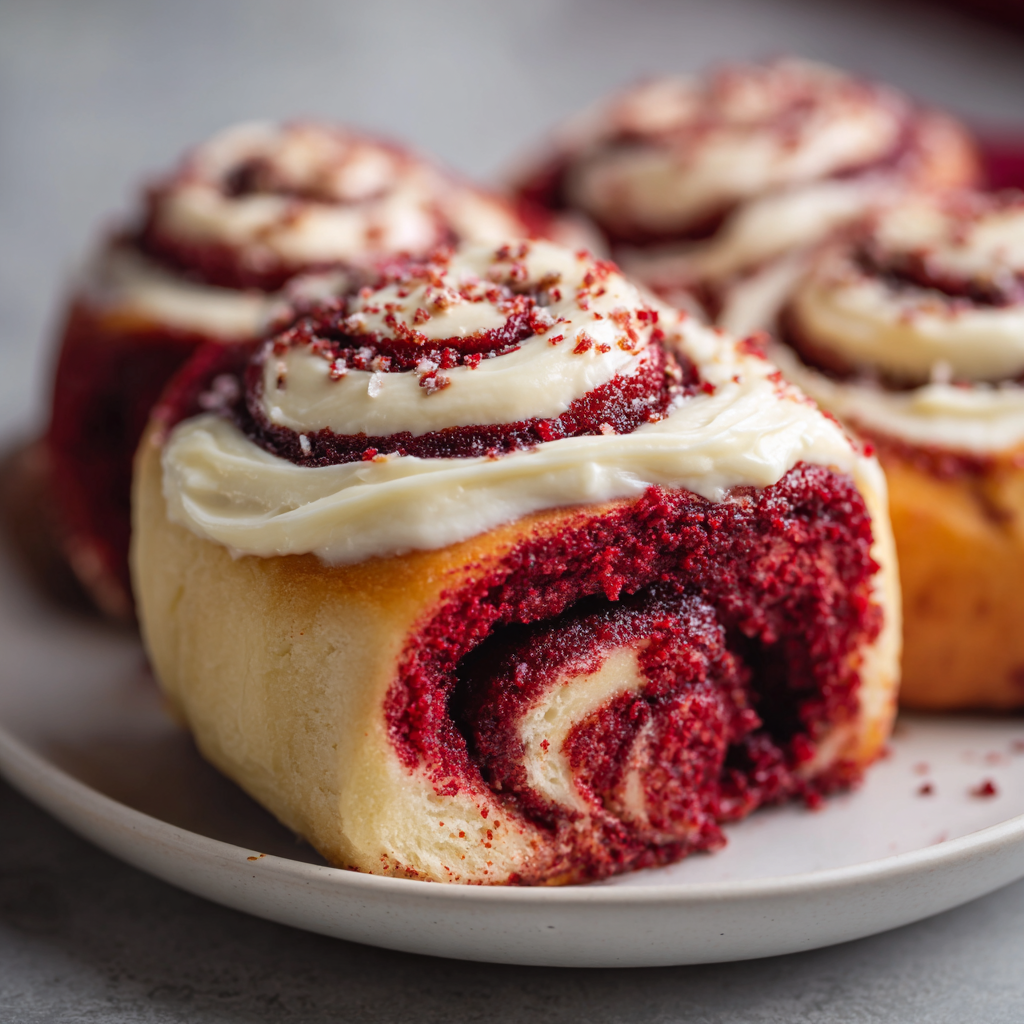
But what if we took that classic, cozy feeling and dialed the magic all the way up to eleven? What if we infused those fluffy, soft pillows of dough with the rich, mysterious charm of red velvet and the deep, comforting warmth of cocoa? Imagine it: a swirl of vibrant crimson and dark cinnamon sugar, all topped with a blanket of tangy, luscious cream cheese frosting that melts into every nook and cranny. That, my friend, is not just a cinnamon roll. That’s a showstopper. That’s a brunch centerpiece. That’s a hug in pastry form, dressed in its most festive outfit.
These Red Velvet Cinnamon Rolls are my ultimate celebration bake. They’re perfect for a lazy weekend project, a Valentine’s Day breakfast-in-bed surprise, a holiday brunch that will have everyone talking, or just because you deserve a little extra joy on a Tuesday. They combine the best of both worlds—the indulgent, fluffy texture of a classic cinnamon bun and the sophisticated, slightly chocolaty flavor of red velvet. So, preheat your oven, put on your favorite apron, and let’s create something absolutely unforgettable together. I promise, the smell alone is worth the effort!
The Happy Kitchen Accident That Started It All
I have to confess, this recipe was born from a beautiful, flour-dusted kitchen mishap. A few years ago, right before Valentine’s Day, I was in a serious baking mood. My mission: classic cinnamon rolls. But as I reached for the vanilla, my elbow knocked over a nearly full bottle of red food coloring. It splashed right into my bowl of melted butter and milk, creating a shockingly vibrant pink pool. My first instinct was to panic—but then I stopped. Instead of starting over, I thought, “Why not?” I added a scoop of cocoa powder to the mix, deciding to just lean into it and see what happened.
What emerged from the oven hours later was nothing short of miraculous. The dough had baked up into the softest, most stunning deep red swirls. The cocoa added this subtle, rich depth that played so perfectly with the cinnamon. It was a complete accident, but it felt like fate. That batch of “oops” rolls became an instant tradition in my house. Now, I can’t imagine a special occasion without them. They’re a reminder that sometimes the best things in life—and in the kitchen—come from happy little accidents and a willingness to get a little messy.
Print
Red Velvet Cinnamon Rolls
- Total Time: ~3 hours
- Yield: 12 rolls 1x
Description
Soft, fluffy rolls made with cocoa and red velvet flavor, swirled with cinnamon sugar, and topped with tangy cream cheese frosting. Great for brunch, Valentine’s Day, or whenever you want something festive and indulgent.
Ingredients
Dough:
1 package (≈ 2¼ tsp) active dry yeast
½ cup warm whole milk
½ cup unsalted butter, melted
2 large eggs, room temperature
~4¼ cups all-purpose flour
3 tbsp unsweetened cocoa powder
2–3 tsp red food coloring
½ tsp salt
½ cup sugar
Filling:
¼ cup unsalted butter, softened
1 cup dark or light brown sugar, packed
2 tbsp ground cinnamon
Cream Cheese Frosting:
¼ cup unsalted butter, softened
4 oz cream cheese, softened
1½ cups powdered sugar, sifted
1 tsp vanilla extract
(Optional: a splash of milk to thin)
Instructions
In warm milk, dissolve yeast and sugar. Let sit until foamy.
Add melted butter, eggs, cocoa, salt, red food coloring. Mix well. Gradually add flour to make a soft dough. Knead until smooth and elastic.
Place dough in greased bowl, cover, let rise until doubled (1–2 hrs).
Roll dough into rectangle. Spread softened butter. Mix brown sugar + cinnamon, sprinkle evenly.
Roll from one long side into a log, cut into 12 equal rolls. Place rolls in a greased 9×13 baking pan. Let rise again until puffy.
Bake at ~350°F (175°C) for ~25–30 minutes, until golden and set.
While warm, mix cream cheese frosting ingredients until smooth. Spread over warm rolls so frosting melts into crevices.
- Prep Time: ~2–3 hours (includes rises)
- Cook Time: 30 minutes
- Category: Dessert
Nutrition
- Calories: 450
- Carbohydrates: ~55‑60g
- Protein: 8g
Gathering Your Red Velvet Magic
Here’s everything you’ll need to create this masterpiece. Don’t be intimidated by the list—it’s mostly pantry staples! The key to a great rise is ensuring your ingredients are at the right temperature, so read those notes!
For the Dough:
- 1 package (≈ 2¼ tsp) active dry yeast: This is our little miracle worker, the engine that makes our dough rise and become fluffy. Make sure your yeast is fresh for the best results!
- ½ cup warm whole milk: “Warm” means between 105-115°F (40-46°C)—like a pleasant bath temperature. Too hot and you’ll kill the yeast; too cold and it won’t activate. Whole milk gives the dough a richer tenderness, but 2% works in a pinch.
- ½ cup unsalted butter, melted: Unsalted lets us control the salt level. Melted butter makes for a more tender crumb compared to softened butter in some doughs.
- 2 large eggs, room temperature: Room temp eggs incorporate much more evenly into the dough, giving it structure and richness. Just pop them in a bowl of warm water for 5-10 minutes if you forgot to take them out!
- ~4¼ cups all-purpose flour: We might not use all of this! We’ll add it gradually until the dough reaches a soft, slightly tacky (but not sticky) consistency.
- 3 tbsp unsweetened cocoa powder: This is the secret weapon! It gives that signature red velvet flavor and a beautiful dark red hue once mixed with the food coloring. Use natural, not Dutch-process, for the right acidity.
- 2–3 tsp red food coloring: For a truly vibrant red, don’t be shy! Gel food coloring works even better as it’s more potent and won’t add extra liquid.
- ½ tsp salt: The flavor enhancer. It balances the sweetness and strengthens the gluten.
- ½ cup sugar: Food for the yeast and a touch of sweetness for the dough.
For the Cinnamon Filling:
- ¼ cup unsalted butter, softened: Softened is key here! It needs to be spreadable so it doesn’t tear our beautifully rolled dough.
- 1 cup dark or light brown sugar, packed: I prefer dark brown for its deeper molasses flavor, but light works perfectly too! Pack it firmly into your measuring cup.
- 2 tbsp ground cinnamon: Use fresh, high-quality cinnamon for the best aroma and taste. This is the heart of the filling!
For the Cream Cheese Frosting:
- ¼ cup unsalted butter, softened: Again, softened! This will help it blend seamlessly with the cream cheese.
- 4 oz cream cheese, softened: Full-fat cream cheese is non-negotiable for that thick, tangy, perfect frosting texture.
- 1½ cups powdered sugar, sifted: Sifting is a chef’s hack to avoid lumps in your frosting. It makes it silky smooth.
- 1 tsp vanilla extract: The classic flavor pairing for red velvet. Pure vanilla extract makes a difference.
- (Optional: a splash of milk to thin): Only if your frosting is too thick to drizzle.
Let’s Bake: The Step-by-Step Dance
Ready to get your hands dirty? Let’s do this! Baking is a dance, not a race. Enjoy each step.
Step 1: Wake Up the Yeast. In a large bowl or the bowl of your stand mixer, combine the warm milk, yeast, and that ½ cup of sugar. Give it a quick whisk and let it sit for about 5-10 minutes. You’re waiting for it to get foamy and fragrant—this is called “proofing” and it tells you your yeast is alive and ready to party! If it doesn’t foam, your yeast might be old or your milk was too hot/cold. Start over before adding other ingredients.
Step 2: Create the Red Velvet Base. Once your yeast is foamy, add the melted (and slightly cooled) butter, room temperature eggs, cocoa powder, salt, and red food coloring. Use a whisk or the paddle attachment on low speed to mix until it’s a shocking, beautifully smooth red liquid.
Step 3: Form the Dough. Switch to your dough hook attachment if using a mixer. Gradually add the flour, about one cup at a time, mixing on low speed until a shaggy dough forms. Once most of the flour is incorporated, let the mixer knead for 5-7 minutes on medium speed. If kneading by hand, turn the dough onto a floured surface and knead for 8-10 minutes. You’re looking for a soft, smooth, and elastic dough that’s slightly tacky but doesn’t stick to your clean hands. You may not need all 4¼ cups of flour, so add the last bit gradually.
Step 4: The First Rise. Place your beautiful red ball of dough into a lightly greased bowl (a quick swipe of butter or oil does the trick). Turn it over once to coat the top. Cover the bowl with plastic wrap or a clean kitchen towel and place it in a warm, draft-free spot. Let it rise for 1-2 hours, or until it has doubled in size. To test, gently poke it with your finger; if the indentation remains, it’s ready!
Step 5: Roll & Fill. Punch the dough down to release the air. Turn it out onto a lightly floured surface. Using a rolling pin, roll it out into a large rectangle, about 16×20 inches. Spread the ¼ cup of softened butter evenly over the entire surface, leaving a small border around the edges. In a small bowl, mix the brown sugar and cinnamon, then sprinkle it evenly over the buttered dough. Gently press the sugar mixture down so it adheres.
Step 6: Roll, Pinch, and Slice. Now for the fun part! Starting from one long side, tightly roll the dough into a log. Pinch the seam closed to seal it. Using a sharp knife, serrated knife, or even a piece of unflavored dental floss, cut the log into 12 equal rolls. Pro tip with floss: slide a piece under the roll, cross the ends over the top, and pull—it gives you perfect, clean cuts without squishing the roll!
Step 7: The Second Rise. Place your gorgeous swirls cut-side up in a greased 9×13 inch baking pan. They should be cozy but not touching. Cover the pan and let them rise again for 30-45 minutes, until they’re puffy and have snuggled up next to each other.
Step 8: Bake to Perfection. Preheat your oven to 350°F (175°C). Once puffy, bake the rolls for 25-30 minutes, until the tops are set and they sound slightly hollow if tapped. The intoxicating smell will tell you they’re close! A thermometer inserted into the center of a roll should read around 190°F (88°C).
Step 9: Frost While Warm. While the rolls are baking, make the frosting. Beat the softened butter and cream cheese together until completely smooth. Gradually beat in the sifted powdered sugar and vanilla until creamy. As soon as the rolls come out of the oven, spread the frosting over the top. Watch that glorious, tangy goodness melt into all the warm crevices. This is the secret to the best frosting experience!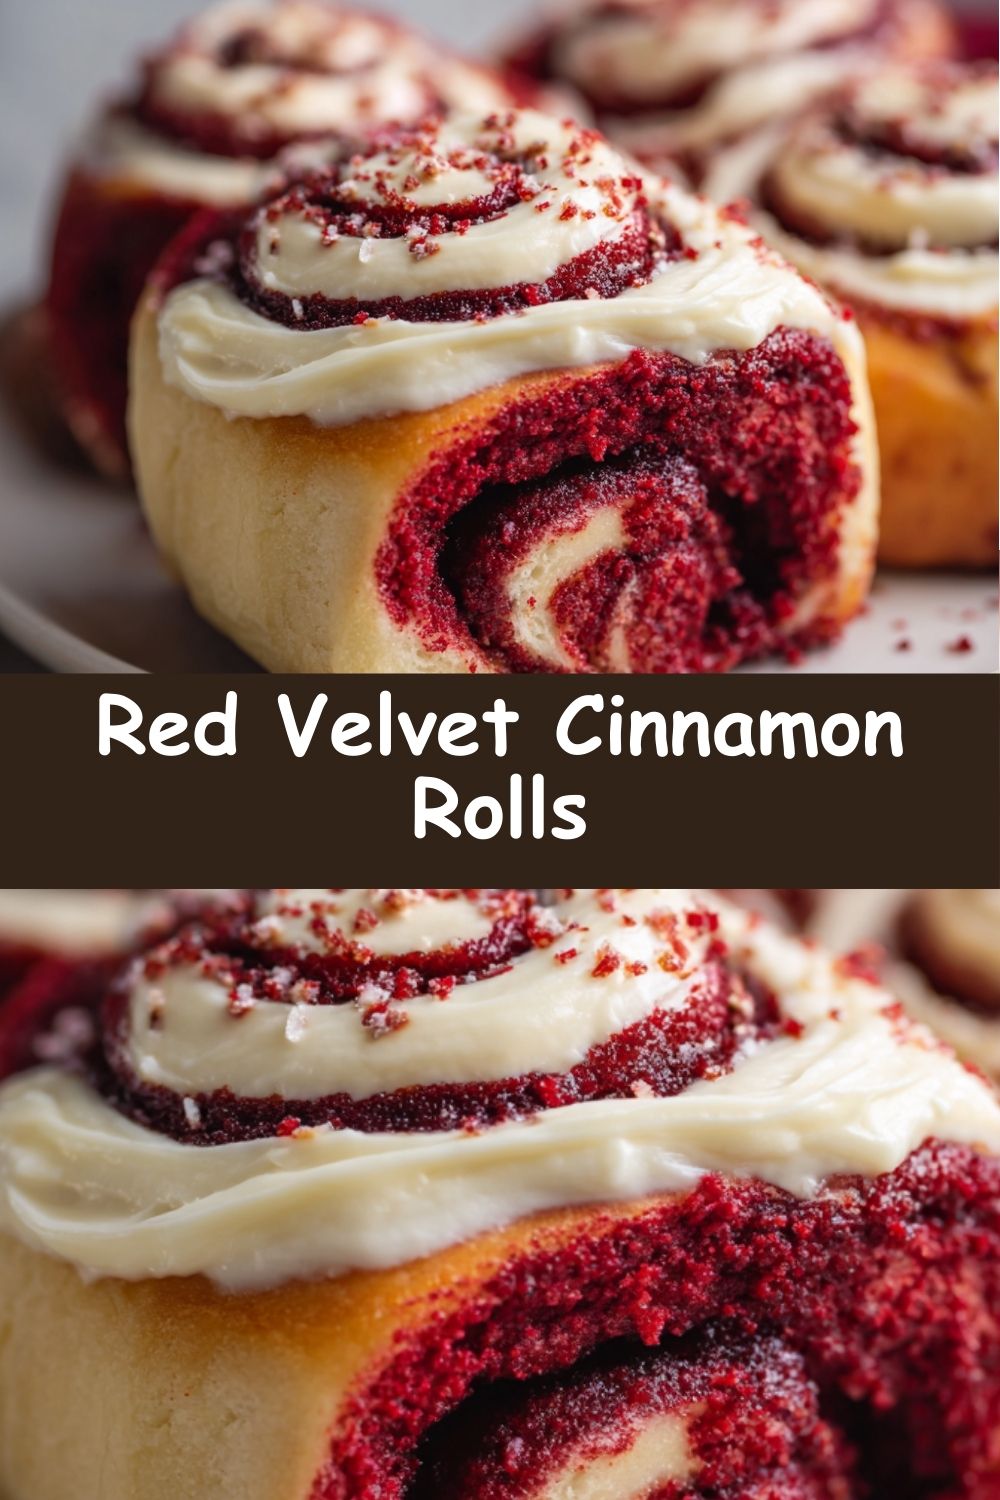
How to Serve These Beauties
Presentation is part of the fun! Let the rolls cool in the pan for about 10-15 minutes after frosting—this lets the frosting set just a little. You can serve them right from the pan for a rustic, family-style feel. For a prettier plate, use a spatula to carefully lift each roll onto individual plates. The vibrant red swirl against the white frosting is a show in itself! These are best served warm, alongside a hot cup of coffee, a cold glass of milk, or even a mimosa for the ultimate brunch vibe. Get ready for the “oohs” and “aahs.”
Mix It Up! Creative Twists
- White Chocolate Drizzle: Add a drizzle of melted white chocolate over the cream cheese frosting for an extra decadent touch.
- Orange Zest Frosting: Add the zest of one orange to the cream cheese frosting for a bright, citrusy twist that cuts through the sweetness.
- Nutty Crunch: Sprinkle a handful of chopped pecans or walnuts over the cinnamon sugar filling before rolling for added texture.
- Vegan-Friendly: Use plant-based milk, butter, and cream cheese. For the egg, a flax egg (1 tbsp ground flax + 3 tbsp water per egg) works well.
- Less Sweet: Reduce the brown sugar in the filling to ¾ cup and the powdered sugar in the frosting to 1 cup.
Clara’s Chef Notes & Kitchen Stories
This recipe has evolved so much since that first food-coloring spill! I’ve learned that the type of cocoa powder really matters—natural cocoa gives that classic tang. I also used to be terrified of yeast, but now I whisper sweet nothings to it while it proofs. It seems to work! The biggest game-changer was using dental floss to cut the rolls—no more squashed, misshapen buns. My kitchen during this process looks like a red velvet bomb went off, and I always, without fail, get red food coloring on my forehead. It’s a badge of honor. Don’t stress about perfection; slightly uneven rolls have more character. The goal is deliciousness, and these rolls deliver every single time.
Your Questions, Answered!
Q: My dough didn’t rise. What went wrong?
A: The most common culprits are old/expired yeast or liquid that was too hot (which kills the yeast) or too cold (which puts it to sleep). Always check the expiration date on your yeast and use a thermometer to check your milk temperature. Also, ensure your rising spot is warm and draft-free (inside an off-oven with the light on is perfect!).
Q: Can I make these the night before?
A: Absolutely! This is a great make-ahead trick. After placing the cut rolls in the pan, cover them tightly with plastic wrap and immediately refrigerate overnight. The next morning, take them out, let them sit on the counter for about 45-60 minutes to finish rising (they may not double but will get puffy), then bake as directed. You can also freeze the unbaked, shaped rolls for up to a month and thaw overnight in the fridge before the second rise and bake.
Q: My frosting is runny. How can I fix it?
A: Runny frosting is usually caused by ingredients that are too warm. Make sure your butter and cream cheese are softened but still cool. If it’s too runny, pop the whole bowl in the fridge for 15-20 minutes to firm up, then re-whip. If it’s too thick, add that splash of milk, one teaspoon at a time.
Q: Can I use a natural food coloring?
A: You can! Beet powder is a great natural alternative. You’ll need to use significantly more—start with 2-3 tablespoons and mix it with the wet ingredients. The color will be more of a deep pink/burgundy than a vibrant fire-engine red, but it will be beautiful and natural!
Nutritional Information (Approximate, per roll)
Let’s keep it real—these are a celebratory treat! Enjoy them mindfully and savor every single bite.
Calories: ~475 | Protein: ~7g | Fat: ~22g | Carbohydrates: ~58g | Sugar: ~35