
Spiderweb Brownies: The Easiest, Spookiest Dessert You’ll Ever Make!
Hey there, my fellow kitchen adventurers! Clara here, coming at you from my (currently flour-dusted) countertop. Is there anything better than the smell of brownies baking? That rich, chocolatey aroma just seems to hug the whole house, promising something deeply delicious is on the horizon. But what if we could take that classic, beloved treat and give it a little… BOO-tiful twist?
With Halloween creeping around the corner, I’m all about desserts that are equal parts spooky and spectacular. I’m talking about the kind of treat that makes both kids and adults do a double-take. You know, the “Wow, you MADE that?!” reaction. But here’s my chef’s secret: I don’t believe stunning desserts have to be complicated. In fact, my favorite kind of kitchen magic is the simple, clever, and wildly effective kind.
That’s exactly why I’m so obsessed with these Spiderweb Brownies. We’re starting with a base of the fudgiest, richest, most decadent brownies you can imagine (seriously, they’re so good they’re almost scary). Then, we’re topping them with an elegant, delicate web of white chocolate that looks incredibly impressive but is secretly a total cinch to create. It’s the perfect project for a fun weekend bake, a Halloween party centerpiece, or just to satisfy that spooky seasonal craving. So, grab your favorite apron, and let’s cook up a batch of fun!
A Web of Sweet Memories
This recipe takes me right back to my first Halloween in my own apartment. I was determined to host a party, but my “entertaining” budget was about as thin as a ghost’s sheet. I wanted to make something that felt special and festive without requiring a degree in pastry arts or a trip to a specialty store. I stared into my pantry, saw a bag of chocolate chips and a forgotten box of brownie mix a friend had left behind, and had a major lightbulb moment.
I remember my hands were slightly shaking as I tried to pipe those first wobbly lines of melted white chocolate. I was convinced I was about to ruin a perfectly good pan of brownies. But then, I dragged the toothpick through the circles, and like magic, this beautiful web pattern appeared! I was absolutely giddy. I placed a little plastic spider on the first one and literally did a happy dance around my tiny kitchen. They were the hit of the party, and my friends were convinced I’d slaved away for hours. I’ve never spilled the secret that it’s one of the easiest tricks in my recipe book! That little victory taught me that the most memorable cooking often comes from a place of playful experimentation, not perfection.
Print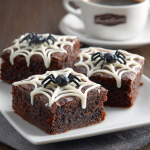
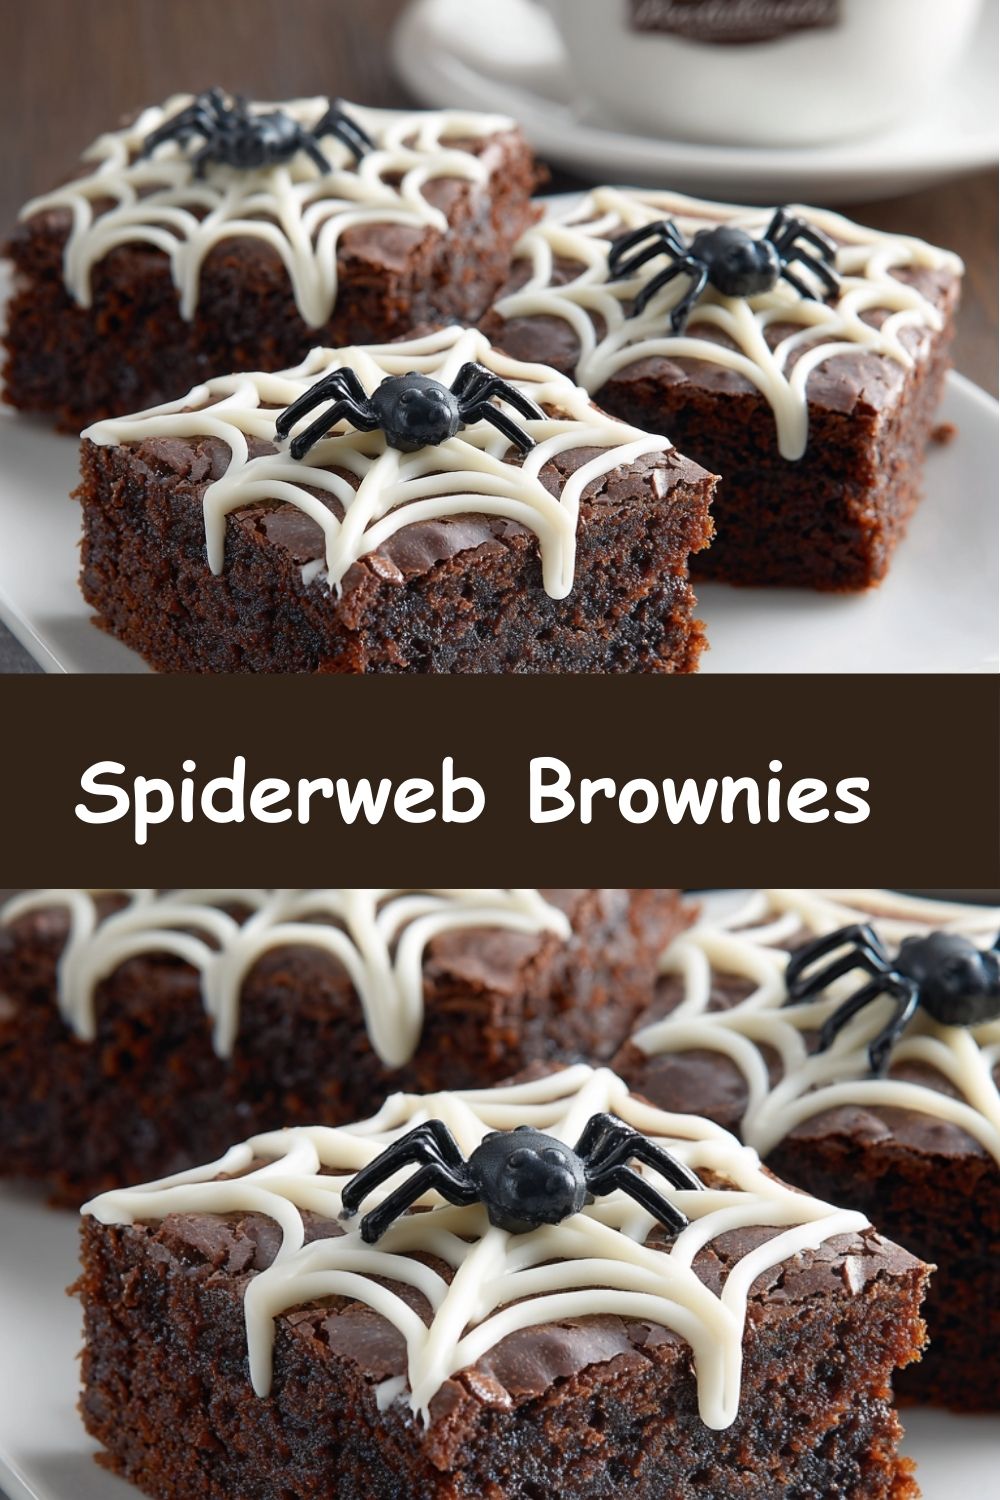
Spiderweb Brownies
- Total Time: 40–45 minutes
- Yield: 9–12 brownies 1x
- Diet: Vegetarian
Description
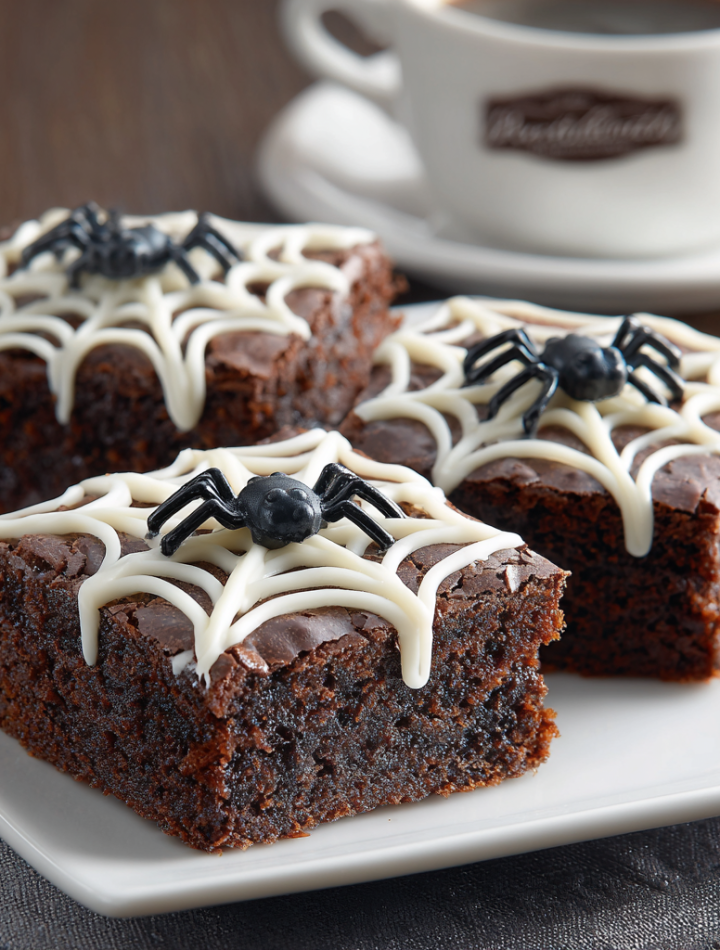
Creep it sweet with these Spiderweb Brownies—rich, fudgy bars topped with a delicate swirl of white chocolate “webbing.” Simple yet striking, they’re the perfect treat to dress up your dessert table. Add a plastic spider on top for that eerie finishing touch, and watch these bites disappear faster than a haunted house door slam.
Ingredients
- 1 batch of brownies (boxed mix or homemade, 8x8 inch pan)
- ½ cup white chocolate chips or candy melts
- Plastic spider decorations (non-edible)
Instructions
- Bake brownies according to recipe and let them cool completely.
- Melt white chocolate chips in a microwave-safe bowl in 20-second intervals, stirring until smooth.
- Use a piping bag or a zip-top bag with a tiny corner snipped off to draw spiderwebs on each brownie square.
- Starting in the center, pipe thin circles and drag a toothpick outward to form a web pattern.
- Place a plastic spider on top of each brownie for decoration (remove before eating).
Notes
- Use parchment paper in the pan for easy brownie removal and clean cuts.
- Try dark chocolate brownies for a richer flavor contrast with the white chocolate web.
- Add orange food coloring to the white chocolate for a Halloween twist.
- Store in an airtight container at room temperature for up to 3 days.
- Prep Time: 15 minutes (plus cooling)
- Cook Time: 25–30 minutes (if baking from scratch or box)
- Category: Dessert
- Method: Baking, Decorating
- Cuisine: American
Nutrition
- Serving Size: 1 brownie
- Calories: 210
- Sugar: 18g
- Sodium: 140mg
- Fat: 10g
- Saturated Fat: 6g
- Unsaturated Fat: 3g
- Trans Fat: 0g
- Carbohydrates: 30g
- Fiber: 1g
- Protein: 2g
- Cholesterol: 25mg
Keywords: spiderweb brownies, Halloween brownies, spooky dessert, white chocolate brownies, Halloween treat
Gathering Your Web-Weaving Supplies
The beauty of this recipe is its beautiful simplicity. You only need a few key players to create this masterpiece. Here’s what you’ll need:
- 1 batch of brownies (for an 8×8 inch pan): This is your delicious canvas! You can use your favorite homemade from-scratch brownie recipe (I’m a sucker for one with an extra hit of espresso powder to deepen the chocolate flavor) or a high-quality boxed mix. I’m a firm believer in the “balance > perfection” mantra—some days, a box mix is exactly what you need to get a delicious dessert on the table without the stress. No judgment here!
- ½ cup white chocolate chips or candy melts: This is our “spiderweb” ink! White chocolate chips work perfectly, but if you want a slightly sturdier web that sets a little faster, white candy melts are a fantastic option. They’re designed for melting and decorating, so they hold their shape beautifully. A quick chef’s insight: If using white chocolate, make sure it’s high quality. Cheaper brands can sometimes be finicky and seize up more easily when melting.
- 1 teaspoon coconut oil or vegetable shortening (optional but helpful): Adding a tiny bit of fat to your white chocolate as it melts helps create a smoother, more fluid consistency that’s ideal for piping. It makes those fine lines so much easier!
- Plastic spider decorations (non-edible): The final, eerie touch! I grab a bag of these from the craft or party store every October. Crucial reminder: These are for decoration only! Place them on the brownies just before serving and be sure to remind your guests to remove them before taking a bite.
Weaving Your Delicious Web: A Step-by-Step Guide
Okay, let’s get down to the fun part! I’ll walk you through each step with all my best tips and hacks to ensure your spiderweb brownies are a screaming success.
- Bake & Cool Your Brownie Base: First things first, bake your brownies according to your chosen recipe or box instructions in an 8×8 inch pan. The most important step here? Let them cool completely! I mean, totally, utterly, room-temperature cool. I know it’s tempting to dive right in, but if you try to pipe warm chocolate onto warm brownies, you’ll end up with a melted, muddy puddle instead of a crisp web. This is the perfect time to practice a little patience—maybe clean up the kitchen or watch a spooky movie while you wait.
- Melt Your White Chocolate: Once your brownies are cool, place your white chocolate chips (or candy melts) and that optional teaspoon of coconut oil into a microwave-safe bowl. Microwave on high in 20-second intervals, stirring vigorously between each burst. This low-and-slow method is key! It prevents the chocolate from burning and seizing up into a grainy mess. Stop heating when just a few small lumps remain—you can usually stir those out with the residual heat for a perfectly smooth, glossy consistency.
- Prepare Your Piping Bag: Transfer your smoothly melted white chocolate into a piping bag fitted with a small round tip (like a #2 or #3). No piping bag? No problem! A simple zip-top plastic bag is a fantastic kitchen hack. Just spoon the chocolate into the bag, push it down into one corner, and use your scissors to snip the TINIEST little hole off the corner. You can always make the hole bigger, but you can’t make it smaller, so start super small! We want fine lines, not thick rivers.
- Pipe the Central Dots & Circles: Now for the artistic part! On each cooled and cut brownie square, start by piping a small dot in the very center. This is the anchor of your web. Next, pipe 3-4 concentric circles around that center dot. Don’t worry about them being perfectly symmetrical—real spiderwebs have character! A little wobble just makes them look more authentic.
- Drag to Create the Web: Here’s where the magic happens. Take a toothpick or the very tip of a small knife. Starting from the center dot, gently drag the toothpick straight out to the edge of the brownie. Wipe the toothpick clean, and repeat this process all the way around the circle, like you’re drawing the spokes of a wheel. Watch in awe as the beautiful web pattern instantly appears! It’s so satisfying.
- The Final Eerie Touch: Let the white chocolate webs set completely. This usually takes about 15-20 minutes at room temperature. Once they’re set, gently place a plastic spider decoration on each web. They’re ready to serve and seriously impress!
How to Serve These Eight-Legged Wonders
Presentation is part of the fun! I love arranging these brownies on a sleek, black slate board or a dark-colored plate to make the white webs really pop. For a full Halloween vibe, scatter a few autumn leaves (fake, clean ones!), candy corn, or even a little dusting of cocoa powder around the platter. Serve them with a pot of strong coffee for the adults or a glass of cold milk for the kids. The best part? Watching someone’s face light up when they see your edible artwork before they devour it in one delicious bite.
Spin Your Own Web: Fun Variations & Swaps
Feel like playing around? This technique is super adaptable!
- Peanut Butter Webs: Not a white chocolate fan? Gently melt some peanut butter chips with a touch of coconut oil and use that for your webs. Chocolate and peanut butter is a classic combo for a reason!
- Orange & Black for Halloween: Use orange candy melts for your webs and add a few black sprinkles before the chocolate sets for a super festive color scheme.
- Minty Fresh Webs: Add a drop or two of peppermint extract to your melted white chocolate for a cool, refreshing twist that pairs amazingly with dark chocolate.
- Gluten-Free & Dairy-Free: This is easily adaptable! Use your favorite gluten-free brownie mix or recipe. For the web, ensure your chocolate chips or candy melts are dairy-free (many are!).
Chef Clara’s Notes & Kitchen Stories
This recipe has evolved in my kitchen over the years. The first time I made them, I was so nervous about the webs that I practiced the design on a sheet of parchment paper first. I highly recommend this for first-time web-weavers! It builds confidence and you can just scrape the practice chocolate back into the bowl to re-melt. Zero waste.
One funny fail I had was trying to use a squeeze bottle instead of a piping bag. The opening was too big and I ended up with what looked like a snowstorm on my brownies rather than a delicate web. We just called them “Blizzard Brownies” and ate them anyway—they were still delicious! The moral of the story? Sometimes kitchen fails lead to new nicknames, and the taste is what truly matters in the end.
Your Spiderweb Brownie Questions, Answered!
Q: My white chocolate seized up and got grainy! What did I do wrong and can I fix it?
A: This usually means a tiny bit of steam or water got into the chocolate, or it got too hot. To try and save it, add another ½ teaspoon of coconut oil and heat it for just 5 more seconds. Sometimes you can bring it back! To prevent it, always make sure your bowl and utensils are completely dry.
Q: Can I make these ahead of time?
A: Absolutely! Bake and cut the brownies the day before. Store them in an airtight container at room temperature. I’d recommend piping the webs the day you plan to serve them so they look their freshest and most crisp.
Q: My webs aren’t as defined as I’d like. Any tips?
A> This is almost always a temperature issue. If the brownies are even slightly warm, the white chocolate will melt and blur. Also, make sure your piping hole is small enough for a thin line. A thick line of chocolate won’t create that delicate web effect.
Q: I don’t have a microwave. How can I melt the chocolate?
A> You can use a double boiler! Simply place a heatproof bowl over a pot of gently simmering water (make sure the bottom of the bowl isn’t touching the water). Stir the chocolate constantly until it’s smooth and melted.
Nutritional Information*
*This is a rough estimate based on a standard boxed brownie mix and white chocolate chips. Values will vary if you use a homemade recipe.
- Prep Time: 15 minutes (plus cooling time)
- Cook Time: As per your brownie recipe
- Servings: 9 brownies
- Calories: 240 per serving
- Total Fat: 11g
- Saturated Fat: 6g
- Carbohydrates: 34g
- Sugars: 24g
- Protein: 2g
There you have it, friends! My go-to recipe for the most fun, festive, and foolproof Halloween treat. I hope you have a blast making them.
With love and a pinch of magic,
Clara