
Sweet Potato Rolls: Your New Secret Weapon for Golden, Fluffy Comfort
Is there anything in the world that smells more like pure, unadulterated love than freshly baked bread wafting through your kitchen? I’m convinced there isn’t. It’s a universal signal that says, “Hey, everything is going to be okay. Come get a warm hug in carbohydrate form.” And today, my friends, we are taking that feeling and cranking it up to eleven with the absolute show-stopper of the bread basket: Sweet Potato Rolls.
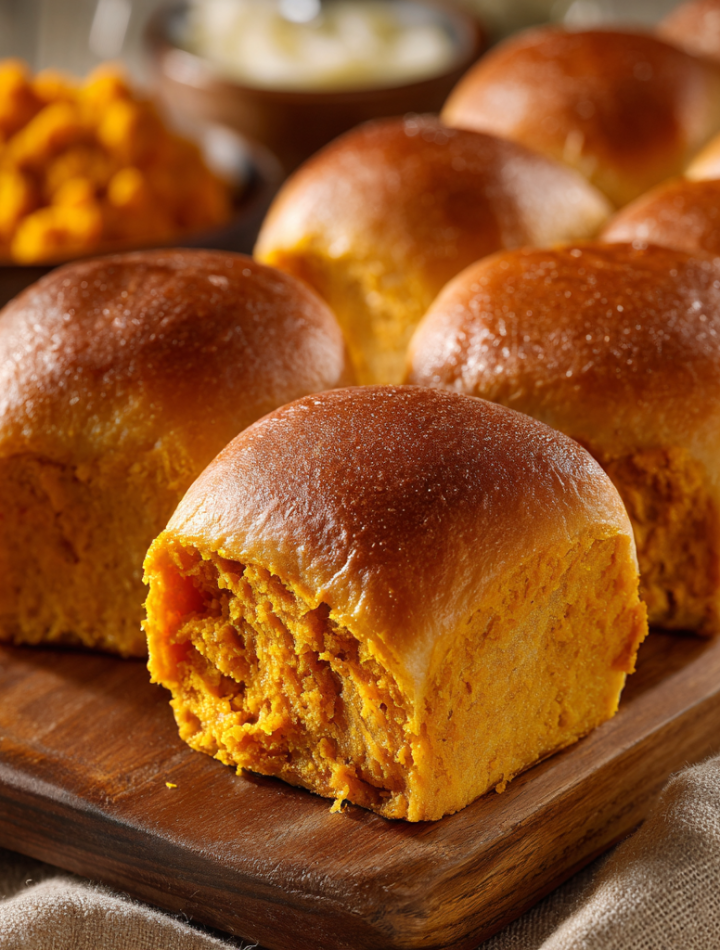
Now, I know what you might be thinking. “Clara, homemade yeast bread? That sounds… intimidating.” Hear me out! I’m not here to lead you into a floury battle with a fussy sourdough starter. This recipe is our happy place. It’s forgiving, it’s rewarding, and it secretly packs a vibrant, orange-hued superfood into the most comforting package imaginable. These rolls are so incredibly soft, they practically sigh when you pull them apart. They have a subtle sweetness and a beautiful golden color that comes straight from the sweet potato itself, with just a whisper of warming cinnamon and nutmeg that makes your whole house smell like the coziest day of the year.
This is my go-to recipe for holidays, potlucks, or any Sunday when I just need to slow down and create something beautiful with my hands. It makes a generous 48 rolls, which sounds like a lot, but trust me—they disappear faster than you can say “pass the butter.” And speaking of butter, we’re giving them a glorious upgrade with a honey butter glaze that creates a shiny, slightly sweet crust you’ll want to dive face-first into. So, tie on your favorite apron, put on some good music, and let’s bake up a batch of pure, fluffy joy together.
The Thanksgiving That Almost Wasn’t
I have to share the story of the first time these sweet potato rolls truly saved the day. It was my third year hosting Thanksgiving, and I was determined to prove I had my “adult life” together. The turkey was brining, the pies were prepped, and I was feeling invincible. Then, disaster struck. My trusty, decade-old oven decided to give up the ghost—with a full house of hungry relatives just hours away. Panic doesn’t even begin to describe it.
We managed to orchestrate a chaotic oven relay race between my kitchen and my lovely neighbor Brenda’s kitchen down the street. The green beans and mashed potatoes were hustled over to her place, but I needed something I could bake quickly in my toaster oven (the only appliance still working for me) to feed the crowd while the main event was cooking elsewhere. I remembered this sweet potato roll dough, which I had thankfully mixed and let rise earlier that morning. In a frenzy, I shaped the little dough balls and baked them in batches in that tiny toaster oven. The smell of cinnamon and yeast filled my kitchen, cutting through the stress. When I finally pulled the last golden batch out, my grandma, who had been quietly observing the chaos, took one, pulled it apart, and smiled. “Clara,” she said, “these are better than any turkey.” In that moment, surrounded by warm bread and family, I realized it wasn’t about the perfect meal. It was about the love baked into it. These rolls have been my little edible security blanket ever since.
Print
Sweet Potato Rolls
- Total Time: 2 hours 45 minutes
- Yield: 48 rolls 1x
Description
Golden, fluffy, and enriched with sweet potato, these rolls bring a soft texture and deep flavor to your table. Perfect for the holidays — or any day you want warm, homemade comfort. This doubled version makes 48 tender rolls and includes warming spices and honey butter for an irresistible upgrade.
Ingredients
2 packets (0.25 oz each) active dry yeast (not rapid rise)
½ cup warm water (95°F–115°F)
1 cup plus 1 teaspoon sugar, divided
2 cups warm milk
1 cup mashed cooked sweet potato
1 teaspoon ground cinnamon (optional twist)
½ teaspoon ground nutmeg (optional twist)
1 teaspoon salt
1 cup plus 4 tablespoons melted butter, divided
2 large eggs, lightly beaten
9 to 9½ cups all-purpose flour, divided
Optional topping: honey butter (mix 2 tbsp honey + 2 tbsp butter)
Instructions
In a small bowl, dissolve yeast and 1 teaspoon sugar in warm water. Let sit for 5–10 minutes until foamy.
In a large bowl, combine remaining sugar, warm milk, mashed sweet potato, spices (if using), salt, 1 cup melted butter, and eggs. Mix well.
Stir in the yeast mixture.
Gradually add 8½ cups of flour, mixing to form a soft dough. Add up to 1 more cup flour if needed.
Knead dough on a floured surface for 8–10 minutes until smooth.
Place in a greased bowl, cover, and let rise for 1½ hours or until doubled.
Punch down dough, divide into 48 equal pieces, shape into balls, and place in greased baking pans.
Cover and let rise for 30–45 minutes.
Preheat oven to 375°F (190°C).
Bake for 15–18 minutes or until golden brown. Brush with remaining melted butter or honey butter.
- Prep Time: 2 hours 30 minutes
- Cook Time: 15 mins
- Category: Dinner
Nutrition
- Calories: 140
- Sugar: 4g
- Carbohydrates: 22g
- Protein: 3g
Gathering Your Golden Ingredients
Here’s everything you’ll need to create this fluffy masterpiece. Don’t be daunted by the list—a lot of these are pantry staples! The sweet potato is the star, and it brings a natural moisture and sweetness that makes these rolls incredibly tender.
- 2 packets (0.25 oz each) active dry yeast: This is our little magic maker, the organism that makes our dough rise and become light and airy. Make sure it’s active dry yeast, not rapid-rise or instant, for this particular recipe. If your yeast doesn’t get foamy after 5-10 minutes in the warm water, it might be old—time for a fresh packet!
- ½ cup warm water (95°F–115°F): Think baby-bottle warm, not hot. Too hot and you’ll harm the yeast; too cold and it won’t wake up properly.
- 1 cup plus 1 teaspoon sugar, divided: That one teaspoon is like a little appetizer for the yeast to get it excited. The rest sweetens the dough perfectly.
- 2 cups warm milk: Whole milk will give you the richest, softest crumb, but 2% works great too. Warm it to the same temperature as the water.
- 1 cup mashed cooked sweet potato: You can bake, boil, or steam your sweet potato. Just make sure it’s mashed smoothly with no stringy bits! About one large potato should do it. Chef’s Insight: Using leftover roasted sweet potato adds an even deeper, caramelized flavor.
- 1 teaspoon ground cinnamon & ½ teaspoon ground nutmeg (optional twist): I call this “optional,” but I highly recommend it! These warming spices are a match made in heaven with the sweet potato. Feel free to add a pinch of cardamom or ginger for an extra layer of coziness.
- 1 teaspoon salt: Crucial for balancing all the sweetness and enhancing the overall flavor. Don’t skip it!
- 1 cup plus 4 tablespoons melted butter, divided: Butter equals flavor and tenderness. We use a full cup in the dough (yes, really!) and save the 4 tablespoons for brushing on top after baking for that gorgeous, glistening finish.
- 2 large eggs, lightly beaten: Eggs add richness, structure, and that beautiful golden color to the crumb.
- 9 to 9½ cups all-purpose flour, divided: We’ll add most of it at once, but holding back that last cup is key. You’ll add it gradually until the dough reaches the perfect, soft, and slightly tacky consistency. The amount needed can vary based on your flour and the moisture in your sweet potato!
- Optional topping: honey butter (mix 2 tbsp honey + 2 tbsp butter): This is the glitter on the masterpiece. Brushing the warm rolls with this mixture takes them from incredible to absolutely irresistible.
Let’s Get Baking: The Step-by-Step Guide to Fluffy Perfection
Ready to get your hands dusty? Follow these steps, and you’ll be a bread-baking pro in no time. I’ve sprinkled in all my favorite tips and hacks to set you up for success.
Step 1: Wake Up the Yeast!
In a small bowl, combine the yeast and that single teaspoon of sugar. Pour the warm water (remember, baby-bottle warm!) over the top and give it a gentle stir. Let it sit for 5-10 minutes. You’re waiting for it to get foamy and creamy on top—this is called “proofing” and it’s your sign that the yeast is alive and ready to party. If nothing happens after 10 minutes, your yeast might be old. Chef’s Hack: No thermometer? A good rule of thumb is that the water should feel warm to the touch but not hot. If it’s uncomfortable to hold your finger in, it’s too hot.
Step 2: Create the Flavor Base
While the yeast is proofing, grab a very large mixing bowl. Combine the remaining 1 cup of sugar, warm milk, mashed sweet potato, cinnamon, nutmeg, salt, that 1 cup of melted butter, and the lightly beaten eggs. Whisk it all together until it’s well combined and beautifully orange. It’s okay if it looks a little lumpy from the sweet potato—it will all smooth out.
Step 3: Bring the Dough Together
By now, your yeast should be foamy and fragrant. Pour it right into the sweet potato mixture and stir to combine. Now, we add the flour. Start with 8½ cups. I like to add it in 2-cup increments, stirring with a sturdy wooden spoon or a Danish dough whisk (my favorite tool for this job!) until it starts to form a shaggy mass. Little Chef Hack: Scrape down the sides of the bowl as you go to incorporate all the flour.
Step 4: The Great Knead
Lightly flour your clean countertop. Turn the dough out onto the surface—it will be sticky! Sprinkle some of the remaining flour over it and begin to knead. Kneading is therapeutic: push the dough away from you with the heel of your hand, fold it over, give it a quarter turn, and repeat. Add the remaining flour, a little at a time, only as much as needed to keep the dough from sticking to your hands. You’re looking for a smooth, soft, and slightly elastic dough. This should take about 8-10 minutes. How do you know it’s ready? Do the “Poke Test”: poke the dough with a floured finger. If the indentation slowly springs back, you’re golden!
Step 5: The First Rise (Patience is a Virtue!)
Place your beautiful ball of dough into a large, greased bowl (a light swipe of butter or oil does the trick). Turn the dough over once to grease the top. This prevents it from drying out. Cover the bowl with a clean kitchen towel or plastic wrap and place it in a warm, draft-free spot. Let it rise for about 1½ hours, or until doubled in size. To test, poke it again—if the indentation remains, it’s ready. Chef’s Tip: If your kitchen is cool, turn your oven on to the lowest setting for one minute, then turn it OFF. Place the covered bowl in the warm (not hot!) oven to rise.
Step 6: Shape Your Rolls
Punch the dough down—this is the fun part! Gently press your fist into the center to deflate it. Turn it out onto a lightly floured surface. Using a sharp knife or a bench scraper, divide the dough in half, then quarters, and so on, until you have 48 equal pieces. Don’t stress about perfection! The goal is roughly the same size so they bake evenly. Roll each piece into a smooth ball and place them snugly, but not crammed, into greased 9×13 inch baking pans or round cake pans.
Step 7: The Second Rise
Cover the pans with kitchen towels and let the shaped rolls rise again for 30-45 minutes. They should look puffy and have risen to fill the pan. Meanwhile, preheat your oven to 375°F (190°C).
Step 8: Bake to Golden Brown Glory
Once puffy, place the rolls in the preheated oven and bake for 15-18 minutes. You’re looking for a beautiful golden-brown top. Chef’s Secret: For an extra-soft top, you can bake them until they are just lightly golden. For a slightly crispier crust, let them go a minute or two longer.
Step 9: The Finishing Touch
As soon as the rolls come out of the oven, brush the tops generously with the remaining 4 tablespoons of melted butter (or the honey butter mixture if you’re using it!). This gives them a gorgeous shine and an incredible flavor boost. Let them cool in the pan for about 5 minutes before serving. But let’s be real, eating one warm, straight from the pan is a rite of passage.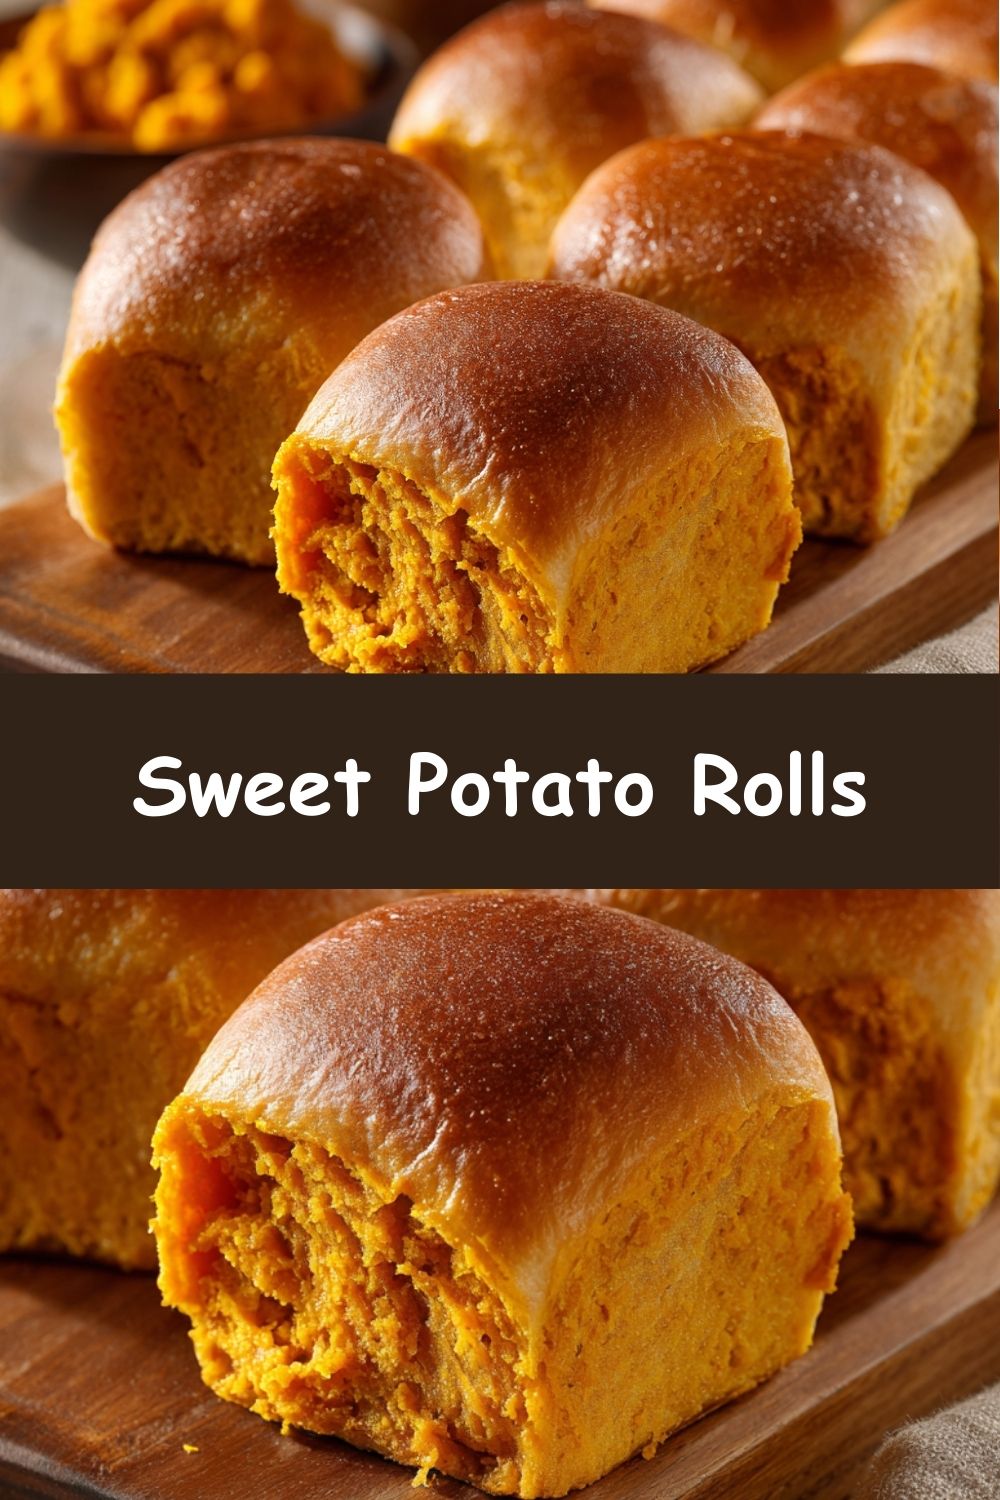
How to Serve These Sunshine Rolls
These sweet potato rolls are incredibly versatile. Of course, they are the undisputed champion of the holiday table, nestled next to the turkey and mashed potatoes. But don’t wait for a special occasion! Serve them warm with a generous slather of salted butter for a simple, satisfying snack. They are also fantastic for making mini sandwiches with leftover holiday turkey or ham. For a real treat, split one open, toast it lightly, and top it with a drizzle of maple syrup for a decadent breakfast. However you serve them, just make sure it’s with a smile.
Get Creative: 5 Fun Twists on the Classic
Once you’ve mastered the basic recipe, feel free to play! Here are a few of my favorite variations:
- Savory Herb Twist: Omit the cinnamon and nutmeg. Instead, add 2 tablespoons of finely chopped fresh rosemary and ½ cup of grated parmesan cheese to the dough. Perfect with a cozy bowl of soup.
- Maple Pecan Delight: Replace the 1 cup of sugar with ¾ cup of pure maple syrup. Fold in 1 cup of chopped toasted pecans during the last minute of kneading. Brush with maple butter after baking.
- Whole Wheat Boost: Substitute up to half of the all-purpose flour with whole wheat flour for a nuttier flavor and extra fiber. You may need a touch more liquid.
- “Everything Bagel” Rolls: Before the second rise, brush the tops of the shaped rolls with an egg wash (1 egg beaten with 1 tbsp water) and sprinkle generously with everything bagel seasoning.
- Dairy-Free/Vegan Version: Use a plant-based milk (oat or almond work well), vegan butter, and a “flax egg” (1 tbsp ground flaxseed mixed with 3 tbsp water per egg, let sit 5 mins).
Clara’s Kitchen Confessions & Notes
This recipe has been a living, breathing thing in my kitchen for years. The first time I made it, I was so nervous about the yeast that I probably checked it 10 times. I’ve learned that bread baking is less about rigid rules and more about feeling the dough. Don’t be afraid to get your hands in there! Over time, I started adding the spices, and the honey butter glaze was a happy accident one day when I ran out of plain melted butter. My biggest kitchen fail with these? I once, in a hurry, used hot milk straight from the microwave and essentially made sweet potato brick-ettes. Lesson learned: patience with temperatures is non-negotiable. Now, making these rolls is a meditative process for me. It’s my reminder that the best things in life—and in the kitchen—are worth waiting for.
Your Sweet Potato Roll Questions, Answered!
Q: Can I make the dough ahead of time?
A: Absolutely! This is a great time-saver. After the first rise, punch the dough down, wrap it tightly in plastic wrap, and store it in the refrigerator for up to 24 hours. When you’re ready to bake, let the dough come to room temperature for about an hour before shaping, then proceed with the second rise and baking.
Q: My dough isn’t rising. What went wrong?
A: The most common culprit is old or dead yeast. Always proof it first to make sure it’s active! The second most common issue is the liquid temperature being too hot (which kills the yeast) or too cold (which puts it to sleep). Your environment can also play a role—if your kitchen is very cold, the dough will take much longer to rise. Try my “warm oven” trick mentioned in the instructions.
Q: The dough is too sticky! What should I do?
A: Don’t panic, and don’t just dump in a ton of extra flour! A slightly sticky dough is often a sign of a soft, moist final product. Make sure your hands and work surface are well-floured. Use a bench scraper to help you fold and turn the dough without it sticking to the counter. Add flour a tablespoon at a time only if it’s truly unmanageable.