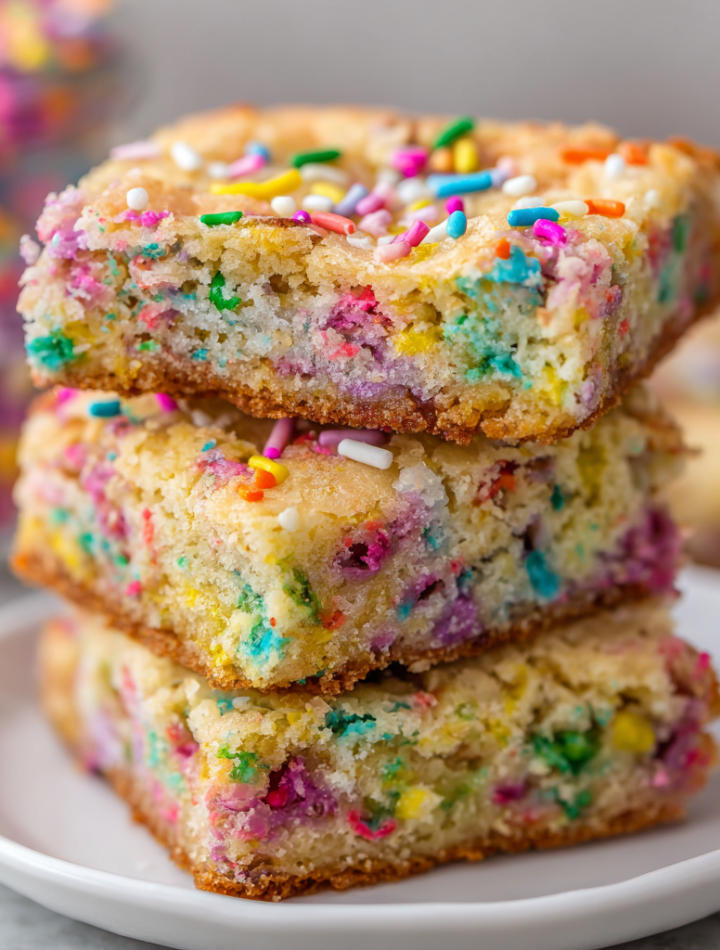

Your New Favorite Reason to Celebrate: Ultimate Funfetti Blondies
Hey there, my fellow flavor adventurer! Clara here, welcoming you back to my kitchen. Today, we’re throwing practicality out the window (just for a moment, I promise!) and diving headfirst into a recipe that is pure, unadulterated joy. We’re talking about my Ultimate Funfetti Blondies. Imagine the soft, chewy, buttery goodness of a perfect blondie, but then we cranked the fun dial up to eleven. We’re talking a confetti explosion of color, pockets of melty white chocolate, and if you’re feeling as extra as I usually am, a surprise crunch from golden Oreos and little gooey marshmallow pockets.
I know, I know. This isn’t my usual glow-bowl situation. But here’s my chef’s philosophy: true nourishment isn’t just about kale and quinoa. It’s about feeding your soul, too. And sometimes, your soul needs a thick, sugary, sprinkle-filled bar that makes you feel like a kid at a birthday party. These blondies are my go-to for bake sales, for gifting to a friend who needs a smile, or for those “I just need a little something sweet” Tuesday afternoons. They come together in one bowl—no mixer required—and are practically foolproof. So, preheat that oven, grab your favorite mixing spoon, and let’s bake a little happiness together.
A Little Sparkle of Nostalgia
This recipe always takes me right back to my seventh birthday party. It was a classic 90s affair in my parents’ backyard, complete with a slightly lopsided homemade cake covered in a truly alarming amount of rainbow sprinkles. My mom, a saint with endless patience, let me “decorate” it myself. I remember the sheer, giddy excitement of shaking that plastic bottle of sprinkles over the frosting, watching them fall like edible glitter, creating a masterpiece only a child could love.
That’s the magic of sprinkles, isn’t it? They’re not just sugar; they’re tiny capsules of pure celebration. They transform the ordinary into a party. When I developed this recipe, I wanted to capture that exact feeling—the uncomplicated joy of a childhood birthday, baked into a bar that’s sophisticated enough for adults but magical enough for kids. Every time I fold those colorful jimmies into the batter, I get a little hit of that seven-year-old’s happiness. It’s my edible time machine, and I’m so excited to share it with you.
Print
Ultimate Funfetti Blondies
- Total Time: 45 minutes
- Yield: About 40 blondies 1x
Description
These thick, chewy funfetti blondies are buttery, soft-centered, and exploding with color. Made in one bowl—no mixer needed—they’re perfect for birthdays, bake sales, or just brightening someone’s day. We’ve doubled the batch and added a few irresistible twists for even more flavor and texture. Sweet, salty, colorful… these are pure joy in bar form.
Ingredients
2 cups unsalted butter, melted and slightly cooled
2 cups packed brown sugar
1 cup granulated sugar
2 tbsp vanilla extract
2 tsp salt
2 tsp baking powder
2 tbsp cornstarch
3 cups all-purpose flour
2 cups white chocolate chips
1 cup rainbow sprinkles (jimmies work best)
½ cup chopped golden Oreos (optional, for crunch)
½ cup mini marshmallows (optional, for gooey pockets)
Instructions
Preheat oven to 350°F (175°C). Grease or line a 9×13″ pan with parchment paper.
In a large mixing bowl, combine melted butter, brown sugar, and granulated sugar. Stir until smooth.
Add vanilla, then stir in salt, baking powder, and cornstarch.
Gradually mix in flour until fully incorporated.
Fold in white chocolate chips, rainbow sprinkles, golden Oreos, and mini marshmallows (if using).
Spread batter evenly into prepared pan. For extra flair, sprinkle a few extra chips and sprinkles on top.
Bake for 30–35 minutes, or until the edges are set and the center looks slightly underbaked (they’ll continue to set as they cool).
Cool completely before slicing into bars.
- Prep Time: 10 minutes
- Cook Time: 30 minutes
- Category: Dessert
Nutrition
- Calories: 210
- Sugar: 18g
- Sodium: 120mg
- Fat: 11g
- Carbohydrates: 26g
- Protein: 2g
Gathering Your Party Ingredients
Here’s what you’ll need to create this sprinkle-filled masterpiece. Remember, baking is part science, part art, so I’ve included my best tips and swaps for each ingredient!
- 2 cups unsalted butter, melted and slightly cooled: This is the foundation of our rich, chewy texture. Melting it gives us that dense, fudgy center we crave in a blondie. Let it cool for a few minutes so it doesn’t accidentally cook the eggs! Chef’s Insight: Using unsalted lets you control the salt level perfectly. If you only have salted, just reduce the added salt by about half.
- 2 cups packed brown sugar & 1 cup granulated sugar: The dynamic duo! Brown sugar brings that deep molasses flavor and moisture, while granulated sugar helps create that slightly crisp, crackly top. Pack that brown sugar firmly into your measuring cup for accuracy.
- 4 large eggs: They’re the binding agents that hold our beautiful mess together. Make sure they’re at room temperature for the smoothest incorporation into the batter.
- 2 tbsp vanilla extract: Yes, that’s two whole tablespoons! It might seem like a lot, but trust me. It adds a incredible depth of flavor that makes these blondies taste professional and bakery-style.
- 2 tsp salt: Crucial for balancing all that sweetness and making the flavors pop. Don’t skip it!
- 2 tsp baking powder & 2 tbsp cornstarch: Our leavening and texture dream team. Baking powder gives them a slight lift, while the cornstarch is my secret weapon for an irresistibly soft and chewy interior.
- 3 cups all-purpose flour: The main structure. Spoon it into your measuring cup and level it off to avoid accidentally using too much, which can make the blondies dry.
- 2 cups white chocolate chips: They add creamy, melty pockets of sweetness that pair perfectly with the vanilla and sprinkles. Substitution Tip: Not a white chocolate fan? Semi-sweet or dark chocolate chips work wonderfully too!
- 1 cup rainbow sprinkles (jimmies work best): The star of the show! I highly recommend using “jimmies” (the long, thin sprinkles) as they hold their color better during baking and don’t bleed into the batter like some nonpareils can.
- ½ cup chopped golden Oreos (optional): My “irresistible twist” for a fantastic crunchy texture and a hint of vanilla wafer flavor.
- ½ cup mini marshmallows (optional): My other “irresistible twist” for creating hidden, gooey, marshmallowy pockets. They’re a total game-changer!
Let’s Get Mixing: The Foolproof Process
Ready for the easiest baking session ever? Grab your biggest bowl and let’s do this. I’ll walk you through each step with all my favorite chef hacks.
- Preheat and Prep: First things first, get that oven heating to 350°F (175°C). This is key for even baking from the moment the pan goes in. Now, grab your 9×13-inch pan. My absolute favorite method is to line it with parchment paper, leaving a slight overhang on two opposite sides. This creates a “sling” that lets you lift the entire cooled blondie block out of the pan for super clean, easy slicing. Lightly grease the paper or any exposed pan parts.
- Combine the Wet Goods: In your large bowl, combine the melted (and slightly cooled!) butter with both sugars. Stir it with a sturdy wooden spoon or a spatula until it’s completely smooth and has lost that gritty sugar texture. It should look like a gorgeous, glossy caramel. Now, add your eggs one at a time, mixing well after each addition until they’re fully incorporated. Follow with the glorious two tablespoons of vanilla. Take a whiff—it already smells amazing, right?
- Whisk the Dry, Then Combine: Before you add the flour, I like to sprinkle the salt, baking powder, and cornstarch directly over the wet batter. Give it a quick whisk to distribute those leaveners evenly. Now, gradually add your flour. I add it in two or three batches, folding gently until you can’t see any more white streaks. Chef’s Hack: Be careful not to overmix once the flour is in! Overmixing develops gluten, which can make your blondies tough instead of tender and chewy.
- The Fun Part: Fold-Ins! Now, dump in your party favors: the white chocolate chips, rainbow sprinkles, and your optional Oreos and mini marshmallows. Fold everything together gently but thoroughly until everything is evenly distributed throughout the thick, glorious batter.
- Pan and Garnish: Transfer all that beautiful, colorful batter into your prepared pan. Use your spatula to spread it into an even layer, pushing it into all the corners. For a truly professional, Instagram-worthy finish, sprinkle a few extra tablespoons of white chocolate chips and sprinkles over the top and press them in lightly.
- Bake to Perfection: Slide the pan into the center of your preheated oven and bake for 30-35 minutes. Now, here is the MOST IMPORTANT TIP for perfect, chewy blondies: you want to underbake them just a touch. The edges will be golden brown and look set, but the center should still look a little soft and slightly underdone. A toothpick inserted into the center might have a few moist crumbs clinging to it, but it shouldn’t have wet batter. They will continue to cook and set up perfectly as they cool in the pan.
- The Torturous Wait: Cool Completely: I know, this is the hardest part. But you must, must, MUST let them cool completely in the pan on a wire rack before you even think about slicing them. If you cut into them while warm, they’ll be a gooey mess (a delicious mess, but a mess nonetheless). For the cleanest, most perfect bars, I sometimes even pop the cooled pan into the fridge for an hour to really firm everything up.
How to Serve These Beauties
Once they’re completely cool and you’ve sliced them into generous squares, the world is your oyster! They are absolutely perfect all on their own with a tall glass of cold milk. For a next-level experience, warm a blondie in the microwave for 10 seconds and serve it à la mode with a scoop of vanilla bean ice cream. The contrast of warm, chewy blondie and cold, creamy ice cream is a religious experience. Pile them high on a platter for a party, wrap them individually in cellophane for adorable gifts, or just hide them in a tin for yourself (no judgment here!).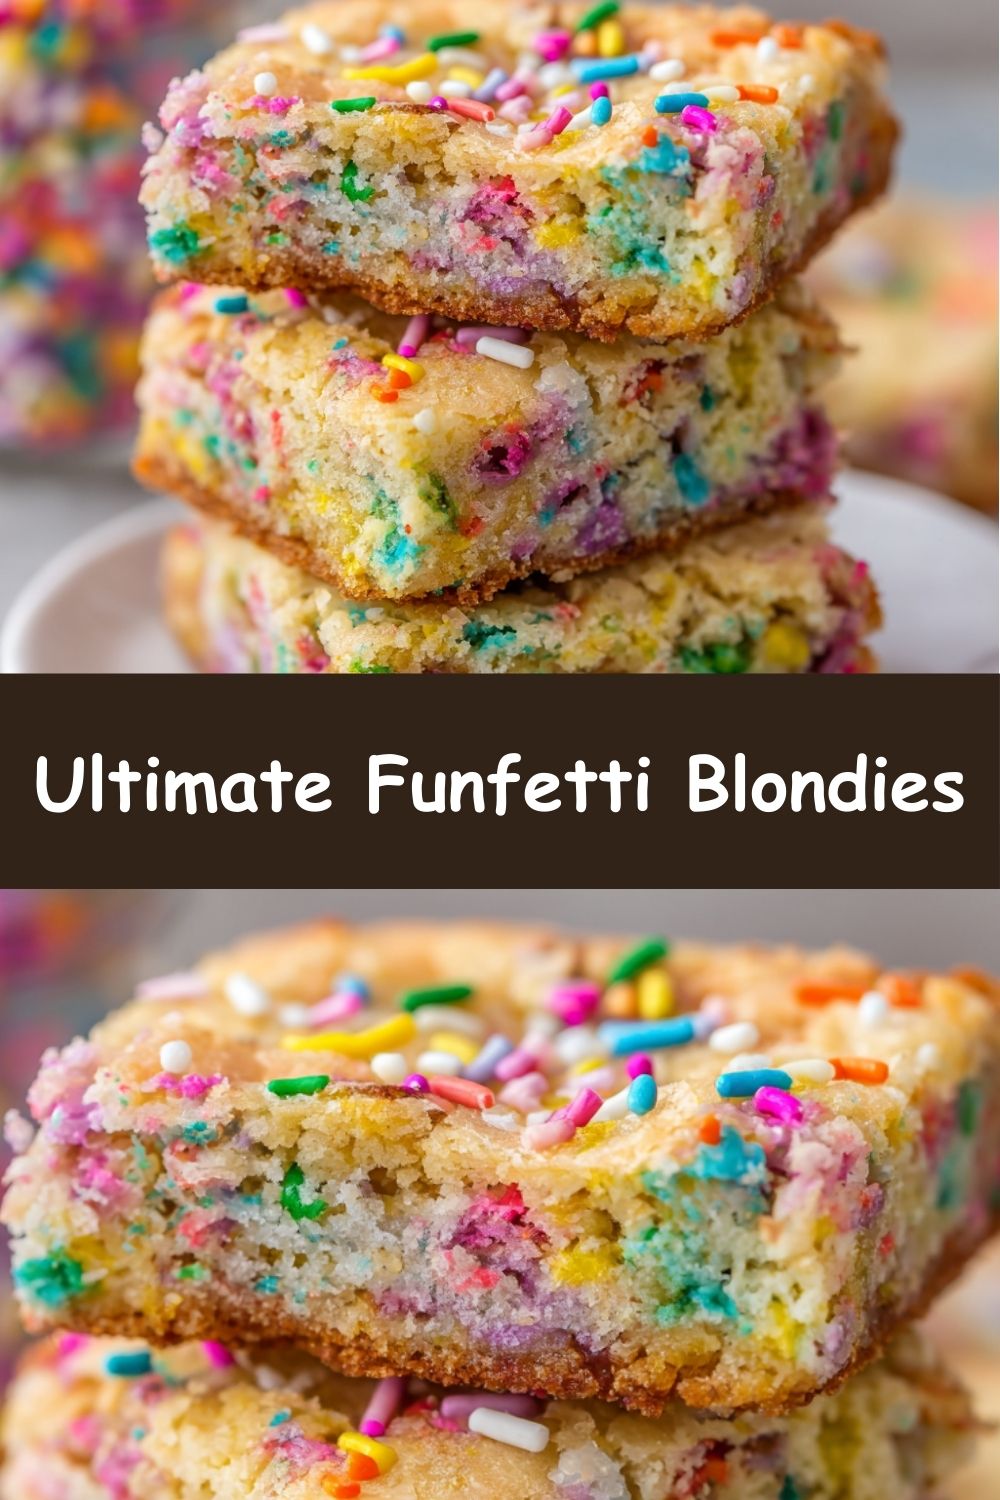
Get Creative: Fun Variations to Try
The beauty of this base recipe is how adaptable it is! Here are a few ways to make it your own:
- Chocolate Lover’s Swap: Replace the white chocolate chips with semi-sweet, milk, or dark chocolate chips. You could even use a mix!
- Nutty Funfetti: Fold in 1 cup of chopped toasted pecans or walnuts for a wonderful textural contrast and nutty flavor.
- Birthday Cake Blitz: Add ½ teaspoon of almond extract along with the vanilla and use 1 cup of rainbow chip (aka “cake batter”) chips instead of white chocolate.
- Gluten-Free Glee: Use a 1:1 gluten-free all-purpose flour blend and ensure your sprinkles and other add-ins are certified gluten-free.
- Confetti Cookie Dough Blondies: For a truly decadent treat, after baking and cooling, swirl a layer of edible cookie dough frosting on top!
Chef’s Notes & Kitchen Confessions
This recipe has evolved so much from my first attempt, which was… a disaster. I used those tiny round nonpareil sprinkles, and my entire batch turned into a murky, grayish-green blob. It was so sad! That’s how I learned the hard way that “jimmies” are the only way to go for baked goods. I also used to be terrified of underbaking, so my first batches were cakey and dry. It took a leap of faith to pull them out when the center still jiggled, but oh my goodness, was it worth it.
Now, these blondies are my signature “happy food.” I’ve made them for countless friends moving into new homes, recovering from breakups, or just celebrating a Tuesday. The best kitchen story? I once accidentally doubled the vanilla (a true happy accident) and created the most fragrant, incredible batch ever. That’s how we landed on the two-tablespoon measurement. So don’t be afraid to make it your own—that’s where the real magic happens!
Your Questions, Answered!
Q: My blondies came out really cakey and dry. What did I do wrong?
A: The most common culprit here is overmixing the batter once the flour was added, or overbaking. Remember, mix until *just* combined and pull them out when the center still looks a tad underbaked! Also, double-check your measuring—too much flour will definitely dry them out.
Q: Can I freeze these blondies?
A: Absolutely! They freeze like a dream. Let them cool completely, slice them, and then wrap them tightly in plastic wrap and store in a freezer bag for up to 3 months. Thaw at room temperature or warm them up in the microwave straight from the freezer.
Q: Why did my sprinkles bleed their color and turn the batter a funny color?
A: Ah, you likely used nonpareils (the little round balls) instead of jimmies (the long strands). Nonpareils have a tendency to bleed their dye when mixed into wet batter. Always opt for jimmies or “quins” for baking!
Q: I don’t have a 9×13 pan. Can I use something else?
A> You can, but the bake time will change. A 10×15-inch jelly roll pan will yield thinner bars that bake faster—start checking at 20 minutes. For thicker, bar-style blondies, a 9×9 pan will work, but you’ll need to extend the baking time significantly (maybe 45-50 minutes) and watch carefully so the edges don’t burn before the center is set.
Nutritional Information*
*Please note: This is a celebratory treat! The following is an estimate per blondie (based on 40 servings) calculated with all optional add-ins and should be considered an approximation. Values can vary based on specific ingredients used.
- Calories: ~210
- Fat: 11g
- Carbohydrates: 26g
- Sugar: 18g
- Protein: 2g
- Sodium: 120mg
Prep Time: 10 minutes | Bake Time: 30-35 minutes | Total Time: 40-45 minutes (plus cooling) | Yield: About 40 blondies