
Vanilla Bean Brown Butter Cheesecake: Your New Favorite Indulgence
Hey friends! Clara here, from my kitchen to yours. Let’s be real for a second: sometimes, life calls for more than a simple salad. Sometimes, it demands a show-stopping, soul-warming, “holy-wow-did-I-make-that?!” kind of dessert. And that, my fellow adventurous eaters, is precisely where this Vanilla Bean Brown Butter Cheis where this Vanilla Bean Brown Butter Cheesecake comes in.
This isn’t just any cheesecake. This is the cheesecake of your dreams—the one that turns a regular Tuesday into a celebration and makes a special occasion feel truly magical. We’re taking a classic and turning up the flavor dial to eleven by browning the butter for the crust, which gives it this incredible, nutty, almost toffee-like depth. Then, we’re infusing the silkiest, creamiest filling with the warm, fragrant seeds of a real vanilla bean. It’s rich, it’s elegant, and it’s surprisingly simple to master. I promise, the smell of that brown butter and vanilla swirling through your kitchen will make you feel like a certified pastry chef. So, tie on your favorite apron, and let’s create something nourishing for the soul (and totally worth licking every single spoon and bowl).
A Slice of Memory
This recipe always takes me back to my grandmother’s kitchen. She was a phenomenal baker, and her signature move was a classic, simple cheesecake that she’d bring to every family gathering. It was perfect, but I was always the curious one, the kid asking, “But what if we added this? Or tried that?” One fall afternoon, I was helping her bake and got a little overzealous with the butter for the crust, accidentally browning it. I was sure I’d ruined everything! But Nana, ever the wise kitchen wizard, just smiled and said, “Let’s see what happens.” What happened was a minor miracle. That “mistake” gave the crust a deeper, more complex flavor that had everyone asking for her secret. She just winked and said, “Clara’s special touch.” This recipe is my full-hearted homage to her—taking that foundation of love and comfort and adding my own twist of adventurous flavor. It’s a reminder that sometimes the best creations come from a happy little accident.
Print
Vanilla Bean Brown Butter Cheesecake
- Total Time: ~7½ hrs
Description
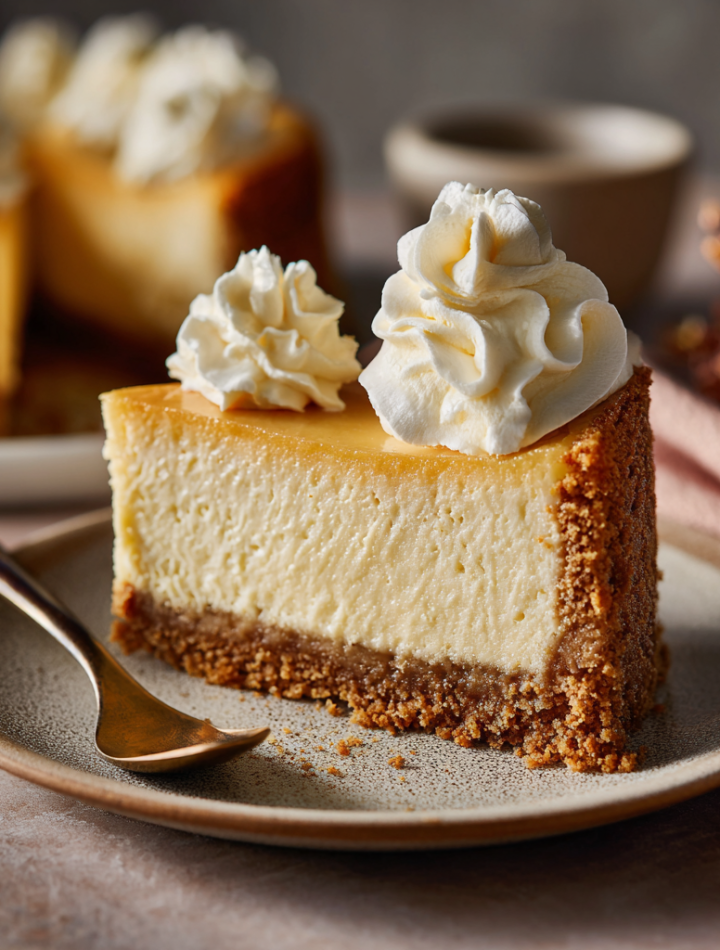
This is not your average cheesecake. Rich, nutty browned butter meets fragrant vanilla bean in a silky, luscious filling atop a golden graham cracker crust. Finished with a light sour cream topping, this elevated twist on a classic is indulgent yet elegant—perfect for holidays, special occasions, or a cozy weekend treat.
Ingredients
Crust:
2 cups graham cracker crumbs
½ cup unsalted butter, browned
¼ cup granulated sugar
Filling:
2 lbs (4 blocks) cream cheese, softened
1¼ cups granulated sugar
½ cup sour cream
½ cup heavy cream
4 large eggs
2 tsp vanilla bean paste (or seeds from 1 pod)
1 tsp vanilla extract
Topping:
½ cup sour cream
2 tbsp powdered sugar
½ tsp vanilla extract
Instructions
Crust: Preheat oven to 325°F (163°C). Brown the butter, then combine with graham crumbs and sugar. Press into a springform pan. Bake for 10 minutes. Cool.
Filling: Beat cream cheese and sugar until smooth. Add sour cream, heavy cream, and vanilla. Mix in eggs one at a time.
Pour over crust and bake in a water bath for 60–70 minutes, until center is just set. Cool in oven with door cracked, then chill 6 hours or overnight.
Topping: Whisk sour cream, powdered sugar, and vanilla. Spread over chilled cheesecake before serving.
- Prep Time: 30 minutes
- Cook Time: 1 hr
- Category: Dessert
Nutrition
- Calories: 450
- Sugar: 24g
- Fat: 32g
- Carbohydrates: 32g
- Protein: 6g
Gathering Your Ingredients
Here’s everything you’ll need to create this masterpiece. Using high-quality ingredients here makes a world of difference!
For the Graham Cracker Crust:
- 2 cups graham cracker crumbs: You can buy pre-crumbed or crush about 15 full sheets yourself in a food processor or sealed bag with a rolling pin. For a fun twist, try using digestive biscuits or ginger snaps!
- ½ cup unsalted butter, browned: This is the star of the show! Browning the butter gives it a nutty, caramelized aroma that takes the crust from great to absolutely unforgettable. We’ll start with a bit more than ½ cup to account for evaporation.
- ¼ cup granulated sugar: This adds a little sweetness and helps the crust crisp up perfectly.
For the Luscious Filling:
- 2 lbs (4 blocks) cream cheese, softened: This is non-negotiable. Full-fat, and it must be at room temperature to avoid a lumpy filling. Take it out a few hours before you start! I like Philadelphia brand for its consistently smooth texture.
- 1¼ cups granulated sugar: The perfect amount of sweetness to balance the tang of the cream cheese.
- ½ cup sour cream & ½ cup heavy cream: This dynamic duo is the secret to the creamiest, most luxurious texture. The sour cream adds a slight tang that cuts through the richness.
- 4 large eggs, at room temperature: Room temp eggs incorporate more evenly, preventing you from overmixing the batter. This is key for a crack-free top!
- 2 tsp vanilla bean paste (or seeds from 1 pod) & 1 tsp vanilla extract: We’re using a double vanilla punch! The paste gives you those beautiful little speckles and an intense flavor, while the extract rounds it all out. If you can only find extract, use 1 tbsp total.
For the Simple Topping:
- ½ cup sour cream: Makes the topping creamy and tangy.
- 2 tbsp powdered sugar: Dissolves easily for a smooth sweetness.
- ½ tsp vanilla extract: A lovely flavor boost that ties it all together.
Let’s Build This Beautiful Thing: Step-by-Step
Don’t let the steps intimidate you! We’re going to take it slow and I’ll be with you for every single one.
Step 1: Brown That Butter! This is our first and most important flavor step. Start with about ⅔ cup of unsalted butter (we need ½ cup after browning). Melt it in a light-colored saucepan over medium heat. It will foam, then crackle. Swirl the pan frequently and watch closely. After a few minutes, you’ll see golden brown bits form at the bottom and it will smell incredibly nutty. Immediately remove it from the heat and pour it into a heatproof bowl (including the bits!) to stop the cooking. Let it cool slightly. Chef’s Hack: Use a light-colored pan so you can easily see the butter change color!
Step 2: Make the Crust. Preheat your oven to 325°F (163°C). Combine the graham cracker crumbs and ¼ cup sugar in a bowl. Pour in the ½ cup of slightly cooled brown butter and mix until the crumbs are evenly moistened and resemble wet sand. Press this mixture firmly and evenly into the bottom and about halfway up the sides of a 9-inch springform pan. I use the bottom of a measuring cup to really pack it down. Bake for 10 minutes, then set it on a wire rack to cool. Chef’s Tip: Lining the bottom of your springform with a parchment round makes removal absolutely foolproof!
Step 3: The Filling (The Main Event!). In the bowl of a stand mixer fitted with a paddle attachment (or using a hand mixer), beat the softened cream cheese on medium speed until it’s completely smooth and creamy—about 2 minutes. Scrape down the bowl. Add the sugar and beat for another minute, scraping the bowl again. This ensures no lumps! Now, add the sour cream, heavy cream, vanilla bean paste, and vanilla extract. Beat on low until just combined. With the mixer on low, add the eggs one at a time, mixing until just incorporated after each addition. DO NOT overmix after adding the eggs! This incorporates too much air and can lead to cracking. Chef’s Hack: The final mixture should be smooth, thick, and silky. If you see a few tiny cream cheese specks, that’s okay—better than overmixing!
Step 4: The Infamous Water Bath. Don’t skip this! It’s the secret to gentle, even cooking and that perfectly creamy texture without cracks. Wrap the bottom and sides of your springform pan tightly with two layers of heavy-duty aluminum foil. This will prevent water from seeping in. Place the foil-wrapped pan in a large roasting pan. Pour the filling over the cooled crust. Then, carefully pour boiling water into the roasting pan until it comes about halfway up the sides of the springform pan.
Step 5: Bake & Cool with Patience. Bake for 60-70 minutes. The edges will be set, but the center will still have a slight jiggle—like Jell-O—when you gently shake the pan. Turn off the oven, crack the oven door open with a wooden spoon, and let the cheesecake cool in the oven for 1 hour. This gradual temperature change is our second defense against cracking! After an hour, remove it from the water bath, take off the foil, and let it cool completely on a wire rack. Then, cover it and refrigerate for at least 6 hours, but preferably overnight. This waiting game is crucial for the flavor and texture to set perfectly.
Step 6: The Finishing Touch. Right before serving, whisk together the ½ cup sour cream, 2 tbsp powdered sugar, and ½ tsp vanilla extract. Spread it gently over the top of the chilled cheesecake. Slice with a sharp knife dipped in hot water for clean, beautiful slices.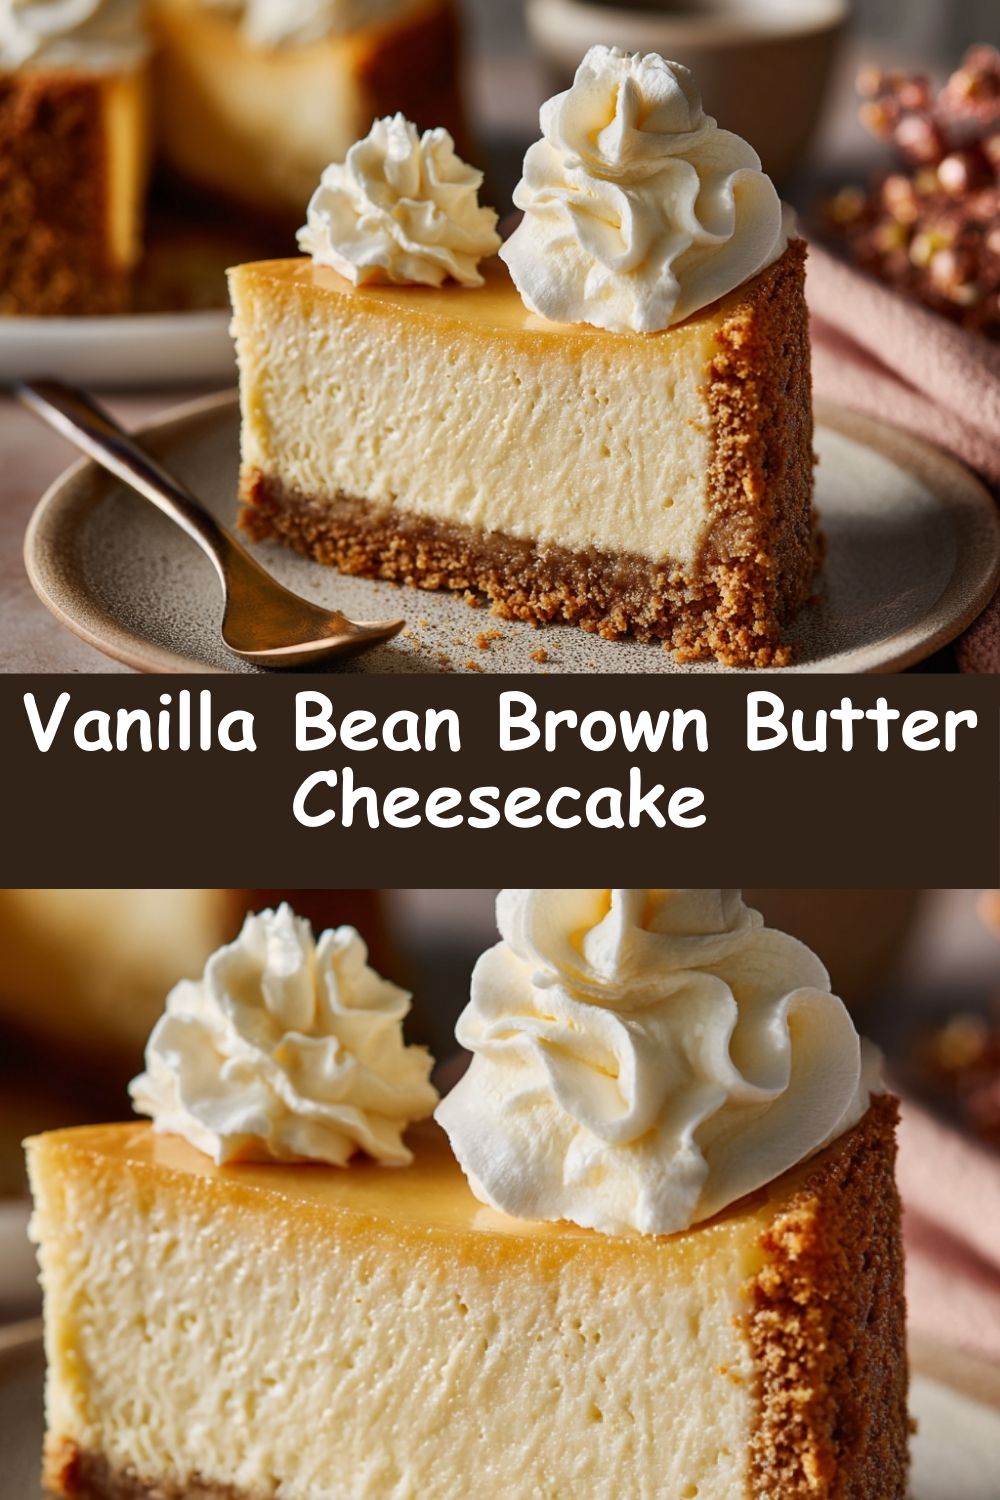
How to Serve This Masterpiece
This cheesecake is a star all on its own, but a little flair never hurts! I love serving a simple slice on a clean white plate to let those vanilla bean specks shine. For a touch of freshness, a few scattered raspberries or a drizzle of salted caramel sauce complements the brown butter flavor beautifully. A dollop of freshly whipped cream is never a bad idea, either. Serve it straight from the fridge for that firm, luxurious texture we worked so hard for!
Make It Your Own: Delicious Variations
- Chocolate Swirl: Melt ½ cup of dark chocolate and drizzle it over the filled crust. Use a knife or skewer to swirl it into the batter before baking.
- Ginger Snap Crust: Swap the graham crackers for ginger snap crumbs for a warm, spicy kick that pairs amazingly with the vanilla.
- Citrus Zest: Add the zest of one orange or lemon to the filling for a bright, sunny twist.
- Bourbon Caramel Sauce: Ditch the sour cream topping and serve with a warm bourbon caramel sauce for the ultimate decadent experience.
- Gluten-Free: Use certified gluten-free graham crackers or gluten-free cookie crumbs for the crust.
Clara’s Chef Notes & Kitchen Stories
This recipe has been a labor of love. The first time I tested it, I was so nervous about the water bath that I used three layers of foil… and still managed to get a tiny leak! The cheesecake was still delicious, but I learned my lesson: heavy-duty foil is a must. I’ve also learned that the brand of cream cheese really does matter. I’ve found that the brick-style, full-fat varieties yield the best, creamiest results without being greasy. And about that vanilla bean paste—I know it can be pricey, but a little jar lasts a long time and the flavor and visual impact are 100% worth it for a special dessert like this. This cheesecake has become my go-to for birthdays, holidays, and any time I need to impress. It’s a recipe that feels fancy but is built on down-to-earth techniques. You’ve got this!
Your Cheesecake Questions, Answered!
Q: My butter burned instead of browned! What do I do?
A: Oh no! Unfortunately, burned butter will make the whole crust taste bitter. It’s best to start over. The line between brown and burnt is thin, so use a light-colored pan and stay with it. The moment you see brown bits and smell that nutty aroma, take it off the heat immediately.
Q: Why did my cheesecake crack?
A: The top three culprits are: 1) Overmixing the batter after adding the eggs, 2) A drastic temperature change, or 3) Overbaking. We combat this by mixing on low, cooling it slowly in the oven, and pulling it out while the center is still slightly jiggly. But hey, if it cracks, that’s what the delicious sour cream topping is for—it covers everything up!
Q: Can I make this without a water bath?
A: I really don’t recommend it. The water bath (or bain-marie) creates a steamy environment that cooks the cheesecake gently and evenly, preventing it from drying out, curdling, or cracking. It’s the key to that dreamy, restaurant-quality texture.
Q: How far in advance can I make this?
A: Cheesecake is the perfect make-ahead dessert! It needs that overnight chill anyway. You can make it up to 2-3 days in advance. Just wait to add the sour cream topping until the day you plan to serve it. Keep it covered in the fridge.
Nutritional Information*
*Disclaimer: This is an indulgent dessert, and that’s okay! It’s all about balance. The following is an estimate per slice (based on 14 slices) calculated with a nutrition calculator. Actual values may vary based on specific ingredients used.
Calories: ~450 | Fat: 32g | Saturated Fat: 18g | Carbohydrates: 32g | Sugar: 24g | Protein: 6g