Whole Roasted Cheesy Cauliflower: The Keto Side Dish That Steals the Show
Hey there, my fellow flavor adventurers! Let’s be real for a second. Cauliflower has had quite the glow-up over the past few years, hasn’t it? It’s gone from that sad, steamed veggie platter nobody touched to the chameleon of the culinary world—transforming into pizza crust, rice, and even mac and cheese. But today, I want to introduce you to its ultimate form. The pièce de résistance. The dish that will make you look at this humble brassica and see a star.
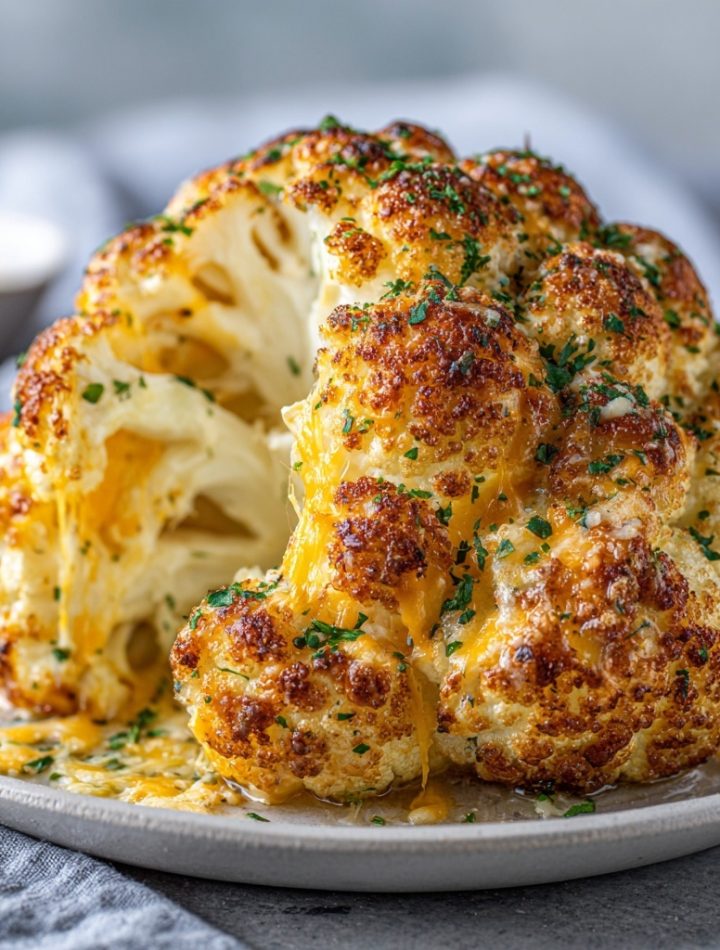
I’m talking about a Whole Roasted Cheesy Cauliflower.
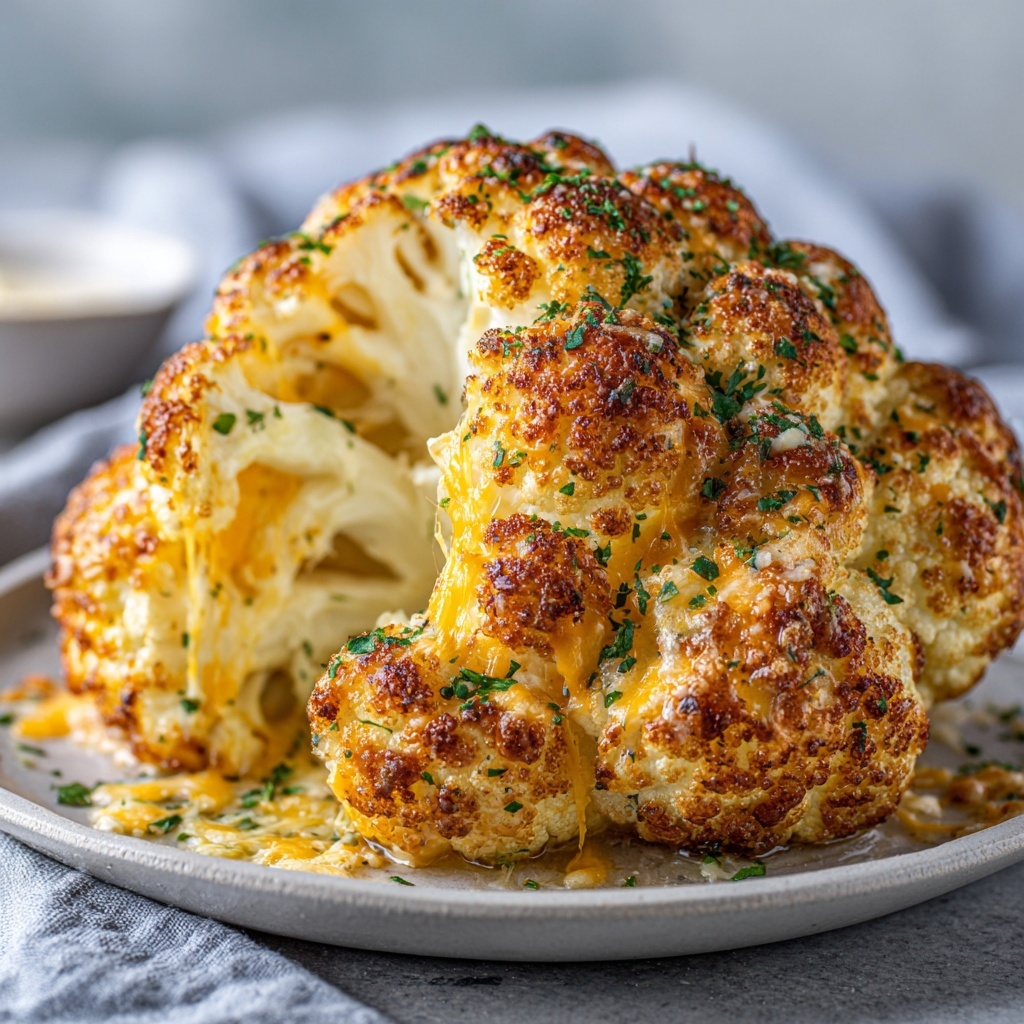
Imagine this: a gorgeous, entire head of cauliflower, boiled until it’s just-tender, then slathered in a magical, savory paste of mayonnaise and sharp cheese. You pop it into a searing hot oven and watch as it transforms into a golden-brown, bubbling masterpiece. When you pull it out, the aroma is pure, unadulterated comfort. The outside is crispy, crackly, and impossibly cheesy, while the inside is tender, steamy, and soaks up every bit of that rich flavor.
This isn’t just a side dish; it’s a statement. It’s the kind of recipe that makes you feel like a kitchen wizard with minimal effort. It’s perfect for a cozy weeknight, impressive enough for a dinner party, and a total game-changer for anyone on a keto or low-carb journey. It’s proof that healthy, feel-good food doesn’t have to be complicated or boring. It can be bold, cheesy, and absolutely, spoon-lickingly delicious. So, are you ready to cook something nourishing—and totally worth licking the spoon? Let’s dive in!
Print
Whole Roasted Cheesy Cauliflower : The Best Keto Side Ever
- Total Time: 30 mins
- Yield: serves 4
Description
Crispy on the outside, tender on the inside, and smothered in melty cheese—this roasted whole cauliflower is a total game-changer. Whether you’re low-carb, keto, or just cauliflower-curious, this simple recipe delivers big flavor with very little effort. It’s bold, cheesy, and guaranteed to win over even picky eaters!
Ingredients
1 whole head of cauliflower (stem removed, base intact)
½ cup mayonnaise
1 cup shredded cheese (smoked sharp cheddar works great)
½ tsp salt
½ tsp black pepper
½ tsp paprika (optional)
Instructions
Bring a large pot of water to a boil. Place cauliflower in upside-down and boil for 7–8 minutes (longer for extra tenderness).
Remove and let it cool slightly.
In a bowl, mix mayo, cheese, salt, pepper, and paprika.
Spread the cheesy mayo mixture all over the cauliflower (use your hands for even coverage).
Place in a baking dish and roast at 400°F (200°C) for 20 minutes, or until golden and bubbly.
Serve hot as a standout side or veggie main dish.
- Prep Time: 10 mins
- Cook Time: 20 mins
- Category: Dinner
Nutrition
- Calories: 220
- Fat: 18g
- Protein: 9g
The Cauliflower That Won Over a Skeptic
I have to confess, my relationship with cauliflower wasn’t always this passionate love affair. For the longest time, it was the bland, pale vegetable my well-meaning mom would boil into submission. It was the “healthy” option I’d push around my plate, dreaming of buttery mashed potatoes instead.
That all changed a few years ago during a chaotic “Friendsgiving.” My friend Leo, a staunch carnivore who proudly declared vegetables “a garnish,” showed up with this glorious, golden orb resting on a platter. We all stared, intrigued. It looked like something from a medieval feast. He carved into it with a triumphant grin, and the inside was so tender it fell apart into cheesy, steamy florets. I took one bite, and my culinary world tilted on its axis. The flavor was deep, savory, and intensely satisfying. Leo, the veggie-skeptic, had created the most unforgettable dish of the night. It was a powerful reminder that the most magical recipes are often the ones that challenge our expectations and bring a little surprise to the table. This recipe is my homage to that moment of delicious, cheesy revelation.
Gathering Your Kitchen Allies
One of the best things about this recipe is its beautiful simplicity. You only need a handful of ingredients to create something truly spectacular. Here’s what you’ll need to gather:
- 1 large head of cauliflower – This is our canvas! Look for one that feels heavy for its size with tight, creamy-white florets and bright green, perky leaves. The leaves are your friend—they get super crispy and delicious in the oven. Chef’s Insight: Don’t remove the core or stem completely! Keeping the base intact is the secret to holding your beautiful cauliflower “steak” together through boiling and roasting.
- ½ cup mayonnaise – This is the secret weapon, the glue that holds the magic together. It creates an incredibly rich, moist crust that keeps the cauliflower from drying out and helps the cheese adhere perfectly. Substitution Tip: For a tangier kick, you can use full-fat Greek yogurt or sour cream. For a dairy-free version, a vegan mayo works wonderfully!
- 1 cup shredded cheese – This is where you can get creative! I am head-over-heels for a good smoked sharp cheddar—it adds a gorgeous, deep, bacony flavor without any bacon. Substitution Tip: A blend of Parmesan and mozzarella is fantastic for a classic Italian vibe. Gouda, pepper jack, or even a sprinkle of Gruyère would be absolutely divine. Pre-shredded cheese is convenient, but grating your own from a block will give you a meltier, smoother texture (no anti-caking agents!).
- ½ tsp salt & ½ tsp black pepper – The fundamental flavor-builders. Don’t be shy here; cauliflower needs a good amount of seasoning to truly sing.
- ½ tsp paprika (optional, but highly recommended) – A little sprinkle of paprika doesn’t just add a subtle, sweet warmth; it also gives the finished crust a breathtaking, deep golden-red color. Smoked paprika would be a next-level choice here!
Let’s Create Some Magic: Your Step-by-Step Guide
Alright, my friends, it’s time to get our hands a little dirty (in the best way possible). Follow these steps, and you’ll be rewarded with a show-stopping centerpiece.
- Prep Your Star Player: First, give your cauliflower a good rinse under cold water. Using a sharp paring knife, carefully trim away any excess leaves from the very base, but leave the core and enough of the stem so the whole head stays firmly intact. This is non-negotiable for structural integrity! Chef’s Hack: I like to slice off just a tiny, tiny bit of the very bottom of the core to create a flat surface. This helps it sit steadily in the pot and later on the baking sheet, preventing any cheesy roll-aways!
- The Quick Boil (The Flavor Foundation): Bring a large pot of generously salted water to a rolling boil. Think of it as a mini spa bath for your cauliflower. Gently lower the cauliflower into the pot, core-side UP. This might feel counterintuitive, but trust me! Boiling it upside-down ensures the dense core gets the most heat, leading to even tenderness throughout. Let it bubble away for 7-8 minutes. Chef’s Insight: This par-boiling step is crucial. It jumpstarts the cooking process, ensuring the inside is perfectly tender by the time the outside is gloriously browned. For a larger or very dense head, go for 10 minutes.
- The Great Cool-Down: Carefully remove the cauliflower from the pot using a large slotted spoon or tongs, and place it in a colander, core-side down, to drain and cool. Let it hang out for at least 10-15 minutes. I know, the temptation to rush is real, but this is a key step! If you slather on the cheesy mayo while it’s piping hot, the mayo will break and become greasy. Patience makes perfect here.
- Mix the “Magic Paste”: While your cauliflower is cooling, preheat your oven to a roaring 400°F (200°C). Then, in a medium bowl, combine your mayonnaise, shredded cheese, salt, pepper, and that beautiful paprika. Mix it until it forms a thick, spreadable, cheesy paste. Give it a taste—this is your moment to adjust the seasoning. Want more pepper? More smokiness? Go for it!
- Get Hands-On and Slather: Place the cooled cauliflower in a cast-iron skillet or a parchment-lined baking dish. Now, using your hands or a small spatula, spread the cheesy mayo mixture evenly over the entire surface of the cauliflower. Get into every nook and cranny! Don’t forget the sides and the bottom if you can. Chef’s Hack: I find using my hands is the best tool for this job. You can really feel the coverage and press the mixture gently into the florets, creating an incredible crust.
- Roast to Golden Perfection: Slide your masterpiece into the hot oven and roast for 20-25 minutes, or until the top is a deep, spotty golden brown and the cheese is bubbly and irresistible. For an extra-crispy top, you can pop it under the broiler for the last 1-2 minutes—but watch it like a hawk!
- The Final Test: To check for doneness, pierce the thickest part of the core with a sharp knife or a skewer. It should slide in with absolutely no resistance. If it feels at all firm, give it another 5 minutes in the oven.
How to Serve This Golden Glory
Presentation is part of the fun with this dish! Let it rest for just a couple of minutes after it comes out of the oven. Then, transfer it carefully to a serving platter or serve it right from the skillet for a rustic, family-style vibe. I love to garnish it with a final flourish—a sprinkle of fresh chopped chives or parsley, a crack of black pepper, or even a drizzle of a little chili oil for heat. Carve it at the table like a roast, letting the tender, cheesy florets fall onto the plate. It’s a spectacular side for a juicy steak, roasted chicken, or a simple fillet of fish. Or, go all-in and make it the main event for a vegetarian feast, served alongside a bright, zesty arugula salad to cut through the richness.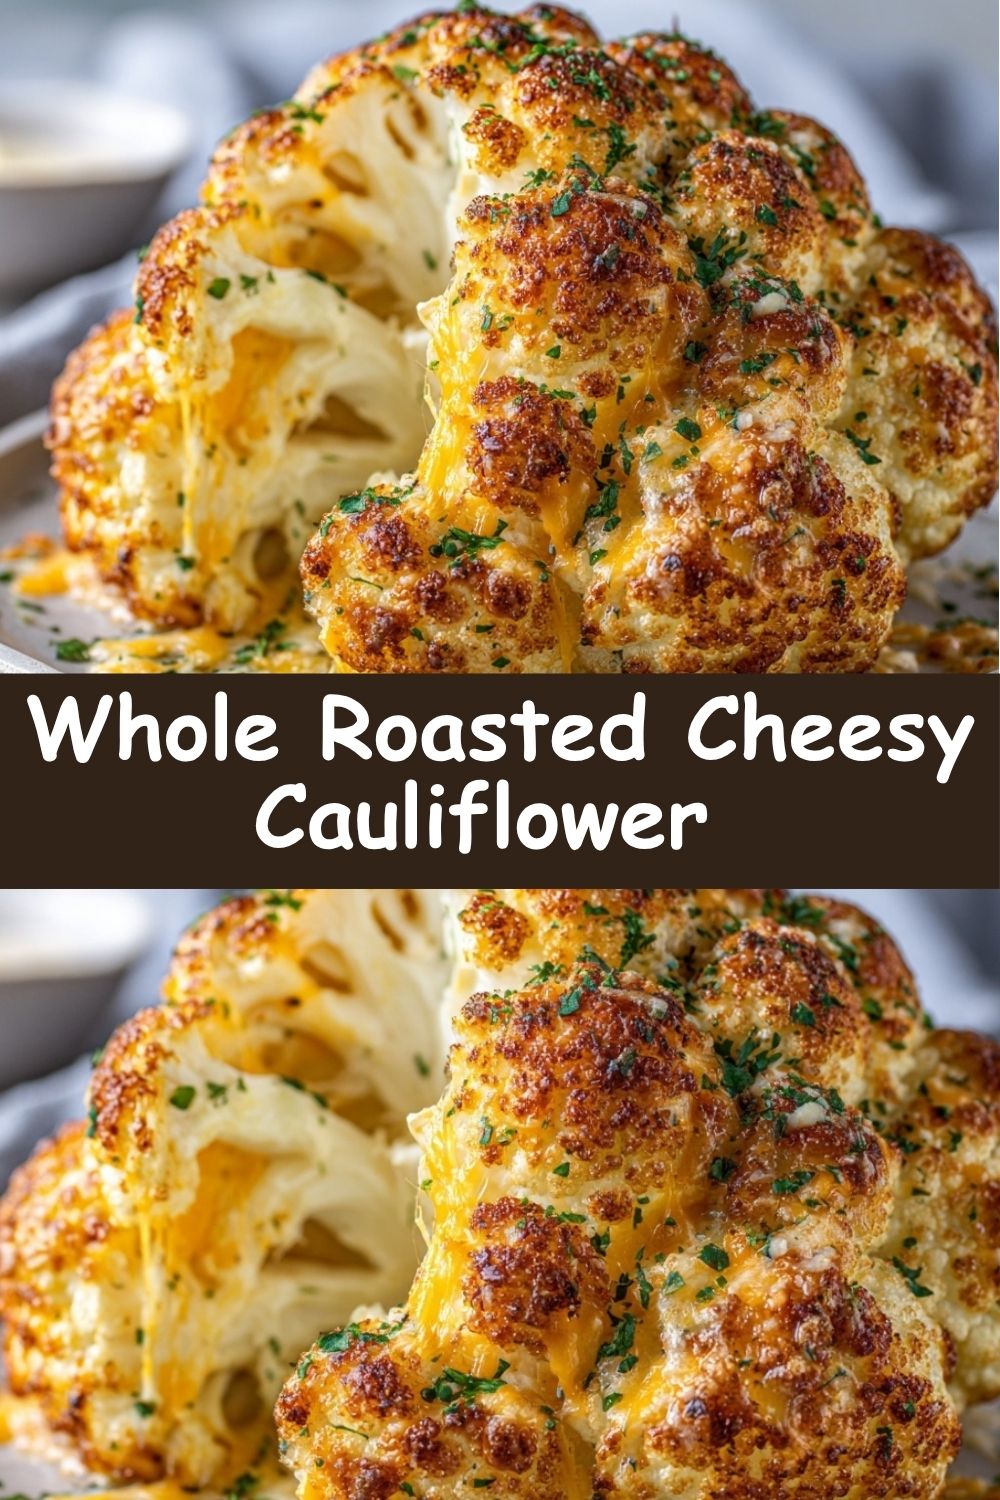
Mix It Up! Endless Flavor Twists
The beauty of this recipe is its adaptability. Once you’ve mastered the classic, try one of these delicious variations:
- Buffalo Blue Cheese: Swap the mayo for ½ cup Greek yogurt + ¼ cup buffalo sauce. Use blue cheese or ranch seasoning in the mix, and top with crumbled blue cheese after baking.
- Everything Bagel: Use ½ cup mayo + ½ cup softened cream cheese. Mix with 1 tbsp of Everything Bagel Seasoning. After roasting, sprinkle with more seasoning and fresh dill.
- Garlic Herb Parmesan: Add 3 minced garlic cloves and 2 tbsp of chopped fresh herbs (rosemary, thyme, parsley) to the mayo base. Use a blend of Parmesan and mozzarella cheese.
- Taco Spiced: Mix 1 tbsp of your favorite taco seasoning into the mayo-cheese base. After roasting, top with fresh cilantro, diced avocado, and a squeeze of lime.
Clara’s Kitchen Confidential
This recipe has become a staple in my kitchen, and it’s evolved in the best ways. The first time I made it, I was so nervous about the core being undercooked that I over-boiled it, and it was a bit mushy. Lesson learned: trust the timing! I’ve also found that the type of baking dish matters. A cast-iron skillet is my absolute favorite because it gets screaming hot and gives the bottom an incredible crispy texture. One of my favorite kitchen memories is of my dog, Basil, sitting directly in front of the oven, whining softly at the “cheesy smell cloud” that had taken over the house. I can’t blame him; the aroma is truly hypnotic. This dish is a testament to the fact that the simplest ingredients, treated with a little love and a lot of cheese, can create pure, uncomplicated joy.
Your Questions, Answered!
Q: My cheese mixture slid right off the cauliflower in the oven! What happened?
A: Oh no, the great cheese slide! This usually happens for one of two reasons. First, the cauliflower wasn’t cooled enough after boiling. A hot, steamy surface will cause the mayo to separate. Second, the coating might have been a bit too thick in one spot. Make sure it’s cooled and spread a nice, even, moderate layer, pressing it gently into the florets.
Q: Can I make this ahead of time?
A: You can definitely get a head start! You can par-boil the cauliflower, let it cool completely, and wrap it tightly to store in the fridge for up to 24 hours. You can also mix the cheese paste and keep it separately in the fridge. When you’re ready, let the cauliflower come to room temp for about 20 minutes, slather it on, and bake. You might need to add a few extra minutes to the cooking time since it’s starting from cold.
Q: The outside is browning too fast, but the inside is still hard. Help!
A> This is a classic oven dilemma! Simply tent the top of the cauliflower loosely with a piece of aluminum foil. This will shield the cheesy crust from burning while the interior continues to cook through to tender perfection.
Q: Is this truly keto-friendly?
A> Yes, indeed! A whole head of cauliflower is low in net carbs, and the other ingredients (mayo, cheese) are high in healthy fats and protein, making this a perfect fit for a keto lifestyle. Just be sure to check the labels on your specific mayo and cheese brands to ensure no hidden sugars or carbs have been added.
Nutritional Information*
Per Serving (approximate, serves 4):
Calories: 220 | Protein: 9g | Fat: 18g | Total Carbohydrates: 6g | Dietary Fiber: 2g | Sugar: 2g | Net Carbs: 4g
*Please note: Nutritional information is an estimate and can vary based on the specific brands and quantities of ingredients you use.